Thirteen different ways for children to discover and plan their own creative ideas
Introduction:
All art starts with an idea or intention. An idea is something you have in mind to do, or a plan of action. It may be very simple and immediate, or planned over time. Sometimes, it can be a long time. Children can be supported in finding their own ideas from preschool on. The following are ways to help children to discover their own interests, ideas, and preferences for making art. Use them all at various times, and for various reasons, to build a repertoire of ways they can use to confidently and effortlessly approach their work. The responsibility for original ideas and self-directed production of artwork is encouraged early. Over time, the role of the teacher becomes more and more of a support system for students rather than an originator of work and ideas.
The three year old and the thirty-three year old are both presented with the same challenges when faced with a blank two dimensional surface, a full palette of colors, and a selection of brushes. Art springs from the human mind, heart, imagination, and ingenuity. Therefore, trust your children. Even a famous artist’s early attempts at pushing the limits to find new ways of expressing look humble by comparison to her/his mature work (e.g. Calder’s very early mobiles).
Note: A group of children are able to plan an idea that may be beyond your abilities, and you may need to seek help from other adults to make it happen. Enjoy the stretch.
GEORGIE STORY
As a young woman, I found that I could solve problems, create ideas, or experience a flash of intuitive inspiration if I remained in bed after awakening and just let myself think. I also found that if I did not write down what I received, I would easily forget the details.
With my eyes closed, I have even had what looked like a video about how to easily make a straw octahedron. It happened on a Saturday morning after having given a complicated octahedron lesson to three classes on that Friday. I remember thinking that night that there must be a simpler way to make that shape, and there was. Observe yourself. See if you also have an ideal way to think creatively. When you find it, use it.
I have woven my way of getting ideas into lessons. Here is an example from the Monoprinting lesson: “I always get my best ideas in the morning just as I wake up. With my eyes closed, I decided to use both hands to make two trees and grass for today’s lesson. I wanted a simple idea I could do quickly, so you could see how to make a mono-print.” I finished the story and the painting at the same time and proceeded to the Monoprinting lesson (See: Art Forms: Finger Painting).
Introduction:
The use of affirmations is an easy and quick way to help children to become aware that they are capable of conceiving ideas which start the process of making art. Affirmations give children the courage and permission to call upon their own interests, and the sensitivity to be who they are. Saying an affirmation was part of the beginning ceremony of each class period (See: The Environment: The Architecture of the Day).
Young people compose wonderful affirmations once they become accustomed to saying them. Engage the children in this work when they are ready. An affirmation can be introduced during the first week of class for the youngest students and on the first day for elementary students.
Note: Start by believing the affirmation for yourself.
Suggested Affirmations:
- I am an artist.
- I think of good ideas for making art.
- I have good ideas. I am a creative person.
- I have an artist within me.
- I am an exciting, creative painter (or whatever art form is being introduced).
- I have a right to ask for help.
- I share my ideas with others when asked.
- I am flexible and easily change my ideas if needed.
- I am a creative thinker.
- I like my ideas and those of other artists.
- I show others what I am feeling and thinking with lines, shapes, colors, texture, and space.
- I am a developing artist. I talk about my art with others.
- My creativity is always with me.
- I have courage to use my ideas to make art.
- I can trust my creativity to be there for me when I need it.
- I am quiet in the studio so I can think creatively and self-talk with my imagination.
- I work quietly, so my brain can think, imagine, and create art.
- I share my skills and knowledge with other artists.
Note: Renoir’s work changed as a result of being influenced by Cezanne’s work and ideas. He spent time with Cezanne for a while.
- I learn from seeing the artwork of other artists.
- I am open to new ideas and ways of making art.
Note: Create using chance as the Dadaists did.
- What I write about art is intelligent and insightful.
- My creativity is always with me. I relax, focus, and think creatively.
- I am an artist. I think with my creative imagination while I am working.
- My good ideas come to life with imagination and focused work.
- I believe in my own uniqueness.
- I am unique. Only I can make the artwork that expresses this uniqueness.
- I exhibit my best artwork for all to see and appreciate.
- I use my time wisely, creatively, and productively, to finish my work.
- I have a very active imagination. I have creative ideas for making art.
- I am one of the artists who created the [Name of Group Project, e.g.,The Peace Tableau]. Without my creative energy, it would not have happened.
- I am talented and have something original to say.
- My work always represents the best I can do at this moment.
- I appreciate my creativity, and use it to make art or solve everyday problems.
- I think. I imagine. I create. I select. I work. I discover. I make art!
- I clean. I organize. I work to serve my community.
- My art is a record of my growth as a thinking, feeling, creative artist.
- I am most creative when I play using my imagination.
- I am talented. I make fabulous art.
- I learn from other artists, and other artists learn from me.
- I am an independent worker. While I solve many problems, I know when to ask for help.
- I celebrate every time I complete an artwork or a piece of Special Work.
- Every work of art I finish is practice for the next one I will be making.
- I am a productive artist. I create, I select, and I make discoveries as I work.
- The affirmation I need at this moment is…
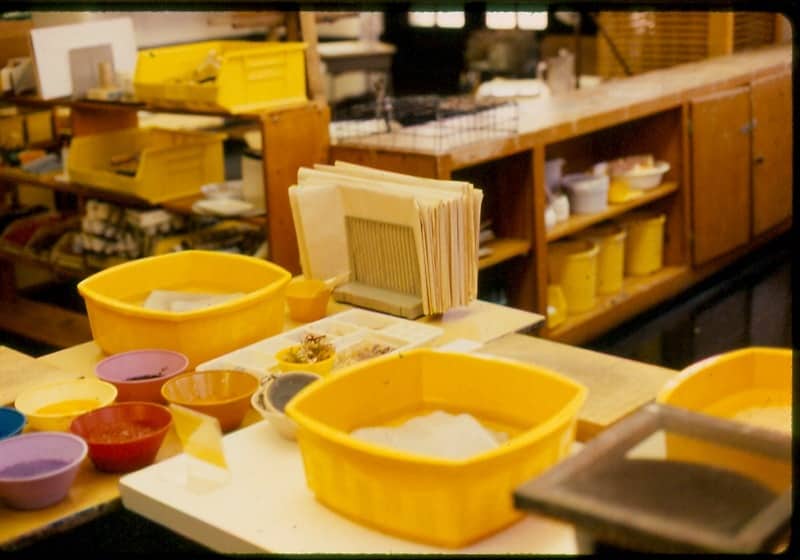 Once an art form area is introduced, it then is open to be chosen, and stays open until it is replaced. Build the art area of the environment (or studio if you are a specialist) around the cleanup skills of the children. They must learn to make messes and to clean them up. The progression of daily living skills must be taught. The children want to be competent, independent, and responsible. The environment progresses in difficulty with both the complexities of the processes used and the children’s ability to clean up and restore it.
Georgie Story
When I first started teaching, I decided to see what would happen if I added a second Tempera Painting activity into the studio, but changed the scale of all the materials and tools to be very small. I isolated the work on a low table in a quiet little corner of the room where there was an abundance of natural light.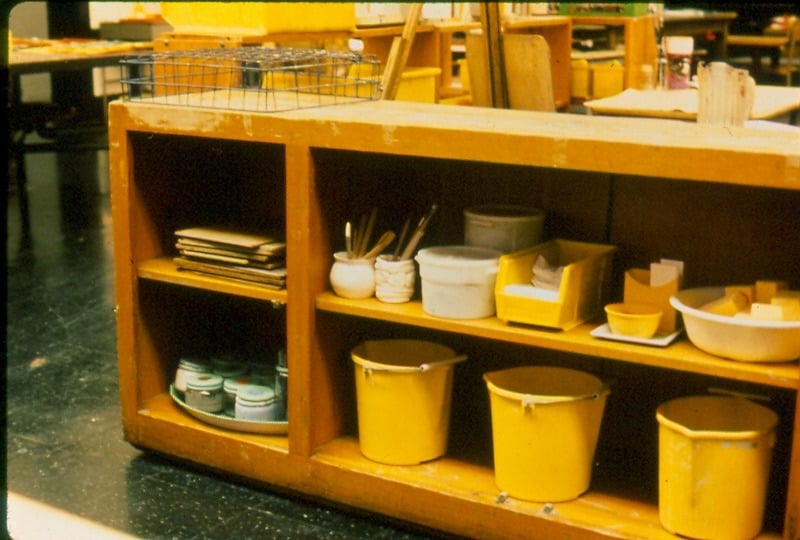 Seeing that a girl had chosen the work, I silently stayed behind her and observed. She had painted several lines and shapes on her paper and then stopped and looked at the painting for a while. She then turned the paper upside-down and exclaimed out loud “of course, it’s a barn,” and finished the painting without realizing that she had had an audience.
Georgie Story
I was asked to join a fellow art teacher in a big project she was doing. She got to our planning meeting ahead of me and was enjoying the art pieces that were hanging in the halls near the studios. When I rounded the corner I found her crying. She explained that the art works were beautiful and were not all alike. She found the quality of the work extraordinary.
Introduction:
Some ideas have been used since the beginning of our visual history. These are ideas that can be found in most any museum. These “Traditional Ideas” are so prevalent that they have identifiable characteristics and names such as Portrait, Landscape, Genre (everyday life), Cityscape, Still Life, Seascape, Narrative, History, and Social Comment. The history of these ideas is an interesting research topic. There is a small room in the New York Metropolitan Museum of Art, in the Greek and Roman area, that houses an ancient cityscape. On the real wall, there is a painted wall above which the city is depicted. It creates the feeling that you are out of doors. For the children, the traditional ideas are concrete examples of what an idea is. They have had experiences that allow them to understand what is depicted. Note: See: The Art Chart for The Traditional Ideas lesson plans. How an idea is expressed is not confined to a realistic rendering. The Art Continuum lesson enlarges the definition of what an artistic idea can look like and why.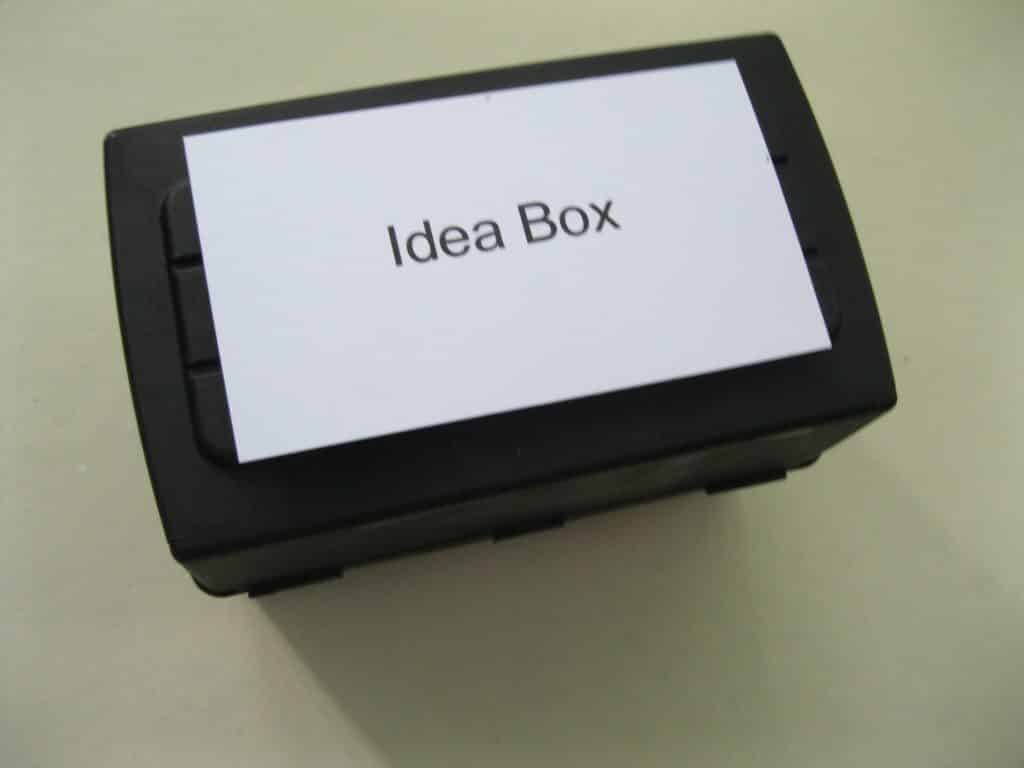
Introduction:
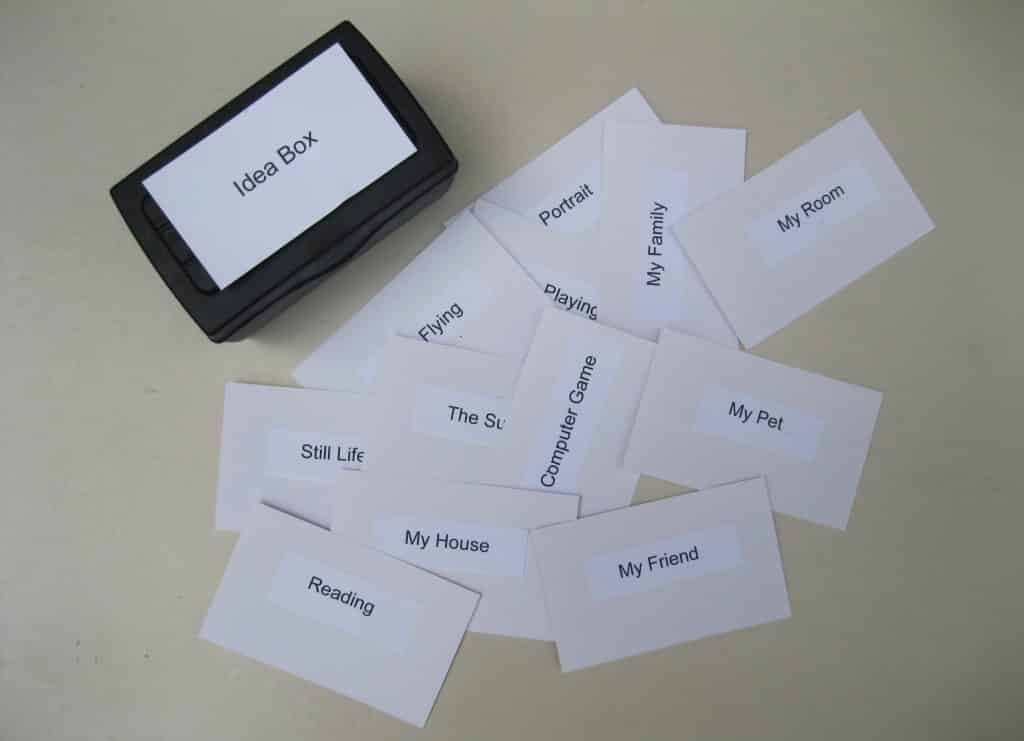
The Idea Box can be used at any point when a child needs help finding an idea for making art. It is made by children for children. Once introduced, each traditional idea can be given a card. During group, organize the gathering of ideas in any fashion that is comfortable to you and the children. Use “passing the talking feather,” or use a brainstorming session. Give the children the right to pass and to not make a suggestion – no pressure. Be aware that there are authorities who think brainstorming is not the most effective technique for encouraging “out of the box” thinking.
Most ideas can be used with different art forms. An art form can be used to record whatever a child is studying, such as a collage using the shapes of all the number combinations that make ten. The idea card supplied by the teacher could read, “I can choose an art form to record what I’m learning.”
Note: An Art Form Idea Box could be made. Make a card for every art form available to them at that time. The child would choose an art form first and then create an idea for it.
Georgie Story
I found that a short, freeform brainstorming session was more productive than going around the circle one at a time. It is, however, a more high energy session. I was fearless when presenting this lesson because even if the children were noisy, the work they produced was of high quality! If they got too loud, I would make the quiet sign and we would pause silently for a few seconds then we returned to our work. I would ask them to say their idea softly and I would parrot it back to them as I recorded it. You might wish to audio record the session or have a second person writing with you.
- Prerequisite: Affirmations, The Traditional Ideas
- Direct Aim: To provide an opportunity to create ideas and share them
- Indirect Aim: To encourage personal ideas
- Point of Interest: Suggest that additional ideas could be added to the Idea Box at any time.
Materials:
- File box
- Index cards
Note: There are many containers or ways you could use to store the ideas, so create one that you like if a file box is not attractive to you. Could the box be stored on a computer for 9-12 students? “An Idea of the Day” could be posted.
- A title card for the top of the box
- Clipboard, pen, and paper to record ideas
Preparation: 5-12
- Decide how you will collect ideas for the box.
- Assemble the file box and materials.
- Affix the title card to the top of the box.
- Place the box in the environment as soon as it is completed.
Presentation: 5-12 for making the box
- Introduce the work by its name.
- Have a clipboard, paper, and pen ready to record the suggestions.
- Have the empty Idea Box and your recording materials on your teaching mat.
- Introduce what they will be doing to gather ideas and why they are doing it.
- Explain that each suggestion made by the children will be put on a file card to be reviewed and used when an idea is needed.
- Demonstrate how they are going to make suggestions. Give examples.
- Start the process. Stop when you need to regroup, or try two short sessions.
Note: It is important that you set limits to any kind of idea that is not acceptable to you (violent content, etc.) before the session begins.
Presentation: 5-12 for using the Idea Box
- Demonstrate how the box can be used.
- Read two or three ideas and suggest they can use the box if they need help creating an idea.
- Remind students that they can add an idea to the box.
- The ideas are read to non-reading students.
- Return the box to its place in the environment.
Note: The box could be brought to a “How To” lesson. The chosen idea would then be used to give the lesson. If you can, modify the idea to show that the creative process is always working.
Extensions:
- Use any traditional ideas the children can identify, to introduce the process of making an art form.
- Accept additional ideas as they are volunteered by students.
Resources:
- Explore the subject of brainstorming on the internet.
Introduction:
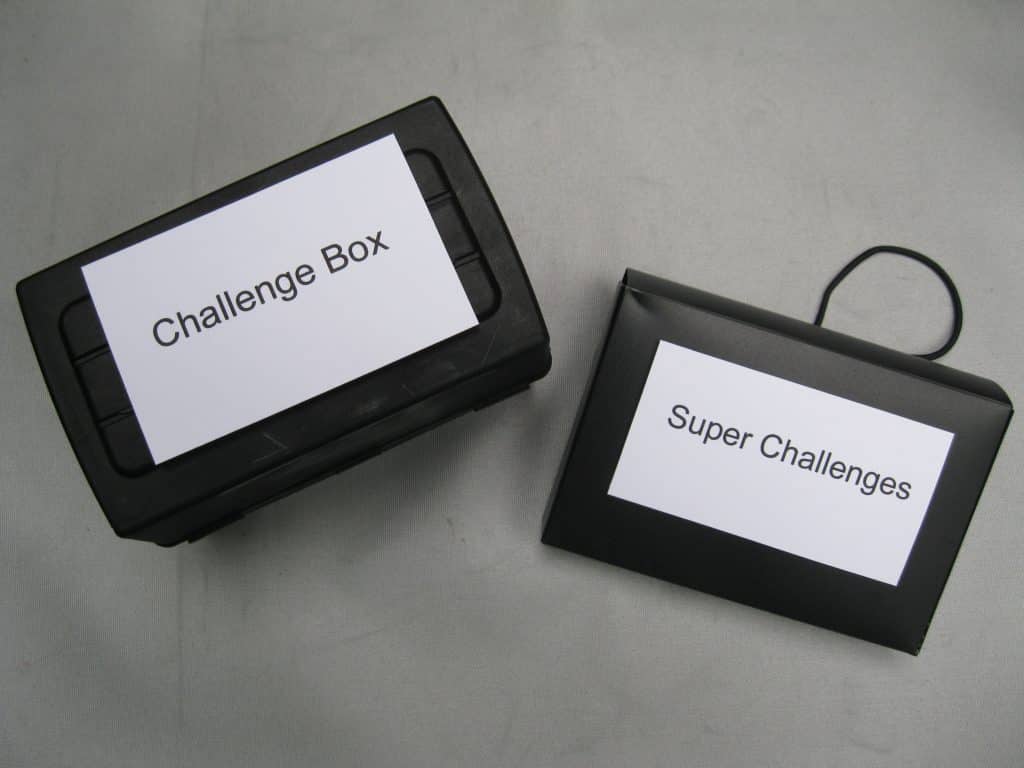
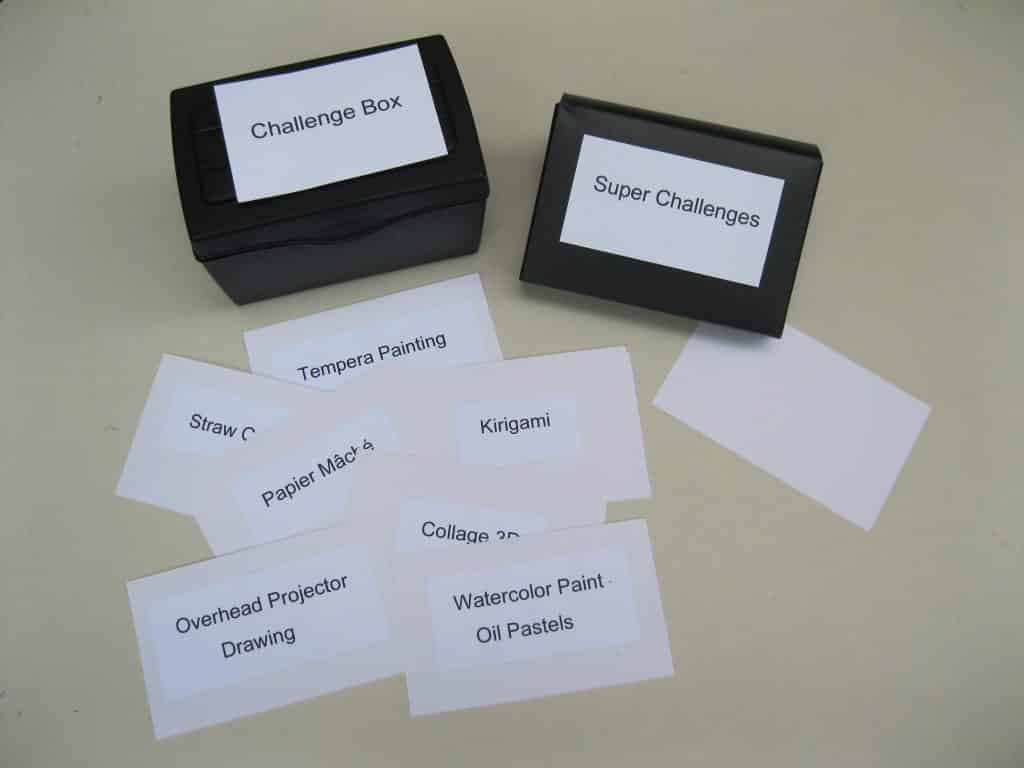
The Challenge Box contains index cards. Each card has the name of one of the art forms available in the studio. The challenge is to choose two art forms at random and create a work of art that combines them. Some combinations are more challenging than others. If the challenge seems too great, allow the student or group to shuffle the cards and choose another combination. The discarded challenge is written on a card and becomes a Super Challenge. Make another box of the Super Challenges for those who want to stretch themselves even more. Either kind of challenge encourages “out of the box” thinking.Georgie Story
I always displayed a simple mobile in my environments somewhere because I loved them so. Early in my teaching career, a kindergarten student wanted to make a mobile out of three prints she had made. I had not introduced the art form and was amazed that she wanted my support to complete her work. She was unaware of the skills that were needed to make a mobile, but felt comfortable enough to ask for help. When I say “trust your students,” I’m not just thinking of them alone. I am thinking of you as well. I was honored by the request and was taught more than the child.- Prerequisite: Ability to use the art forms or skills activities available
- Direct Aim: To encourage artistic problem solving to recognize combinations of art forms in art history
- Indirect Aim: To stimulate the creation of personal ideas
- Point of Interest: Suggest this activity for students who need a greater challenge.
Materials:
- 2 file boxes
- 3” x 5” index cards or blank playing cards
- Recording materials: pen and blank cards in a container
- Lamination material
- Tray for the activity
Preparation:
- Make and laminate a card for each art form or skill activity available.
- Make and laminate a label for each box and install the labels on the boxes.
- Shuffle the cards before putting them away.
- Enlarge the box as new art forms are introduced.
- Assemble the activity and place it with the other box or boxes.
Presentation: 5-12
- Bring the boxes and the recording materials to the presentation.
- Introduce the work by its name.
- Shuffle the cards, and lay them out face down, or fan them out. Choose two.
- Record the combination on a blank card, which becomes the challenge card.
- Ask the group to imagine that this combination is their challenge and let them volunteer to share what they would do.
- Put your name on the challenge card.
- Decide if you are willing to let a student use that challenge. I would. Put the child’s name and date the challenge was created on the card.
- Demonstrate how to clean up the activity and put the work away.
- The challenge card is put in the Unfinished Work box until it is done. The card belongs to the child who created it.
Extension:
- Make the Super Challenge Box. It will be empty at first. Make a super challenge card when the challenge is declared too difficult. It is then available to be chosen by someone else.
Resources:
- File boxes:Office supply and discount stores
- Michael’s has wooden file boxes
- The boxes are unfinished and the wood will need to be sealed.
- 3” x 5” index cards: Office supply stores, Wal-Mart, Kroger, school supply stores
Introduction:
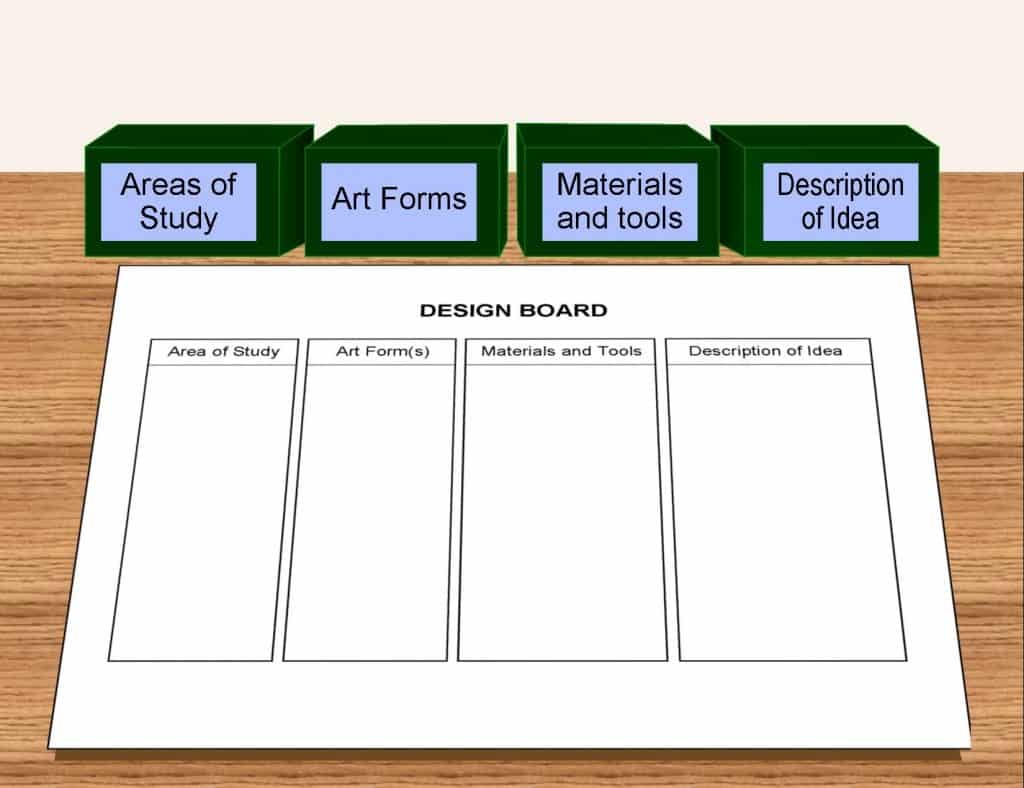
The design board is an activity that is to be used to make a plan for creating a visual answer to a classroom academic assignment. It can be used by an individual, a small group, or an entire class. The board assists students to choose, prepare, and explain the idea or intentions for their work.- Prerequisite: Ability to use the art forms
- Direct Aim: To create a plan for a classroom or individual project
- Indirect Aim: To provide evidence of learning through a work of art
- Point of Interest: Suggest this activity to students that are having a problem attacking their academic work.
Materials:
- 4 boxes labeled: Areas of Study, Art Forms, Materials and Tools, Idea. Use matching crayon boxes, file boxes, or clear plastic boxes.
- A piece of illustration board or thin wood wide enough to display the boxes horizontally (Draw a line between each heading if you wish.)
- The Areas of Study box: a card or label for each subject being studied in the classroom (e.g. weather, geometry, zoology). Update as needed.
- The Art Form box: a card for each art form available for use, e.g., painting, printmaking, papier mâché, book making, photomontage, stationery, straw construction, flip book, mobile, etc.
- The Materials and Tools box: Cards which list what is needed to make the chosen art form which can be prepared by the teacher
- The Idea: blank cards to record and describe what is to be created, e.g., an accordion book of watercolor paintings illustrating different kinds of clouds
- A 9-12 work plan (See: Environment: Work Plan),
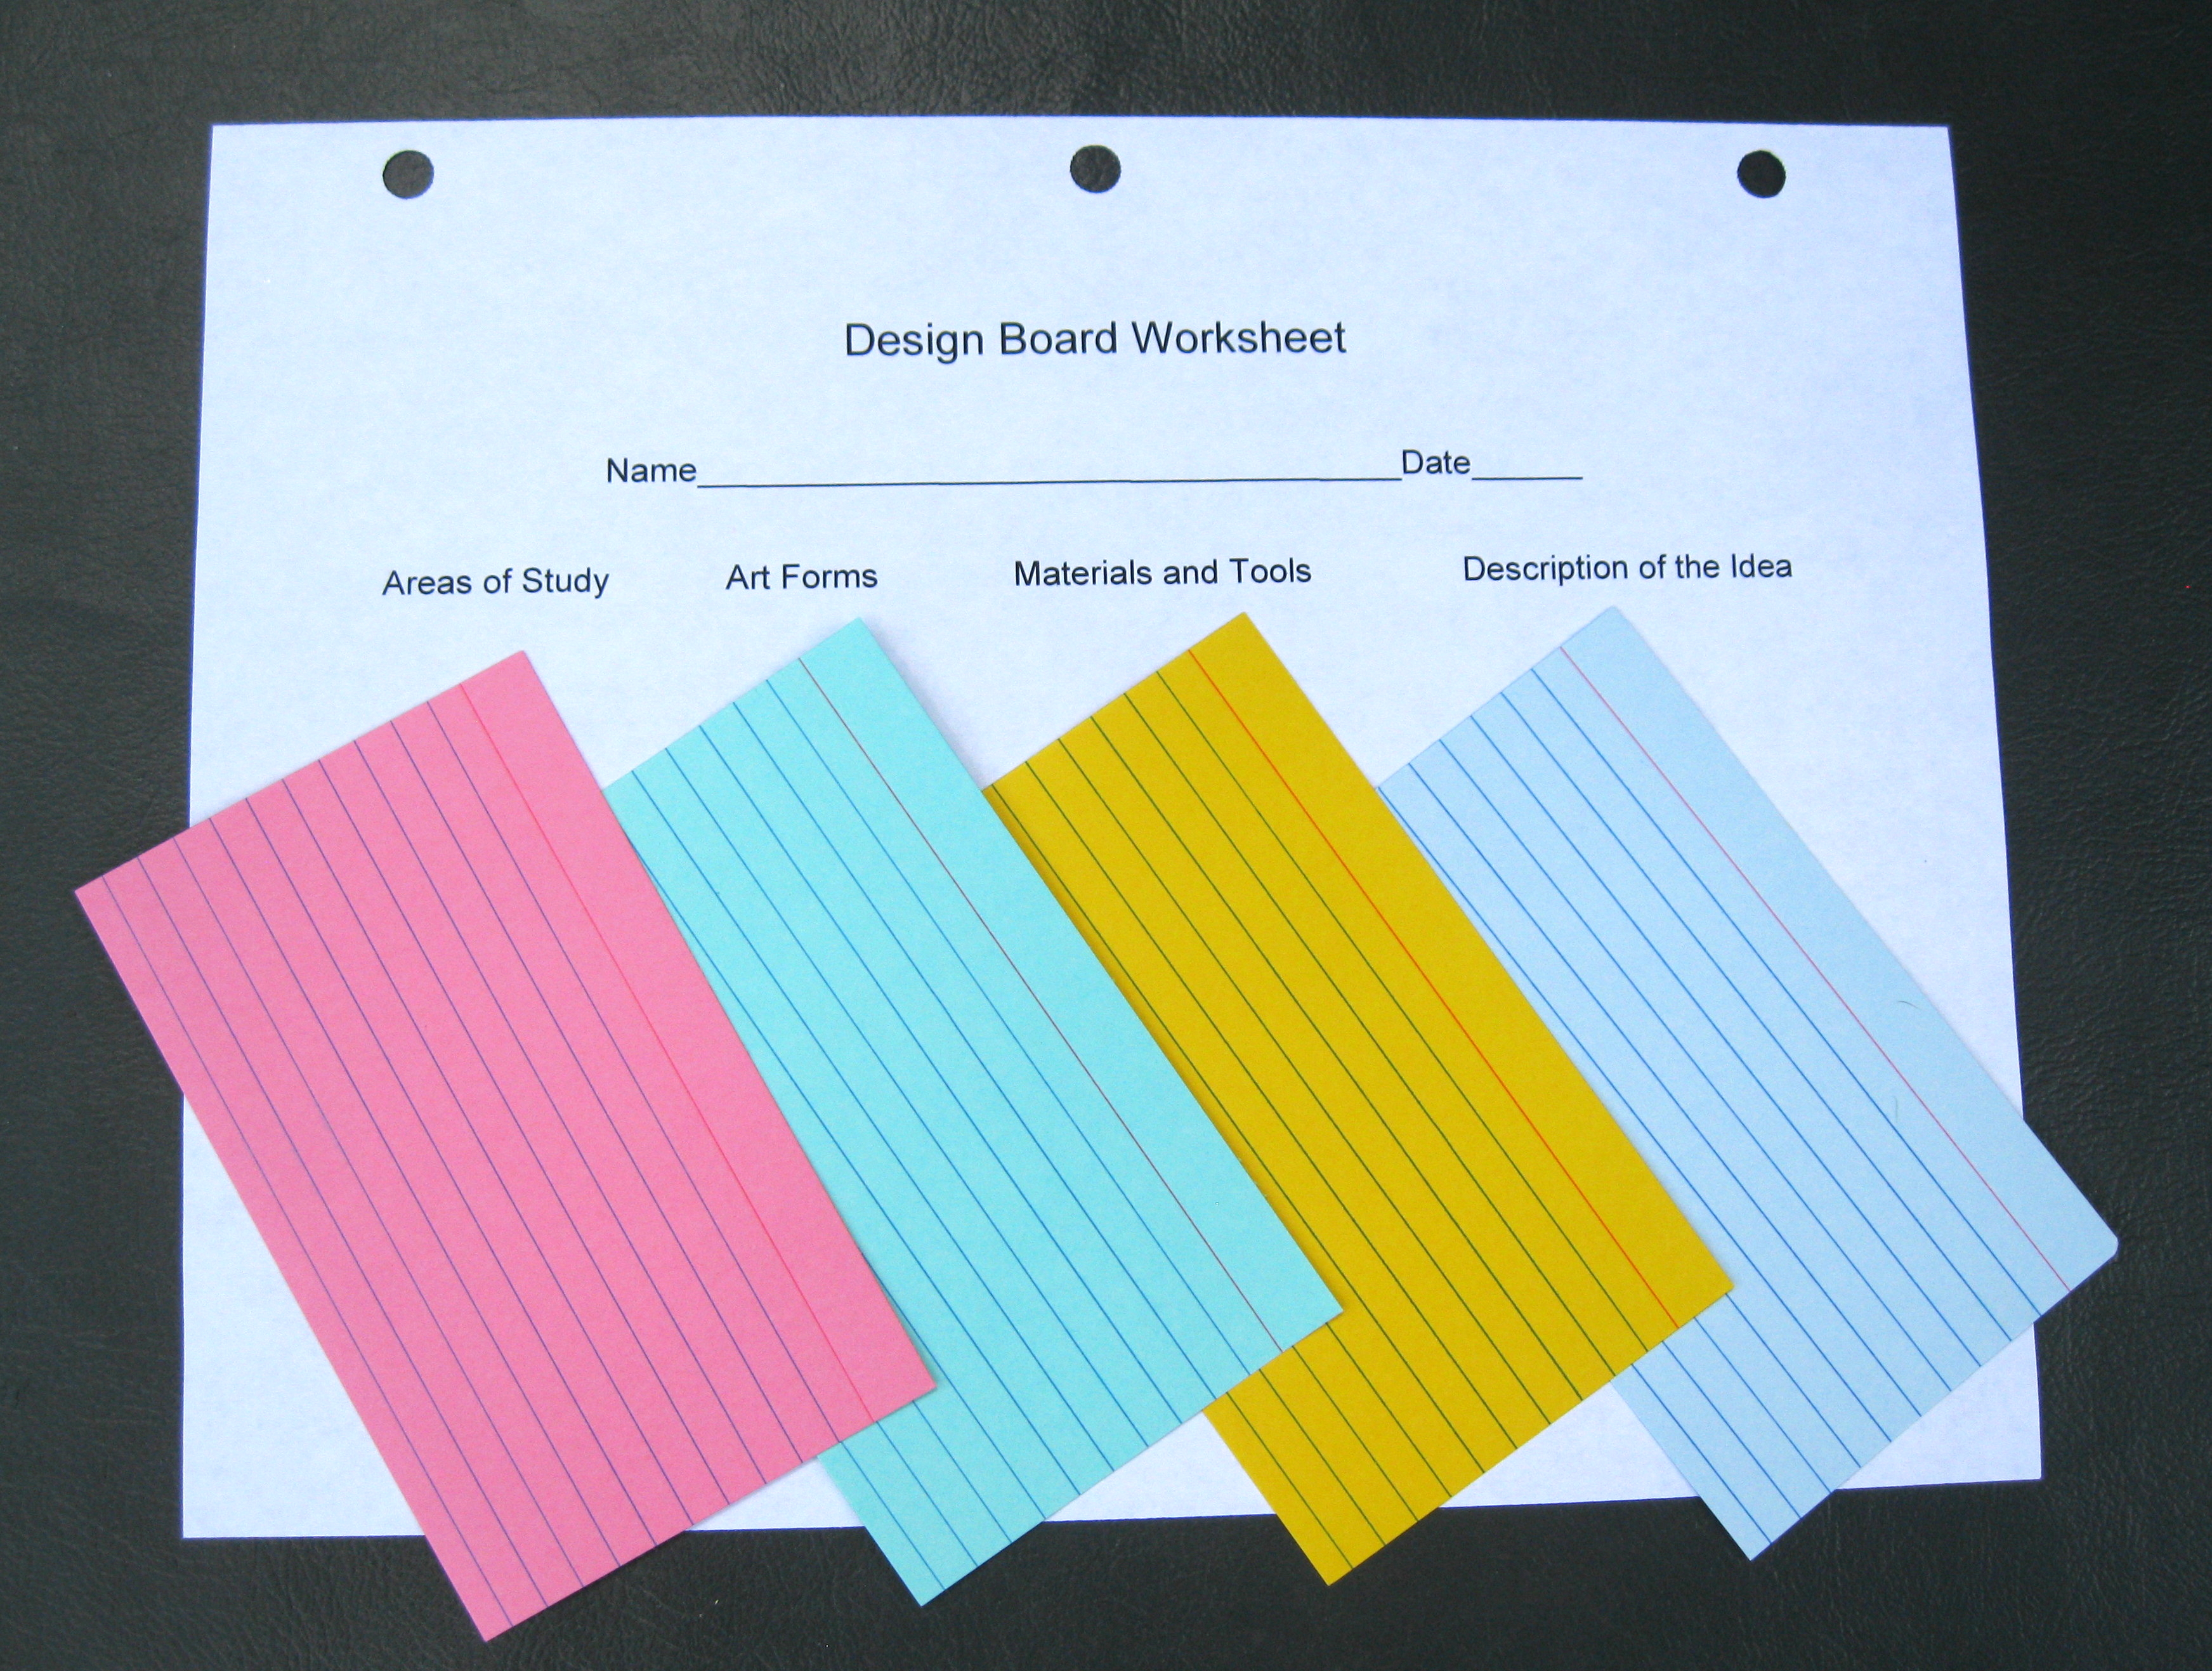
- Design Board Worksheet
- Laminating material
Preparation:
- To make the board, choose the boxes and the cards you need.
- The boxes will determine the size of the board. Use laminated illustration board or thin wood for the entire Design Board. The board needs to be long enough for the boxes and wide enough to accommodate each box with its heading below it.
- Seal all wooden parts of the activity.
- Feel free to think of a simpler design if you so choose.
- Make the label cards for Areas of Study, Art Forms, Materials/Tools, and Laminate them and attach them to the boxes.
- Make the board with its headings. Finish it so it is easily cleaned.
- Make the labels with a computer if using illustration board.
- Use rub on lettering if using wood. Seal the board.
- Note: Color coding the labels for each box and its cards will make cleanup easier.
- Make the Design Board Work Plan on 8½” x 11” paper, or choose another way to record the plan. It is an important step.
- Make the Design Board Worksheet that follows, so students can record their project. Use landscape orientation.
Presentation: 9-12
- Design a simple project with your students that the total class will want to do, e.g., Stationery for a thank you note after a field trip. Give each student a work plan to fill out as the lesson progresses.
- Choose the area of study and place it on the board, e.g., Writing assignment: letters of appreciation.
- Choose an Art Form (stationery: sheet of paper or card and envelope).
- Make a list with the children of everything that will be needed for the work (colored paper, glue sticks, scissors, scissors that cut interesting edges, markers, collage materials, colored envelopes or a pattern to make one, paper punches, scrapbooking paper trimmer).
- Have each student write one to three sentences that describe the idea of the work, or write a group description of the idea with your students using their words.
Extensions:
- The Design Board can be used instead of a brainstorming session for a large group project.
- The Design Board can be designed for self motivated work in other art disciplines such as literature, music, movement, theater, or film.
Resources:
- Office supply: containers, boxes
- Hardware store: wood planks
 A school or a teacher may be asked to provide artwork for a good reason, e.g., table decorations for a conference of Parents for Public Schools. It is the children who will be doing the work, and they need to be consulted before any commitment is made. This is not a problem, because students like to do projects that showcase their talents. It has happened that older students are sometimes reluctant to give up their class time, especially if the project does not relate to them or their interests. In that case it can be chosen as Special Work, which is usually more academic than creative.
The more that children’s artwork is seen outside the school environment, the more likely they will receive requests. Well written and well directed press releases relating to children’s art activities and art shows also generate interest in their work.
Special school events generate the need for art. When the auditorium needs to be readied for a special event, it usually involves art and music along with other arts disciplines. An annual arts show with matted work, a concert, and a special opening celebration create traditions that are eagerly anticipated, attended, and remembered.
Teachers can commission artwork (See: Large Projects: The Tree). A simple request, when turned over to the children, can become larger and more complex than you anticipated. Be prepared to “follow the children.”
 When children understand how something is made, it releases them to use it expressively in their own way. If you expect children to be creative with any process, simple or complex, it must be introduced in preschool and continue to be made available with experiences that develop higher levels of proficiency, just like math and reading.
Several art forms are made with such complicated processes that they must be repeated often with teacher-supplied ideas before they can be offered in an open-ended manner (Indirect Preparation). Outlining each step in written and visual form helps to speed the learning process for older students, for processes such as paper making, pottery on a wheel, weaving.
An advanced technique may be introduced to the whole class, using a teacher conceived idea to isolate the difficulty. The new skill becomes the point of interest. The difficulty of making a clay slab was introduced in a project for making clay tiles for a sink backsplash in both the 6-9 and 9-12 environments.
A process may need to be expanded for individual students in order to teach an advanced technique of a known art form, e.g., a new fold in Origami, a new wrap in God’s Eyes, another illusion of movement for a Flip Book. The child’s work gives rise to the lesson.
Introduction:
The study of a culture reveals the sense of beauty, decoration, and design of a given group of people at a given time. The study provides an opportunity for children to visually record their learning. The children’s record can be created in any of the art forms and materials that are available to them. For example, if they know how to make a Flip Book, their idea about the culture can be presented via that form. If the study is to provide ideas for artwork, it is suggested that a study include an art form that was a part of that culture. An in-depth presentation will provide enough information so as to generate individual or group work. With the children’s help, discover and isolate design elements and principles (Visual Analysis) that identify the style of the culture. It is possible, then, for the children to use the information to create within those cultural design limits. If a child is inspired by such a study, those same qualities will show up in independent work later. Your research and preparation is a key activity for the success of this approach. The key lesson for the study of a culture is the fascinating teacher-prepared stories that initiate the work. When using a culture for expanding personal ideas, it is just as important that the study explores how the art reflects meaning. What is special about it? What motivates the work? Who are the artists? Do the children know why they are doing this work? Does the work relate to any other discipline they are learning in class? Note: This is a time to consider using the “The Needs of People Chart,” as well as, “The Art Chart” to guide your presentation. (See: The Art Chart)- Prerequisite: Knowledge of the Culture and The Art Chart
- Direct Aim: To investigate how the art of a group of people defines them, their world view, and their place in history.
- Indirect Aim: To stimulate the creation of personal ideas
- Point of Interest: “What do you like about the way the culture expresses itself? How is the culture reflected in their artwork?”
Materials:
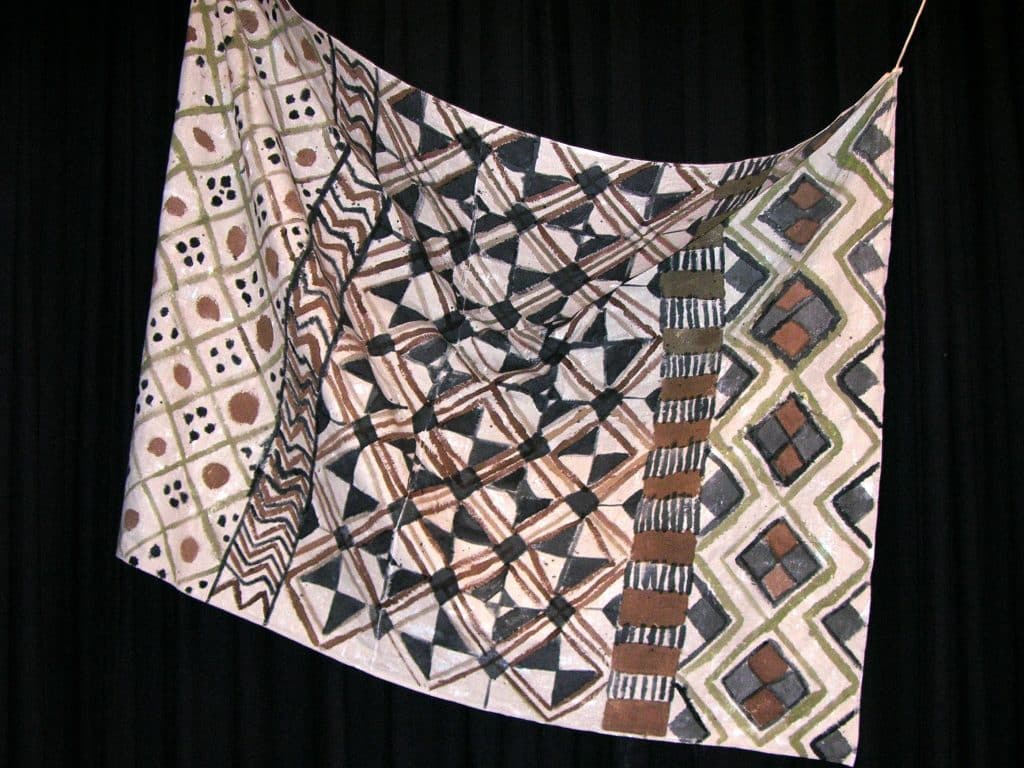
- Examples of actual artwork: a piece of mud cloth, museum quality reproductions, books and/or videos.
- Are there learning materials or experiences that need to accompany this work: reading assignment, manipulative materials, research work, field trip?
Preparation:
- Organize the art form areas the children will be using, and have everything ready. It does not necessarily need to be complex to be successful.
- Read about internal and external information, and be ready to introduce them to your children (See: Resources).
- Prepare all classroom materials needed (contracts, manipulatives, field trips, etc.).
- Prepare the introductory lesson.
- Decide where and how to exhibit the finished work. They will work hard and deserve to have their work exhibited in and out of the school.
Introduction:
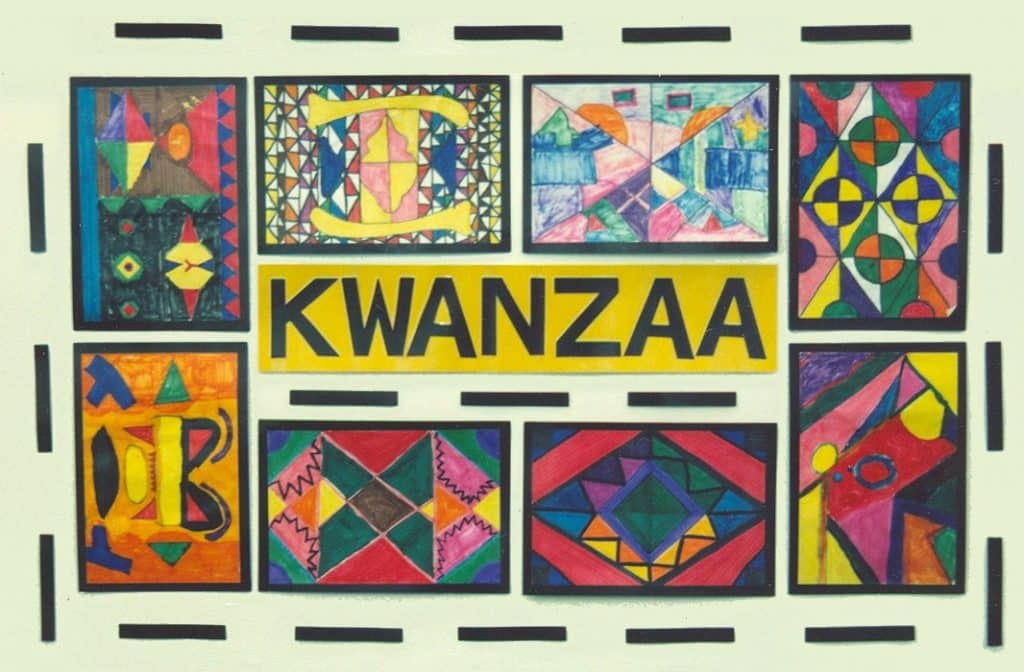
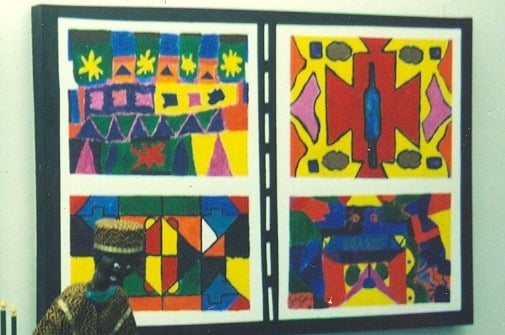
My children and I were invited to create a museum show for an African-American Museum that was near our school. The head of the education department approved it for installation in the next school year. It was clear that we were free to do as we wished, as long as it related to the African-American experience. I suggested a tableau, and nothing was more African-American to me than Kwanzaa. I discussed this with all of my 9-12 classes, and all were excited about doing the project. My sixth graders, however, would graduate before it would happen, so in order to include them, I decided to begin the tableau project with a study of the Ndebele People of Africa. All the students made marker paintings based on design elements of the Ndebele. The graduating students were given the choice of taking their finished work with them or leaving it for us to use in the Kwanzaa tableau. (See: Large Projects: Kwanzaa Tableau)Ndebele Marker Paintings
One child’s parent had given me wrapping paper of four different Ndebele designs. These were designs that had been painted on houses in Africa. The study of the Ndebele People would be a fascinating subject for you and the children. I strongly suggest this topic. I introduced this work to 9-12 year olds. I did not try it with 6-9, though it could well work with that group.- Prerequisite: The Art Chart, use of a compass
- Direct Aim: To investigate how the art of a group of people defines them, their world view, and their place in history
- Indirect Aim: To stimulate the creation of personal ideas
- Point of Interest: Ask the student, “Has this study influenced you or interested you in any way?”
Materials:
- 8½” x 11” white paper
- 9” x 12” black cover paper
- Pencils in a container
- Markers of many colors: thick and thin line
- Drafting equipment (rulers, triangles, compasses, protractors, geometric templates, etc.)
Preparation:
- Gather information about the Ndebele People. Have visual materials to share. Introduce the information as an interesting short story punctuated with visuals, maps, etc. (in a PowerPoint presentation?)
- Most important is that the designs were developed and painted by women artists using tempera paint, even though previously only men had been the artists. The rainy season washes the houses every year and new designs are created and painted. The women make money by selling the photographic rights to the work. Even the little house made for the spirits of family members who have passed is painted like the house.
- What classroom assignments might be generated by the study?
- Make a work Plan or use some other form of evaluation
- Have paper and markers available in the art area. Make sure the markers are all usable.
- Plan to exhibit the finished work. Consider mounting the finished designs on black cover paper and laminating them. Arrange and display them so as to emulate how the designs are placed on a home. Observe closely how each row of designs is separated by simple bands of shapes. See: Large Projects: Kwanzaa Tableau
Presentation: 6-12
- Make your initial presentation into a story about the Ndebele People (External Information).
- List everything that the children would agree can be seen in the work, e.g., overlapping lines and shapes, repeated bright contrasting colors, placement and repetition of designs. This is the first step of Art Criticism (Internal Information).
- Using the list of what is seen; describe the relationships of the things seen, e.g.,
- Interpenetrating geometric shapes
- Designs arranged in horizontal bands
- Colors repeated
- Black and white are the basic colors that form the structure of individual designs.
- Demonstrate using a compass for making circles, and explain that the children will need to share the drafting tools.
- “Having heard the story of the Ndebele women and seen examples of their work, you can now use your imagination and your materials to create an interesting variation on paper. When we have finished our small designs, we will mount them all on black cover paper and display them using Ndebele borders.”
- Permit more than one design to be created by each student.
Extensions:
- After the finished work is displayed at your school, offer to exhibit the work in a library, civic center, coffee shop, church, or another school. Include any written work done by your students.
- Discuss with your students how they might use this design style to make other art forms. Let them make the suggestions (jewelry, weavings, tempera painting, scratch board, note cards, stationery).
- Record all information gathered by the class, and find where it belongs in the Art Chart:
- Idea
- Art Continuum (if introduced)
- Art Form, Subject Matter, Medium, Tools, Techniques, etc.
- Elements of Art
- The last step of art criticism is interpretation. This explains the idea behind the work. What do all of the earlier observations mean? This takes intelligence, sensitivity, and courage. It is an explanation of the work of art. The interpretation is based on what you have seen and felt. The question is what does the visual evidence mean or suggest, regardless of the artist’s intentions?
Resources:
- Start your research in the Children’s section in your library, to find books on the Ndebele People.
- Use “Ndebele People of Africa” when surfing the net for visuals and information.
- Amazon has several nice books.
- References for art criticism
- Barrett, Terry. Criticizing Art. Mountain View, CA: Mayfield Publishing Co., 1994, Chapter 2 – Internal and External Information
- Feldman, Edmund Burke, Becoming Human Through Art. Englewood Cliffs, NJ: Prentice-Hall. Inc. 1970, Chapter 12 – Mastering the Techniques of Art Criticism.
Introduction:
The life and work of any artist holds such fascinating possibilities that a clear intention needs to shape the study. The intention here is to enhance the observation of an artist’s work by learning more about the person’s background. This research constitutes “external information.” The lives of architects, sculptors, film makers, or quilters reveal the motivation of their work. Artists have been influenced by where they studied, traveled, or worked. Life experiences and friendships may have had great impact on their lives and work. Political events, advances in scientific fields, new technologies, or advances in old ones (such as new kinds of paints) impact the artist.
To reveal to children that they can generate their own ideas, they need to know that each artist has unique feelings, environments and experiences which inspire them to express in a form of art. Generating personal ideas is common to humans of any age, as they observe what’s going on around them, how it affects them, and how they relate to different ideas. Researching, observing and responding to the lives of other artists can lead to children’s understanding that they can express their own uniqueness artistically.
Since I never had enough class time with children for them to do their own research, I did the work of finding external information that was short and to the point. I chose modern to contemporary work for this kind of lesson because it just seemed more interesting to me and to them. Even adults find modern and contemporary art challenging. We are living in a period that encourages us to validate our own reaction to what is presented by the artists. Most artists I’ve met enjoy hearing others’ perceptions of their work. And, if they don’t, they will usually discuss it with you anyway. When selecting books and videos, make sure they are meant for young people.
- Prerequisite:Knowledge of the Art Chart: Internal/External Information, The Art Continuum, so the group can analyze the artist’s work, at least through art elements (See: Understanding Art).
- Direct Aim:To understand the ideas of others, to demystify where artists get their ideas, and understand what influences their work.
- Indirect Aim:To stimulate the creation of personal ideas
- Point of Interest: Suggest that the student journal when experiencing a work of art, no matter what kind (visual, music, poetry, etc.). They can record their reactions to the piece in the form of feelings, thoughts, and questions that the work engenders. These reactions and questions can guide their search for external information. It is possible that the story of an artist’s life and work may allow the student to revisit the work with renewed interest and greater understanding. It also may engender new questions about the work and themselves.
Preparation:
Note: If you have never done this work with your children, you choose one artist whose work you appreciate and really enjoy. With experience, you can decide whether to allow the children to choose other artists.
- Prepare several manipulative materials using reproductions of one artist’s work, and include external information about their life work
- Gather a selection of library books, e.g., the Scholastic Inc. Children’s Press series Getting to Know the World’s Greatest Artists (see Resources).
- Suggest websites for older students; search on artists’ names
- Review videos
Note: Videos are sometimes too long and/or verbally inappropriate. Isolate a portion you want the children to see, turn off the audio and supply your own commentary.
- Prepare all classroom materials needed, e.g., student contracts and field trip permission slips.
- Organize the research areas the children will be using, and have everything ready. It does not necessarily need to be complex to be successful.
Presentation:
- Present the introductory lesson. If you wish, read from the first two paragraphs of Introduction to this lesson.
- Choose an artist or period of art to study with your children.
- For 5-9 students, design manipulative materials such as matching-and-sorting cards of famous paintings (see Resources), timelines of artist lives, short stories about artists for reading, or a writing assignment such as documenting things they have seen in an art reproduction.
- For older students 9-12 with research skills, share how you gathered information.
- Create with your students the list of questions they can use to guide their research. Your research will help with this process. You can truly speak from your own experience. Continue to refine the list if needed. You could also ask them to do the work with you.
- Ask your students to share what it is about the artwork that holds their interest. How does the work influence how they feel about art, or how it influences their thinking and creating their own art?
- Is there a parent who is a working artist who might be willing to be interviewed by your students? It would be exciting to hear how the person develops their ideas.
- Choose with the children how the research is to be reported and used - for individual work, for a group project, or for a special exhibit or event.
- Discuss how the written work could be expanded. Would it meet the criteria for a writing assignment, a poetry study, or a letter writing opportunity?
- Decide where and how to exhibit the finished work.
Note: The best authority on the artist’s work is always the artist. Is it possible to dialogue with the artist? Often, videos are available of an artist talking about their art or being interviewed. Remember, art critics do not always rely on the artist’s intentions to make their assessments of the work.
Suggested Artists
- Painters (Jacob Lawrence, Norman Rockwell, René Magritte, Ellsworth Kelly, Robert Rauschenberg)
- Sculptors (Auguste Rodin, Alexander Calder, Claes Oldenburg)
- Architects (Frank Lloyd Wright, Antonio Gaudi, Frank O. Gehry, I. M Pei)
- Environmental Arts (internet search “Land Art Artists”) for Andy Goldsworthy, Robert Smithson, Richard Long, Michael Heizer, Nancy Holt, and “light artist” James Turrell
- Animator: Jane Aaron, cartoonist
- On the internet, go to “Independent Stop-Motion Animator Jane Aaron Dies at 67.” Scroll down the article until you come to her two feature Videos (Traveling Light and Set in Motion).
- Animator: Winsor McCay
- On the internet, there are many choices. Try this one: https://www.youtube.com/watch?v=fAfIBpxDG6w
Watch a few others, then make your choice.
Resources:
- Museums have education departments that prepare lessons which are interesting. Remember to translate the lesson into the principles and practices of Montessori Education.
- Books, reproductions and DVDs designed for young people are available from companies that sell art materials and equipment to teachers.
- Art Image Publications 800.3612598 https://www.artimagepublications.com/
- Children’s Press scholastic.com/librarypublishing
- Crizmac 800.913.8555 https://www.crizmac.com/ Art Ed. Resources
- Crystal Productions 800.255.8629 crystalproductions.com Art Education Resources
- Davis Publications, Inc. 800.533.2847 https://davisart.com/ Art Education Resources
- Discount School Supply 800.627.2829 https://www.discountschoolsupply.com/ Art Materials and Equipment
- Nasco Arts & Crafts 800.558.9595 https://www.enasco.com/ Art Materials, Equipment and Art Education Resources
- Sax Arts & Crafts 800.558.6696 https://www.saxarts.com/ Art Materials, Equipment and Art Education Resources
- Triarco Arts & Crafts 800.328.3360 https://www.etriarco.com/ Art Materials, Equipment and Art Education resources
- United Art & Education 800.322.3247 Art Materials, Equipment and Art Education resources
- Postcards for matching-and-sorting activity: https://www.zazzle.com/famous+paintings+postcards
Georgie Stories
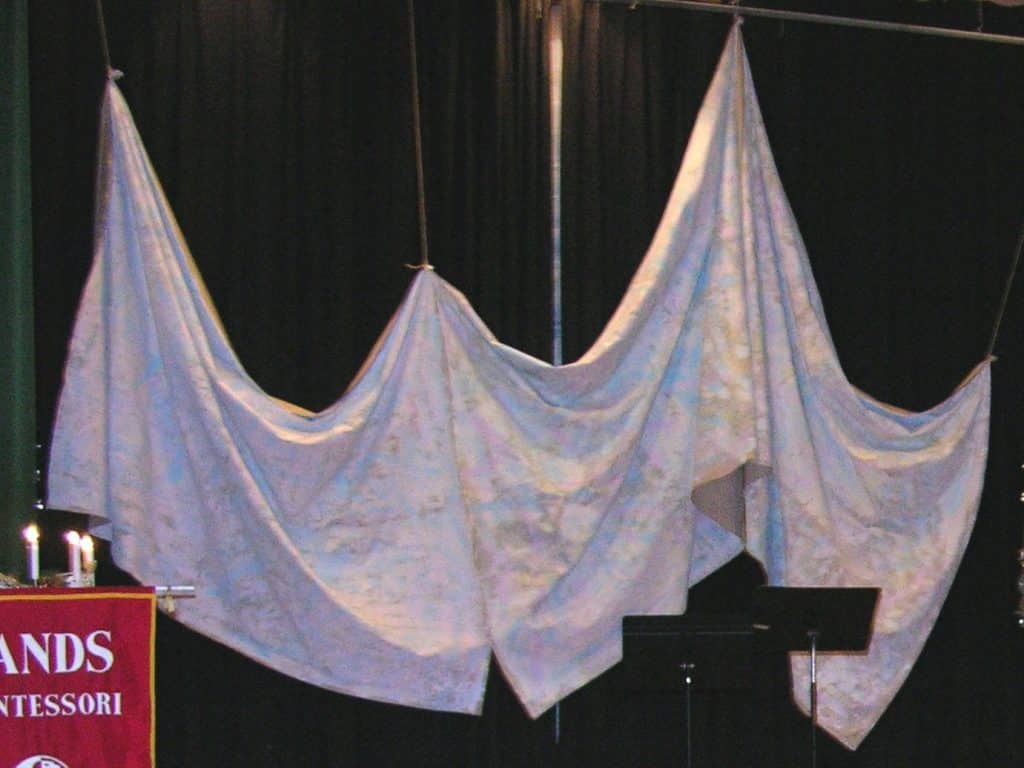
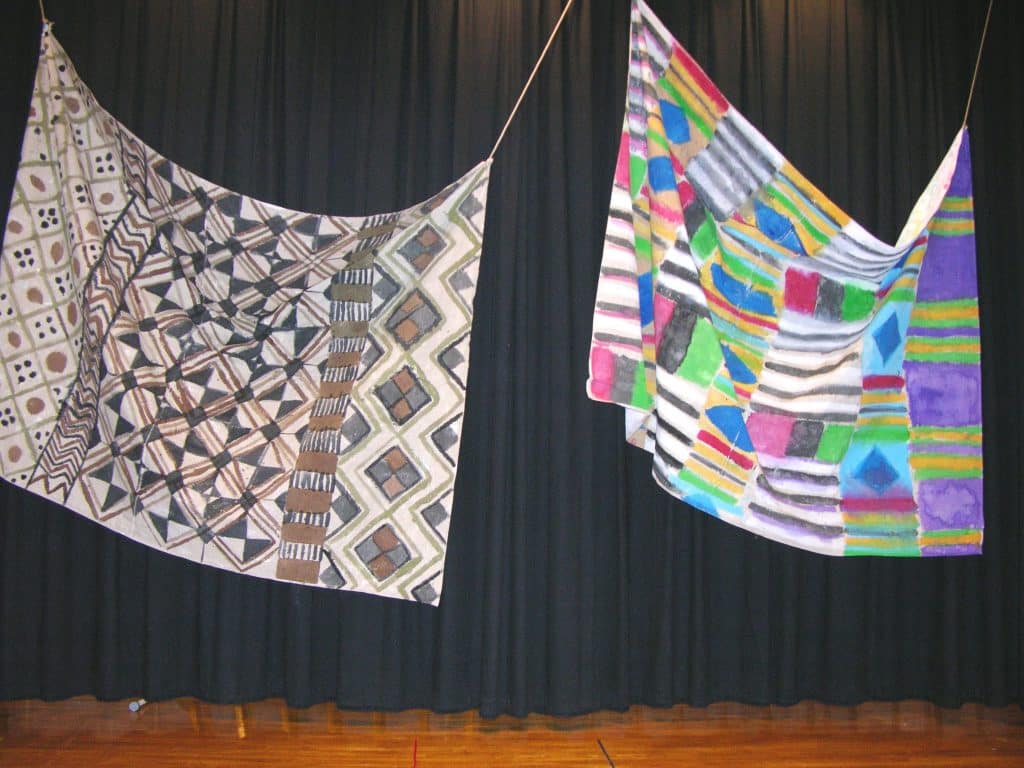
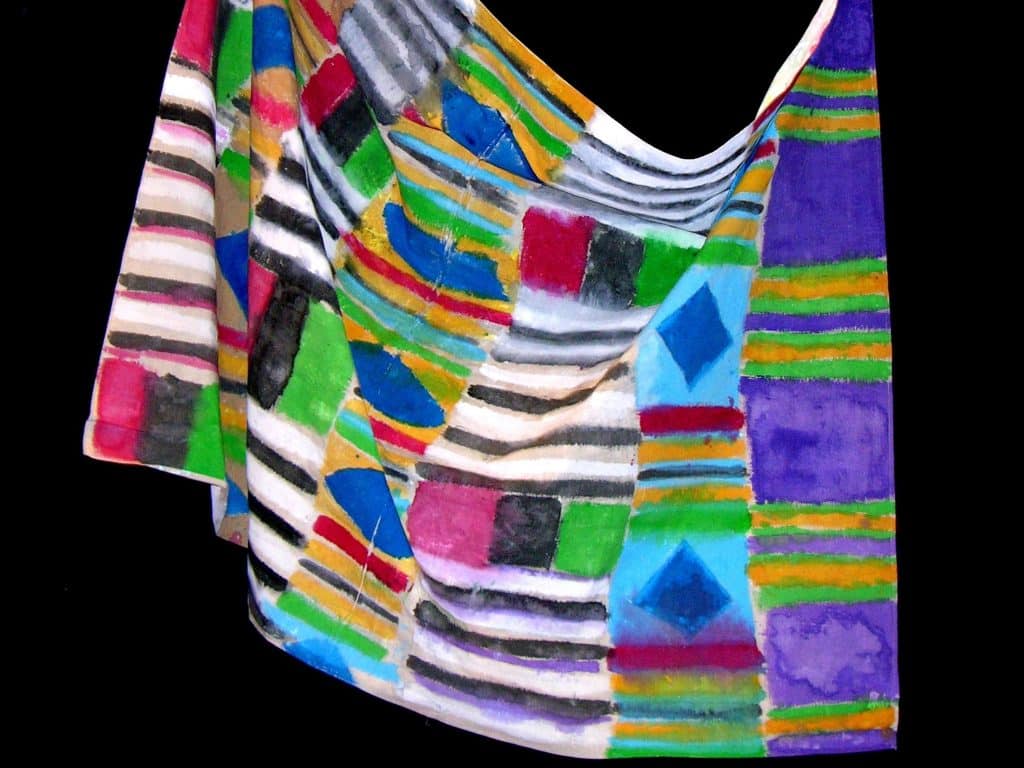
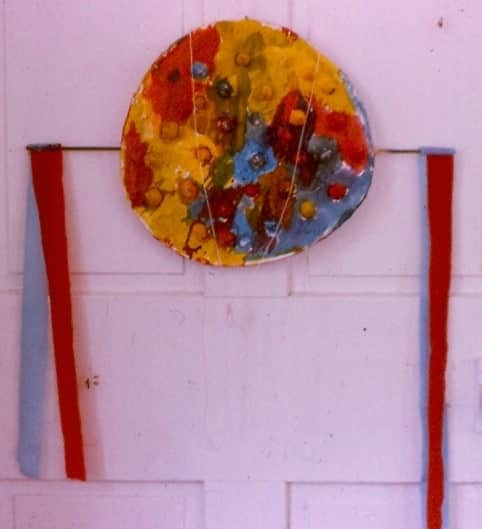
- I used the study of Sam Gilliam’s suspended paintings to motivate a project that was needed by the school for stage decorations. I first saw the work of Sam Gilliam at the Museum of Modern Art in New York City. In a hallway, a long piece of painted canvas was hung over rods and looped down just out of reach. He had successfully integrated painting and sculpture. During a gallery show in Cincinnati, he and I made a tape of him explaining how he discovered the idea for “sculptural painting”. Years later, I could not find the recording. So, from images in a catalog for a retrospective show of his work in 2006-7, I made transparences of his suspended paintings. I presented them and related his story to the children as “the jumping off place” to use to create decorations for our auditorium.
- I used drawings by Vincent van Gogh as being a clear example of invented texture and as preparation for visiting a museum show. If it is preparation for seeing a special retrospective show of a single artist or group of artists, the museum will have a catalog that accompanies the show. The catalogs are available before the show even reaches your area. It will distill most of the information you will need. This is true especially for contemporary artists with whom you might not be as familiar.
Introduction:
Seeing the work done by other artists can influence and inspire us to see greater possibilities when we choose to create. In the history of art, there are many stories of how one artist influenced another.
Children are influenced by the work of other children. It may happen that one student complains about another using his/her idea. Our copyright laws exhibit proof that adults grapple with the same problem. Remind students to ask for permission to use another person’s idea. Advise the asking child to state what they like about the other child’s work. They may even ask the person for help. Children will also emulate the teacher’s ideas. If that happens, invite the student to share one of their ideas for your next lesson.
Children need help to understand what an honor it is for someone to be influenced by their ideas. However, it is disrespectful for another to claim ownership of them. The following lesson illustrates the respect that Pablo Picasso gave to Diego de Velázquez by using his most famous painting, Las Meninas, as the jumping-off point for a series of paintings and drawings he did in 1957. Being influenced by other artists does not mean one copies their ideas as much as it points the way for us to explore whatever we like about another person’s work. It expands our awareness and encourages us to follow our own means of expression. The following lesson for 9-12 students is an example of one artist’s work influencing another.
Note: Reproductions of Picasso’s Las Meninas are difficult to get and are expensive. You can find a picture of it on the internet and show it full screen on your computer or projected on a whiteboard.
- Prerequisite: Exposure to both Velázquez and Pablo Picasso
- Direct Aim: To allow children to see how one artist explored the idea of another
- Indirect Aim: To stimulate the creation of personal ideas
- Point of Interest: “Think whether you have ever been influenced by the artwork of another artist.”
Materials:
- A reproduction of Las Meninas by Diego de Velázquez
- A reproduction of Las Meninas by Picasso
- Reproductions to make an exhibit of the work of each artist along with the presentation (optional)
- Index cards
- Laminating material
Preparation:
- Research Las Meninas by both painters on the internet. This will provide the external information you will need for the lesson.
- Study and read about Velázquez’s painting in Annotated Art (See: Resources). You can select descriptions of the characters and details in the painting, write them on index cards, and place them near the reproduction. Laminate the cards. There are many interesting people depicted in the painting. See if you can find the same characters and details in Picasso’s versions of the subject.
First Presentation: 9-12
- Assemble a group and introduce the Velázquez painting by its name. Make sure everyone can see the reproduction.
- Ask the students to investigate the painting with you. What is going on in the painting? Remind the students that they are not looking for the right answer, but an answer that can be tested by looking at the painting (internal information). Ask them first what questions do they ask themselves when they look at the work? What are they seeing? What is seen in the painting that tells them that they know what is going on?
- Dismiss the group when the work session feels finished. Display the reproduction on a table easel or on a wall at eye level, with the cards you have made from the book.
Second Presentation: 9-12
- Revisit the painting and ask how the cards that go with the painting have changed their experience of the work.
- Review the cards with the class if needed.
Third Presentation:
- Introduce the Picasso painting and compare it to Velázquez.
- “How is the Picasso painting similar to the Velázquez painting and how are they different.”
Note: leave the two around for a period of time. Don’t remove them too quickly. It is possible that very simple differences will not be detected immediately - e.g. one has a vertical format (portrait) and the other has a horizontal one (landscape).
Extensions:
- If The Art Continuum has been taught, give a short review presentation putting the two paintings on the Art Continuum (See: The Art Chart: The Art Continuum). Where the Picasso painting belongs on the continuum is an interesting question. I would place it just past the Abstract point. Other paintings he did of the subject push them even closer to Non-Objective.
Resources:
- Cumming, Robert. Annotated Art. London: New York, 1995. Print. Read pages 6-9 before looking at the annotated painting on pages 56 and 57. More information is found on pages 17, 75, and 91.
- Artimagepublications.com 18” x 22¾” reproduction of Velázquez’s Las Meninas D200979, 800-361-2598
- Contact [email protected] to order a 50 x 70 cm or 23⅝” x 25½” reproduction of Las Meninas by Picasso described as Pintura Sobre Tela on the website. Order
- Las Meninas, 150 x 70cm, Euro 12: $14.11 (8/19/17)
- Six Cards, Euro 5.50: $6.47
- Postage, Euro: 27.70: $32.58
- The museum uses a standard packaging system so more than one teacher’s order could share the cost of the postage. The museum staff will help you.
- To make a purchase, you will need to give the museum the following information: Your name, shipping address, email address, telephone number, a credit card number, its expiration date, and the number and size of the reproductions you want.
- If you have a problem using your US credit card to make a purchase from a European vendor, you may be able to purchase a refillable debit card that is valid in Europe. One example is the Visa TravelMoney card, which is available from AAA: see https://ohiovalley.aaa.com/travel-money.
What can you make with a paper cone?
(The Guilford test was to find as many possible uses for a brick)
Introduction:
The first time I used this lesson was while I was teaching in the Children’s Studio. I did not know who developed the activity, I just knew it worked. I thought using a brick was inappropriate for children, so I chose paper cones for the work. The results generated in my environment were exciting. After my presentation, the four year olds, as a group, had an idea. The children used all the cones in the collage center and placed them side by side on the white line I used for lessons and meetings. They were emulating what was happening outside the studio. The city was repainting the crosswalks in the neighborhood with white paint and used orange cones to indicate the paint was wet. When I gave the presentation, the room had a full collage center with at least 24 cones in one of the 20 boxes.
- Prerequisite: Basic skills, Introduction to the Geometric Solids
- Direct Aim: To create an alternative, creative use of a paper cone
- Indirect Aim: To support creative thinking
- Point of interest: Remember, the paper cones will always be available to you for making art.
Note: When I gave this lesson, the environment had a fully operating collage center. All the basic skills activities had been taught. The focus of the lesson was finding interesting things to make with paper cones, not how to do it. Wait to give this lesson until you know you will only need to assist, not teach how to use the equipment and art materials.
Materials:
- Paper cones, 18-36 (see Resources)
- Have ready in a central location (This is similar to a collage center only small)
- 4 scissors
- Glue, set up for 4
- 4 glue sticks
- Paper fasteners and paper clips in containers
- 4 staplers
- 2 paper punches: 1¼ and 1⅛
- Yarn and/or string
- 2 wooden capital I spools to hold the yarn and/or string
- Markers in a container
- A collage tray
- Simple Watercolor Painting (See: Art Forms I)
Preparation:
- Gather all the equipment and art materials needed.
- Choose containers for the equipment.
- Design the activity for a table where several people could work at one time, or establish a place where children go to get what they need. They choose their work space.
- Loosely wrap the string and yarn around the capital “I”s.
- Have ready in the environment the markers, the Simple Watercolor Painting, and the collage tray.
- Put 18-20 plain paper cones in a container.
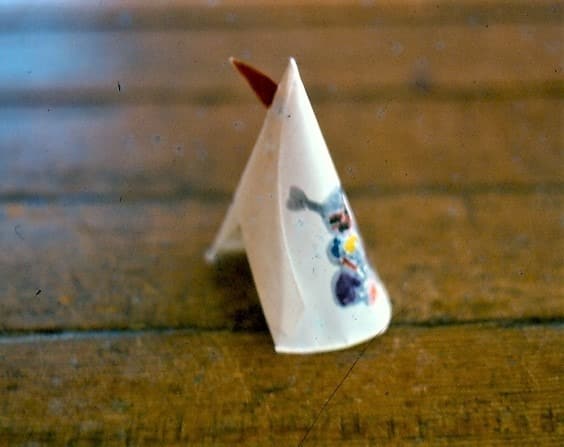
Presentation: 6-12
- Bring the container of cones to your teaching mat.
- “I am going to ask you a few questions. However, there is no one correct answer. All answers are good answers to my question. Ok? Are you ready to hear the questions?” Wait for a response. “Good, let’s begin.”
- Empty the cones onto your teaching mat. Let them spill all over. “I have lots of plain paper cones. How do people use them?” Let them tell you all the ways they could be used.
- “The next question I wish to ask is, what can you make with one or more paper cones? How can you use them to create an idea? How can you add them to another idea? Know that I will always have paper cones handy if you get a sudden inspiration.”
Extensions:
Use papier mâché egg cartons and ask the same questions.
Georgie Story
A parent donated many large hunks of Styrofoam that I could not safely store. So the 9-12 class I was teaching decided to make a Christmas tree for the front hall of the school using dowel rods and glue with the Styrofoam. Then a group of Jewish children made a menorah with the same materials. The children had fun embellishing the basic tree and menorah with many of the smaller foam shapes. Moments after we finished, the Cincinnati Fire Department made its annual visit to inspect the school. I was called to the office and the gentlemen told me I would have to remove the Styrofoam art immediately and store the rest of the material in a metal trash can with a tight lid. I showed the inspectors the roof of our kitchen which was in the basement a level below us. The roof was in an enormous open-air light shaft, accessible from very large windows in the hall. They agreed to let us transfer the Styrofoam sculptures; the janitor and I moved the two pieces out onto the roof. The universe blessed us that afternoon with snow, and both tree and menorah were covered beautifully.
Resources:
- Online: You want 4 oz. plain paper cone cones. Check several sources for the best buy. Check the cost of shipping.
- SOLO Cone Water Cups, White, 200 count
- If you are shopping at a restaurant supply store, check out their cup prices and quantities.
Introduction:
Large projects are exciting for the children, the teacher, the parents, and the community. Large can be defined as being produced by an entire class, by all the classes of the same level, or by all children in the school. All are possible. The ideal is to turn the idea over to the children and allow them to design the project. The only intervention that is sometimes leveled is when some practical consideration places limits on what is imagined. Sometimes a project is limited by time or money; sometimes it’s a lack of materials or lack of expertise that must be dealt with in a creative manner. Remember, you have resources at your disposal. People will help and lend their expertise to projects you and the children want to make, but you must ask. The success when using this process depends on the questions the teacher asks the children and when the questions are asked. The teacher’s questions model the design decisions each artist must ask themselves in order to produce a work of art. Any process that is used will demand its own set of design questions and its own set of skills. In essence the teacher is walking the children through the creative process of thinking and making their group idea. It is important that new “How to” lessons are given to the group as the need arises, and that problems are solved by the group when they occur.The Process Rules
The process I have developed to design by consensus relies on these simple rules.- Both the students and the teacher decide on what is to be done. The children are asked to suggest an idea or process to be used.
- If the teacher suggests a process or topic, the children have the right to refuse the idea, replace it with another, or amplify the original idea. They have done all three at various times.
- If more than one class is involved, each class must accept the design decisions made by the preceding class or classes, and add to the idea.
- If you are an art specialist, each class will be given the next design question to be considered.
- If a group of teachers are working together, I suggest the teachers work out a way of doing this process together before it is offered to the children. Think up and outline the process together before stating the idea. Know its steps.
- If you are doing it with just your group, then outline what you will need to do and make a schedule or process for how the work will be available during class time.
- For the process to work most effectively, each class must be told about the decisions already made by the preceding classes. Make it a brief list. The new question is given within a context so the next step is truly a creative design answer. “The collage will be a tree, a Fall tree, the leaves will fall off, it will be a Winter tree, with birds and snow, it will have buildings in the background, and it will be a Spring tree, with multi-colored blossoms. Green leaves will replace the flowers, it will be a Summer tree, with details showing summer activities. From photos taken of the changes during the process, it will be a made into a movie.”
- (See photos and video in Large Projects.)
- When problems arise they too are presented as a question. “The work is done and the year is over. Now what would you like to do with it? Leave it up? When we return next school year, the tree art will still be in summer mode.”
- Everyone involved will be required to set aside individual work when the project demands going forward with the process of making it. Exceptions will happen.
- All students are the artists of the project. Think of creative ways to credit the artists other than by signing the work.
Additional Things to Consider
- Celebrate the completion of the work. Send out press releases and have an art opening.
- Students can send thank-you notes to all people and organizations that helped to make the project. They can choose to make their own stationery, or use the school’s.
- Document the work by photos and/or video as it is being made. Exhibit this material with the work. These images interest people as much as the finished work. I suggest this rule because I failed to document several projects, and I have regretted it.
- If possible, find another place outside the school grounds to display the work. Businesses, churches, or non-profit organizations may agree to display it.
- The work can also be reworked into another idea (See Large Projects for an example).
- Use the finished work as the focus for an evaluation process of your choice. Do a formal critical analysis of the work. (See: The Art Chart)
- Prerequisite: Experience making the art form(s) used in the project
- Direct Aim: To create a large work of art that can only be accomplished by many artists within a given time period
- Indirect Aim: To work as a team to create an idea, work on a project over time, and/or experience solving problems as they appear.
- Point of Interest: Ask the groups involved, “What did you like best about making this work?”
Presentation Annotated: 6-9
- I greeted the first class and started our lesson in the classroom. I explained the project and asked if they would like to help make a collage in time for parent’s night. They agreed 100%. So the class left the studio and sat in front of the blank board.
- “Look at the bulletin board. It is twelve feet tall and seven feet wide. What idea would look great on that space.” I suggested they begin brainstorming. I wrote everything I heard. When a tree was offered as the idea, the children began talking to each other. This is when I asked “Is our collage to be a tree?” Yes was the group answer.Their Special Work was done for that day. We went back into the room and they chose their first individual work of the year, knowing he rest of the classes would continue the tree design process.
- The next class decided the tree would be so large that the top and the sides of the tree would go off the board after seeing how trees were handled in several reproductions I showed them. The design question that needed to be answered was “How big will the tree be?”
- The next class decided where the trunk would start and end, how wide it would be, and where the roots would enter the ground. They knew the parts of a tree from preprimary. I put tape markers on the board and measured everything in order to record the tree’s placement on the board. “Where will the parts of the tree begin and end?”
- The next class decided where the land would touch the sky so as to establish a horizon line. “Is the tree collage to be mounted on a colored background or will it be in a natural setting?”
- Before the design process was completed, the green and blue papers were installed by a group called the lunch bunch. This was an important thing to do. Children often make interesting collages, but fail to establish a background first that was needed by the idea. This conceptual step is learned over time.
- I asked the next class, “We live in a climate that has four seasons. Will it be a Winter tree, a Spring tree, a Summer tree or an Autumn tree?” They decided it would be an Autumn tree, and thought each child could design their own leaf and decorate it with collage materials.
- When I explained what that class had decided, the next group suggested the leaves fall from our tree when the trees outside began to lose theirs.
- The next class decided to make the tree transition into a winter tree. “What will need to change in order for people to see Winter?” There were lots of interesting suggestions made which included a snow storm, a bird feeder, and birds. They chose a light gray color for the background to match their idea, and began making the necessary changes before we left for winter recess.
- One class thought it was only logical that the tree should then progress to bloom as a flowering Spring tree. We started changing the tree and its background in late March. The tree had multicolored flowers that gradually were replaced by green leaves as they were made.
- Of course, summer was to come next.
- During the very last design session, a third grader suggested we make the whole thing into a movie! This produced a roar of excitement among the children, and a feeling of “NOW what?!” for me. I had no experience turning a series of photos into a movie.
- By the time we started on summer, the children were adept at animating things and the area around the tree was packed with collages that were designed for the foreground, middle ground, or background. It was important for me to review the Parts of the Picture Plane for all classes.
- There was even an inchworm that worked its way down the tree trunk.
- I photographed the board every time something moved or appeared for the first time.
- A parent who was a graphic designer copied all the photos and made them into a movie. That work has been lost, but a new version is included in this curriculum to suggest how it might have looked. The new video is free to view in the Introduction to Large Projects.
Materials:
- A full collage center with everything possible
- See: Basic skills: Paste, glue sticks and gluing activities for suggested collage materials
- Scissors, glue, glue sticks, etc.
- Various sizes of railroad board, cover paper
- Colored paper
- Colored tissue paper
- Staplers for installing the collage
- A pointer
- A tall ladder
Preparation:
- The collage area had to be fully stocked and operational at all times.
Continued Presentations:
- We would sit in front of the collage anytime new decisions were needed. I had a collapsible pointer with me. The meetings occurred either at the beginning or end of a work period. The meetings were special work.
- The call for creative solutions was presented in the form of a question. “What do we change in the collage to make it look more like winter?” They changed the green grass to gray and the sky to light purple. “What material would best make the spring flowers for the tree? What color could they be?” They wanted tissue paper in many colors.
- There were times when each class would sit in front of the collage and take turns installing pieces or moving them around. I had the tallest ladder stored near the studio. Four children anchored the legs of the ladder. A child could use the ladder, but only so high. I was always on the ladder behind them. I installed one or two pieces as directed by the class in the upper part of the collage, but the rest of the higher pieces were installed by me before or after school.
- Children created surprising collage objects that were appropriate for the work. One child made the sun. Of course, it must have one!
Extra Work time
- New lunch bunch crews were formed when necessary. I generated a permission slip so parents would know the children were working with me during their playtime.
- Three third grade girls and one first grader comprised the lunch bunch that created the tree. First, each drew a tree, and then I gave an observation lesson at a real tree. During the next lunch period, they drew the tree and cut half of it out. It was finished by the afternoon class. The background and the tree were installed before the designing phase was over. The Fall tree had to look finished by parent’s night without the children feeling pressured.
- During the last week of school, the movie was shown in our big auditorium by the parent who animated it.
