Simple to complex drawing, painting, origami etc.
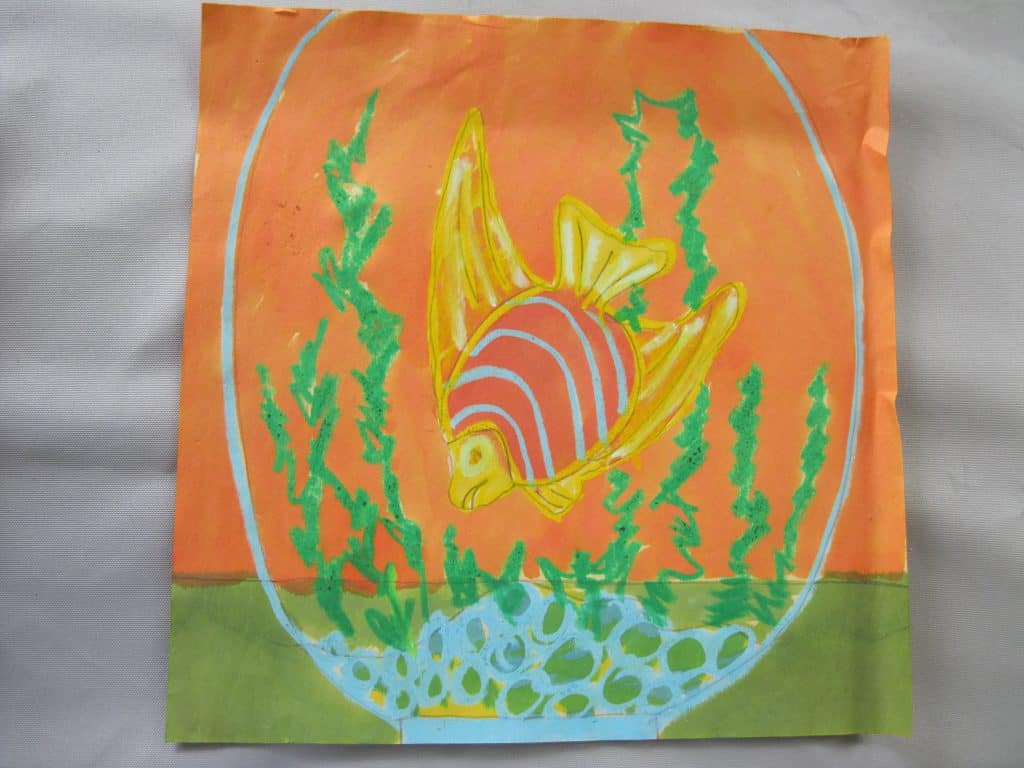 Each art form is defined by characteristics which create possibilities as well as limitations. They are further defined by the materials used to make them. There is a structure to each form that can always be creatively elaborated upon. New and non-traditional materials, technologies, and philosophies enlarge the possibilities for artistic ideas. This, in turn, creates new art forms and enlivens the traditional ones. Alexander Calder, for example, invented the mobile by extending the possibilities of sculpture into actual physical movement and balance to create an art form that had been static for centuries.
All works of art start with an idea. Driven by the mind and the heart, the desire to communicate and express oneself starts very young. The three year old and the 33 year old artist both must make creative decisions when faced with a blank surface, paint, and brushes. Think of creativity as having three different processes all giving rise to the new. They are invention, discovery, and selection. These terms can be applied to children’s art as well as to adult art. The processes can be woven into lessons and used when speaking to children about their art. It is helpful, when a child thinks they have made a mistake, to let them know that they have discovered a variation. These terms apply to all creative activities. If you are vigilant, you will discover how to apply them to all your endeavors. You are creative when you select the Montessori materials and activities that compose the environment at any one time.
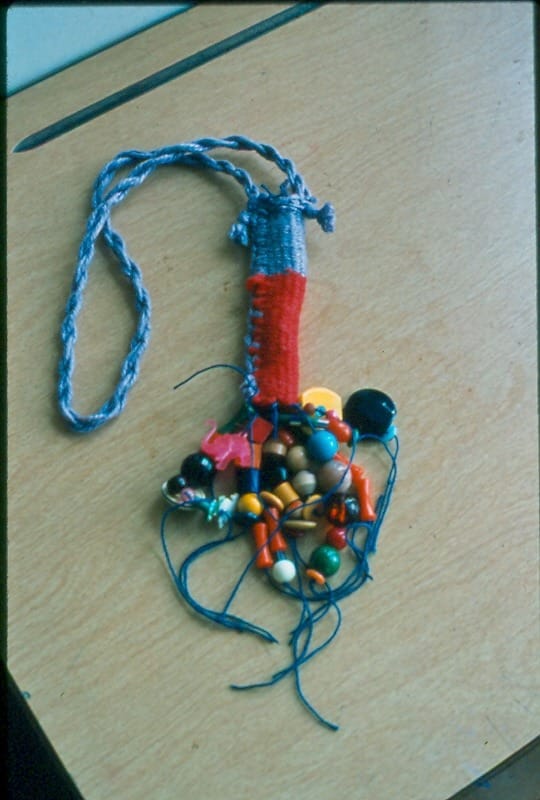 When demonstrating how to make an art form, give only a classic lesson. It is tempting to share simple variations your students can use. When doing so, you rob the child of the joy of discovering them. As a teacher, you could give the same lesson over and over for several years and still make discoveries yourself. Enjoy!
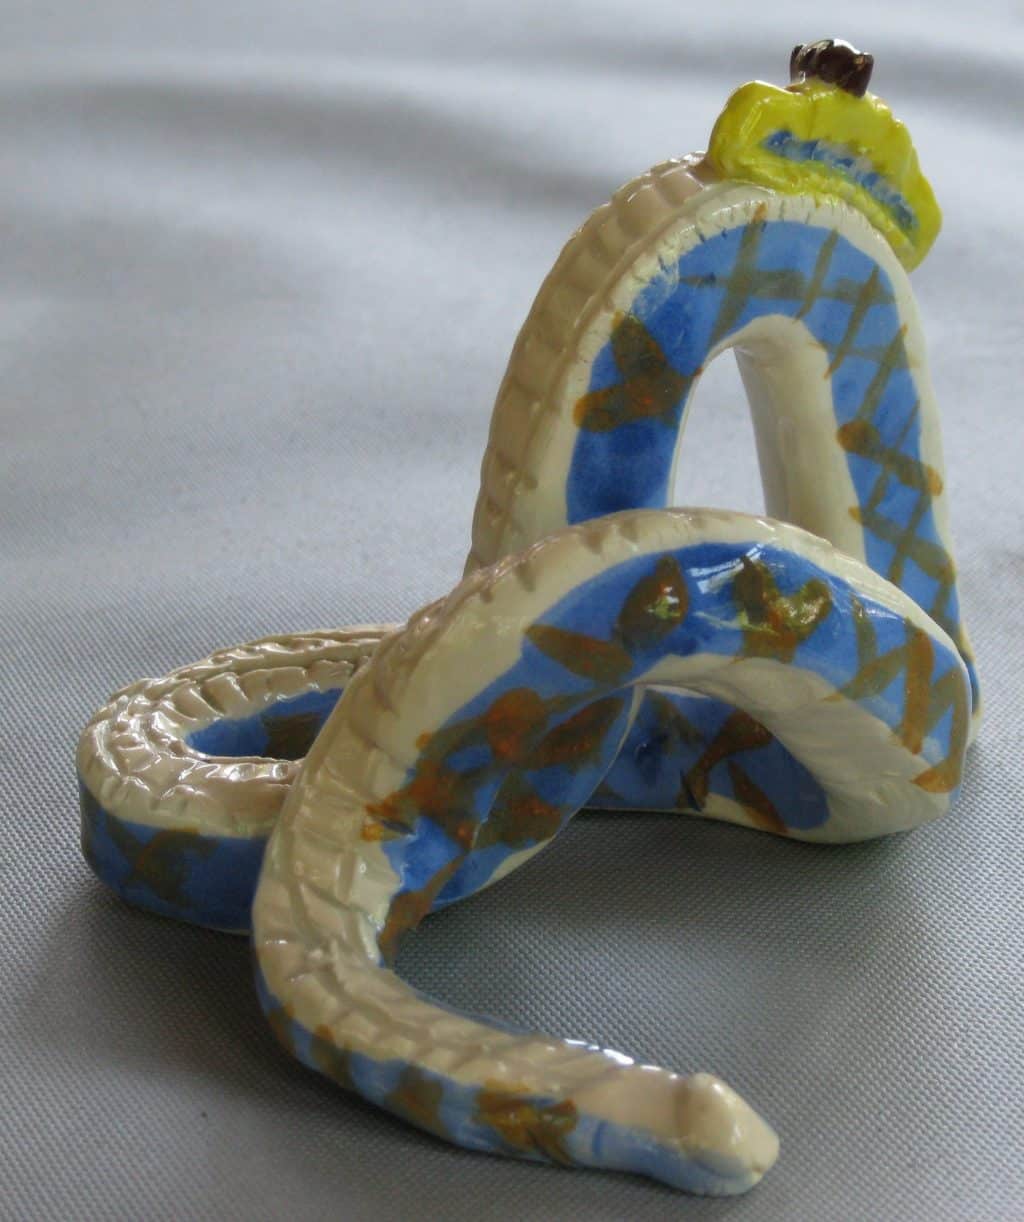 Refrain from suggesting how to rework a piece of finished work; that is the child’s decision. Remember, the child is free to repeat the same art form. We can suggest, teach a lesson again, ask questions, or make statements, which may assist the person the next time they choose the work (Point of Interest). Remember, sometimes we create from pure intuition and arrive at its meaning only after it is finished. The process of self discovery takes time.
Children will come to you for help. If the problem is not the discovery of a variation, discuss with them options for solving their dilemma and let them choose. They can use their “mistake” creatively, which may force them to change their idea, which is one of the delights of “making it up.” They could be given instructions on how to erase a mistake, if that is possible, or they can start over, or even choose new work! Watch for children who start over often. They need support and instruction with each phase of their work.
Note: Most, but not all lessons are group presentations. All the equipment and materials need to be on a teaching mat or low table when the group meets. Everything is replaced in the environment as part of the lesson. You are free to choose how you will give any of these lessons.
Note: How to help children create their own ideas is addressed in Generating Personal Ideas.
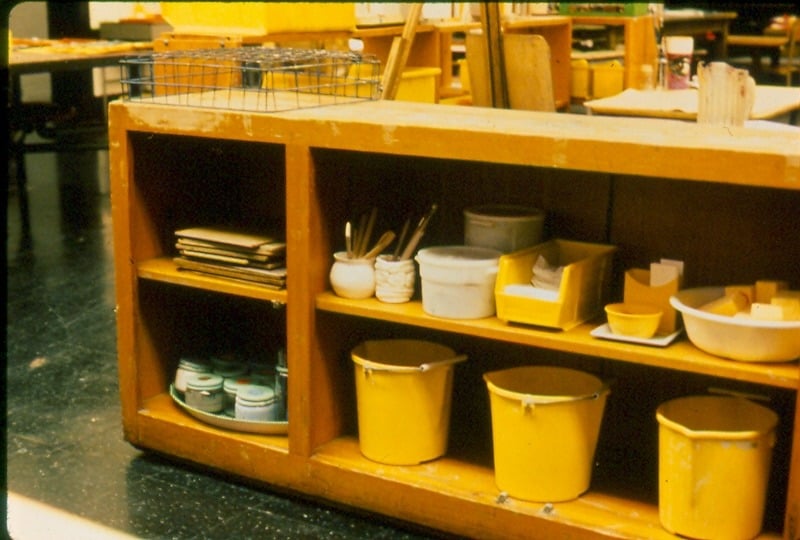 Present all art forms as open ended areas in the studio. In order for the children to be responsible for their ideas, all materials and tools need to be available and ready for use.
The presentation of an art form is a “How to do it” lesson that unlocks its possibilities. What motivates the presenter is revealed as part of the lesson. This models the person’s creative attempt to reveal the idea of the piece. The “How to do” and the “What to do” are then turned over to the students.
Concomitant with the presentation of art form lessons is the introduction of ways by which one can access ideas (See: Generating Personal Ideas). Each of these techniques is indirect preparation for making art, and is modeled in the “How to” presentations. When the “How to” and the “What to do” are chosen and combined by the student, an authentic, spontaneous artwork is created. The children give themselves permission to work and to exercise their powers of creation. This produces artwork that is more individualistic, unique, and interesting.
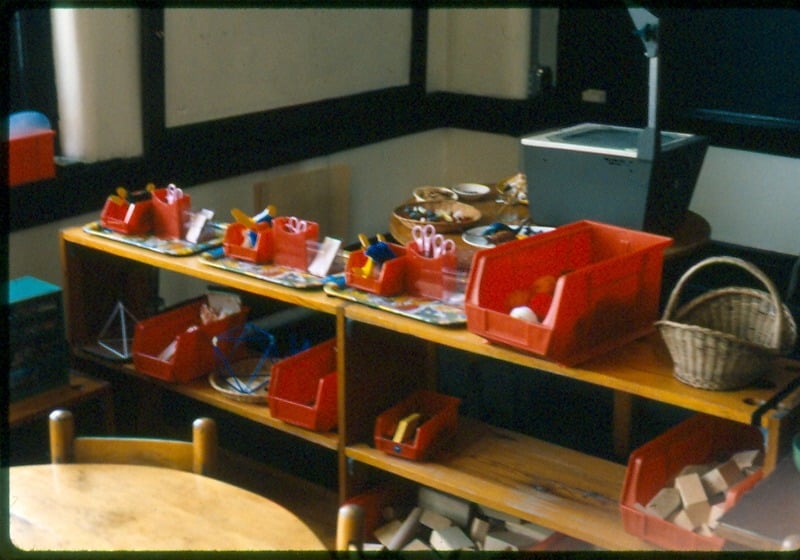 Once an area is introduced, it is available to be chosen, and stays open or is replaced. Build the art area of the environment or studio around the cleanup skills of the children (See: Practical Life). They must learn to make messes and to clean them up. The progression of daily living skills must be taught. Children want to be competent, independent, and responsible. The environment progresses in difficulty, with both the complexities of the processes and the children’s ability to clean up and restore them.
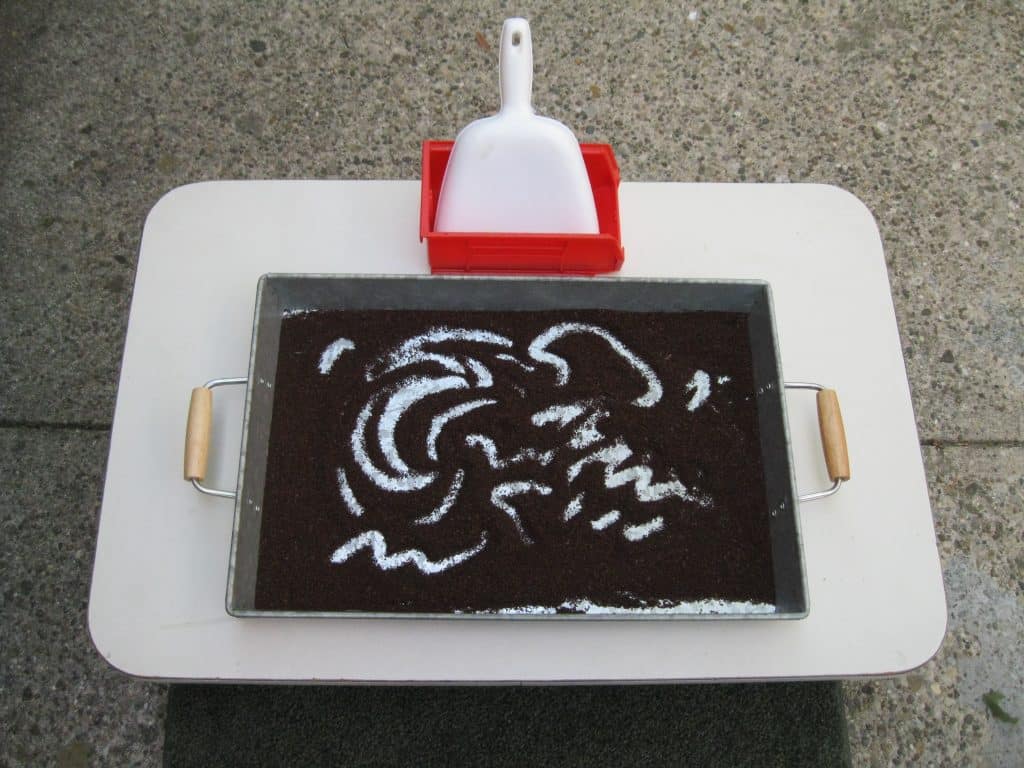 This is a popular activity for drawing and learning which appears in the studio very early in the year. The lesson is short and the work almost self directed. It is an immediate experience, somewhat like finger painting, but dry. Clean up is simple but important.
Note: Coffee grounds create a slippery surface if left on a tiled floor.
- Prerequisite: Practical Life activities
- Direct Aim: To make marks on a surface
- Indirect Aim: For self expression, drawing lessons, penmanship (See: Extensions)
- Point of Interest: Suggest the child to be on the lookout for any coffee grounds that may have found their way to the floor.
Materials:
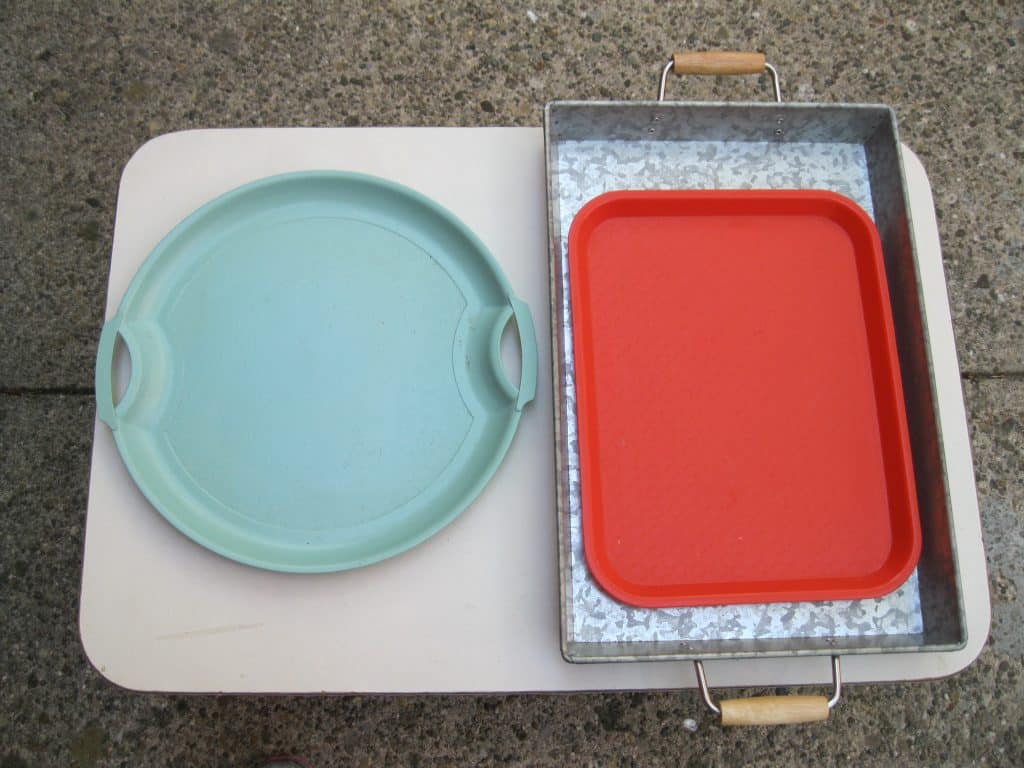
- A tray 12”-14” in diameter for the coffee grounds, preferably with handles
- Very coarsely ground coffee
- Small hand broom and dustpan set in a container
- Include a hand sweeper if the work is on a carpet.
- Apron (optional - only an excuse to practice putting it on and off)
- An observation/teaching chair beside the table Note: 9-12 students may need a larger tray. When given the right to work in the small studio, they almost always chose the tray when it was out.
Preparation:
- Select the tray. Fill with grounds. Experiment to find the best amount needed. Replace it when needed.
- Isolate the activity on a table.
- Place extension materials on a shelf nearby.
- Set up activity.
- Place the small hand broom and dust pan above and to the right of the tray.
- Place the apron on the back of the chair.
- Place the teaching/observing chair next to the table.
Presentation: 5-9 Individual or Group Lesson
- Introduce the work by name.
- Have the child put on the apron.
- Demonstrate how to draw with one finger then with several fingers.
- Demonstrate how to clean (rub) the grounds off your finger.
- Demonstrate how to gently shake the tray to erase the drawing.
- Do not lift it off the table. When assisting a child, put your hands over the child’s on the handles, and slide back and forth on the table.
- Demonstrate how to use the brush set to replace any grounds that are on the table.
- Check the floor and throw any grounds in the trash.
Extensions:
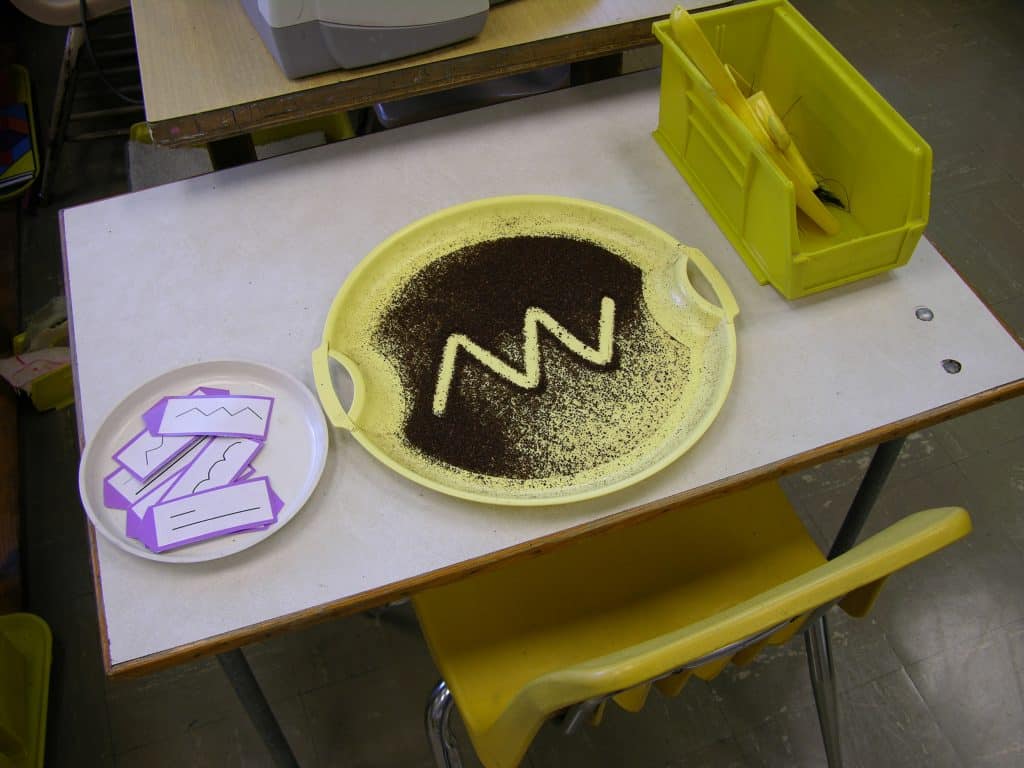
- Place extension activities in containers close to the activity, and introduce when needed to the entire group, or to individuals.
- Practice drawing different kinds of lines.
- Practice drawing geometric shapes and organic shapes.
- Practice making letter or number forms.
- Practice pure contour drawing.
 Resources:
- MontessoriServices.com
- Find the tray in discount store
- Pure Contour Drawing Books:
- Edwards, Betty. Drawing on the Right Side of the Brain: A Course in Enhancing Creativity and Artistic Confidence. New York: Tarcher/Putnam, 1999: 88.
- Nicolaides, Kimon. The Natural Way to Draw. Boston: Houghton Mifflin,1941: 9.
Drawing is one of the first art forms discovered by children. They may use a finger to draw in the dust on a piece of furniture, or in the condensation on a window pane. They might even experiment with less desirable materials. Their first drawing implement might be a stick or a stone they use in a sand box, or on the ground. They exhibit a personal style while still scribbling. A child’s unnamed scribbled ideas can be identified by their fellow classmates.
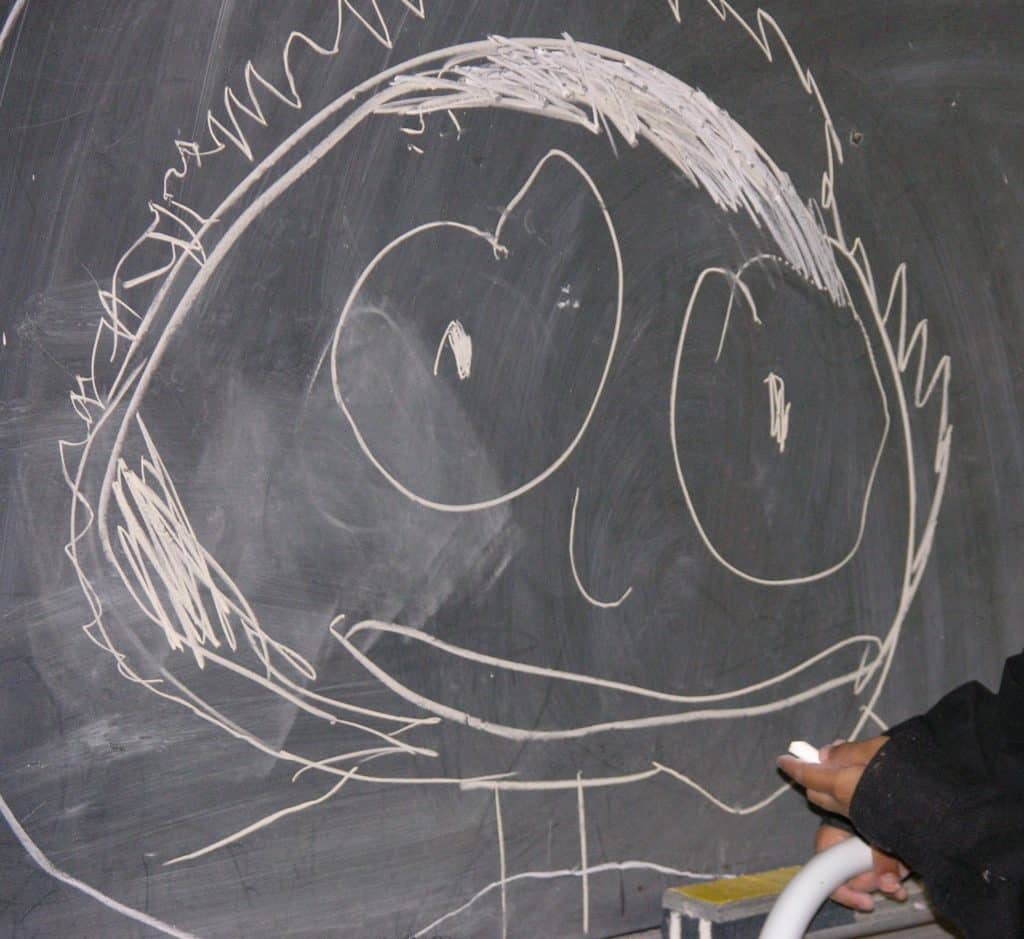
Children want to draw, and at some point want to draw so that the things they draw look real! That means the objects look three dimensional on a two dimensional plane. If I tell an adult that I am an art teacher they usually say “I can’t draw.” Children as young as four will confess to an adult that they cannot draw. A common misunderstanding about art is that the ability to draw something realistically means you are an artist. Drawing realistically is a skill that most of us must learn. To be an artist, the skill must be used creatively to express an idea. We teach children to read by giving them reading lessons every day, or at least the opportunity to practice. Were drawing given the same attention, most children would respect their skill. Drawing realistically requires an understanding of how the three dimensional world is translated onto a two dimensional plane, and definitely can be learned.
The challenge when teaching young children to draw is to determine what experiences would assist them in learning the translation process naturally, so they can feel competent as they move through each stage of their unfolding visual development. When children bring their work for you to see, I suggest you share your positive thoughts and feelings. They are often unaware of how charming and powerful their work really is. Mat and display their work. Parents are very happy to see that their child’s work is appreciated.
GEORGIE STORY
My elementary students were not motivated by most of the drawing lessons I found in books. I suggest you create a general display area for drawing materials and equipment, and let the children choose the work. Remember, drawing is a part of many art forms. Choose lessons you feel comfortable giving and watch how the children react to them. They will actually groan if they are not interested.
I decided one summer that I needed to rejuvenate my drawing skills, and followed the drawing lessons in Drawing on the Right Side of the Brain. I enjoyed it and made or found materials to teach it to my 9-12 students. Drawing lessons need to be optional. You can offer to start another drawing group once children notice the progress by the first group.
It was advantageous for another reason. While on a teacher exchange in China, a high school student gave me his drawing book and a black pen. He asked me in perfect English to draw him. Judging by his body language, his facial expressions, and by the group of giggling students around him, I knew I was being challenged. In a few seconds, I made a contour drawing of his head and hat and handed his book back. He smiled and nodded. I guess I passed the test.
- Prerequisite: Practical Life activities, Metal Insets
- Direct Aim: To make marks on a surface
- Indirect Aim: To use drawing for self expression
- Point of consciousness: What I am drawing is not real. What is real is my drawing.
Materials:
- Thin and thick washable markers
- Check them weekly to discard and replace empty ones.
- Ebony drawing pencils
- Drawing paper: 8½” x 11”, 9” x 12”, 9” x 9”, 12” x 12”, 12” x 15”,
and/or 12” x 18” - Buy the best drawing paper you can afford.
- Start with one marker, then quickly progress to all colors.
- Appropriate containers for paper:
- A cafeteria tray or a rectangular space defined by tape on a shelf for 12” x 15”, 12” x 18”
paper - A desk tray appropriate for 9” x 12” and 12” x 12” paper
- Paper 8 ½” x 11”, 9” x 12”, and 12” x 12” can be installed in hanging wall files or “shop
ticket holders” (See: Resources).
Preparation:
- Install the activity and materials in a place away from water.
- Install the activity at a table or on a shelf if the children are to be seated while drawing.
- If the children are to stand then a vertical surface is needed.
- An easel can be used as a drawing station. Cover the easel with metal and use magnets to
hold the paper in place. Try installing strong magnets behind the easel and then use the
same kind to hold the paper to the front. - Try installing an old bulletin board low enough to use as a vertical drawing board. Secure it
top and bottom. Paint the surface or cover with a neutral colored, non-porous material. Use
push pins to hold paper. - Install the paper close by.
Presentation: 5-9
- Introduce the work by its name.
- Help the child put his/her name on the back of the paper.
- Suggest that the child ask her/his brain for a good idea
(See: Generating Personal Ideas). - Demonstrate how to cleanup the activity and return the marker(s).
- Turn the marker upside down, press to close. Ask them to listen for the “click” when top goes on.
- Remind them where the finished work box is located.
Extensions:
- Provide choices by adding a variety of drawing implements from time to time such as oil pastels, drawing pencils, colored pencils, or black drawing pens.
- Provide chalk and an eraser for a blackboard. Use appropriate chalk outdoors on cement or blacktop. Photograph the result for an exhibition.
- Turn cleanup into a daily living activity with brooms and buckets of water.
- Larger pieces of paper will be attractive to both individual artists, and also to small groups that might wish to create together.
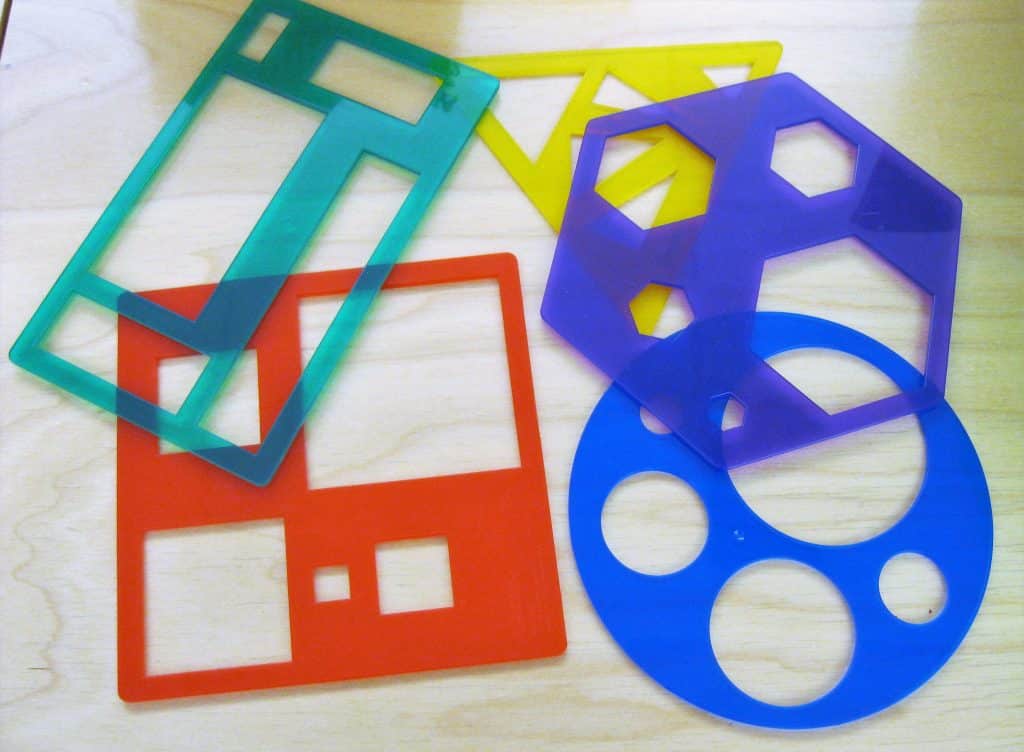
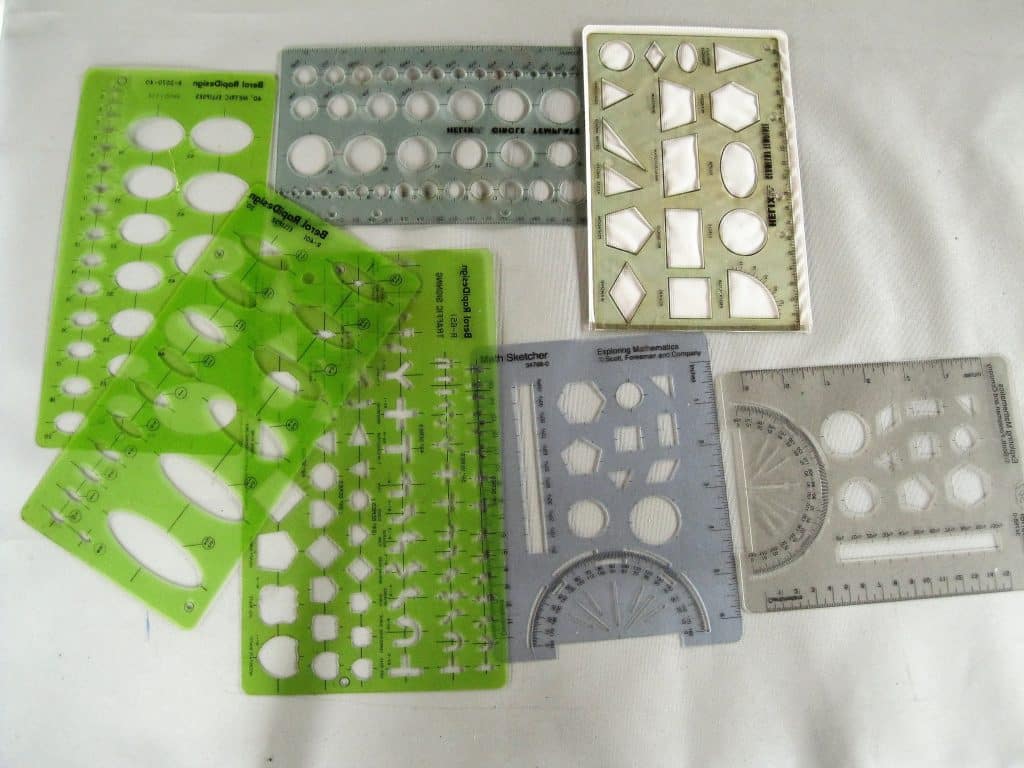
- Add an assortment of stencils near the paper.
- Making books or illustrating what is being studied.
 Resources:
- Look for “acid free” paper. Hammermill paper is all acid free and comes in all sizes. Save all scraps of fine paper for paper making.
- Desk trays and shop tickets holders are available from office supply stores.
- There are many “How to Draw” books. I do not recommend those that present animals and people in a “cartoony” manner. Cartoon drawing is an art form; a specialized method of creating that is too important to lump in with realistic drawing. The cartoonist creates an alternative view of reality. It is a powerful way of making an image.
Books:
- Brookes, Mona. Drawing with Children: A Creative Method for Adult Beginners, Too. New
York: G. P. Putnam’s Sons 1996. - Marvin Bartle’s site “How to Teach Drawing to Children.” www.goshen.edu/art/ed/draw.html
- He respects the intelligence and creativity of children and he teaches the children to observe what they are drawing. Read his online book, which he describes as being appropriate for children who read.
Create a drawing center. Offer different kinds and sizes of paper, along with a variety of marking tools. A library of books about drawing will foster self-exploration for you and the children. Often they illustrate ways for using different drawing equipment. Any one of these techniques can be turned into a drawing lesson. Your demonstration of them may create an interest in drawing for some people that a simple line drawing does not do. Consider making all drawing lessons optional. If you have few drawing skills, consider learning with the children.
Note: Artists often paint and draw from photographs they have made.
GEORGIE STORY
• Prerequisite: Practice using different implements for drawing
• Direct Aim: To make marks on a surface
• Indirect Aim: Drawing for self expression
• Point of Consciousness: “What you are drawing is not real. What is real is your drawing.”
 Materials:
- A variety of different kinds of papers in a variety of sizes and shapes
- Rectangles of different proportions and squares, etc.
- Provide the plastic circle from the Puzzle Map of the World Continents – or other circular objects – to make circular paper or draw circles.
- A place to display paper and drawing implements: Recycle a magazine rack or other display furniture
- Drawing tools: Choose any or all:
- Markers
- Drawing pencils ranging from 4H (hard) to 6B (soft): two sets
- 12 Ebony pencils and sharpener
- Colored pencils
- Oil pastels
- Fine line black pens or Sharpies
- Quill pens and ink
- A variety of templates and stencils
- Ask your class to contribute objects that they might like to draw.
- Gather a group of interesting things that can be arranged to make a still life. Provide a tri-fold display board to isolate the arrangement. Drape a cloth over it for an interesting background, or encourage your students to design a flat background using paper. Note: Your environment is one big still life!
- Allow students to draw outside during playtime using regular clipboards, or large clipboards made for drawing with attached clips and handles.
- Assign drawing as one way to show evidence of learning.
Preparation:
- Gather the supplies and equipment you need.
- Decide where and how you want to display the area.
- Design a work plan (See: The Environment: Work Plan).
Presentation: Choose what you are comfortable doing.
Resources:
- Make a collection of books about drawing.
- Half Price book stores
- Bargain Book section of any book store
- Doverpublishing.com: shop all their Art Books.
- School Supply stores
- Michael’s or hobby Stores
- Public Library: Find what you like, then buy it elsewhere.
 • Prerequisite: Daily living activities
• Direct Aim: An expressive tool for drawing
• Indirect Aim: Introduction to the use and care of a brush and apron
• Point of Interest: Mention how they may wish to remember to return the brush bristles up!
Materials:
- An apron
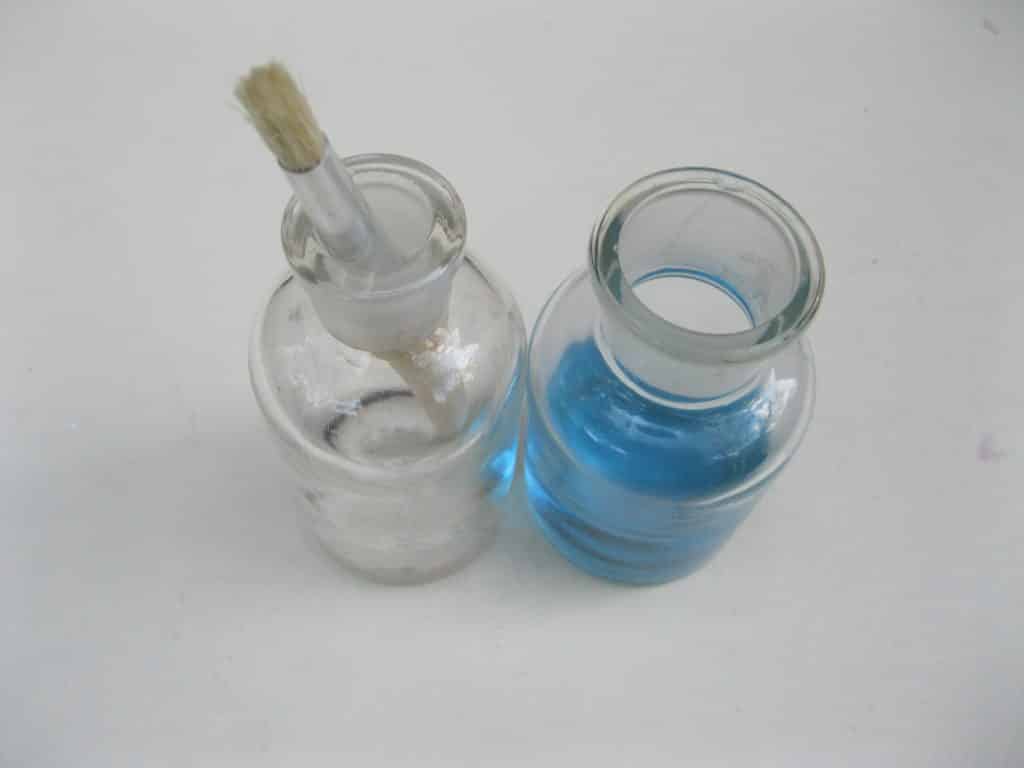
- A round, ”Chubby” or “Stubby” brush; also Foam Paint Brushes
- A sturdy bottle for the brush (brushes)
- A half bottle of very light blue water. The color lets you know when more is needed.
- Blackboard or easel with a slate blackboard
- When the work dries, the space is ready for the next person to use.
- A damp sponge
Preparation:
- Gather needed equipment.
- Place brush in its container with handle down and bristles up.
- Put blue water in its container.
- Place the damp sponge last.
- Decide how to present the apron.
Presentation: 5
- Introduce the work by its name.
- Help child to put on the apron if needed.
- Demonstrate how to load the brush with water and then wipe it on edge of the container to prevent dripping.
- Return the brush to its container with handle down and bristles up.
- Offer the work to the child.
Extension:
- Work outdoors on cement, black top, or brick walls.
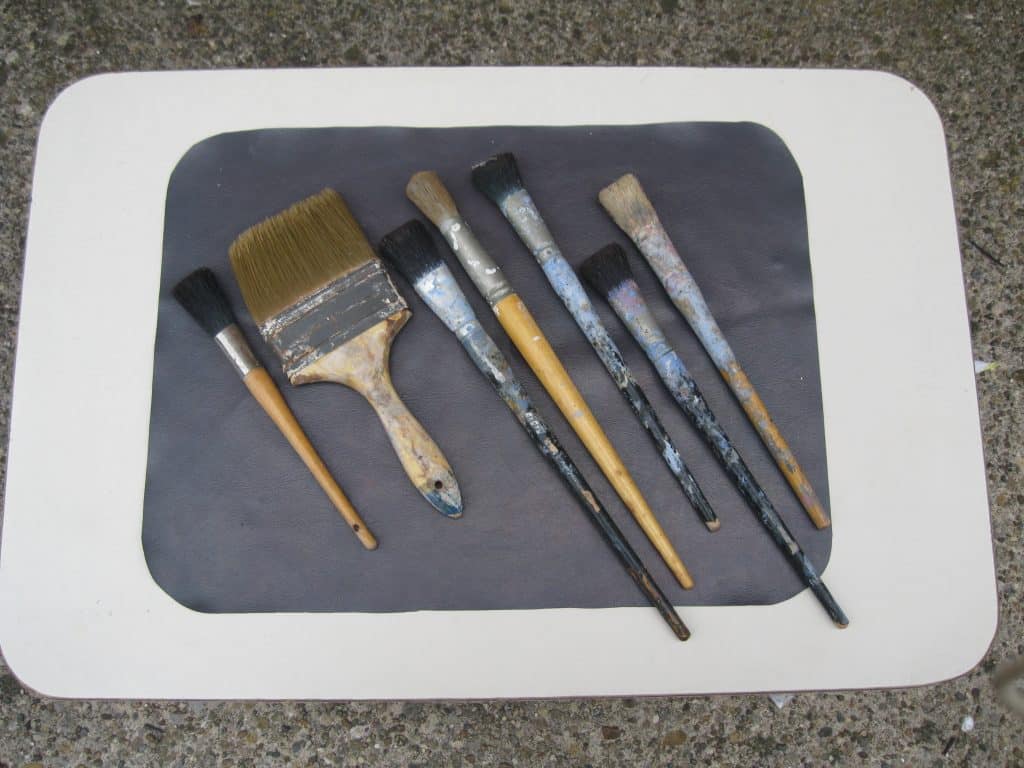
- Use house painting brushes (round and/or flat) or foam paint brushes.
- Use small buckets for water and aprons.
Resources:
- Find small round, stiff, hog’s hair like brushes called “Chubby” or “Stubby” in art supply catalogs.
- Large round or flat brushes and foam paint brushes are found in house paint departments.
This painting activity has many applications. It is an easy, open ended way to introduce painting into the environment. It is easy to clean up and requires few skills. The activity requires little paint, and modest sized, interesting, shaped paper. Reconfigured, it is valuable in the 9-12 environments as well.
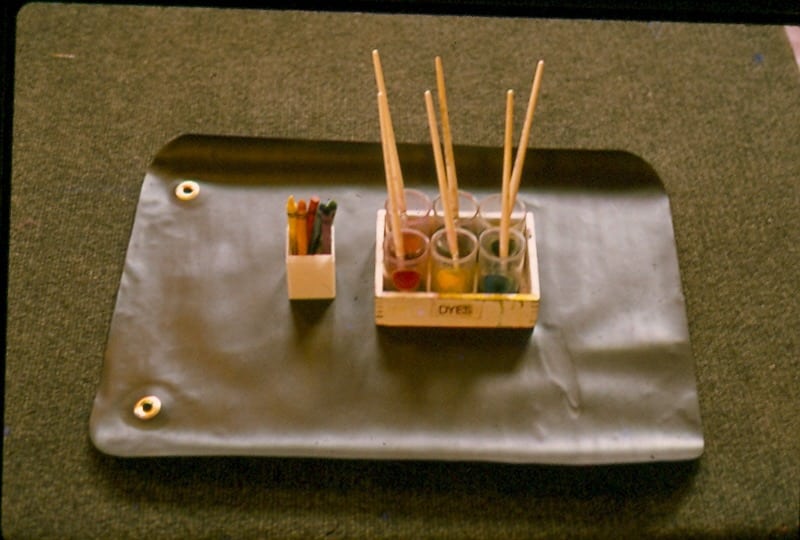
This is one activity that leaves the paint brushes in the paint pot. The bristles start to curve after a while. Clean them immediately after class or invite students to clean them.
• Prerequisite: Practical life, ability to get water at the sink
• Direct Aim: Creative expression
• Indirect Aim: Introduction to painting
• Point of Interest: Ask children to notice that each brush has its own paint pot. Return the brush to the pot of the color you are using.
Note: Simplify the work by introducing it as a drawing activity using only one color of paint. Use just the primary colors next, and add oil pastels to increase interest and difficulty.
 Materials:
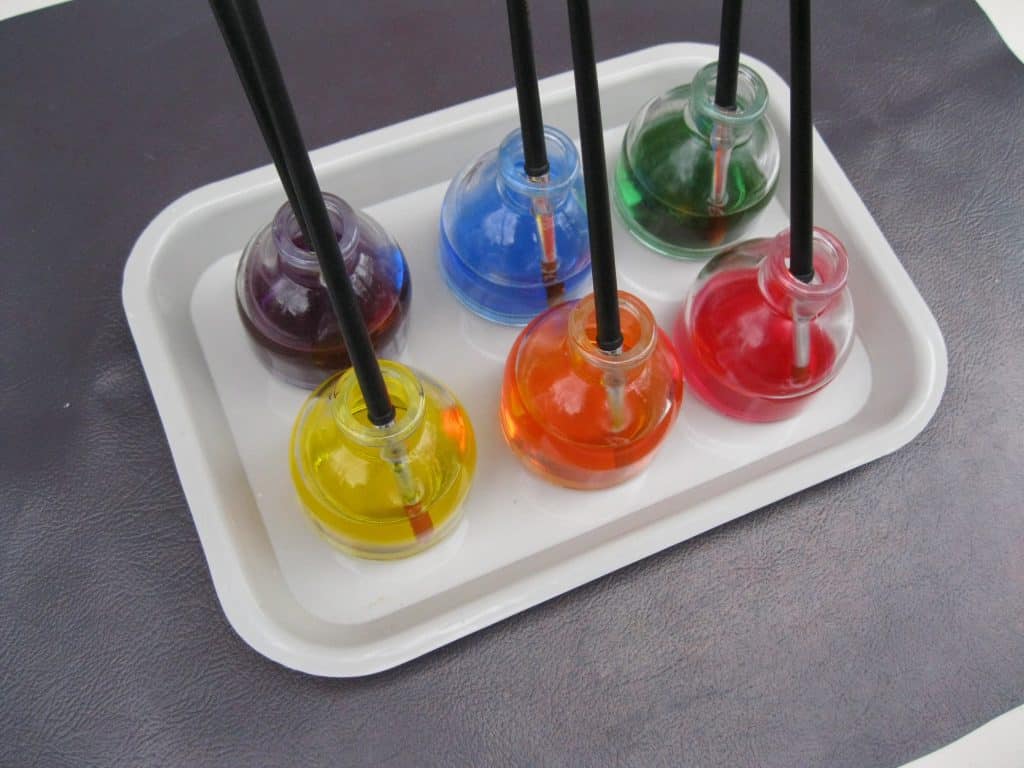
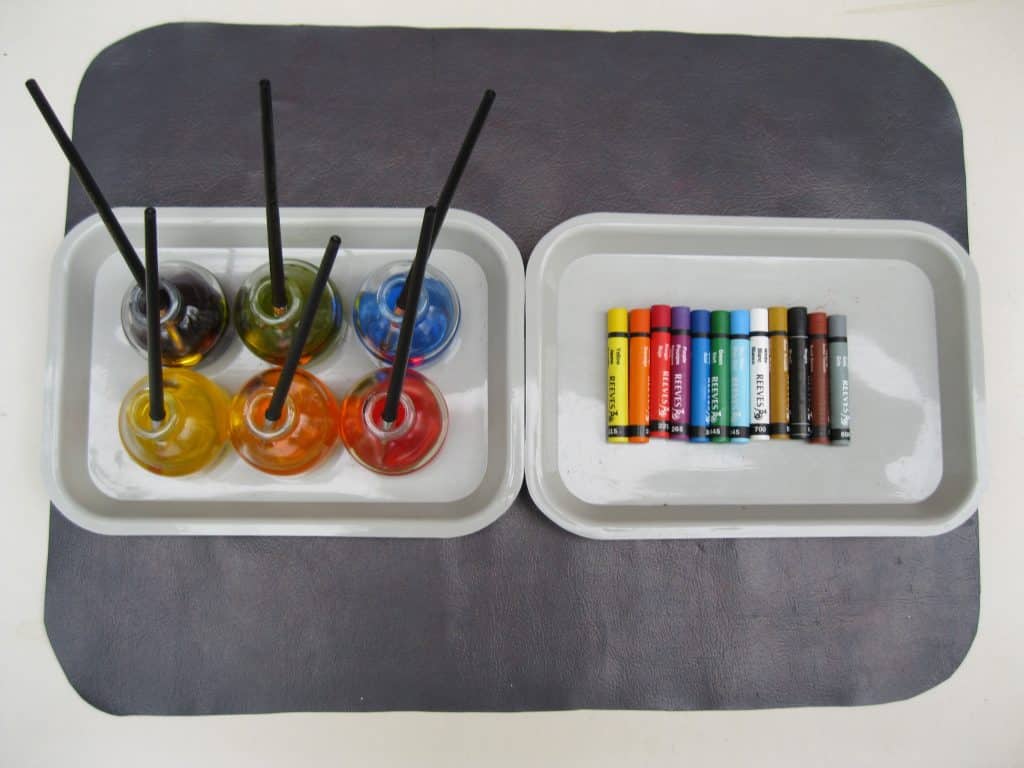
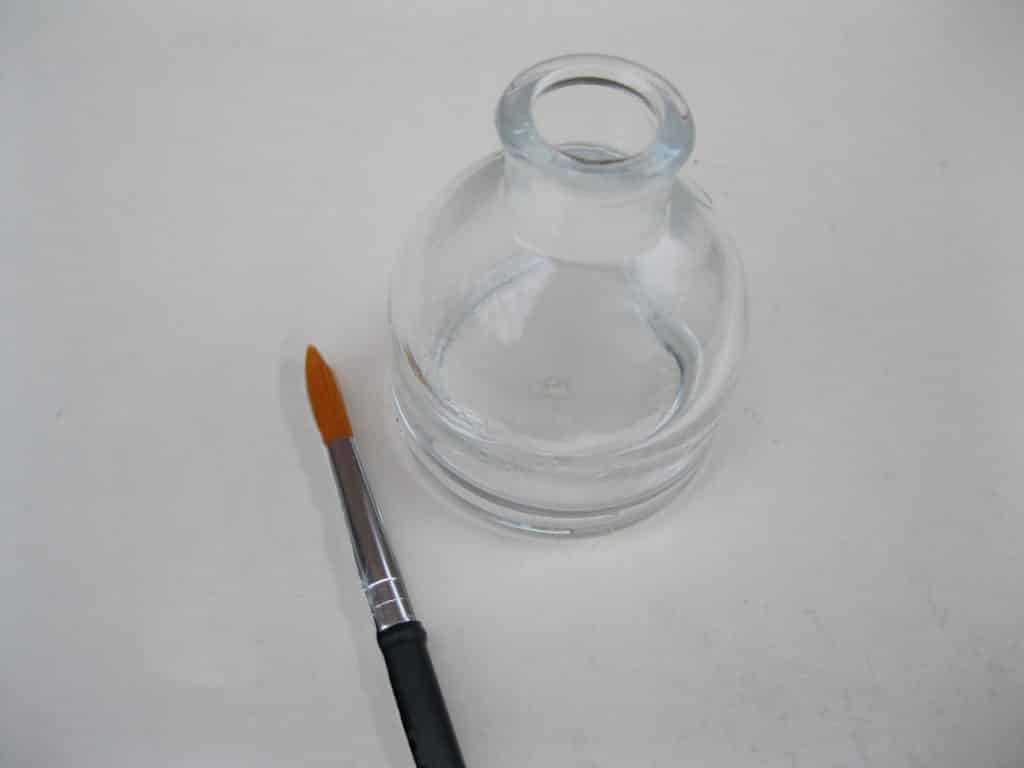
- 6 small glass containers such as antique cream holders or shot glasses
- Liquid water color paint
- If your budget allows, buy the primary (R, Y, B) and secondary (O, P, G) colors. Buy two yellow bottles to every one red and blue.
- 6 eight ounce squirt bottles to store prepared paint
- 12 Number 7 inexpensive brushes for two sets
- A tray or box (round or rectangular) for the paint pots
- 8-12 oil pastels on a tray or in a container
- 2 aprons
- A table for two to isolate the work
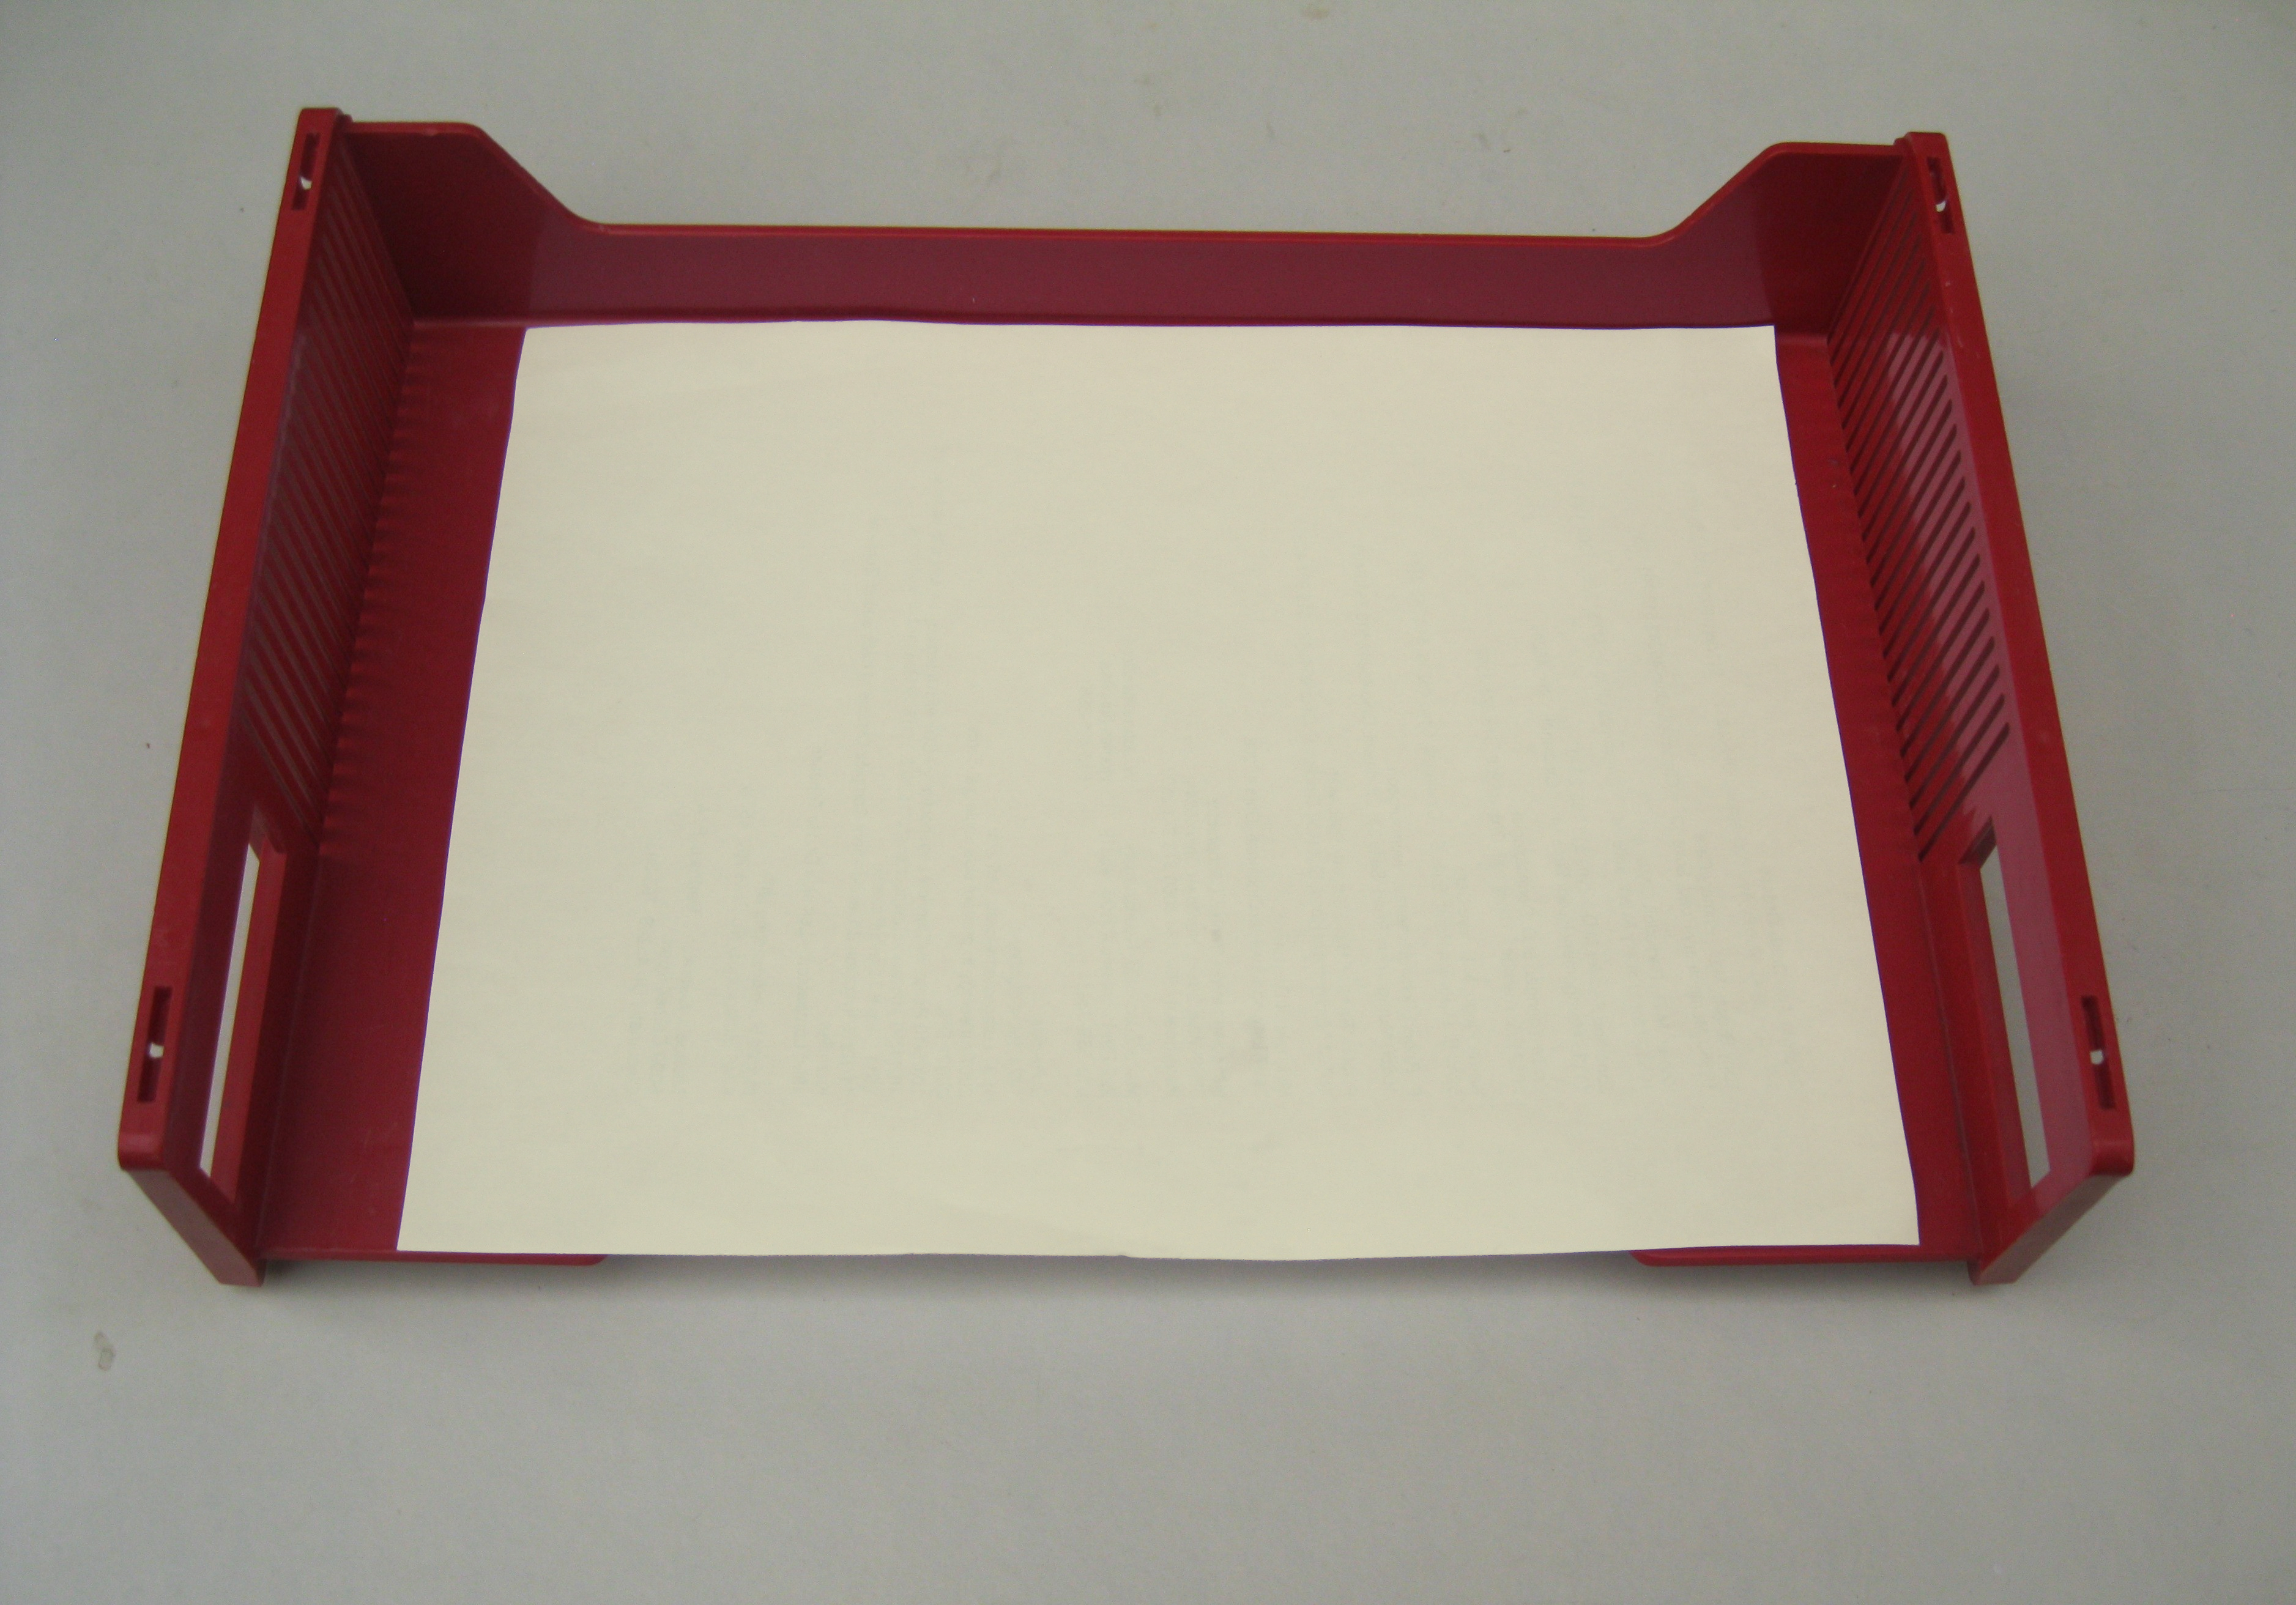
- 1 letter tray or cafeteria tray for the paper
- Manila paper or better, cut 12” x 12” (8-10 sheets at a time)
- 2 pencils for names in a container
- A work mat at each persons space (optional)
- A drying space for the work
 Preparation:
- Select all the containers, materials, and equipment needed.
- Dilute the very rich paint and place in squirt bottles. Test each color on paper. Make a formula for ease of preparation, or it can be done sensorially.
- Buy two setups of paint pots and brushes. One for the environment and one ready to replace it, if needed.
- Fill paint pots 1/3-1/2 full.
- If using a round tray, put the colors in the second color wheel order (yellow, orange, red, purple, blue, and green).
- If using a rectangular tray, put the warm colors (yellow, orange, and red) in one row, and the cool ones (purple, blue, and green) in the other.
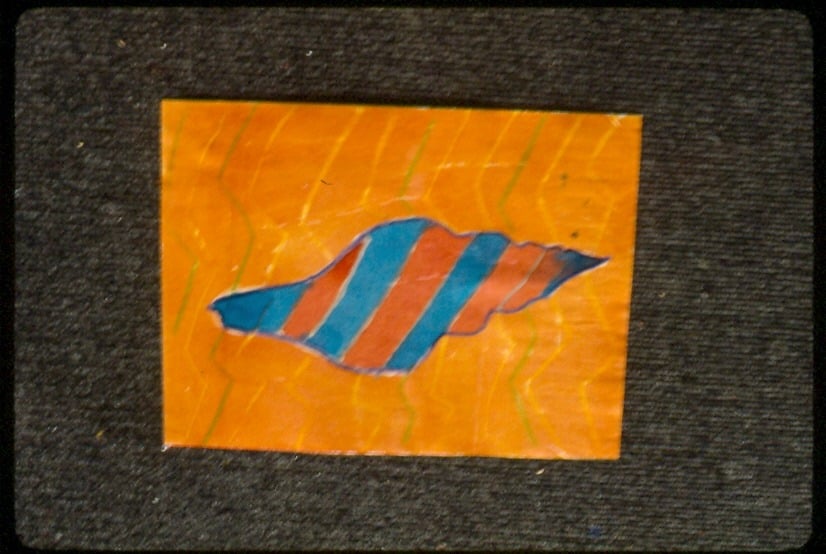
- Present the oil pastels (fat ones) on a tray and add them to the table. The oil pastels will create a water resistant surface of lines and shapes which repels the paint. When both are used together it is called Crayon Resist Painting.
- Cut the paper into 12” squares, and place in the tray.
- Put the aprons on the back of the chairs.
- Place the paper and pencil close to the activity (beside? above?).
- Place the paint in the middle of the table. Place the oil pastels next to the paint.
- To prepare for your presentation, use your own idea, or research what a mandala is. For basic versions of “mandala”, find the book The Psychology of Children’s Art by Rhoda Kellogg and Scott O’Dell.
 Presentation: 5-9
- Put on an apron. Put your name on the work. Turn the paper over.
- Explain, while you are drawing with the oil pastels, that you are going to make a mandala. “People of all ages all over the world love to make mandalas. To be a mandala, the drawing needs to be a circle or a square with crosses inside.” Show an example, or draw it.
- Demonstrate how to remove a brush from the paint pot. Wipe the brush on the container’s rim to remove some of the paint so it does not drip.
- Remind them how important it is to remember where to return the brush when all the colors are present.
- Work just long enough to demonstrate how to use the activity.
- Explain that you are stopping so they can work. Use your work in progress each time you give the lesson.
- Put your work on the drying shelf.
- Demonstrate how to clean up the activity. Get a bucket with 2” of water and a sponge from the sink. Wipe off any spills on the table. Brushes are not cleaned until the end of the day.
- Return the equipment to the sink. Place the apron back on the chair.
Extensions:
- This station becomes a place where color can be applied to all kinds of art forms such as an overhead projector drawing, a mono print, or a kite sail.
- The paint is ideal for adding color to God’s Eye sticks, beads, wooden supports for weavings, or wooden sculptures.
Resources:
- Liquid watercolor: https://discountschoolsupply.com, 1-800-627-2829
- #LWRE: red, #LWYE: yellow, #LWBL: blue
- #LWOR: orange, #LWPR: purple, #LWGR: green
- Tip Trays, or chrome trays to hold paint pots: restaurant supply companies or Gray trays: Montessori Services
- Glass Containers:
- Antique individual creamers (expensive)
- Cylindrical shot glasses: restaurant supply companies
- Glass small flower vases from Michaels.com
- Reeves Large Oil Pastels in 24 colors at Michaels.com
- The #7 brush is compatible with the size of the paper. Sable brushes are more expensive and are a step up in performance.
- See: Dick Blick Arts And Crafts: Item 05138-1007
#7 Crayola Taklon Brush-SZ7 Premium WC - See: School Specialty by Sax: Item 008643
Crayola 1121 #7 Camel Hair Brush
- See: Dick Blick Arts And Crafts: Item 05138-1007
- The Psychology of Children’s Art by Rhoda Kellogg with Scott O’Dell
https://www.amazon.com
This activity is used as needed to paint mono-prints, kite sails, God’s Eye sticks, beads, wooden supports for weavings, or any other art form that would need a bit of color. Lessons are given on an as-needed basis. True watercolor painting is introduced to 9-12 children on a more difficult level than this work represents.
- Prerequisite: Care of brushes
- Direct Aim: Creative expression
- Indirect Aim: Introduction to painting as a decorative element
- Point of Interest: Ask children to remember to store the brushes bristles up.
Materials:
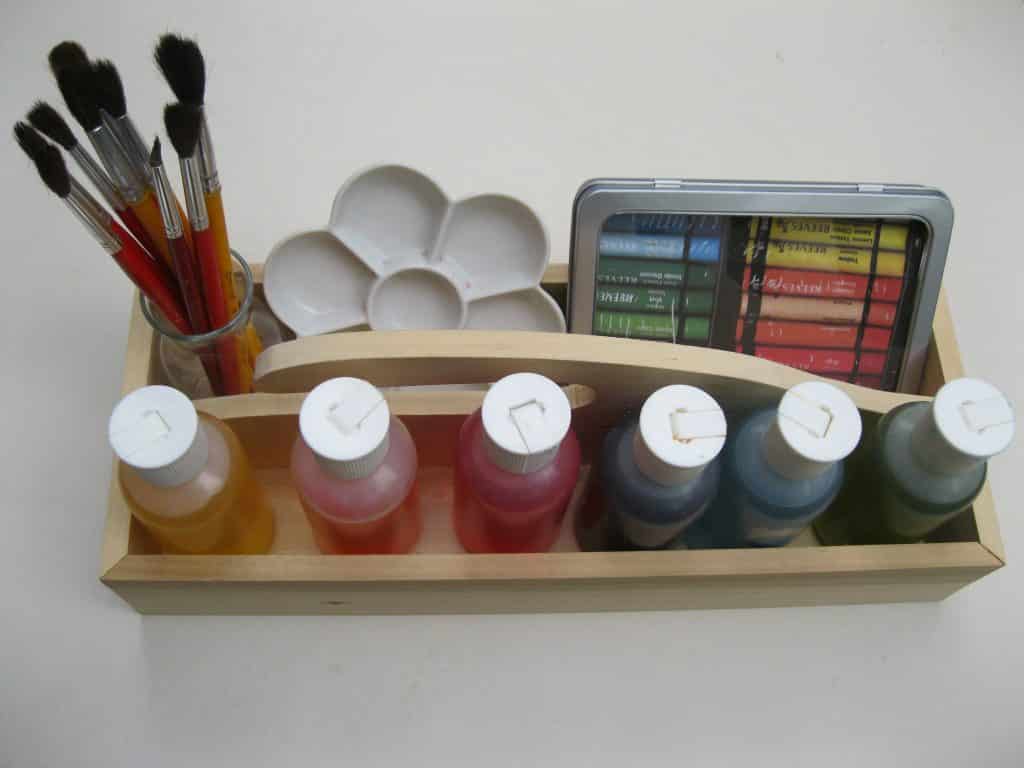
- 6 four ounce plastic bottles for liquid watercolor paint
- More bottles if metallic colors are included.
- A container of brushes: 2 of each size 12, 9, 7, 4, and 2
- 2 small mixing palettes with several small wells for paint, with an area for mixing colors
- A container for all the equipment that makes it easy to carry.
- A set of 12-24 large oil pastels in a container
Note: The mixing palette is a control of error. It is not uncommon for students to overestimate the amount of paint they will need.
Preparation:
- Select all the containers, materials, and equipment needed.
- Dilute the very rich paint and place in squirt bottles. Test each color on paper. Make a formula for ease of preparation, or it can be done sensorially.
- Place all the materials in a tote for easy transport to another work area.
- Decide where to store the extra prepared paint.
- You might assign a pair of students you have trained to check, clean, and replenish the activity.
Presentation: As needed or given as part of another activity
- Gather the materials needed
- The tote
- Apron and work mat
- A bucket, water, and sponge
- A sample of the material you may be coloring (paper, wooden stick, or cardboard)
- Use your work for the demonstration if possible
- Discuss what creative decisions they may wish to think about. Ask, “How can the color enrich the idea of the work and make it more enjoyable to see?” They may wish to think about using oil pastels, or other materials available in the studio.
- Demonstrate how to lay out chosen colors in the paint wells. Use as little as possible.
- Choose an appropriate size brush for the work.
- Demonstrate how the color is applied to the work.
- Restore the activity, and return the cleanup equipment to the sink or leave for the students’ use.
Resources:
- Liquid watercolor: https://www.discountschoolsupply.com 1-800-627-2829
- #LWRE: red, #LWYE: yellow, #LWBL: blue,
- #LWOR: orange, #LWPR: purple, #LWGR: green
- School supply companies:
- Dick Blick: Crayola Wood Handle Watercolor Brushes, sizes 2, 4, 6, 8, 10
- Empty bottles
- Reeves Large Oil Pastels in 24 colors at https://www.michael's.com
- Paint Palettes: You choose
- Enesco Arts and Crafts: https://www.nasco,com 800.558.9595
- 6-Well plastic Flower Palette #9727775
- Plastic Palette Trays- Pkg. 12 #9702823 Best for paint control
- Utrecht Art Supplies. https://www.utrecht.com 800.223.9132
- Ceramic Palette: Seven Well Saucer: G63385
- Round Aluminum Palette:
- 6 Well 5” Diameter
- 10 Well 7 ½ “ Diameter
“One, put your apron on. Two, get your water. Three, get your finger paint and paint! One, clean your hands. Two, clean your apron. Three, clean the table and paint container, and empty the bucket. You are cleaned up!” The work is first done with shaving cream. Finger paint is used when the children can handle water. Practice giving this lesson so it can be done quickly. Give it as a group lesson or individual one. You choose.
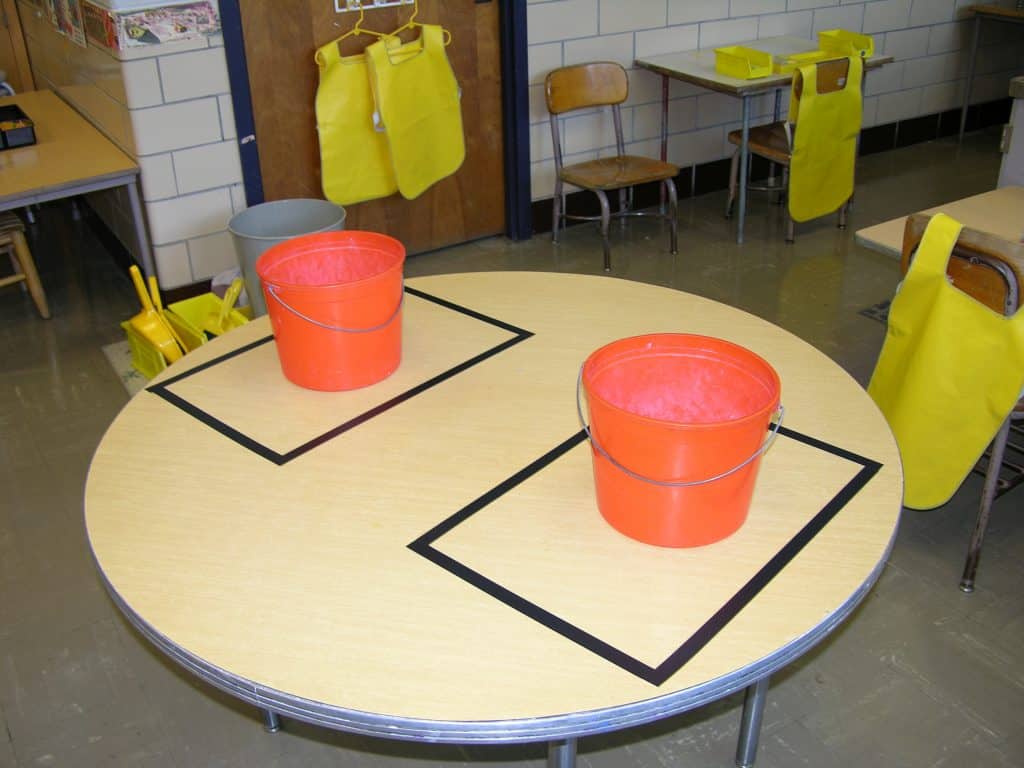
Finger painting is a very freeing activity, and can be successfully done with 5-12 year olds. For the youngest children, carrying water to and from a sink is a higher level of difficulty. Two lessons are needed to explore its creative potential and to learn how to control the materials. The last two lessons are exciting extensions that introduce pulling (making) prints (print making) and hand coloring them. All lessons need to be short.
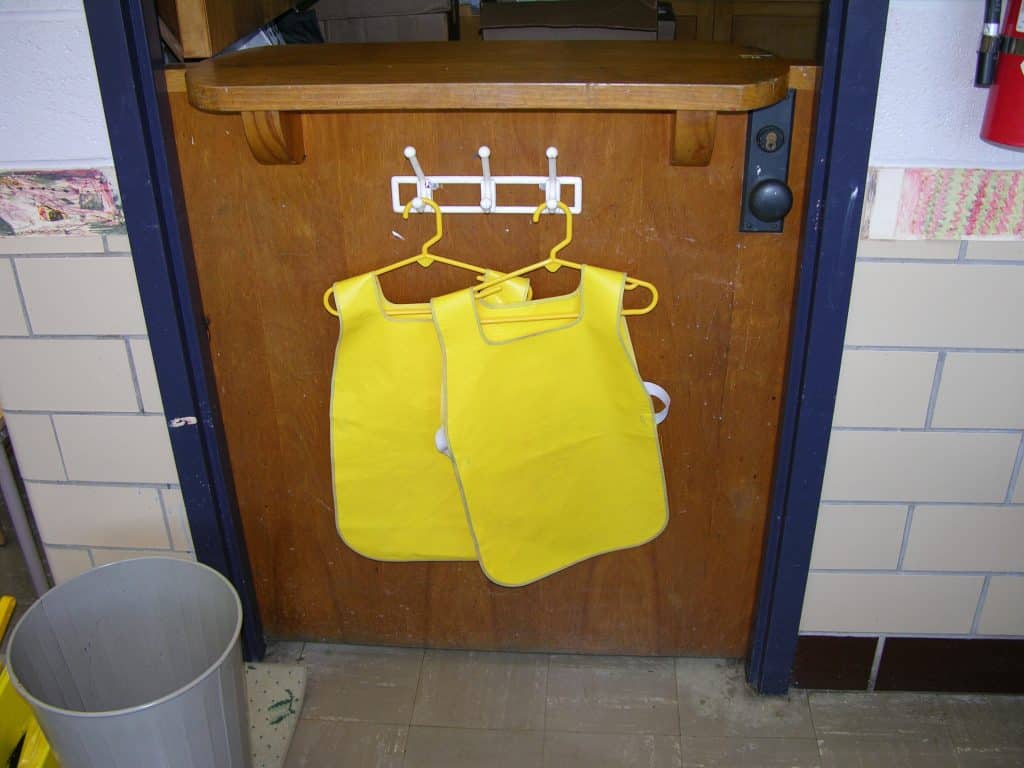
Notice those who are not choosing the work, but observing it. They are the children you will want to invite to an individual lesson. It may be necessary to paint with the child (I paint, you paint). If that does not engage the child, ask if you can help move the child’s hands. However, all children have the right to opt out of the work.
Note: The rectangular space delineated by the tape is called the “picture plane,” just like a piece of drawing paper, or a stretched canvas! Use those words with the children and let them get used to hearing them. The “picture plane” is the flat surface they will paint or draw on. Later, it will relate to understanding how depth is created on a flat “picture plane.”
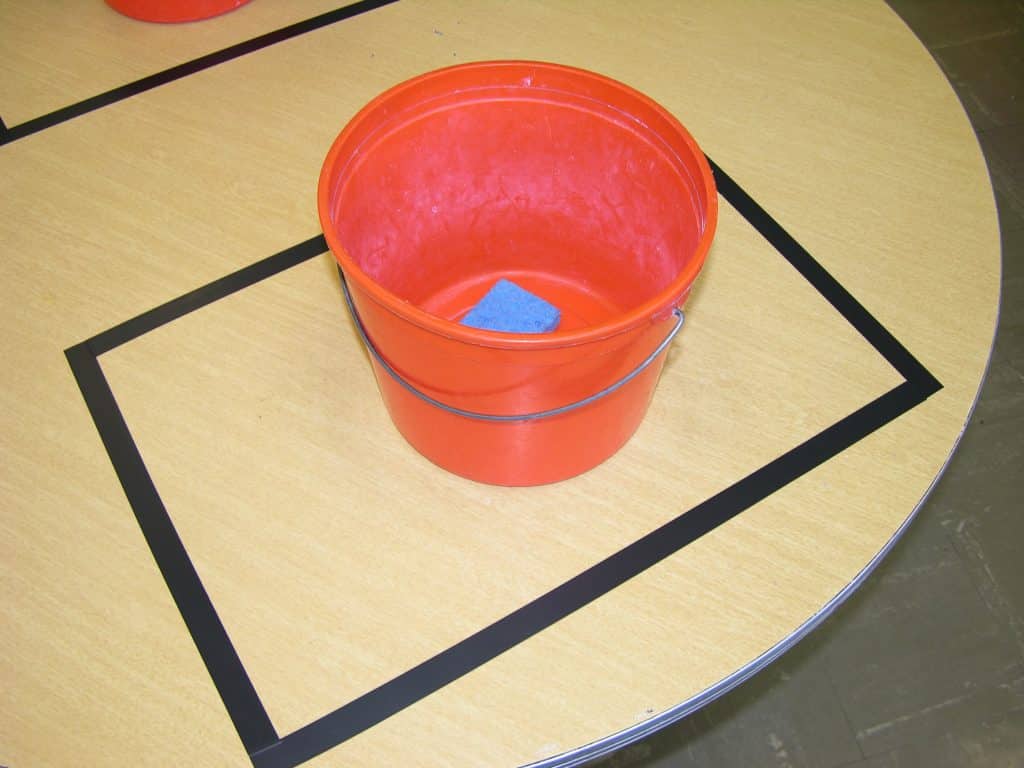
- Prerequisite: Water activities, especially how to use a sponge and any activity that requires carrying small amounts of water
- Direct Aim: Self expression
- Indirect Aim: Control of water, preparation for drawing and painting with an implement
- Points of Interest: What does the child need to notice, or to do in order to better control the water? Suggest they experiment with different ways to use their fingers and hands to create their ideas.
Materials: 5-9 First Lesson
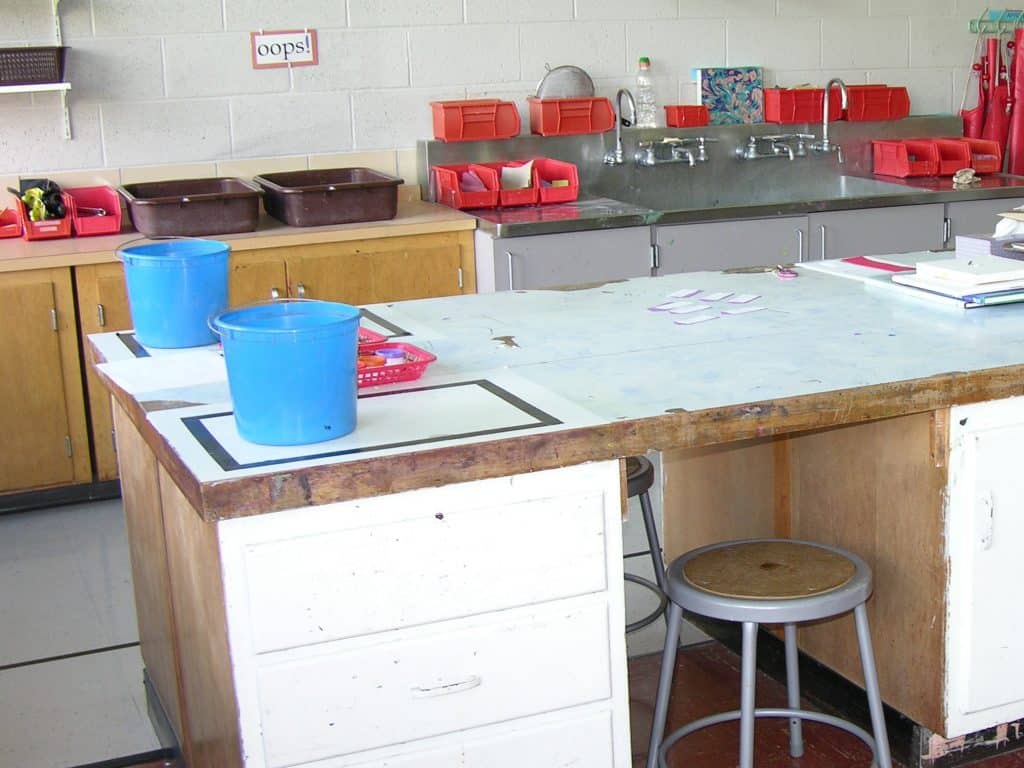
- Table with 2 painting stations (standing work)
- This activity requires a non-porous tabletop
- 2 aprons on hangers, on hooks, or folded then placed over a chair or on a tray under the table,
- 2 taped rectangles on a table, or two small tables larger than 12” x 18” with one rectangle each
- 2 one-gallon buckets with a hand-sized sponge in each
- Shaving foam (cheapest) and 8–10 individual lidded containers (see photo) (see: Resources below “1, 2, 3, Finger Paint” activity)
- 2 larger Akrobins: one labeled “full” and the other labeled “empty” to hold at least 6-8 of the shaving foam containers (see: Resources)
Note: Make sure you have a container of shop cloths to help with big spills, and a clothes line on which to dry them.
Preparation: 5-9 First Lesson
- Place the table close to the water source.
- Decide where to display the aprons.
- Place a piece of 12” x 18” paper on a table as a sizing guide, and put electrical tape just outside its edges to create the picture plane. When finished, remove the paper.
- Place a sponge in each bucket, and place one in the middle of each work space (picture plane) as a control of error that reminds the child to get water.
- Fill the containers with shaving foam. Find the best amount of shaving foam needed to easily paint. The amount of foam is a control of error for the child!
- Note: Fill the containers with foam before class. Full containers left over night will lose air and will not be useable.
- Label the two Akrobins (full, empty). Place them on a shelf or ledge close to the painting table.
- Create a tape rectangle on the tile floor or low table where you can give a group lesson.
Presentation: 5-9 First Lesson
- Introduce the work by its name: 1, 2, 3, Finger Paint and 1, 2, 3, Cleanup.
- Show the group where the work is installed, where the aprons are found, and start the lesson.
- “One, put your apron on.” Put the apron on.
- “Two, get your water.” Fill the bucket ¼ - ⅓ full.
- Place your finger on the outside of the bucket to show the water level inside. With enough back light, the water level is visible.
- As you are moving, keep repeating the numbers and the actions they represent.
- “Three, get your finger paint, which is shaving foam for now.”
- Go to where the foam containers are stored and take one. Again, repeat the numbers and what they mean.
- Explain that you are working on the floor for the lesson, but that they will use the table work spaces.
- Wet your hands.
- Open the container and scoop out the foam with two or three fingers.
- Flatten your hands and spread the foam over the surface of the rectangle. “Now I can finger paint.”
- Finger paint using your hands and fingers in different ways. “I always think about what I am doing and what I might try next!”
- “Now I’m going to erase my drawing and start over again.” Stop, and spread the foam over the surface with your hands flat on the table.
- Again, paint doing something you did not do the first time.
- Declare yourself finished. “Now I am going to do 1, 2, 3, Cleanup.”
- Hold up your hands for them to see. “One, clean your hands.”
- Put one hand in the water then the other. Pick up the sponge, empty it, and wipe your hands dry.
- “Two, clean your apron.” Look down at your apron and wipe it off with a damp sponge.”
Note: Do not remove the apron to clean it since that would be a higher level of difficulty. - Again, fill the sponge and empty the sponge. Review the numbers and their meanings.
- “Three, clean the table.” Wipe the table as you would for table scrubbing (top to bottom, left to right, clean sponge after each one or two swipes).
- Fill and empty the sponge as needed. After most or all of the foam has been removed, wipe the whole area in a random pattern.
- Put the container and lid in the water. Empty the sponge and wipe them dry with a damp sponge.
- Place the clean container and lid in the container labeled “empty.”
- Empty the bucket in the sink in the following manner. “Place the bucket in the sink. Turn it on its side to let the water drain out. Empty the sponge and wipe off the outside. Place the sponge back into the bucket.” Be dramatic with this step.
- Return the bucket and sponge to its place in the middle of the picture plane.
- Remove your apron and return it to its place in the environment.
- Remind them where their aprons are.
- Note:
- You return the clean, empty containers open so they can easily be filled.
- Fill the containers with foam before class. Full containers left over night will lose air and will not be useable.
Extensions: There are no extensions because the activity is indirect preparation for using “real” finger paint.
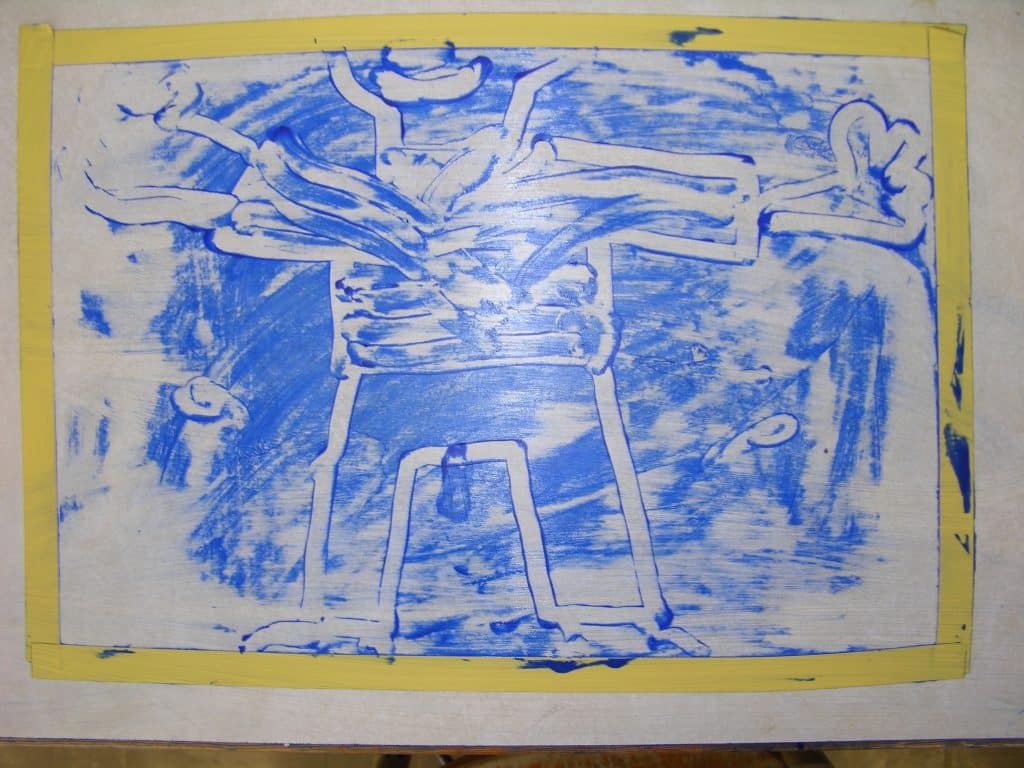
Materials: 5-9 Second Lesson
- Finger paint replaces the shaving foam. Choose a dark color.
- The rest of the setup remains the same.
Preparation: 5-9 Second Lesson
- Fill the containers with finger paint. Experiment to find the right amount of finger paint needed to fill the picture plane. Too little paint makes it difficult to easily move your fingers through the paint. Using too much paint makes cleanup messy and difficult. The correct amount of paint is a control of error for the child!
- The rest of the preparation remains the same.
Presentation: 5-9 Second Lesson
- Introduce the work by congratulating the group, because everyone has worked hard to master the art of finger painting, and are now ready for “real” finger paint.
- Give the lesson as before, and repeat the numbers with their commands.
- More water will be required for cleanup: ⅓ - ½ bucket. Share with them what you are thinking as you work. Now is the time to use a simple idea (Make two trees and grass using both hands at the same time!).
- Demonstrate how to cleanup. One, clean your hands. Two, clean your apron. Three, clean the table and your container. Check the floor for paint.
- Note: New Point of Interest: Remind students that fresh water may be needed to finish their cleanup.
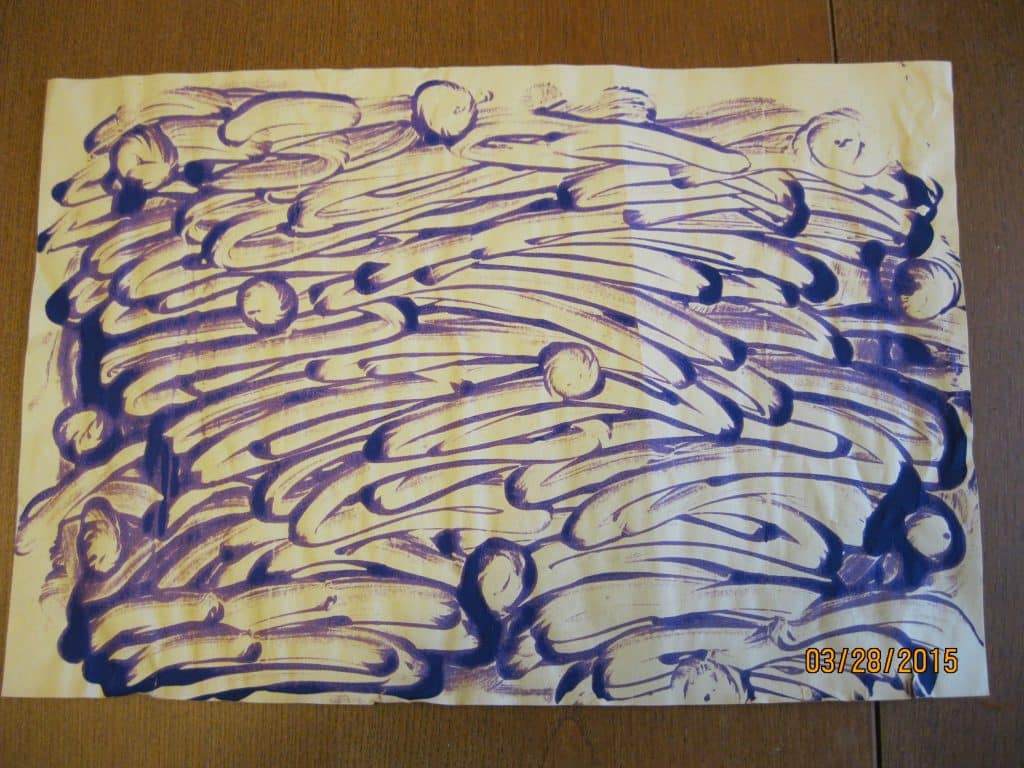
Extension: 5-12 Third Lesson: Pulling a Monoprint – “Printmaking”
- Prerequisite: Finger painting with paint
- Indirect Aim: Introduction to print making
- Direct Aim: Documenting the painting by extending the work into a
new art form - Point of Interest: Is your name on the back of your print?
Materials: 5-9 Third Lesson
- Materials and equipment needed for finger painting with paint
- 12” x 18” pieces of manila paper or better, 6-8 sheets
- Note: Manila paper is great because it is so absorbent and cheap, but it deteriorates easily. Laminate all finished work if you wish it preserved.
- A container for paper:
- Cafeteria tray for the paper
- A space outlined on a shelf nearby
- Gently rolled paper placed in a plastic trash can
- 2 pencils and a container
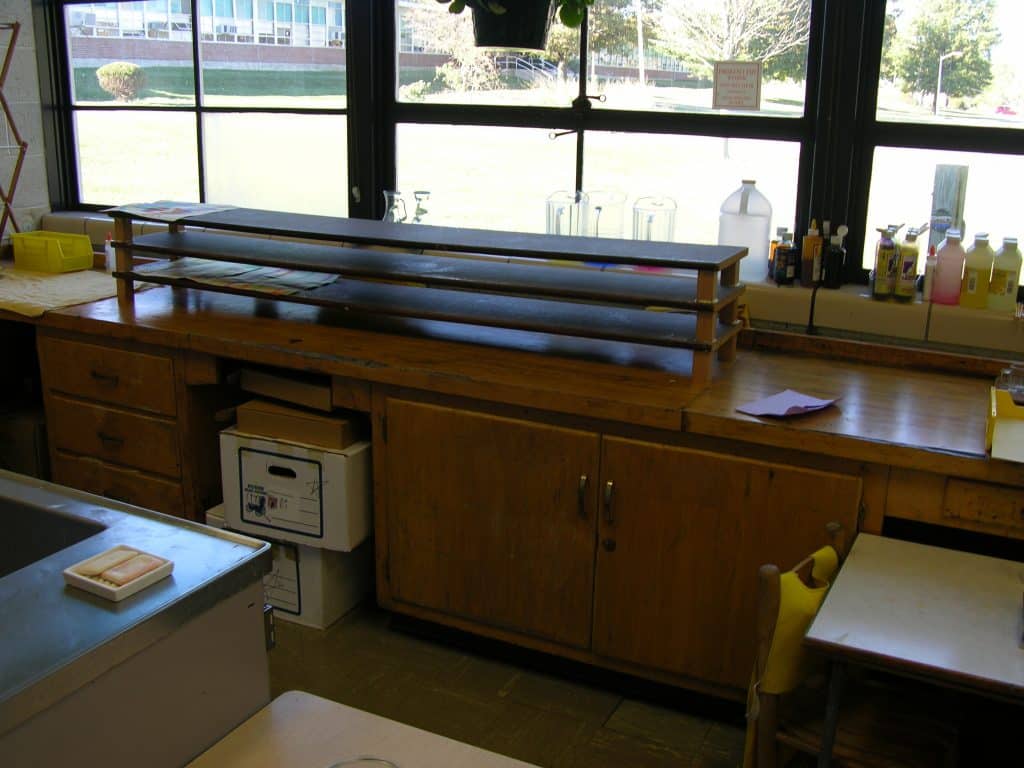
- A drying place for the prints
- Use empty classroom shelving.
- Special shelving just for drying work (See: The Environment)
- Clotheshorse with clothes pins
- Against the bottom of a wall outside the room
- A commercial drying rack
Preparation: 5-9 Third Lesson
- Decide where the monoprints will be placed to dry.
- Install the paper and pencils next to the paint.
Presentation: 5-9 Third Lesson
- Introduce the term monoprint. “Mono means once. The print occurs when the finger painted idea is transferred from the table to the paper. It can only be transferred once.”
- As you give the lesson, quickly review 1, 2, 3, Finger Painting.
- Share with your students what you are thinking as you quickly make your painting.
- Clean your hands. Empty the sponge and dry your hands with the damp sponge.
- Get your paper so the children will see where it is kept. Put your name on it.
- Gently bend the paper in half into a big “U.” You will see your name.
- Center the bottom of the “U” over the middle of the painting (picture plane).
- Lower the paper until it touches the paint. Continue to lower both sides at the same time until the painting is covered. You may need to assist children with this step. Observe for signs of hesitation.
- Use your flat hand to gently rub over the paper. The paper may create bumps where the paint has been absorbed.
- Pick up the paper from the top corners and pull it off the table. Be prepared for the “Ahs.”
- After showing it to the children, put the print where it is to dry.
- Most of the paint will be gone, and you can proceed to reinforce the 1, 2, 3, Cleanup.
- Review the cleanup numbers and associated responsibilities.
Presentation: 5-12 Fourth Lesson: Hand Coloring the Print
Note: Finger paintings need to be dry before coloring!
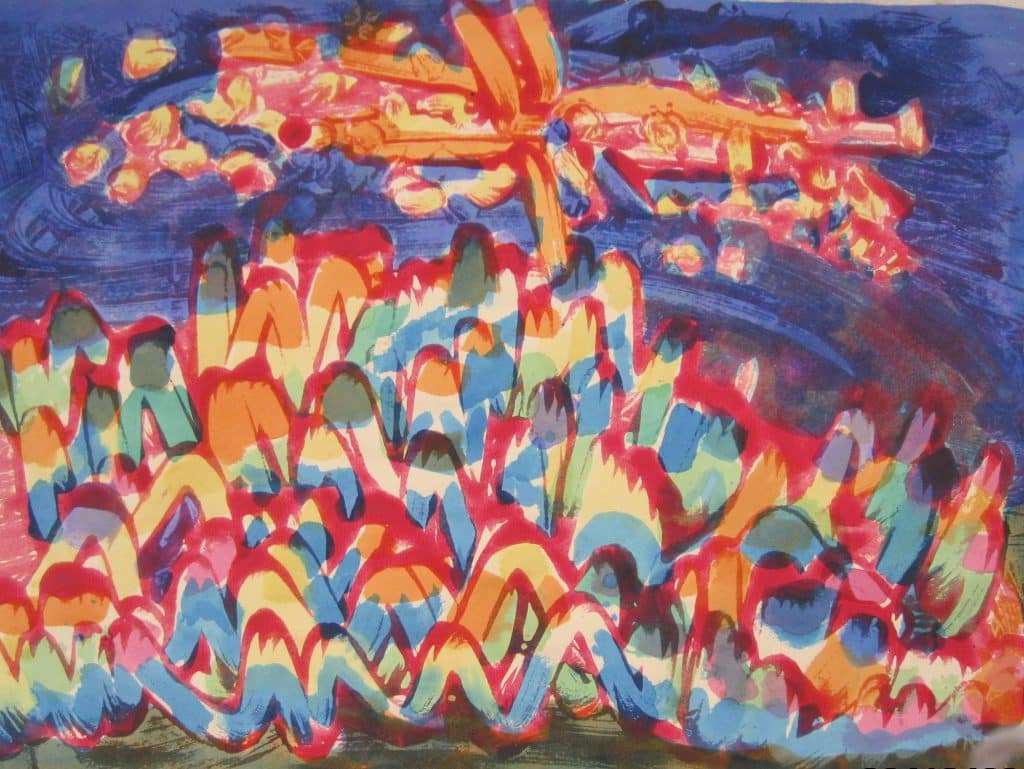
- Use watercolor paint and oil pastels to color some or all the shapes on the paper that are without color (see: Easy Watercolor Painting).
- “This lesson presents the ways you can hand color your monoprint. Choose what you like best.”
- “Notice where in the print there is only paper and no finger paint. Those are the lines and shapes that can be painted.” Paint a shape.
- “Be careful. Know that the dry finger paint will smear if it gets too wet.”
- “Oil pastels can also be used to color the unpainted lines and shapes.” Choose two or three small spaces to color.
- “Make a design of lines or dots in a shape with oil pastels and then paint the shape.”
- Oil pastels can also be used to draw over the dry finger paint. Demonstrate that possibility.
- Show your work to the children, and put it in the drying place.
Resources:
- Gallon sized plastic buckets: paint departments
- Shop cloths: auto parts stores
- Clothes drying rack and clothes pins: discount, or hardware store
- Use the least expensive brands of shaving cream. Expensive brands have such a heavy body that they do not spread easily.
- White, Doublewall, 4 ounce plastic jars: Click on DOUJ4 https://www.specialtybottle.com/whitedoublewallplasticjarsmi.aspx
- AkroBins: Model No. 30230:
- https://www.monsterbins.com/akro-bins/stackable
A few changes can be made when presenting the work to 9-12 students. Make a work plan, or use your own method of assessment and accountability. Provide a palette of finger paint colors and written instructions. Some students use many colors with success, while others mix all the colors to brown, much like what three or four year olds do with tempera paint. The activity is a productive way of reinforcing cleanup procedures in the early part of the school year. Our school received new students each year because we were, for a long time, the only 9-12 facility available in our area.
Note: You can always use the 5-9 lessons if you wish, and modify it your way when you observe your students doing the work. One difference with the older students is that you will not need to repeat the 1, 2, 3, part of the presentation very often. They get it.
Materials:
- Materials and equipment needed for finger painting and pulling prints for 5-9
- 2 ounce containers of finger paint colors
- A tray or container for the paint pots
- A tray or container for empty pots
- 12” x 18” pieces of manila paper
- A cafeteria tray or other paper holder
- 2 pencils and a container
- A drying place for the prints
- An iron and board (optional); prints wrinkle as they dry.
- A Work Plan (See: Work Plans under The Environment)
- A card listing the steps needed to do the work in a menu holder
- Use the 1, 2, and 3 here. This provides needed support.
Preparation:
- Review all four 5-9 presentations which will be given as one.
- Give special attention to lesson three which describes pulling a print.
- Decide where the monoprints will be placed to dry. Consider using a professional drying rack.
- Fill the paint pots. Make 2 sets of paint pots for a quick replenishing of the activity. Furnish the primary colors and white, or all the primary and secondary colors plus black and white.
- Make the tape guide for the paper as described in the 5-9 preparation.
- Install the paper and pencils.
- Prepare the “Steps” if using for support.
- Install the iron and board, if using.
- Make one with a large wooden drawing board, padding, and cloth. Staple it together.
- Design a work plan (See: Work Plans in The Environment).
Presentation: 9-12
- Put on your apron.
- Get a ½ bucket of water.
- Choose paint colors and place them on the picture plane.
- Paint your idea.
- Demonstrate how to pull a monoprint.
- Suggest students continue to paint and print at least two or three pieces.
- Suggest students hand color at least one piece after the fingerpaint is dry.
- Demonstrate cleanup.
Note: Students may invent ways to use the print they make for other art forms such as origami, note cards, book making, or gift tags.
Resources:
- A table top drying rack is ideal for a 9-12 art environment. However, the equipment would need to be modified.
- There are many different drying racks available through art supply companies. Find the one best for your environment.
- It might need large laminated rectangles of poster board in order to hold the larger paper.
- Leave 2-3 spaces between each paper holder. You will not use all the holders provided.
- White, Doublewall 2 and/or 4 ounce Plastic Jars with lids: https://www.specialtybottle.com/whitedoublewallplasticjarsmi.aspx
Click on:- 2oz jar: ID Code DOUJ2, Closure 58 WHT DOME
- 4oz jar: ID Code DOUJ4, Closure 70 WHT DOME
- AkroBins: Model No. 30230:
- https://www.monsterbins.com/akro-bins/stackable
- Wooden drawing board: art supply companies
Suggested Steps for menu holder
Steps for Finger Painting and Monoprinting
1, 2, 3 Finger Painting: 1, 2, 3 Clean-up
- Put your apron on.
- Get a ½ bucket of water.
- Place your paint colors on the
picture plane. Put your name on the paper. - Paint your idea.
- Pull a monoprint. Place it on the drying rack.
- Cleanup the picture plane.
- Continue to paint and print at least one or two more pieces.
- Cleanup the activity.
- Clean your hands.
- Clean the table.
- Clean your apron and all equipment.
Place the clean bucket and sponge in the
middle of the picture plane.
- Hand color at least one dry print.
- Think of other ways to use the finished
paper.
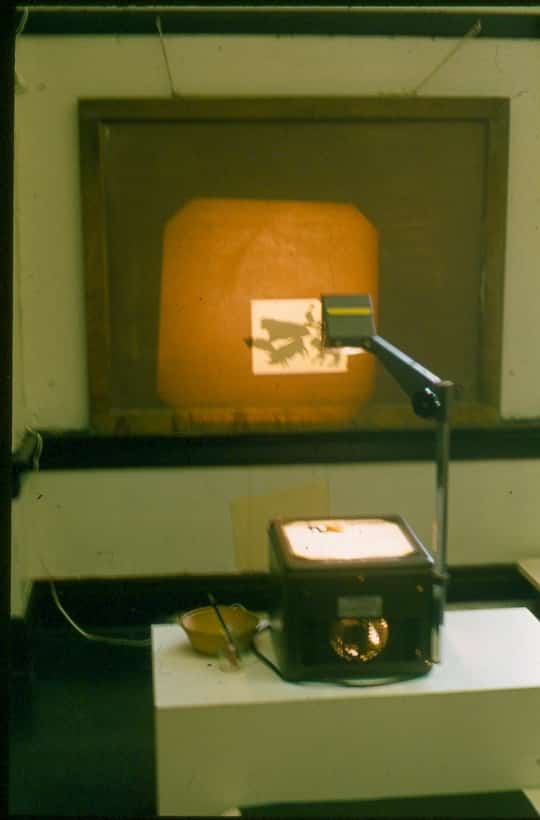
Georgie Story
When I first started teaching, I installed an overhead projector in the Children’s Studio, which was an art learning environment for neighborhood children. I wanted them to experience seeing the shape and texture of various objects. The only wall area dark enough for the projector had a permanent bulletin board on it. Almost immediately, a child asked where he could find paper and pencil to copy the design of objects he had projected onto the bulletin board. The activity was invented at that moment. The children and I kept thinking of ways to use the overhead. Lessons involving difficult concepts were made simple to comprehend when using the projector. This equipment is highly recommended for all 3-12 environments.
- Prerequisite: Daily Living, Metal Insets, Easy Liquid Watercolor Painting
- Direct Aim: Creative self expression
- Indirect Aim: Idea development
- Points of Interest: What do you think would be interesting to project?
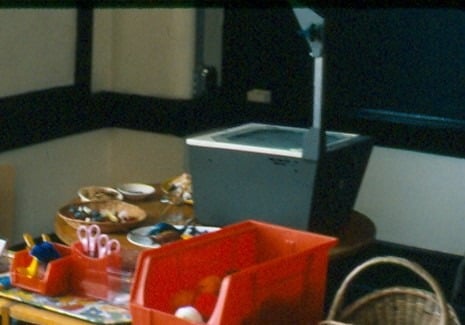
Materials for the projector:
- An overhead projector
- A table for the projector
- Paper and a pencil in containers
- 2 push pins in a container
- Objects to project
- A bulletin board big enough for large paper (12” x 12” and 12” x 18”)
- A shelf or other space to hold containers of objects and paper.
- For an advanced lesson for 9-12 students, place the projector on a media cart, or an old serving cart with wheels. Either cart may provide space for collected objects and maybe even paper. The rolling cart will also allow the older student to change the size of the image.
Note: An overhead projector needs some added controls in place for use by children 5-9. Keep the equipment stationary for 5-9 students. The controls need to remain in place for 9-12 people until a full lesson is presented on how to use the equipment safely.
- Tape around the place where the pole is attached to the base of the projector so it can not be removed.
- Tape around the focus knob so it can not be moved.
- Tape the top assembly that holds the mirrors in place so it will not move. It can be adjusted up and down. You want it straight ahead.
- When you observe a curious student investigating the equipment or trying to move its parts, I make the following suggestion for handling the situation: Let them know you have noticed their interest in the equipment and that you will invite the person to help you the next time you adjust it, but for now the controls must stay in place. This student may become your new tech assistant.
Presentation:
- Introduce the work by its name. “This is a drawing lesson using this piece of equipment called an Overhead Projector. The button to turn it on is in the front of the machine. It is the only thing you need to do to use it.” Turn the projector on. “Listen to how it sounds.”
- “The machine has a fan to protect the light bulb inside from getting too hot.”
- Put your hand on the bed of the projector. “My hand blocks the light.”
- Put an object on the bed (use the word “bed”). “The light coming from the bottom of the equipment is projected onto mirrors in the upper part, and the mirrors then project the image onto the bulletin board.” Move your hands up as you speak of each part of the equipment. End up walking and pointing to the board where the image is projected.
- “All you need to do to use the projector is to turn it on. Draw your idea, then turn it off.”
- Put your name on a piece of paper, turn it over, and pin it on the board.
- “There is an edge where the light ends and the dark shape of the object begins. Keep your eye on that edge and trace the shape with the pencil.” Trace the object while you talk. “Keep yourself out of the light.”
- When you are finished, again ask the group to listen. “Listen quietly to what happens when I turn off the projector.” Turn off the projector. “The fan is still working. The fan automatically turns off when the bulb has cooled down.”
- Demonstrate how to put the objects back, clean up the activity, and return the push pins and pencil to their containers.
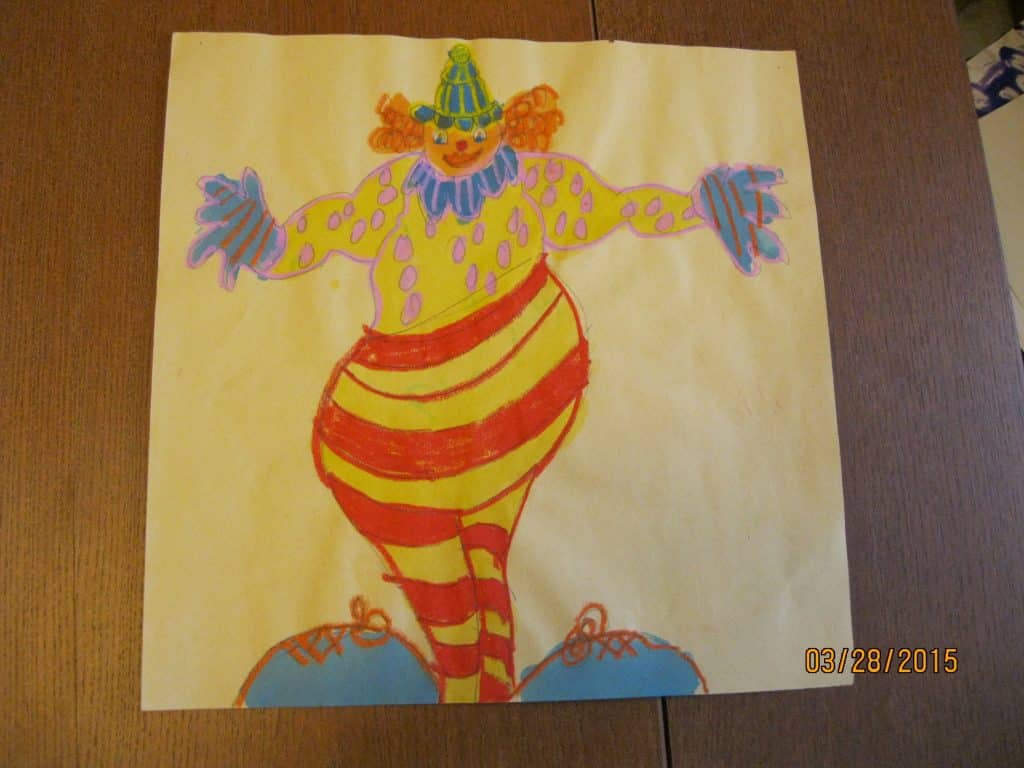
Materials: for Drawing and Painting
- A pencil in a container
- Thick and thin markers and colored pencils in containers
- Easy Liquid Watercolor Paints set up in the environment
- Start with a variety of objects in a basket until you amass a larger collection.
- Objects to consider using: each kind in a container
- Keys
- Plastic animals large and small (don’t forget bugs, dinosaurs and other extinct animals)
- Kitchen tools
- Objects not being used in language activities
- Natural objects: leaves, pinecones, twigs, sea shells, coral
- Small toys: trucks, cars, boats, dolls, teddy bears, cartoon characters
- Geometric shapes
- Plastic and silk flowers parts
- Small musical instruments
- Art and school supplies: paper clips, scissors, etc.
- Small hand tools and other hardware
- Do not forget an interesting, oversized object. I used a cloth dinosaur. Have fun building your collection !
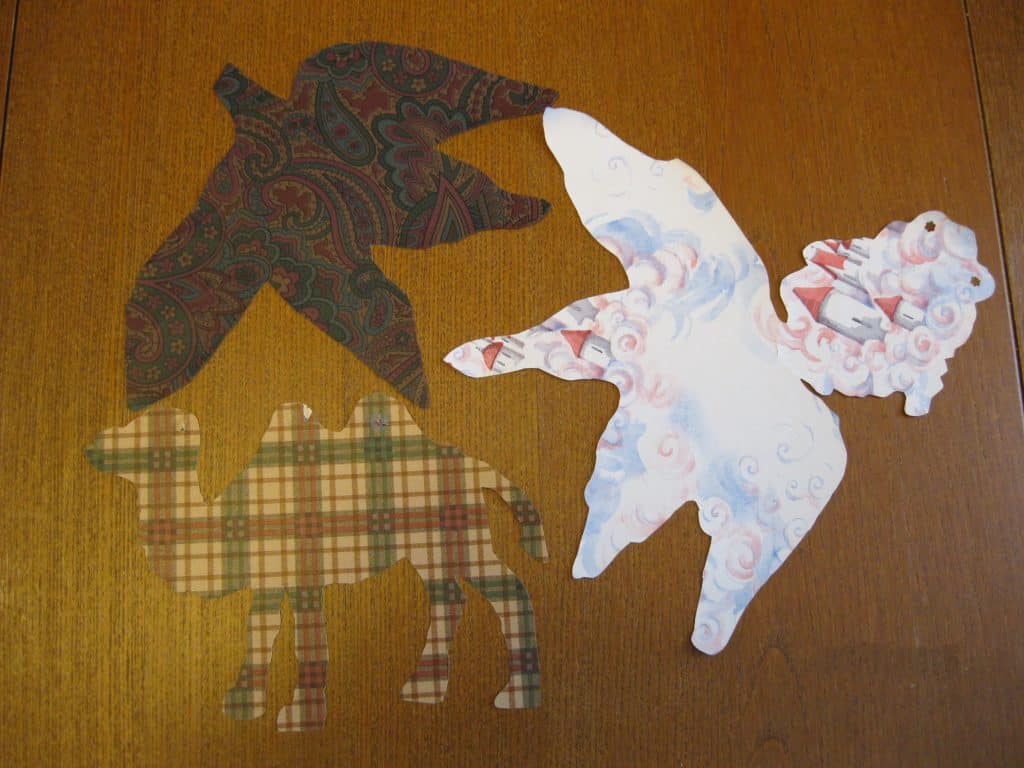
Extensions:
- When a drawing is colored using both simple watercolor paint and oil pastels it is called a “Crayon Resist Painting.” Make a drawing. Go over the pencil lines with oil pastels. Add extra lines and shapes that enhance your idea. Use the watercolor paint to color the rest of the paper.
- Invite children to bring things from home to use for a day.
- Think of a way to invite students to choose objects from the environment to project. They may need a way to remember where to return them.
- Invite the class to think of ways to use the overhead projector and its objects to create ideas for the Idea Box (see: Generating Personal Ideas).
Note: You might need to ask this question more than one time. Accept ideas already suggested without comment. You can include the following ideas. Any of them can be given as a lesson.
- Make an idea using only one object that is traced several times. Use this as your example for the idea box.
- Make an idea using more than one object.
- Create an idea using parts of several objects to make one thing.
- Make an object seem to enter the picture plane because you only see the front part of it, or an object seems to leave the picture plane because you can only see the end of it, or both.
- Create an idea with another person.
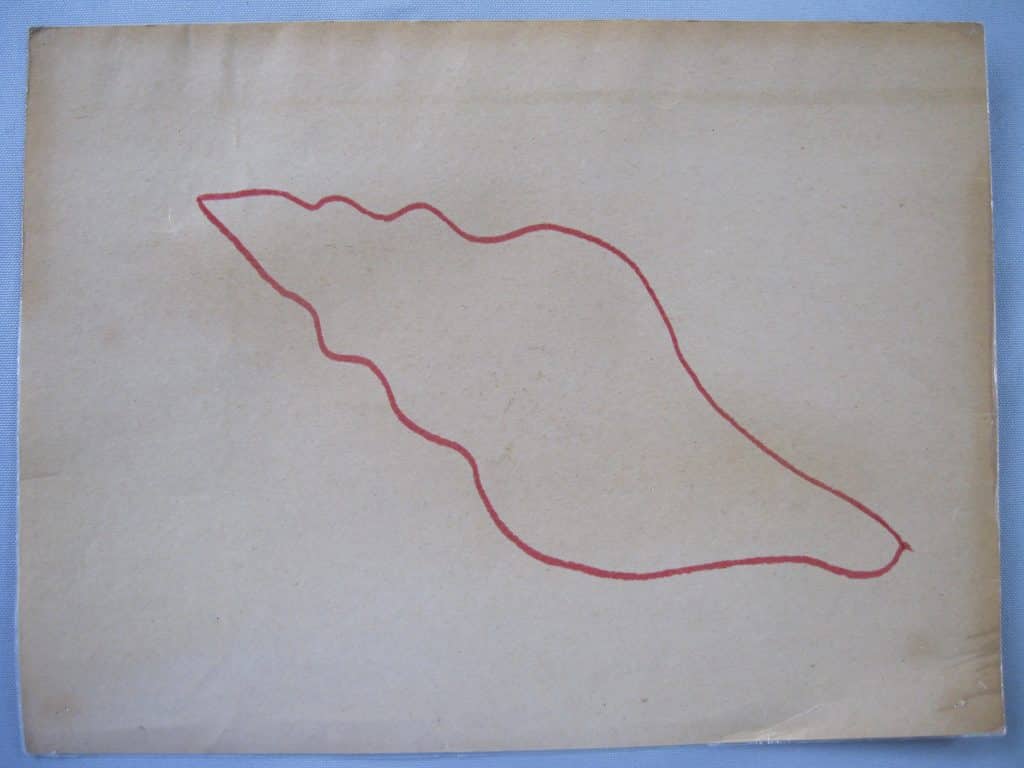
- Use an object and make it into something else (a shell into a tree).
- Ask the children who have created an idea if you could put their idea in a general way in the “Idea Box” for others to use.
- Design a group project with the children.
- Use the map puzzle pieces and make an enormous presentation of the United States, one state at a time.
- Use the continent puzzle map. Fill each continent with information using pictures and words. Think Big!
- Make profiles of the children with black paper.
- Advanced Extensions: 6-12
- Provide collage materials instead of just plain paper.
- Provide poster board squares and rectangles upon which the collages can be built.
- Make large envelopes to keep all the pieces until the collage is completely designed. That will prevent students from gluing the important shapes down and then deciding they wished they had a background or could have overlapped them.
- A lesson introducing foreground, background, and middle ground will help students to understand there is an order to gluing down the pieces. First the background is glued down, followed by the middle ground pieces, and lastly, the foreground pieces. This is important especially because the pieces usually need to overlap each other (See: Understanding Art I – Parts of a Picture Plane). This is learned over time.
- Make puff sculptures.
- Project a shape onto 2 pieces of 12” x 18” white drawing paper that have been stapled together near the edges. Colored paper could also be used.
- Cut them out.
- Staple the two cut pieces of paper together, leaving an opening for stuffing.
- Paint or draw details on the front and back of the shape.
- Stuff the shape through the opening with shredded or crumpled paper, then staple it closed. Hang the work from the ceiling.
Resources:
- Overhead projectors can be bought new and used. Read the reviews before buying. All I had was a basic model.
- Objects can be purchased from:
- Shops at art museums, zoos, natural history museums
- Toy stores
- Discount stores: especially for interesting everyday objects
- Thrift shops
- Hardware stores
- Retro serving carts (1950-70s) can be found in antique shops. Often, it has an electrical cord built into its design, which might require a 3-prong adapter for newer grounded plugs. A cart with wheels will allow 9-12 students to choose how big their work will be.
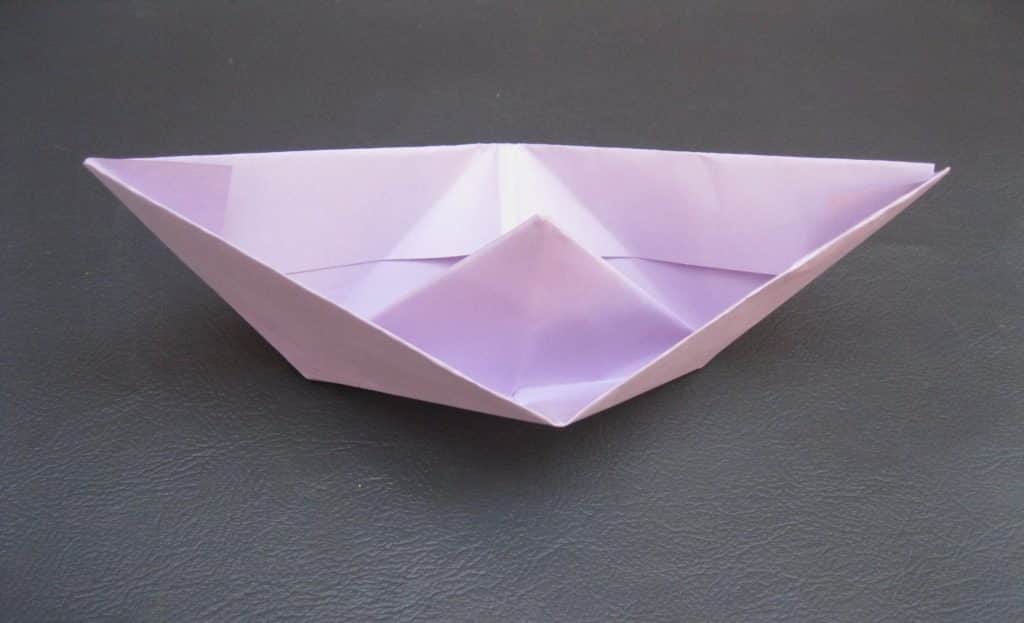
Paper folding is not like other art forms. Paper is folded to make a figure or design. The children make a copy of someone else’s original idea. What it is and how it is made was predetermined by its original artist. New figures introduce new, more advanced folds. With experience, it is possible for children to create their own original figures.
Georgie Story
When I was a child, my father taught me how to make a boat using newspaper. When I first started teaching, I noticed one day that there were four or five children wandering around the studio observing others but not choosing work. I offered them an opportunity to make a boat. They all joined me, and Chinese paper folding became a choice for everyone. I broke the process down into progressive steps, and put a blue coding dot with a gold star on any step that might be difficult to copy without help.
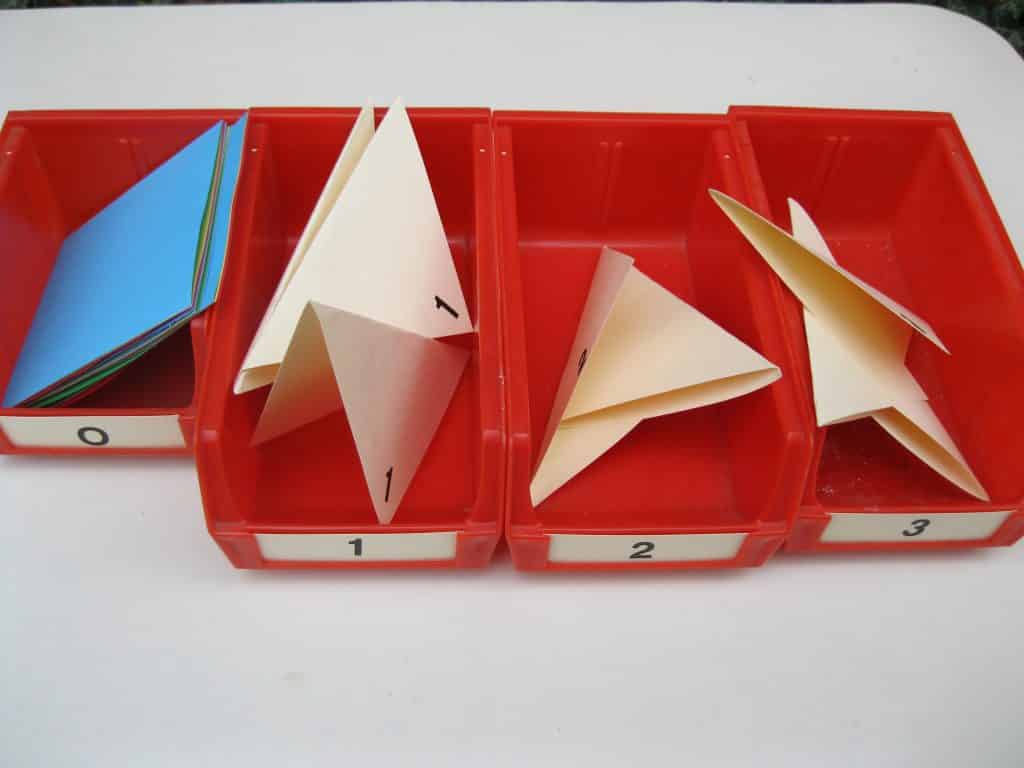
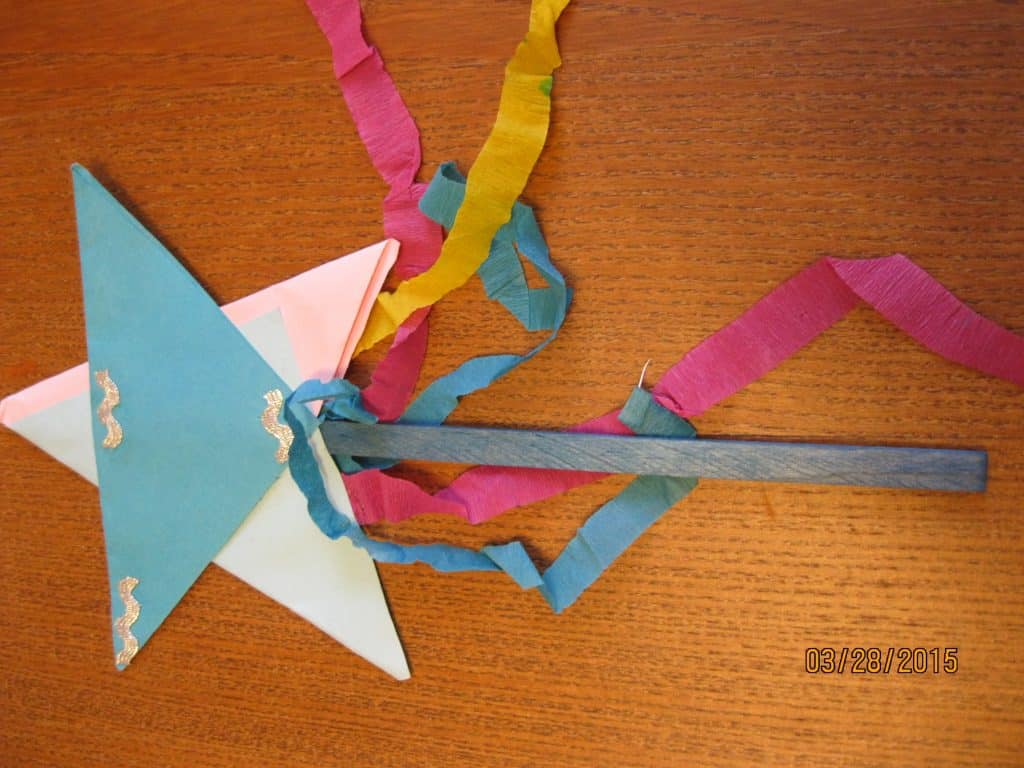
Two forms are presented below that are simpler than the boat, but still interest children. First is a five pointed star and the second is a finger puppet. The star is a simple figure, yet children found ways to change the idea of the figure. They created rocket ships, flowers, note cards, tree ornaments, six pointed stars, and arrows, using part of or all of the steps that made the star. Kite sticks were added to the activity because a child wanted to make a magic wand. I wish I could remember where I found the instructions for the star, but I cannot. The puppet was created by a second grader after zhezhi/origami was introduced into the studio. It can be made with a full sheet of 8½” x 11”, as well as a half piece 8½” x 5½”.
Note: This art form is best taught individually or in small groups.
- Prerequisite: Practical Life Activities, Cloth Folding
- Direct Aim: To create, step by step, an established figure or design
- Indirect Aim: To use the art form creatively
To develop new forms - Point of Interest: This art form requires us to make crisp folds.
Materials: The Star
- Squares of colored paper 4¼” x 4¼” if using 8½” x 11” paper
- Old file folders or heavy cover paper to make the steps
- Rub on numbers
- 2 glue sticks in a container
- Containers for each step
- A collage tray (optional)
- A stapler
- Kite sticks or dowel rods in a container, for wands, arrows, and spaceships. (Optional)
Note: A closed glue stick becomes a burnishing tool for crisp folds.
Preparation: The Star (see photos)
- Cut 8 pieces of Manila colored heavy paper 4¼” x 4¼” to make the steps.
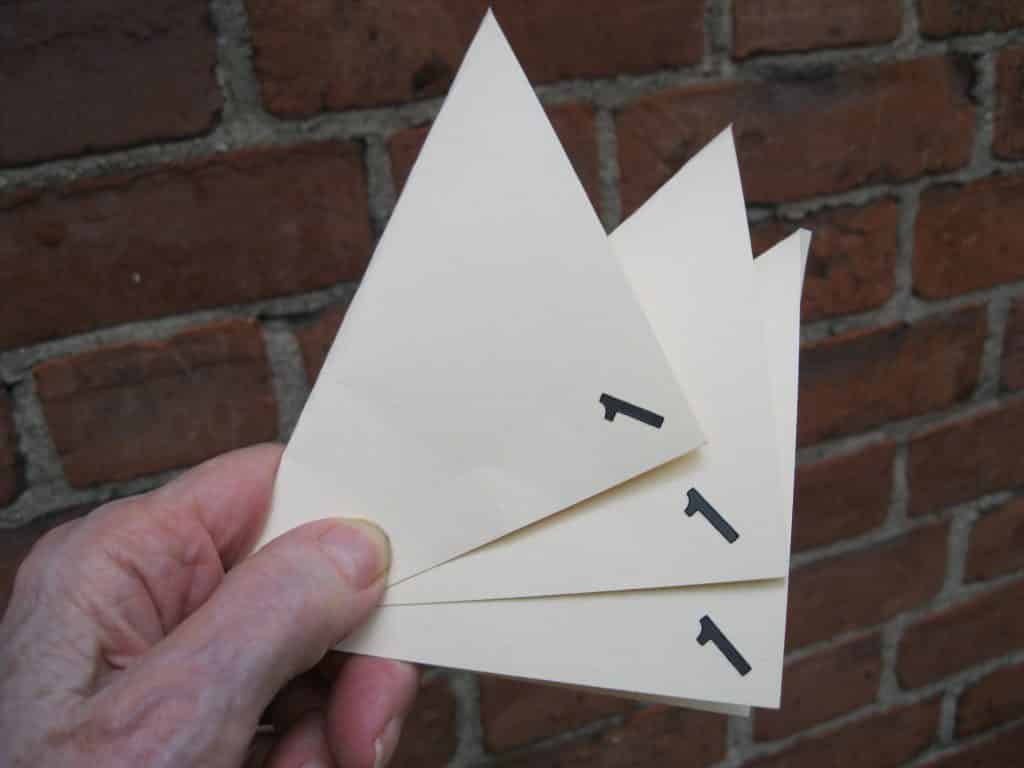
- Step #1 is 3 squares of heavy paper folded in half to make triangles. All 3 will have the #1 on them.
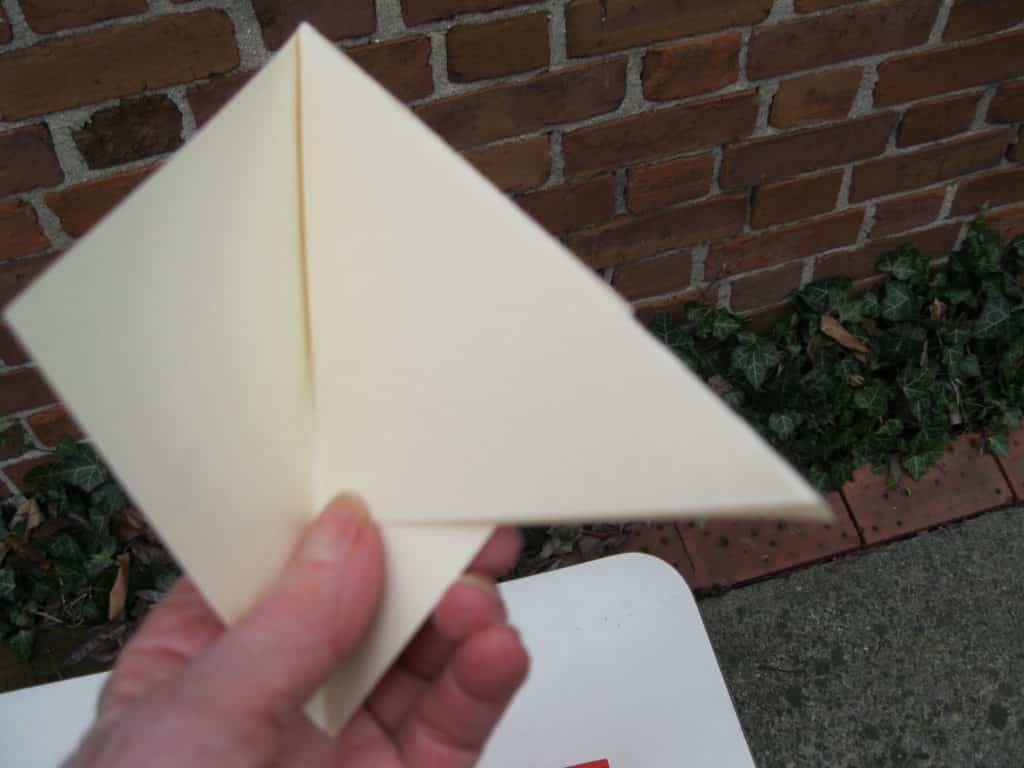
- Step #2 is two triangles placed together. One is opened and a second is closed and put inside to form three points of the star. Glue one side of the closed triangle to the right side of the open one. Leave the step open so the children can see how they are put together. It looks like an arrow when both triangles are closed. This is a tricky step.
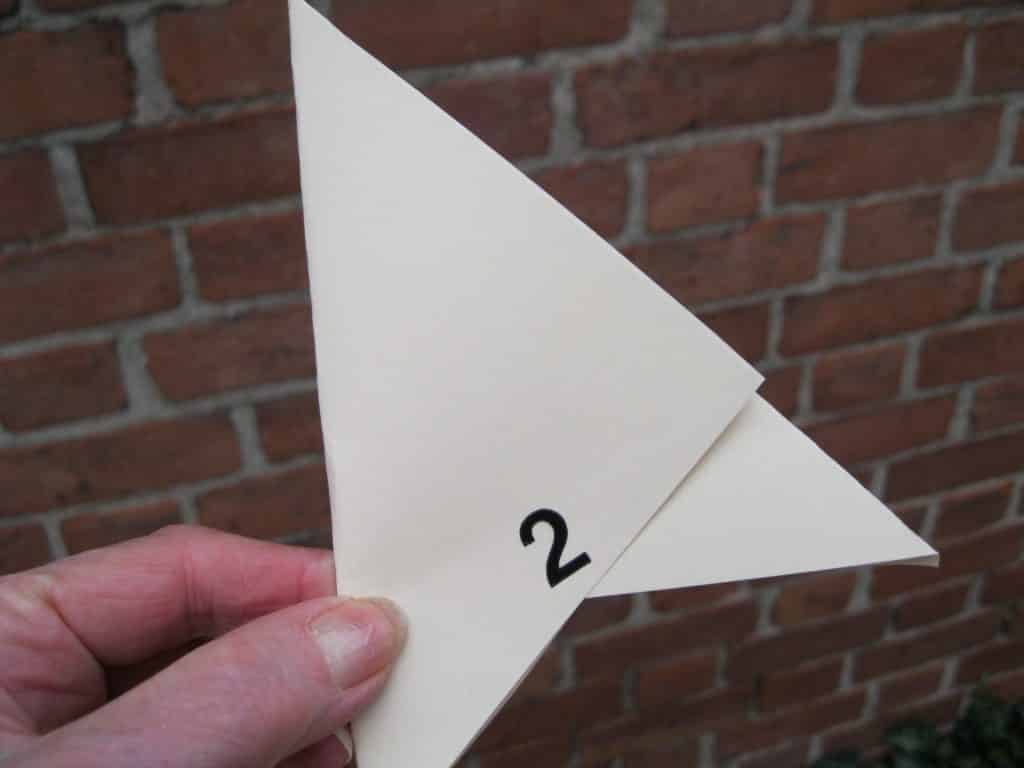
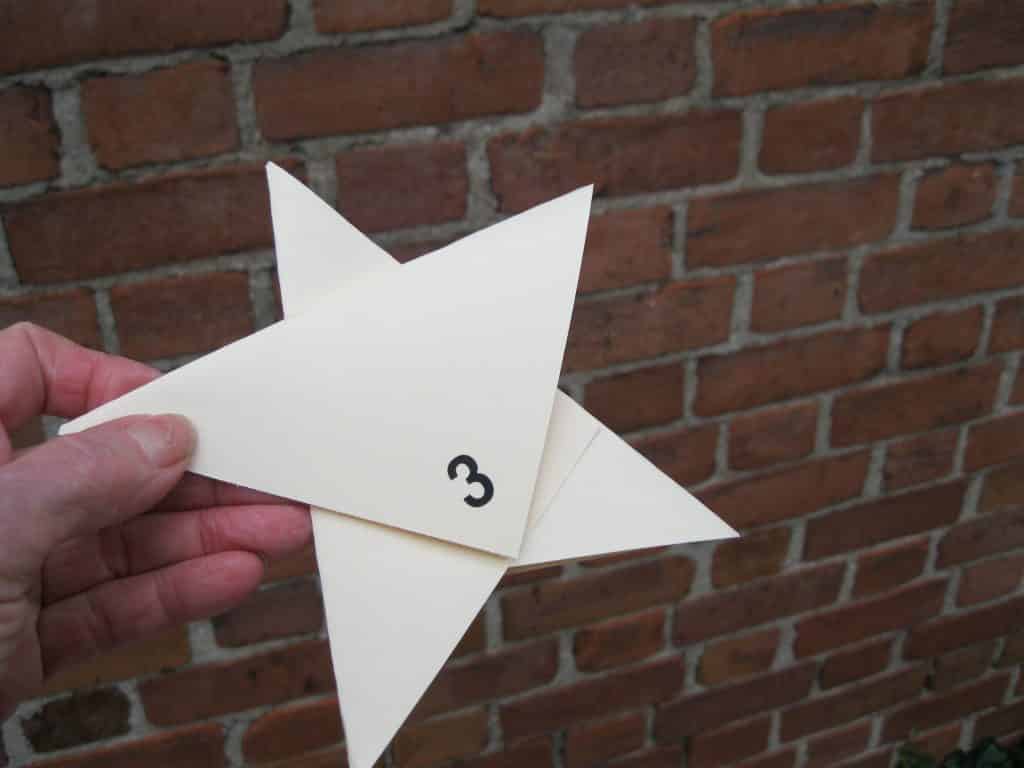
- Step #3. The last triangle is turned upside down and is placed across the arrow shape to form the five pointed star. Glue the last triangular form in place. Some children chose to not glue the triangle closed so they could write a note inside.
- Choose the containers you will use. Number them 0,1,2,3. Zero is paper with no folds. Number each step.
- Cut the colored paper into squares. It takes 3 squares to make a star. Put out at least 15 pieces. Replenish as needed.
- Put the glue sticks in their container. Place the stapler next, if using.
- Make a collage tray. Include thin markers and thin strips of crepe paper for shooting stars and anything else you think the children will want. Choose from the following:
- Plain and printed paper strips and shapes
- Colored feathers cut in half, exotic feathers
- Large sequins, flat buttons, small pom-poms
- Precut felt and/or plastic foam shapes
- Strips of lace or ribbon, silver and/or gold rick-rack
- Silk flower parts (new), tiny sprigs of plastic flowers
- Strips of raffia, yarn
- Pieces of colored plastic or cellophane straws
- Strips of chenille pipe cleaners of varied lengths
- White or silver/gold paper doilies cut into interesting pieces
- Wall paper shapes or scraps
- Fancy origami paper, wrapping paper, designs printed on tissue boxes
- Make a simple finished star and decide how to display it.
- Choose a place for the work. It is dry work, so it could go on the geography shelf. The earth does revolve around a star!
- Include the stapler if using.
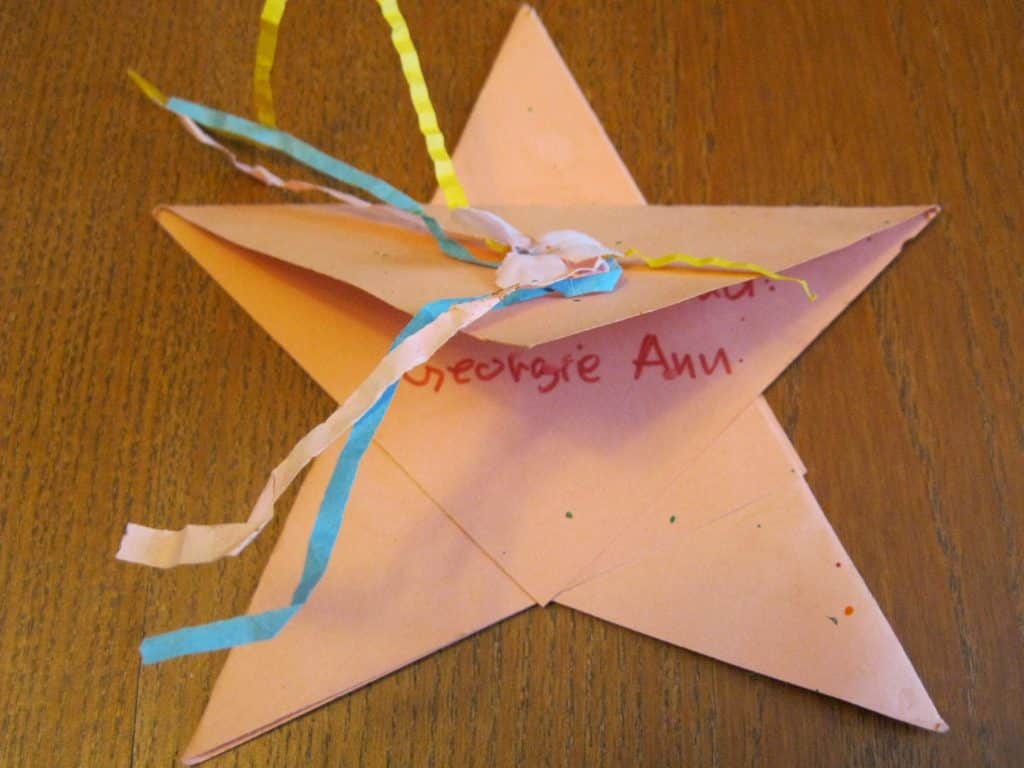 Presentation: The Star
- Introduce the work by its name. “This is a paper folding art form developed in Asia a long time ago. We will be copying the artist’s idea, but we can still add our own ideas to it.”
- Choose three pieces of paper. Remove the three numbered triangles from their container. Demonstrate how to fold each of the squares into a triangle.
- Put the first square on the work mat with a point facing you. Fold the top point down onto the bottom one. Hold the points down with one hand and run a finger of the other up to the middle of the fold above, and then crease the paper down. Release the points and use both hands to complete the crease to form the folded triangle. Assist children as needed. Fold the other two. Replace the teaching triangles and go to the next step.
- Show the children the # 2 example and study it with them.
- Choose two triangles. Open one triangle and keep the other closed. Slide the closed triangle along the folded groove of the other until the two folded outsides create an arrow at the top. Glue the closed triangles to the open. Assist children as needed.
- Turn the third triangle up side-down. Place the third triangle straight across the other two to form the star. The bottom point meets the intersection of the other two triangles. Glue it there closed, or leave the top flap unglued for writing a note inside.
- Introduce any materials that are present for decorating the finished star.
- Replace all the teaching steps. Restore the activity.
Extensions: The Star
- Add paper with printed designs.
- Add stars to a bulletin board about the planets of our solar system.
- Make a group collage about the different colored stars found in the universe.
- Make holiday ornaments of stars, using fancy paper. Use them as gift tags.
 Resources: Zhezhi / Origami
- Research the art form on the internet. Start with https://www.youtube.com/watch?v=Ud-fi4YWnCs
- The Art of Chinese Paper Folding by Maying Sooing is an old book
published in 1948. It is filled with old forms that I found interesting. - Make a collection of paper folding books that have interesting designs. There are many clever modular forms that people ages 9-12 might like. Put your collection in their environment and let them choose their work.
- A small number of my students and their fathers belonged to paper folding clubs and were very proficient at making difficult forms.
- A three hundred and sixty-five day calendar exists that has a new origami figure for each day.
Georgie Story
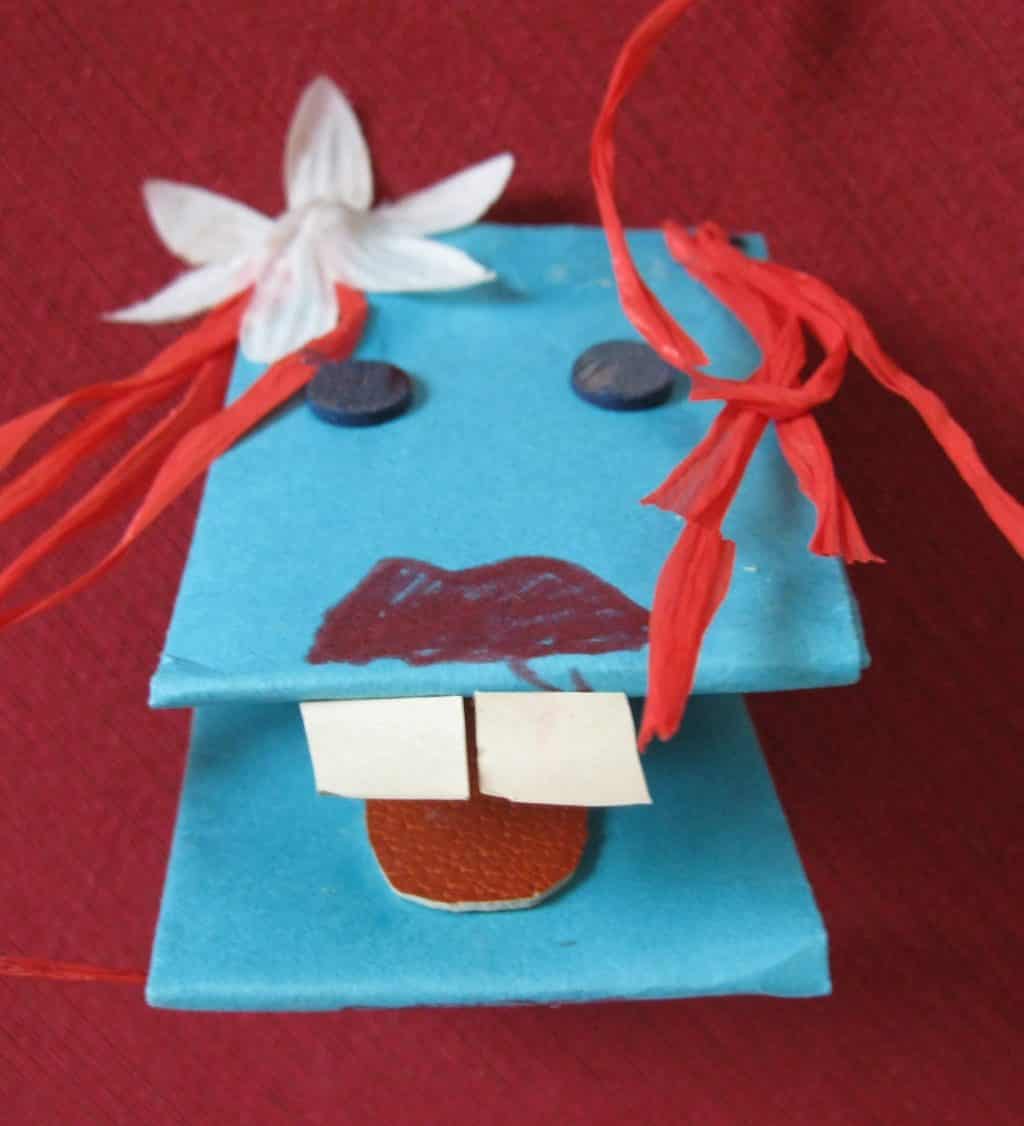
The first time I introduced Origami, I reassured my students that they would be able to create their own ideas once they knew how to make a variety of folds. Two weeks later, a second grade child presented me with her own idea. With only seven simple folds she had created a puppet. I asked her how she did it. She reported that first she folded it and then had to figure out what it was. After playing with it, she discovered it was a puppet. Many years later I found it illustrated in a book. Knowing this child, I believed she created it by herself.
 Materials: The Puppet
- Colored paper 8½” x 11” or 8½” x 5½”
- The 8½” x 5½” size is best for younger children. It is easier for them to open and close the mouth.
- Old file folders or heavy neutral-colored cover paper to make the steps
- Rub on numbers
- Containers for each step
- A collage tray (optional)
- 2 glue sticks in a container
- 2 scissors
 Preparation: The Puppet
- Cut 7 pieces of Manila colored heavy paper for the steps you will make.
- Choose the containers you will use. Label them 0-7. Zero
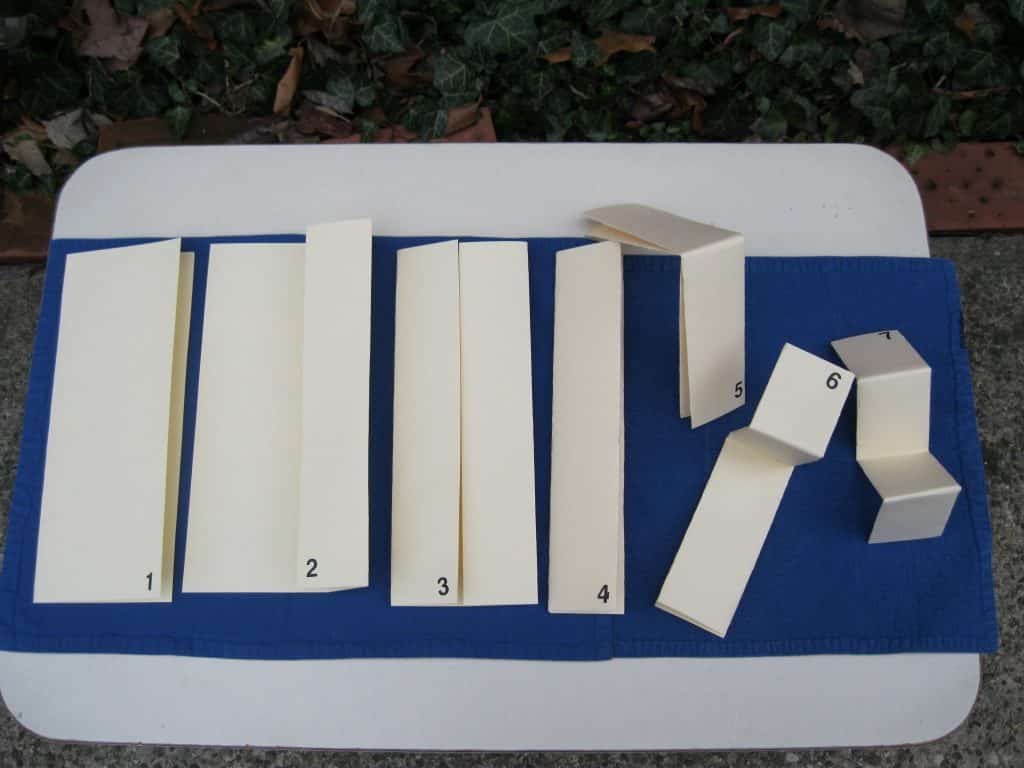
is paper the with no folds. - Create the seven steps. The directions are for 8½” x 11” paper.
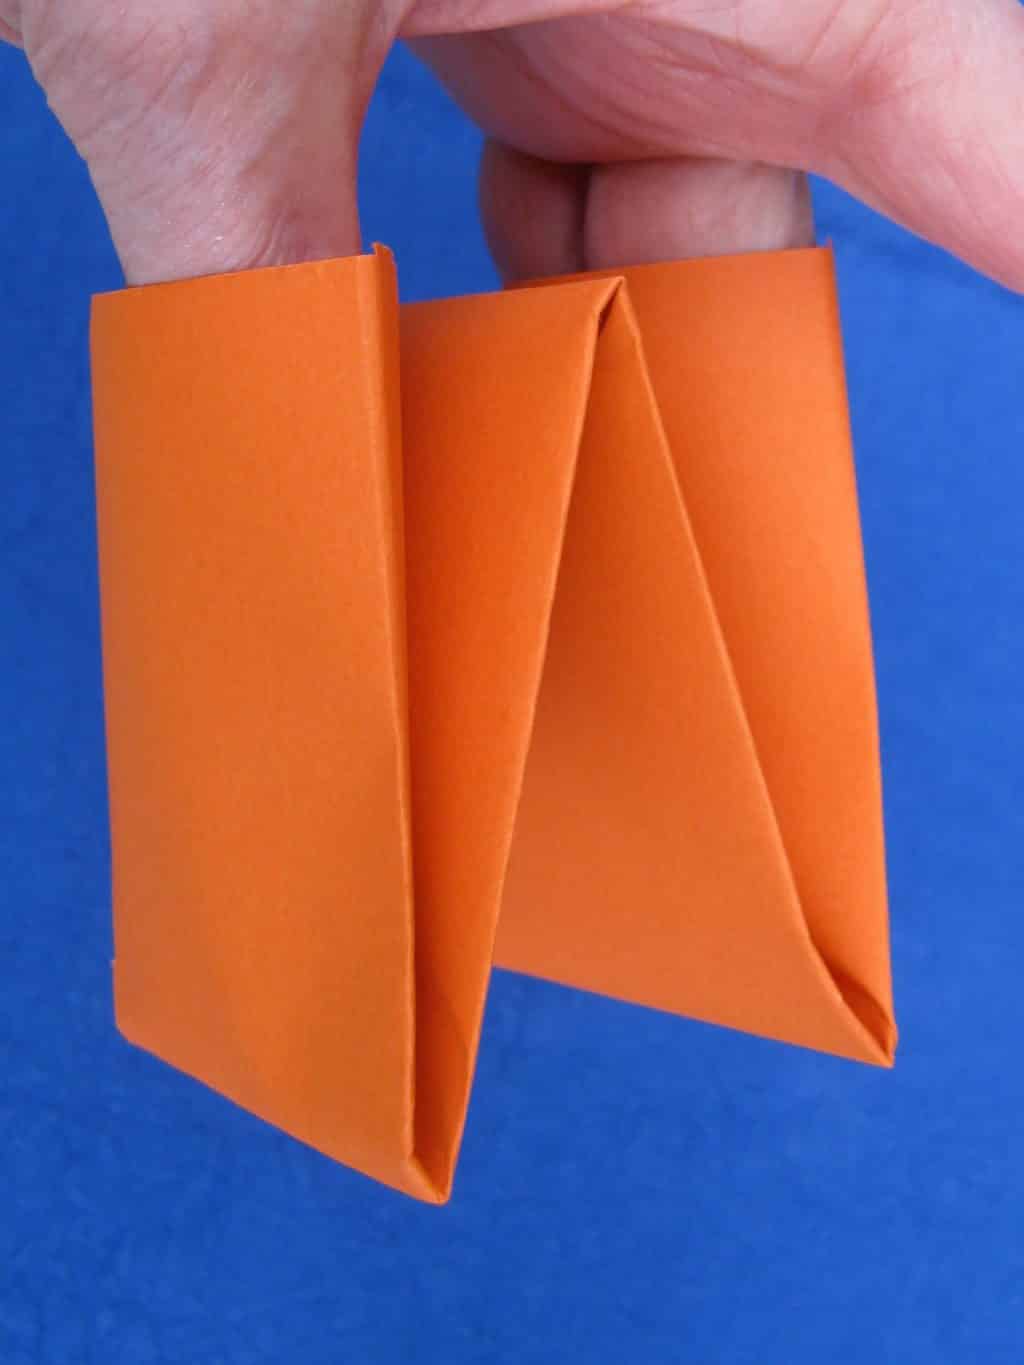
- Fold the paper in half by bringing the two long sides together (11” x 4¼”). Crease the edge.
- Unfold the paper. Fold one long side into the middle. Line up the edge to just meet the center crease (11” x 6⅜”). Crease the new edge.
- Unfold the paper. Fold the other side into the middle (11” x 6⅜”). Crease the new edge.
- Fold both long sides back into the middle, which folds the whole thing in half. (11” x 2⅛”)
- Fold the strip in half (5½” x 2⅛”). Crease the new edge.
- Fold one end up to the middle crease. (2⅛” x 2¾”). Crease the new edge. Turn it over.
- Fold other end up to the middle crease (2⅛” x 2¾”). Crease the new edge. It will look like a W or an M.
- To operate the puppet, fold the sections together. Insert your thumb in the bottom most fold and your index finger and middle finger in the uppermost fold. Push your fingers all the way in. Open and close the mouth.
- Number each step.
- Put out at least 12 pieces of paper. Replenish as needed.
- Put the glue sticks in their container if using.
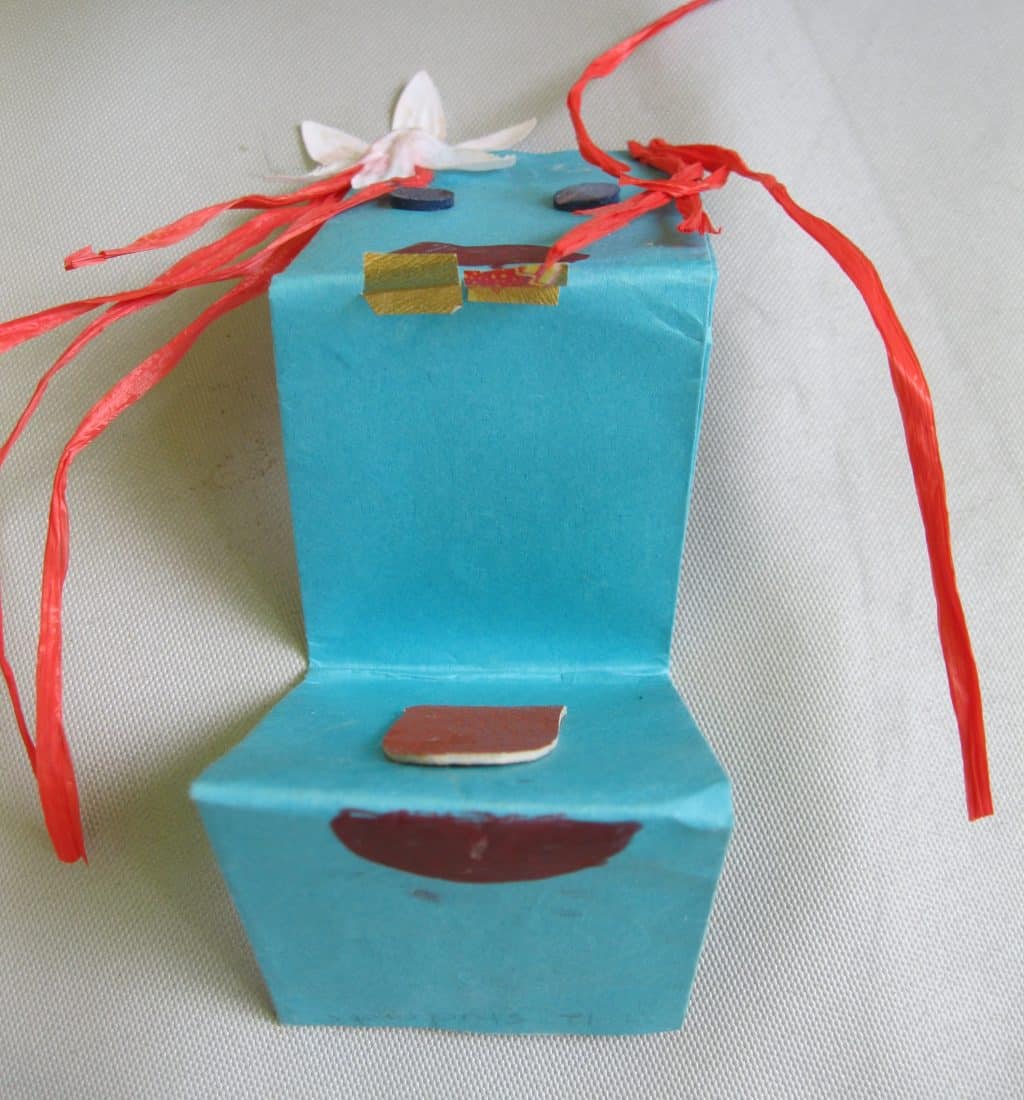
- Make a collage tray. Include thin markers and anything to make hair, ears, hats, facial features, tongues and teeth. Please, no store-bought wiggly eyes – they short-circuit creativity (See: Materials: The Star).
- Make a simple finished puppet and decide how to display it.
- Choose a place for the work.
- Encourage the children to develop a character they can animate.
 Presentation: The Puppet
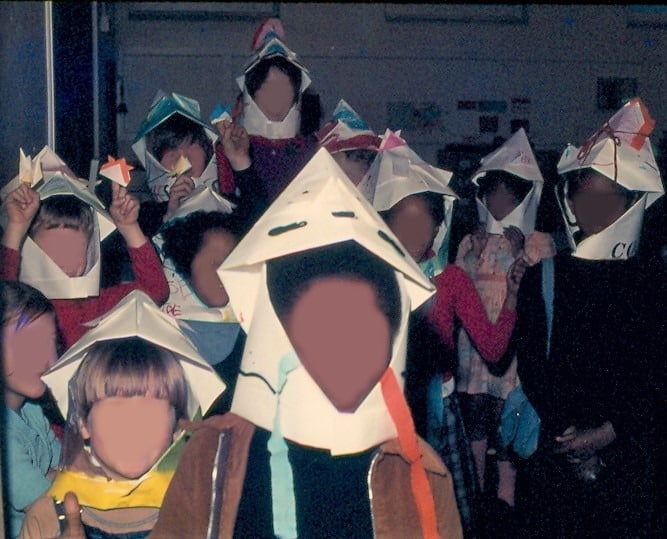
- Tell the story about how a child made the puppet. Let them know that the basic design of the puppet was someone else’s idea, but they will make it into a character that is their own. It is up to them to make it what it is.
- Choose a piece of paper and offer paper to each member of the group.
- Remove step 1 and demonstrate how to make it. Demonstrate how to crease the fold. Assist where needed.
- Replace each step and go to the next until the puppet is finished.
- Introduce the collage materials. It is important to give simple information that will help the children realize their idea. Show where the mouth is. Our eyes are in the middle of our head so they would appear in the middle of the rectangle. Our ears do, too. Animals have eyes higher the on head and their ears are higher, too.
Extensions: The Puppet
- Ask the children what they would like to do now that they can make a simple puppet.
- Make puppets of the characters from a book the class likes.
- Create a play or plays using puppets. Make a movie with them.
- Create your own Paper Folding Club. Meet during lunch, after school, or in the evening when parents and siblings can attend. Will your group need childcare?
 Resources: The Puppet
- See: Resources for The Star above
- There are several Videos available for making a boat. Search the internet using “Zhezhi / Origami boat instructions”.
Georgie Story
One of my undergraduate painting professors noticed how dirty our brushes were. The following lesson is very similar to the one he gave to our class. I gave this lesson once a year to each level I taught. It was usually an end lesson in the first part of the year. The lesson can also be isolated and given as a practical life exercise if simple watercolor painting is in the environment (See Art Forms I).
Introduction:
Simple watercolor painting and tempera painting will require clean brushes. Brush cleaning is an advantageous activity when either or both are in the environment.
I gave group brush-cleaning lessons. It can always be given as an individual lesson. You will need a small bar of soap in a container at the sink stash if your students clean their hands with liquid soap.
The activity can be isolated and structured like silver polishing, or can become a part of the small classroom cleaning station (See Practical Life).
All Levels:
- Prerequisite: Practical Life activities that teach children to control water
- Direct Aim: To clean a brush
- Indirect Aim: To build respect for the care of tools
- Point of Interest: Remember to place brushes with bristles up in containers!
Materials:
- A dirty brush used for painting
- 1 apron (from the painting station, from the cleaning station or from a general place you use for aprons)
- If you have your own apron, find a special place to keep it.
- Invite children who need a larger apron to use yours.
- A bar of soap in a container
- A bucket
- A damp sponge from the sink
- If you have your own apron, find a special place to keep it.
Note: Personal-size bars of soap and cleaning sponges were at the sink at all times in my environments.
Preparation:
- Gather all the materials for your lesson on your teaching mat or table
- Use a dirty paint brush from a painting activity.
- Use a bucket from under the sink, filled ⅓ with water.
- Bring a bar of soap and a damp sponge from on top of the sink.
- Select an apron.
Presentation:
Group Presentation using materials available at the sink
- “Put your apron on”.
- “This is a bucket from the sink filled with water up to about here.” Show them where the water ends.
- “I chose a dirty brush for the lesson.”
- “Put the brush in one hand and the soap in the palm of the other.”
- “Dip the brush in the water. Wiggle it around in the water to get it wet. Pull it out of the water and wait until it stops dripping.”
- “Rub the brush over the soap gently until the brush is filled with suds. Tickle the soap with the brush; be gentle. The paint in the brush colors the soap.” Put the soap down.
- “With your palm up, run the soapy water around your hand to clean the color out of the brush.”
- “Grab the bottom of the bristles and gently wiggle the hairs of the brush toward you and away from you. This small movement drives the soapy water up to the metal tube called the ferrule which holds the bristles.”
- “Rinse the brush, your hand, and the soap in the bucket.”
- “Wring out the sponge and wipe the color off the soap.”
- “Repeat the process until no color comes out of the bristles and the suds are white.”
- “Rinse the clean brush in the water.”
- “Wipe off the soap with the sponge and return the soap and its dish to the sink.”
- “Rinse the brush in running water. Rinse the sponge out in running water. Gently squeeze it dry, wipe off the brush handle, then run the bristles gently over the sponge to remove water.”
- “Put the bucket into the sink. Turn it over to empty it. Rinse it out with clear water. Return it to where the buckets are stored.”
- “Rinse the sponge again and dry your hands.”
- “Return the damp sponge to its sink container.”
Extensions:
- As a practical life activity, structure the activity like silver polishing.
- Clean brushes at a Small Cleaning Station (See: Practical Life).
- Place the following two items first before the other equipment to be cleaned.
- The dirty brushes in a container (bristles up)
- A small cake of soap in a dish
- An apron, water, and sponges are a part of the cleaning station.
- Place the clean brushes flat on the drying towel or in a container with bristles up
- Place the following two items first before the other equipment to be cleaned.
Resources:
- Dollar Tree: Several brands of small bars of soap are available online or in the store, packed 2 or 3 for $1
- No soap was provided for my studios so I bought small bars of travel soap in a large quantity. They lasted for 5 or 6 years.
- Home Depot: 1-Gal. White Plastic Pail (Pack of 3)
- Amazon: Sponges O-Cel-O Handy Sponges, Assorted Colors, 4 Count (Pack of 4)
Introduction:
Painting, like drawing, is an important art form to have in the environment at all times, especially if you are a Montessori art teacher. Each level is presented in a different manner. All levels are open ended and each requires more control of the material as the children grow in age and experience.
The following painting activities were presented on tables. Easels could be used for 6-12s if there is adequate space to include a small worktable for painting equipment beside each easel.
All Levels:
- Prerequisite: 5-12 Ability to control water, Simple Watercolor Painting
6-12: Ability to clean a brush - Introduction to Traditional Ideas
Introduction to the Art Continuum
(See: The Art Chart and Generating Personal Ideas) - Direct Aim: Creative expression
- Indirect Aim: Preparation for using advanced materials
- Point of Interest: 5: “Could you use anything you are learning as the idea for your painting?
6-9: “Would you enjoy using one of the traditional ideas for making your painting?”
9-12: “You might think about using a photo you took as the idea for your painting.”
Tempera Painting: 5
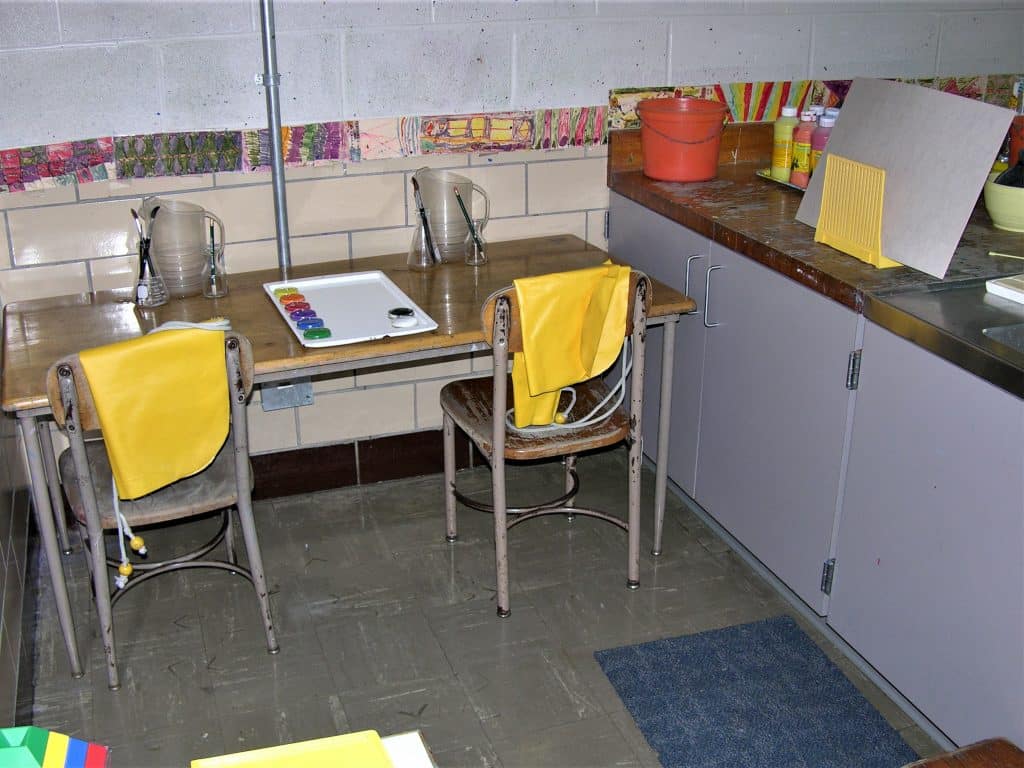
Materials for 2 Children:
- 1 palette [See: Resources below]
- Paint cups with covers and matching brushes
- Washable tempera paint
- Sheets of bogus paper, mixed media paper, bristol paper [See Resources]
- 12”x18”, 12”x15”, 12”x12”, or 11”x14”
- Acid-free paper will preserve children’s art work and is more expensive than bogus paper
- Note: I chose bogus paper (a softer form of recycled kraft paper) over bristol It was less expensive. Bogus paper is more absorbent and holds more paint. Colors seemed more brilliant and interactive on the gray surface. Young children tend to leave small and large unpainted spaces and shapes. The neutral color of the paper visually becomes part of the painting.
- 2 pencils in a holder
- 2 water pitchers
- 2 damp sponges 4” x 4” x 1”
- 2 trays (or a plastic tape square) for sponges when not in use
- 2 aprons
- A teacher’s apron for the presentation
- 1 sink bucket for the presentation
- A place to display paper
- A place and/or equipment for drying work (See The Environment)
- Table or easel
- Water-resistant mat or low table for the presentation
Preparation: 5
- Fill each container with 1½” of paint.
- Place the brushes in the pots.
- Place the containers on the palette, arranging the colors in an instructive manner, e.g.,
- Y, O, R on the left, P, B, G on the right, W, BR, BL at the bottom or top
- Place the palette of colors in the middle of the table.
- Put a water pitcher and a sponge in a container at the top of the table above each workspace.
- Decide where to place each apron.
- Cut paper to size(s) if needed.
- Dampen sponges and cut to size if necessary.
- Place sponges on a tray or make tape shape on table
- Find a place to display the paper close to the activity.
- Place the pencils next to the paper.
- Prepare the drying space.
- Each day make sure the sponges are damp.
- This book is an excellent resource for young children’s artwork:
- Kellogg, Rhoda. Analyzing Children’s Art. Palo Alto, CA, National Press Books, 1969.
Presentation: 5
Note: This is a group lesson presentation. You can choose to give it individually. You are welcome to develop your own idea for the presentation.
- Have the work set up on a low table or on a mat on the floor for the presentation.
- “This work is called tempera painting because tempera is the name of the kind paint you will be using.”
- “You can see that each color has its own container and its own brush.”
- “To start, put your apron on.” Put your apron on.
- Go to where you have the paper. “Your paper is here. Write your name (and room number) on the back of the paper.” Then bring the paper to your work space. Use your own way to get names on the work.
- “Fill the pitcher half way up with water.” Go to the sink and demonstrate how to get the water. Carry the pitcher with two hands.
- “Before you begin painting, sit and think silently for a few seconds. Have in mind how you are going to begin, and what you are going to paint.”
- ”I am going to paint a mandala. Mandala is the Sanskrit word for circle. Children all over the world discover by themselves how to make Mandalas.”
- “For the idea to be a mandala it will have circles with squares and crossed lines inside them.”
- “What color do I want to use first?” Choose a color and make a big circle in the middle of the paper and then stop.
- Turn the brush up toward yourself so you can see its tip. “The tip of the brush is still yellow.” Show the group the tip of the brush. “It is yellow so I can put it back the yellow container.” Return the brush.
- “A mandala can be made with a square so I will add a square to my idea with blue paint.” Paint a square around the circle so close that the brush picks up some of the yellow paint where the circle meets the straight line of the square.
- Look at the brush tip. It will look green. Show the tip to the children.
- “If I put this brush back into the blue paint pot the blue paint will start to turn green so I will clean it before returning it to the paint pot.
- Swirl the brush around in the water, wipe the brush on the rim of the pitcher to remove as much water and paint as possible and swipe the bristles over the sponge to remove more water. Look at the brush tip. “It is clean.” Place the brush in its pot.
- Choose another color. Make horizontal and vertical crossed lines in the middle of the circle. Look at the brush tip. Clean the brush when needed.
- Add diagonal crossed lines and check the tip of the brush.
- Quickly fill up the spaces with color and more shapes. Keep checking the tip and showing the children when the end is not the color of the handle.
- Put your wet painting where the children will put theirs. Demonstrate how it is done.
- Clean up the work. Demonstrate taking the pitcher to the sink with two hands. “Put the pitcher down into the sink and then turn it over. Rinse out the pitcher and the sponge with water. Squeeze the sponge out and dry the pitcher with it.”
- Use a sink bucket and sponge to wipe up any paint still present on the table,
- Return the materials to the work table. Release the students to choose their work.
Note: Spills can more easily occur when a child pours the water out from the rim of the sink.
Extension:
- The children may wish to add collage materials to their paintings if a collage tray or collage center is available.
Resources: All Levels
- Paint Holders
- 5s: Discount School Supplies: Colorations No-Mess Paint Cups, set of 10, 2½” diameter x 3½” high, 8 oz
https://www.discountschoolsupply.com/Product/ProductDetail.aspx?product=44 - 5s: United Art & Education: Creativity Street No-Spill Paint Cups, set of 10, 3” diameter x 3¼” high, 8 oz
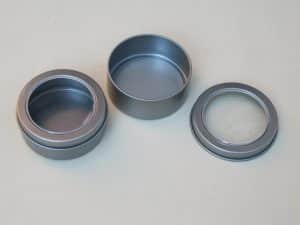
https://www.unitednow.com/creativity-street-no-spill-paint-cups - 6-12 paint holder: Magnetic Tins (Dollar Tree item 237626)
- 5s: Discount School Supplies: Colorations No-Mess Paint Cups, set of 10, 2½” diameter x 3½” high, 8 oz
- Brushes 6-12
- 5s: Discount School Supplies: Colorations Plastic Chubby Paint Brushes, set of 10, 7½” long
https://www.discountschoolsupply.com/Product/ProductDetail.aspx?product=45 - 5s: United Art & Education: Kid Dynasty Stubby Brush 10-Count Set
https://www.unitednow.com/kid-dynasty-stubby-brush-10-count-set - United Art & Education: Crayola Round Brushes Set
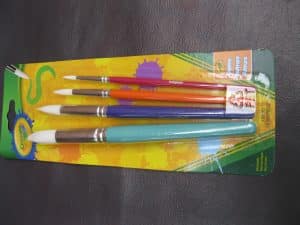
- Dick Blick: Crayola Wood Handle Watercolor Brushes, sizes 2, 4, 6, 8, 10, 12
- 5s: Discount School Supplies: Colorations Plastic Chubby Paint Brushes, set of 10, 7½” long
- Tempera Paint
- School Specialty : Crayola Artista II Tempera Paints, pints, (high quality of color and washable, also available in quarts)
- choose each basic color: yellow, red, blue, orange, green, purple, black, white
- Butcher Tray Palette
- (5-12s) 11” x 15”: Dick Blick item 03066-1015
- Dollar General, in store: Restaurant water pitchers
- Paper
- com: Higher quality, acid free: 400 Series, Toned Gray Mixed Media, 11”x14”
www.utrechtart.com/Search/Default.aspx?src=strathmore+toned+gray+mixed+media+paper&Search=+ - United Art & Education: Art1st Mixed Media Art Paper, 80 lb, 500 sheets/ream
https://www.unitednow.com/art1st-mixed-media-art-paper-reams - United Art & Education: Bristol paper
Strathmore 300 Series Vellum Bristol Pads,
https://www.unitednow.com/strathmore-300-series-vellum-bristol-pads - United Art & Education: Pacon Gray Bogus Paper
https://www.unitednow.com/pacon-gray-bogus-paper
- com: Higher quality, acid free: 400 Series, Toned Gray Mixed Media, 11”x14”
- Drying Racks:
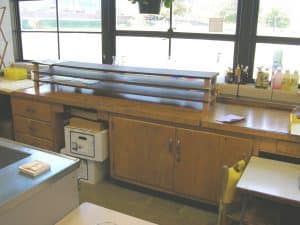
- Discount stores: Clotheshorse
- Amazon: edx education Paint Drying Rack
- Homemade rack (See: Photograph in Preparation below)
- Sponges:
- Amazon – you choose
- Boardwalk Large Cellulose Sponge, 4 3/10 x 7 4/5, Yellow, 24/Carton – dampen & cut these in thirds to make 72 child-size sponges
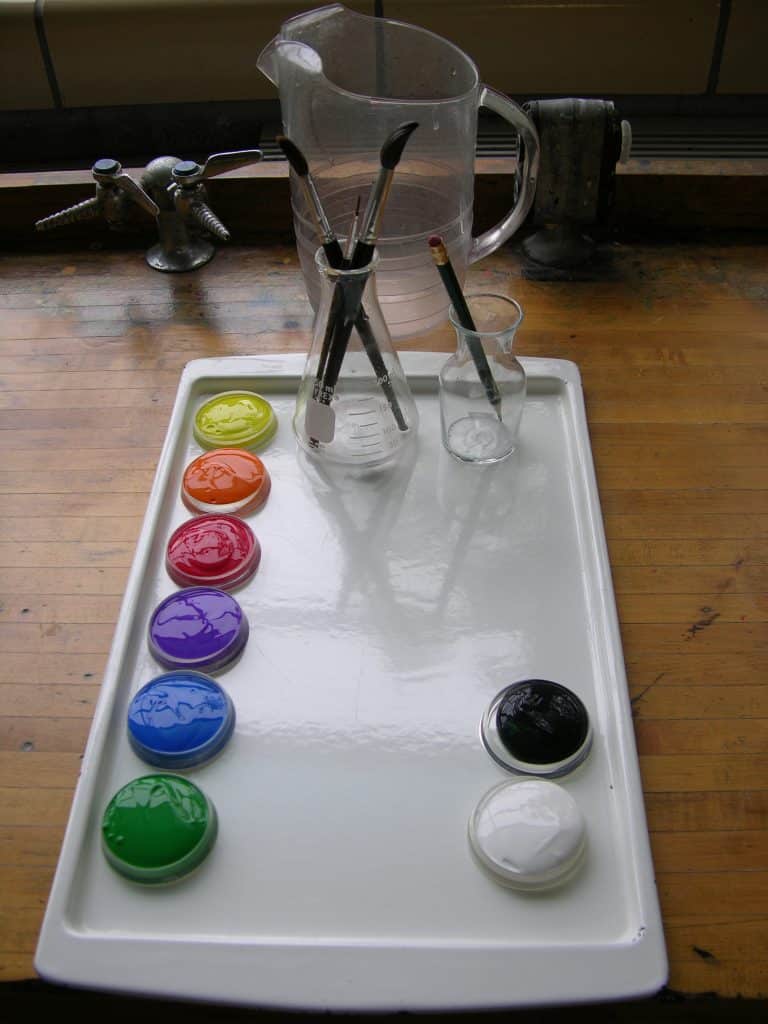 Tempera Painting: 6-9
Introduction:
An unnamed, creative Montessori teacher suggested using large furniture cup casters as an ideal way to display individual colors of tempera paint on a palette. It seemed the information circulated by “word of mouth.” What a good idea. I had at least 24 of them when I was still teaching. I displayed one set of 8 colors on a palette and had two sets ready to use on a covered palette which was close by. That way I could replace any empty color container while the children were still in the studio. These cups are apparently no longer available (See: Resources for replacements).
Note: There are children who love to clean. Be observant for the “super cleaners.” These children will clean up every paint container – sometimes even those that were not used – doing a great job of making the activity look perfect while using up a lot of paint unnecessarily. Supervise their cleanup, instructing them not to clean pots unless all the paint has been used or the paint has been contaminated with other colors. At another time, introduce them to the small cleaning station and/or brush cleaning.
Materials for 2 Children:
- 1 butcher tray palette 11”x 15” [See: Resources]
- 8 metal paint containers with covers [See Resources: Magnetic Tins]
- Washable tempera paint
- Sheets of paper: Acid-free paper will better preserve children’s art work and is more expensive than other papers.
- The size of the paper may be controlled by the type of paper selected or cut to a desired size
- 11”x14”, 12”x18”, 12”x15”, or 12”x12”
- 3 or 5 brushes: You choose the brushes.
- 1 large rectangular table
- 2 restaurant water pitchers (to clean brushes when changing colors)
- 2 aprons
- A place and/or equipment for drying work (See The Environment)
- I had clotheshorses in two studios for younger children’s work.
- In the last 5-9 environments, I made a large long drying rack using finished boards separated by 2” x 2” x 4”–5” pieces of wood (see photo).
- A container to display paper flat, or loosely rolled up and stored vertically in a plastic trash can
- 2 pencils in two holders: 1 at each painting station, or two pencils in one holder next to the paper
- 1 gallon bucket from under the sink
- 1 sponge from the sink
- Water-resistant mat or low table for the presentation
Note: The word palette means the surface used to mix color, but also describes the range of colors used to make the work of art.
Preparation:
- An important part of the presentation will be how you introduce your idea. Let the children hear all the ideas you thought to use and pick one. If you wish, you can choose to make a Mandala (See: The lesson for 5s above). Whatever you choose make it simple, such as features from the landscape around you, a plant in the environment, your sleeping cat, or the sun, moon and stars, etc. Fill the whole paper with paint.
- Practice giving the lesson and making the painting. This will reduce the time taken to give the lesson.
- Gather the equipment and materials needed to set up the table.
- Set out the brushes and pencils in their containers, and the water pitchers.
- Fill the metal paint containers and arrange them on the palette. Cover them if done way ahead of using them. Carefully remove the lids before class begins, so the paint doesn’t spill out.
- Place the palette in the middle of the work space if the setup is for two people. If it is setup for one person make sure the open area for mixing colors is closest to the painter.
- Place the paper stock as close as possible to the painting table.
- Decide on the size and kind of paper you wish to use. Cut the paper to size if needed.
Presentation: 6-9
Note: You are welcome to develop your own idea for the presentation.
- This is a group lesson. Have the work set up on a low table or mat just like it will appear on their work table. Have your paper, half filled water pitcher, brushes, and apron at the work space. Have a bucket ⅓—½ full of water with a sponge. Have in mind what you are going to paint. Have your name and room number on the paper.
Note: Having everything ready to paint puts the emphasis on the painting part of the lesson. The important details will come at the end of the lesson as you put things away and just before the children choose work.
- “This work is called tempera painting because tempera is the name of the kind of paint you will be using.”
- “Write your name (and room number) on the back of the paper as I have done.” Show them the back of the paper.
- “You can see that each color has its own container and there are 3 (4) different sized brushes.”
- “To start, put your apron on.” Put your apron on.
- Sit and think silently for a few seconds before continuing the lesson.
- Share several ideas.
- “I am going to paint the sun………and the earth too!”
- Draw a large circle using yellow, orange, and red paint. Make the edge bumpy. Mix color right on the paper. Fill the shape with paint. “The sun is enormous compared to the size of the earth.”
- Clean out the large brush in the water pitcher. Wipe the bristles on the rim of the pitcher to remove as much water as possible. Leave the larger brush on the palette.
- Below and to the right (left) of the sun paint a very small blue circle using a small brush. Use white for tiny clouds and blue for the water. “The earth looks small because it is very much smaller than the sun and I want it to look far away.” Leave the brush on the palette.
- “I am going to paint the space around the sun with a dark color.” Use the large brush again. Mix purple with blue and a touch of orange on the palette.
- “If you run out of space for mixing colors, squeeze water out of the sponge that is in the bucket. Use the damp sponge to clean a space to continue to mix paint. Put the sponge back in the bucket.
- “You can mix the colors right on the paper” Put black around the edges of the paper and use your brush to mix it with the purple and blue right on the paper. “I am finished for now.”
- “After the paint is dry, I will add small dots of paint for stars.”
- “Watch where I go to store my work until it is dry.” Give necessary instructions.
- “It is time for me to clean up.” Give the following instructions to restore the work.
- “Clean the palette with a damp sponge.”
- “Swish each brush around in the bucket of water to remove as much paint as possible, then wipe on a damp sponge. Replace the brushes in their container, bristles up.”
- “I am going to return the painting activity to its place on your table.”
- Use the damp sponge to clean off the teaching table (mat). “Clean your space on the table.”
- “Take the bucket of dirty water and sponge to the sink.”
- Exaggerate your next movement. “I am putting the bucket down into the sink and then I will turn it over. Rinse out the bucket. Rinse out the sponge.”
- “Wipe the outside of the bucket off with the sponge and return the bucket to its place under the sink.”
- “With two hands take the pitcher to the sink” Put the pitcher down into the sink turn it over. “Rinse it out and wipe the drips off with the sponge.”
- Place the pitcher on the table.
- “Clean and refresh the sponge in running water. Squeeze all the water out of the sponge and wipe off your hands. Place the sponge in its container on the sink.”
- Return the brushes to the work table.
- Remind students to wash their hands with soap and water, and that “Paper towels are only used to dry clean hands, not for spills and cleanup.”
- Show the children where the paper stock is located. Take the apron off and show the children where they will find theirs.
- Dismiss the students to choose their work.
Extension:
- The children may wish to add collage materials to their paintings if a collage tray or collage center is available.
Resources: See Resources: All Levels, above
Tempera Painting: 9-12
Introduction:
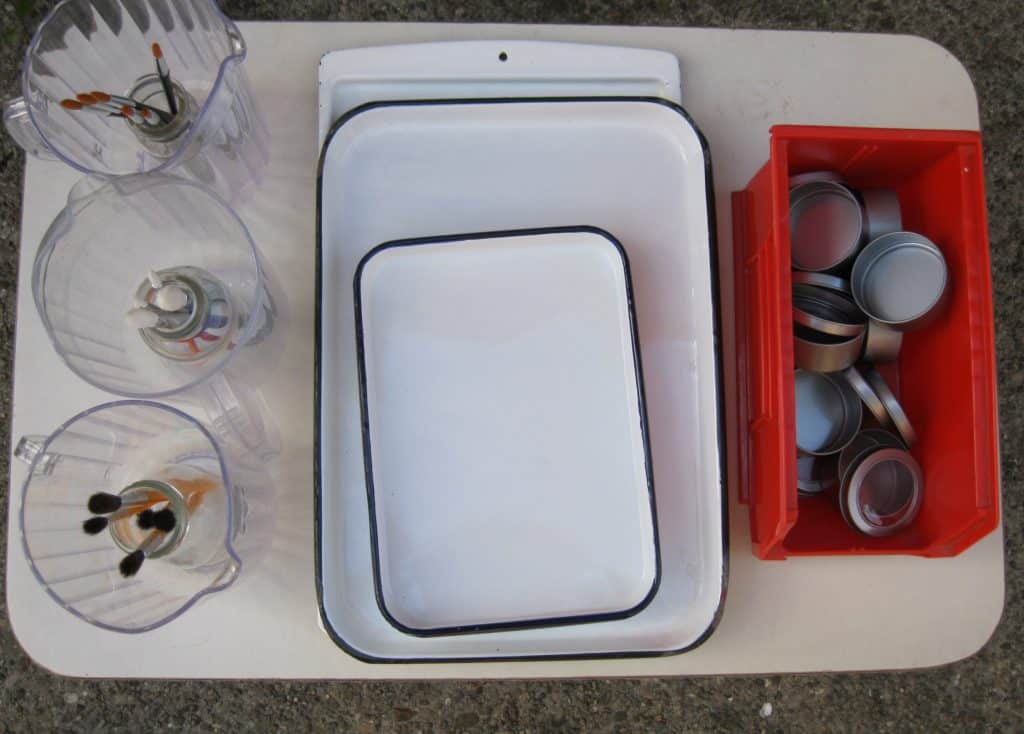 At the beginning of each school year, I set up the tempera painting activity just as it had appeared in the 6-9 studios but only for one person with the paint bottles nearby. Tempera painting is still interesting to 9-12 students. Give the 6-9 presentation especially if you have students new to the school or if it is also new to you. If so, review the 6-9 Lesson above.
The medium is also used with other art forms such as collage sculpture, papier-mâché or scratch board. When you and your students are ready to increase the flexible use of the medium, an open display of equipment allows students to set up the painting equipment in a space that suits their needs. The original space provided can still be used to paint a two- or three-dimensional art form. The materials can be carried to a prepared table or floor space. When the materials are unstructured, a presentation needs to be given about how to set up a palette and the work space.
Since each student was given a work plan, I had a good idea of what I needed to have ready for each class at that level.
Note: The word palette means the surface used to mix color, but also describes the range of colors used to make the work of art. A 9-12 year old painter can choose the colors they wish to use especially if they are aware of different color schemes.
Open Display Area of Painting Materials and Equipment
Introduction:
Once the 6-9 presentation has been reviewed, the following structure is possible. The space given to painting is still available as one place to use tempera paint. The students are able to assemble what they need to use tempera paint anywhere it is needed.
Preparation:
- Place 8 or 10 one-pint bottles of Crayola Artista II tempera paint in a row on a shelf (windowsill) wherever they were kept when tempera painting 6-9 style was first introduced.
- The 6-9 equipment is arranged in the order they are needed for using tempera paint.
- 2-3 metal palettes stacked on top of each other
- They do not need to be the same size
- 2-3 restaurant water pitchers
- A container of 3-5 different sized brushes in each pitcher, bristles up
- 1-16 empty metal paint containers with lids in a storage bin
- A separate storage bin for capped paint containers containing usable paint left by another student
- Aprons, sponges and work mats available at the sink
- 2-3 metal palettes stacked on top of each other
- Designate a drying area and/or have a desktop drying rack available
- In the first 9-12 studio, paintings were placed to dry on a step 10’–14‘ long which led up to two locked double French doors.
- I had a desktop drying rack for the last 9-12 studio.
- Prepare and place the desktop drying rack.
- The drying rack will come in pieces to be assembled.
- It might have many more shelves than you will need. I spaced mine 3-4 holes apart. You decide what you think is needed. It can always be changed.
- The rack did not hold 12” x 18” paper so I laminated 12” x 18” pieces of heavy railroad board to place on at least 12 shelves; Make more cardboard pieces if they are needed. You might also consider making smaller ones for printmaking.
- Display paper and pencils in an obvious place.
- I found an old library display piece of furniture and used it to display all the kinds of paper the students could use including a roll of tracing paper. Each space for each type of paper was labeled. Rulers and yard sticks were kept there also.
- Remind the students that aprons, buckets, and sponges are kept at the sink
- Remind the students where mats are available.
- Designate a drying area for three-dimensional art work after Collage Sculpture is introduced.
Note: You may wish to place the 9-12 Simple Watercolor Carry-All next to the tempera paint materials.
Presentation: To paint a Collage Sculpture
- “I have already shown you how to make a painting with tempera paint. Now we will see how to add tempera paint to another art form. All the equipment needed to use tempera paint is stacked up and ready to be used to add paint to other art forms.”
- “You will find equipment for tempera painting near where we made paintings before.”
- Choose a table or floor mat for the presentation. “You can work at the space set aside for tempera painting if it is not in use.”
- Suggest that students paint on a free-standing table or on the floor if several students need to paint a large project at the same time.
- Choose an art form that requires tempera paint as part of the creative process.
- Temporarily remove the name tag from the Collage Sculpture. (See: Collage Sculpture below.)
- “I have finished building my Collage Sculpture of a spaceship, and I am ready to paint it. I will paint most of the spaceship white. I am not mixing colors so I do not need a water pitcher.”
- Gather equipment from the unstructured tempera paint area as you continue the presentation.
- “I will need one small palette, 1 brush and 1 paint container. If you plan to use more than one color, you will need 1 container for each color.”
- “Fill the paint container with the amount of paint you think you will have time to use and place on the palette. Remember you can always get more.”
- “I have already gotten an apron, a ½ bucket of water, a sponge, a bar of soap, and a mat from the sink area.”
- Ask a student to help you carry your materials to the lesson.
- Paint part of the work and stop.
- Replace the name tag and put your work away to dry.
- Clean the paint holder, and wipe the container with a damp sponge.
- Clean the brush.
- Go to the area where everything belongs and return all the clean equipment.
- Note: It is not uncommon for 9-12 students to take their dirty equipment to the sink to clean up much like what they would do at home. Remind the students to clean up at their workspace. See The Sink in The Uniqueness of Montessori Art Education: Part 2 – The Environment.
Extensions:
- Paint out-of-doors.
- Add paint to another art form such as the ends of a God’s Eye, Weaving, Bookmaking, or Papier-mâché.
Resources:
- Tate, Elizabeth. The North Light Illustrated Book of Painting Techniques. Cincinnati OH: North Light Books, 1986.
- This book may help you in preparing to present painting.
- See: Resources above, for All Levels
Introduction
“Draw only what you can see” is a rule of realistic drawing. The large one million cube is perfect for introducing the concept of “Observation” and “A Point of View.” Its size allows an entire class to sit around it. Children will have a different point of view of the cube based on where they sit.
After this lesson the children will be ready to be introduced to one point, two point. and three point perspective.
The Pink Tower lesson is the prerequisite lesson that in general states that things and people seem to appear smaller and smaller the further they are from the observer.
Prerequisites: The Pink Tower Lesson in the Sensorial Section
Direct Aim: To observe a large cube: To define Observation and Point of View
Indirect Aim: To understand how the lesson information relates to realistic drawing. “Draw only what you can see.”
Point of Interest: Did you get to see more than one view of the million cube?
Materials:
- The large million cube or
- a large box with six sides
- A piece of furniture like a sit-upon that is a cube or a rectangular prism.
Preparation:
- Find a place where there is enough space to give the lesson.
- Place the cube in the middle of the space.
- Put the children in a line. Walk them around the cube to make a circle and then sit down.
Presentation:
- “Our lesson today is to observe one geometric shape. Observe means to look and think about what you are seeing.”
- “Can you name the shape we are going to observe? What is it called?” Wait for the answer.
- “It is a big cube that gives you one idea of how big one million cubic centimeters might look like.”
- “Today, we are going to look at the cube and learn something about drawing.”
- “Can you identify how many sides the cube has?” Wait for the answer.
- “Yes, it has six sides. There is one side no one can see. Which side is it?” Wait for the answer.
- “Yes, it is the bottom. We can not see it but we know it is there.”
- “One rule of drawing to make something look real is “You cannot draw what you cannot see.”
- “There are five other sides you can see. It is big enough that you would need to walk around the cube to really experience most of its sides.”
- “From where each of you are seated, the cube is so big that each of you can only see a part of it.”
- “If I asked each of you to make a drawing of the cube, your drawings would not all look the same. Let’s find out why.”
- “Each person would have a different ‘Point of View.’”
- “The point is the place where you are seated and view is what you can see.”
- “So lets find what you can see.”
- “Raise your hand if you can see the top of the cube. “
- “The top of the cube would be part of your drawing.”
- “Raise your hand if you can see one side of the cube as well as the top.”
- “Those two sides would be the only shapes in your drawing because they are the only sides you can see.”
- “Raise your hand if you can see the top of the cube and two of its sides.”
- “Your drawing would have three sides of the cube.”
- “Raise your hand if the two sides of the cube appear to be different in sizes.”
- “Raise your hand if the two sides of the cube appear to be the same size.”
- “When I asked you what shape the object was you all knew it was a cube.”
- “The cube was identified by seeing only two or three sides while the object had six sides.”
- “To make a drawing of cube look real “You only draw what you can see.”
- “The drawing of the cube will only need at the most three shapes.”
- “How to draw the shapes will be the subject of future lessons.”
Extensions:
- Put the cube from the basket of geometric solids on a low table so the children can move the cube to see different points of view.
- Think of a clever way to introduce the phrase “Point of View” in a non-art context.
Resources:
To find used Montessori equipment for sale near you, you may want to try these sites (in the United States, at least):
You may also want to contact nearby Montessori schools.

