Activities that explain and define the elements of art
Introduction:
Mixing colors seems magical to children. They even voice the word “magic” when observing a simple mixing demonstration. The color mixing exercises were always in use. The following color activities are based on the work of the Swiss artist and art educator, Johannes Itten. His book, The Art of Color, is a classic color theory curriculum. His background and teaching history are interesting.
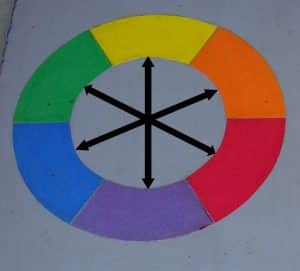
Color has five qualities. Books may only tell you there are three. The first quality is hue. Hue is another name for color. The second quality is value. Value is the lightness or the darkness of a color. The third quality is intensity. Intensity is the brightness or dullness of a color. The fourth quality of color is interaction. Colors influence each other. The fifth quality is weight. Each color by its natural lightness or darkness has a feeling of weight. Yellow is at the top of the traditional color chart while purple is at the bottom. Red and blue are closer in lightness and darkness and are on either side of purple, which is the darkest. Orange and green are darker than yellow, yet lighter than red and blue. The lightness and darkness of a color is important when mixing hues. The traditional color wheels are weighted. The lightest color is at the top and the darkest is at the bottom, and the rest of the colors follow in order of descending darkness.
The Montessori color boxes, while important, do not address all the qualities of color. There is a wealth of exciting information to be found in the study of four color groups and four color wheels. Once each of them is learned, have the children record their work. Suggestions are given, but structure the recording of the information as you like.
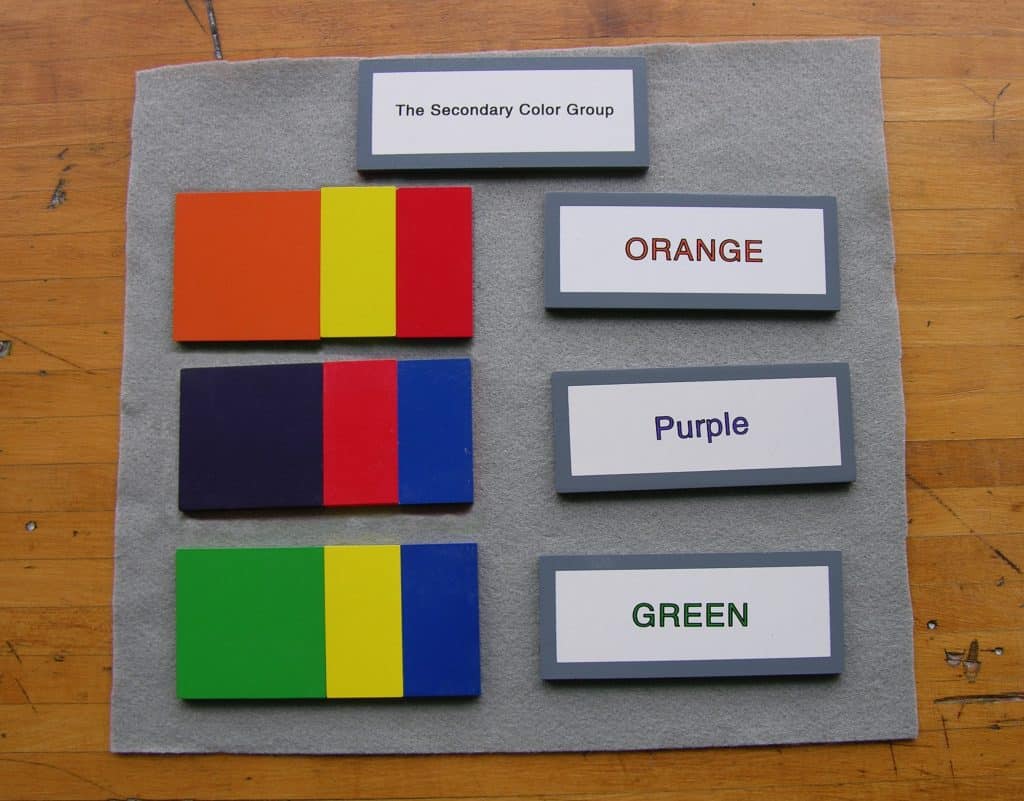
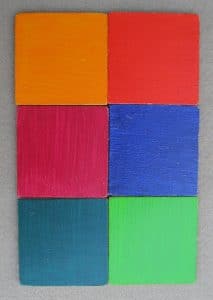
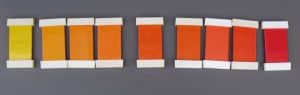
The primary colors red, yellow, and blue are not mixed colors but they can be combined to create three other groups of colors. The Secondary Colors are orange, purple, and green. Each secondary color is visually midway between the two primaries that produce it. The Intermediate Colors are yellow-orange, red-orange, red-purple, blue-purple, blue-green, and yellow-green. They are not visually balanced colors. There is only one orange but many yellow-oranges and red-oranges, etc. They appear to have more of one primary than the other. The neutral colors are brown, gray, black, and white. They are made using all the primary colors except one of them that cannot be mixed. The four color wheels reveal relationships that exist between these color groups.
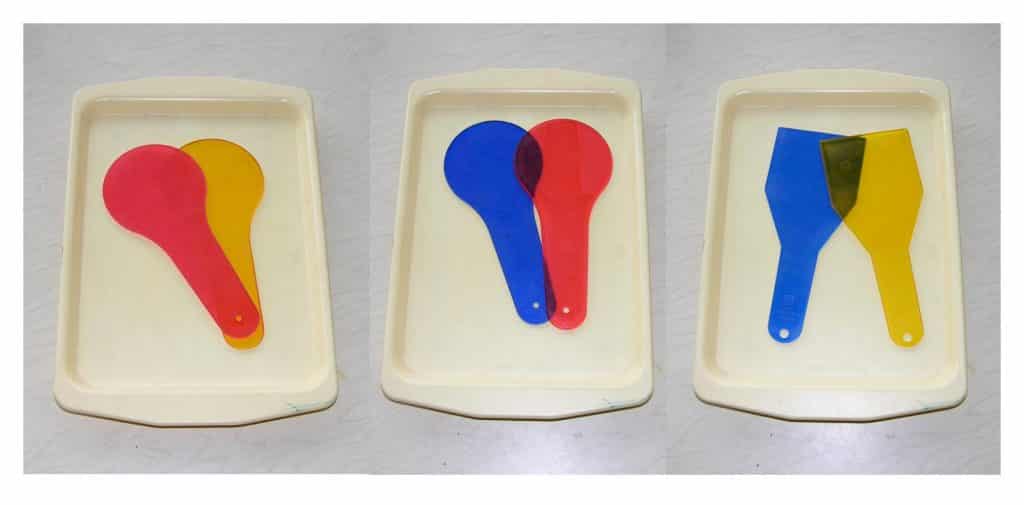
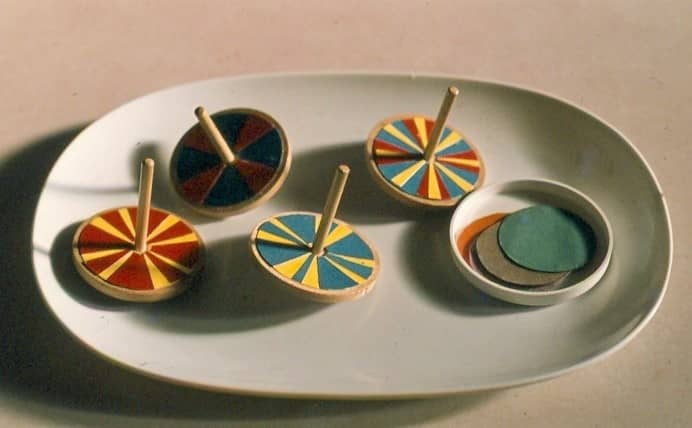
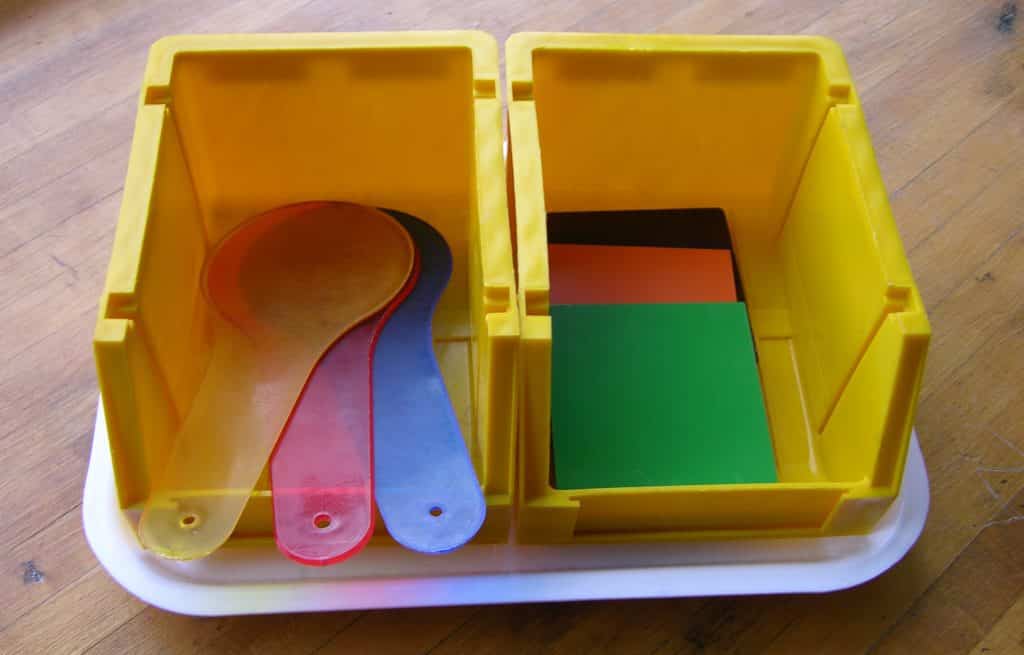
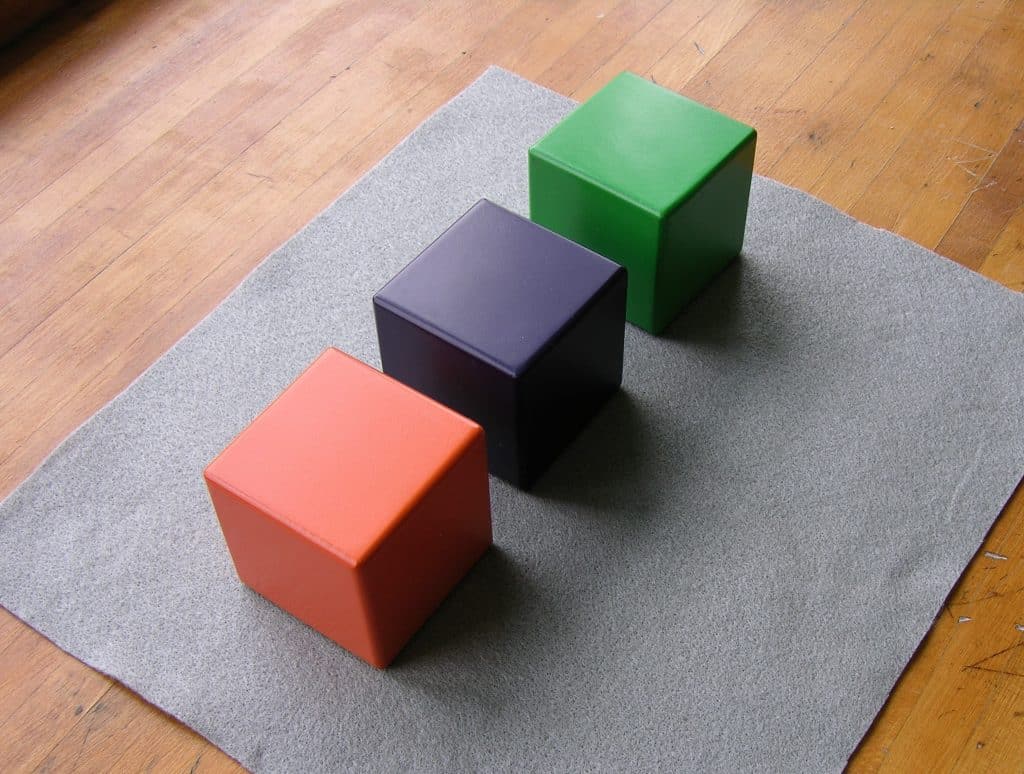
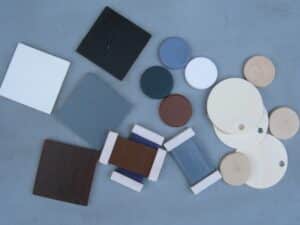
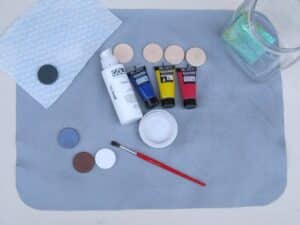
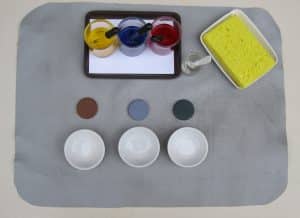
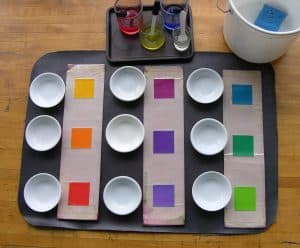
Color paddles and spinning tops – like the ones pictured here – are dry color mixing activities. Wet activities are done with transparent watercolor paint mixed in white containers. Mixing color is a sensorial activity, not mathematical. Allow the children the freedom to see when they have arrived at the color they want.
Note: The first and second color boxes start the study of color. The traditional lessons are important to give.
GEORGIE STORY
I taught five year olds, so their first discovery activities took place at home or at school before they came to me. I started color mixing while introducing water control activities at the beginning of the school year. I introduced at least 30 color theory exercises for children 5-9 and still selectively reviewed some of them for the 9-12 students before going on to more complex color work.
Introduction:
The color paddles exercise is a dry mixing activity. It can be put in an elementary environment on day one. Artistically, the colors in The First Color Box belong to a group called the Primary Colors. Primary means first, or basic. They can be mixed to make all other colors except one. Within color theory, making colors with paint is called a subtractive system. The primary subtractive colors magenta, yellow, and cyan are specific red, yellow and blue ink colors used for printing. The older 9-12 children would also be interested in the additive color system, which mixes light in the colors red, green and blue. Additive color is used to create the images on the electronic screens that they use and enjoy.- Prerequisite: The First and Second Color Boxes Use of the Color Paddles as a discovery tool
- Direct Aim: To experience finding the secondary colors without water.
- Indirect Aim: To creatively use color as a tool for self expression
- Point of interest: “Now that you know how important the Primary Colors are, you may record them for your Special Work file.”
Materials:
- Color Paddles: 2 red, 2 yellow, 2 blue
- 3 trays: white or gray
- The Primary Color Group Work sheet or recording method of your choice
- A tray for the worksheet
- Crayons, markers, or oil pastels in a container with a pencil
Preparation:
- Place two paddles on each tray
- Place a yellow and red paddle next to each other on a tray. Yellow on the left and red on the right
- Place red on the left and blue on the right.
- Place yellow on the left and blue on the right.
- Place the work after the First Color Box or on the art shelf.
- Put the worksheet and its crayons next to the color paddles.
Presentation: 5-6
- Place the three trays across the mat horizontally.
- Introduce the work by its name.
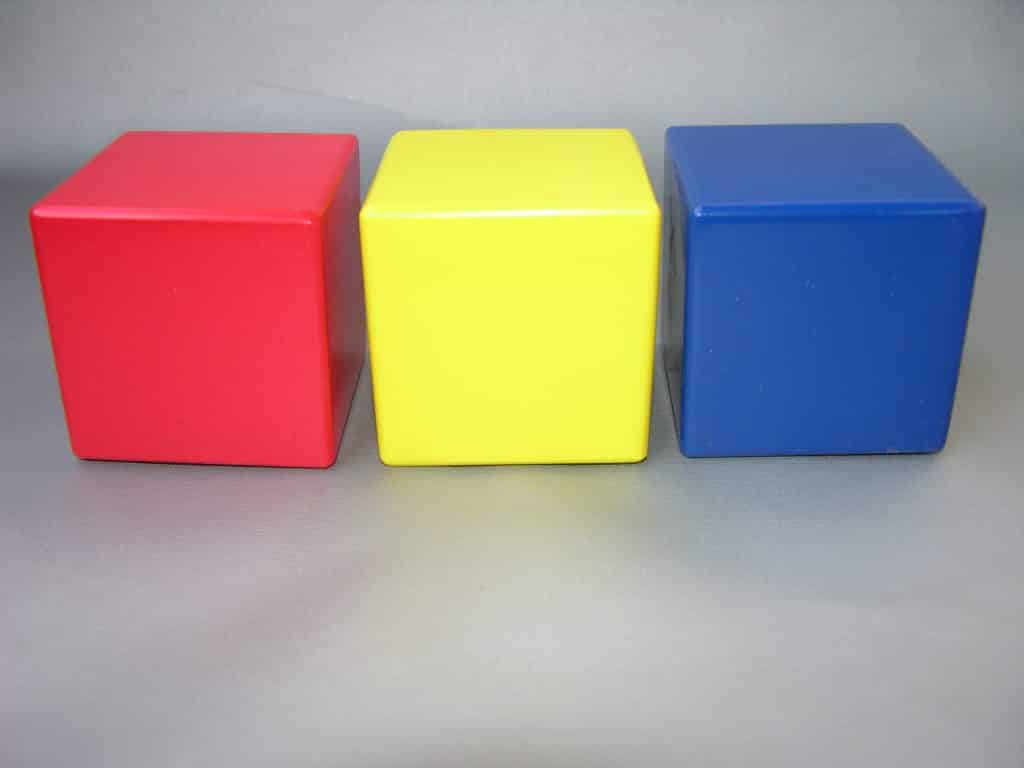
- “The First Color Box holds the colors red, yellow, and blue. This group of colors has an artistic name. These colors are called the Primary Color Group. Primary means first, most important. Red, yellow, and blue are primary colors. These special colors when mixed together will make all the colors you will need except one. We will discover which one that is.”
- “We are going to put two primary color paddles together and make a new color. Each tray will make a different color that you can name.”
- “Let’s start with the first tray.” Hold up the paddles by their handles and ask the children to name each primary color. Cross the paddles. “Yellow and red make (wait for the answer) orange. Yes, they make orange. A primary color mixed with another primary color will make a what’s called a secondary color. Orange is a secondary color.” Place the paddles on their tray.
- Proceed to the next tray. Hold up the paddles by their handles and ask the children to name each primary color. Cross the paddles. “Red and blue make (wait for the answer) Purple. Yes, they make purple. Red is a primary color and blue is a primary color and together they make a secondary color. Purple is a secondary color.” Place the paddles on their tray.
- Proceed to the next tray. Hold up the paddles by their handles and ask the children to name each primary color. Cross the paddles. “Yellow and blue make (wait for the answer) green. Correct. Yellow is a primary color and blue is a primary color and together they make a secondary color. Green is a secondary color.” Place the paddles on their tray.
- Suggest they read the color paddles with you.
- Restore and return the work to the shelf.
Extensions: Other dry color mixing activities:
- Color tops which when spun create a secondary color. (see photo)
- Transparent color swatches can be used with an overhead projector to mix secondary colors. (see photo)
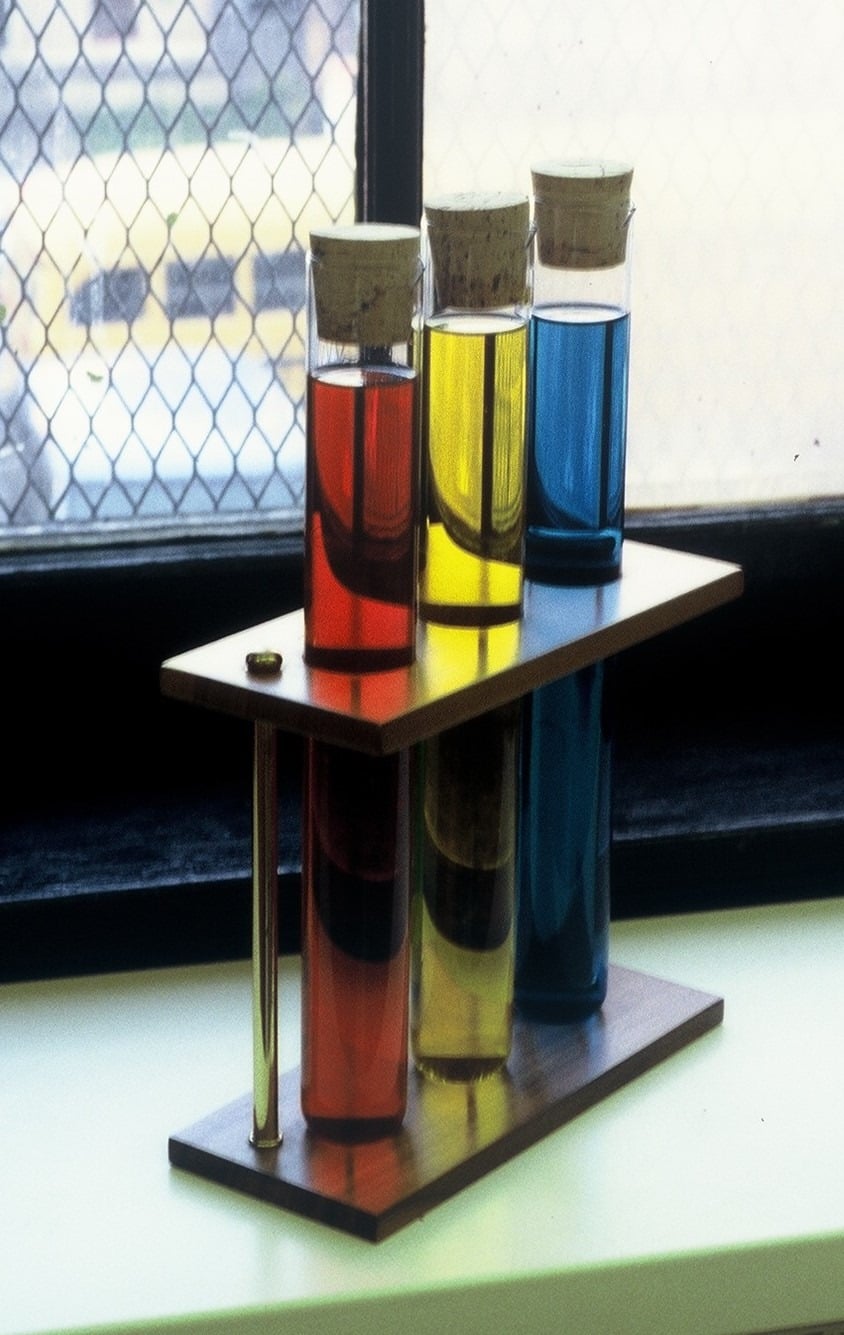
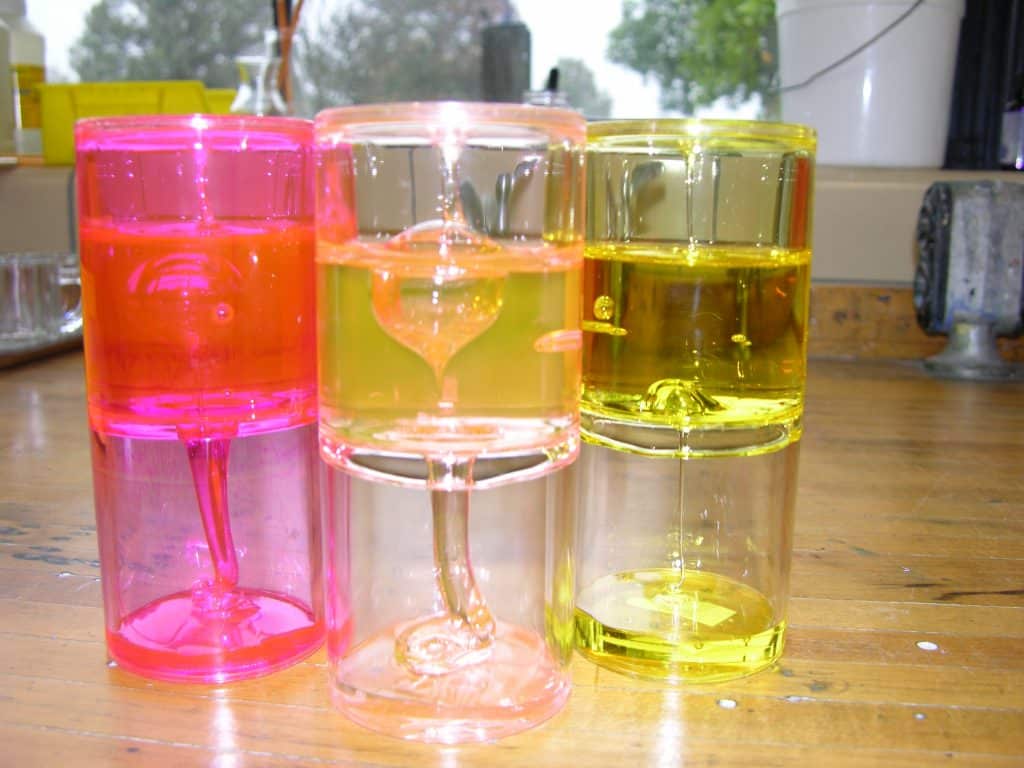
- Fill tall chemistry test tubes with the primary colors and place them where they can be seen but not touched. Place them so they will make secondary colors as you pass them. (see photo)
- Dry mixing can progress in difficulty.
- Place three primary color paddles in a container. Place one orange, purple, and green color tablet in a matching container. (see photo)
- There will be no control of error, just trial and error. Let the children discover brown with the paddles on their own.
- Place three primary color paddles in a container. Place one orange, purple, and green color tablet in a matching container. (see photo)
- You can make your own spinners. To find wooden tops, you want to search the internet using “spinning wooden tops”. The spinners pictured here use pie sections of color, but here is an easier way:
- Cut two circles of cover paper the size of the spinner. Punch a hole in the middle of the circles. Use a grommet kit to make the desired center hole size. You will need one yellow and one red circle to make orange. Glue the red circle onto the spinner. With a hole punch, scatter holes over the yellow circle. Consider using ¼” and ⅛” hole punches to reach the desired color. You will need to check your work often. To make sure the yellow circle stays in place during testing, put only a tiny bit of glue stick under it, so you can pull it up and make more holes if necessary to achieve the orange effect.
- Start with blue and punch holes in the red circle for purple.
- Start with blue and add yellow for green.
- To produce the neutral colors brown or grey, combine a circle of purple on top of yellow, or green on red, or blue on orange. Enjoy the experimentation required to get the effect you want. A small group of children would also enjoy doing this with you.
- Glue the finished pieces on top of one another and seal them with plastic spray finish. Glue the punched paper to the top.
- Ideally you want five tops; three for the secondary colors orange, purple, and green, as well as two for the neutrals, brown and gray.
- I found a set of five wooden tops #1290067479 on etsy.com through TimsWoodenToyShop. They are beautiful. I would not want to cover them with paper but one could. Use them to teach children how to use a top first.
Resources:
- Paddles and tops:
- Montessori Services
- School supply stores
- Internet
- General Tools 71264 Grommet Kit with grommets, Amazon
Introduction:
Simple color wheels are not available to buy. Manufactured wheels are very complex and do not isolate information that would make it easy for younger people to learn color theory. At this time, it is up to us to make the simple ones for our environments. There are three basic wheels, with a fourth that is optional but beautiful because it is Johannes Itten’s original full color wheel creatively edited in Elements of Color, page 31. Once the three simple wheels are mastered, it is easier for 9-12 students to use the manufactured, more visually cluttered ones to learn what they offer. For this activity I have included directions for making a model and a puzzle of the first two color wheels. Directions for making the third and fourth color wheels will be covered in a future Section – Understanding Art III.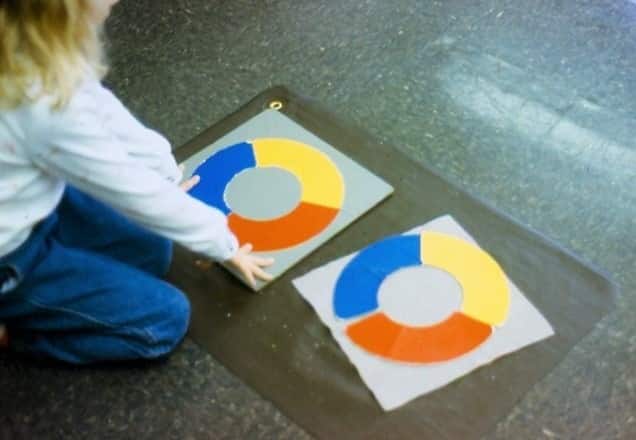 I made mine out of heavy tempered Masonite with colored paper and laminated cardboard pieces. They lasted 32 years. As an alternative, you could make the wheels out of just colored paper and have them professionally hard-laminated. You are free to make them any way you wish, maybe even as a wooden puzzle. One preprimary teacher had a parent make them out of felt; however, intermediate colors for the third wheel are difficult to find in felt, and felt is not easily cleaned.
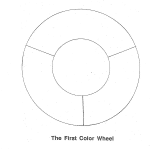
Note: A traditional first color wheel starts with yellow at the top, red on the right, and blue on the left. It is read clockwise. Because of our copyright laws, manufactured color wheels cannot always follow that tradition. Yours can, using the preparations below.
I made mine out of heavy tempered Masonite with colored paper and laminated cardboard pieces. They lasted 32 years. As an alternative, you could make the wheels out of just colored paper and have them professionally hard-laminated. You are free to make them any way you wish, maybe even as a wooden puzzle. One preprimary teacher had a parent make them out of felt; however, intermediate colors for the third wheel are difficult to find in felt, and felt is not easily cleaned.
Note: A traditional first color wheel starts with yellow at the top, red on the right, and blue on the left. It is read clockwise. Because of our copyright laws, manufactured color wheels cannot always follow that tradition. Yours can, using the preparations below.
- Prerequisite: The first color box presented as Primary Colors
- Direct Aim: To establish the importance of the Primary Colors
- Indirect Aim: To introduce the color wheel as a learning tool to introduce the second color wheel
- Point of interest: “Would you like to learn how to read the First Color Wheel? Can you read it forwards and backwards? It starts with yellow at the top.”
Materials: Masonite Color Wheel (see photo)
- Tempered Masonite cut to 12” x 12” squares (see Preparation)
- Primer paint – medium gray
- Clear sealant spray paint
- A soft pencil
- A pointed black permanent marker
- Red, yellow and blue paper
- Medium gray Bainbridge Board
- Drafting equipment: compass, protractor, T-square, ruler
- Yes Paste, or glue stick
- A roll of cold laminating material
- A 12” x 12” square of gray felt for each color wheel
- A container for the movable pieces of the color wheels (optional)
- They can be stacked on top of the wheel.
Preparation: Primary Color Wheel
Note: Read all the following directions before you begin. In the steps below, we will create a control model (chart) on Masonite for the primary color wheel and a set of color puzzle sections for students to match your model in the activity. If you plan eventually to make permanent models of the three (or all four) color wheels, have that number of Masonite squares cut now. To prepare the primary color wheel:- One square of tempered Masonite cut 12” x 12”.
- Paint the top surface with medium gray primer and let it cure.
- Seal all other surfaces of the Masonite with clear spray paint.
- On the gray surface of the Masonite square, use a soft pencil dot to mark the center of the square at the intersection of its diagonals.
- Using a pointed permanent marker, mark another dot about ½” higher for the center of the wheel, and erase the first dot.
- The outer circle will have a 10” diameter and the inner circle will have a 5” diameter. From the center dot, use the compass to draw these two circles.
- Draw a horizontal line through the center point of the wheel, parallel to the top and bottom edges of the square. The line is used under the protractor to make the lines that separate the color sections.
- Each section will be 120 degrees. Make a pencil dot at 30 degrees and 150 degrees on the outer edge of the protractor.
- Place a ruler vertically at the 90 degree mark down through the center of the protractor; put a pencil dot at the bottom of the circles.
- Draw the lines that intersect the circles at the 30, 150, and 90 degree marks.
- Erase any pencil lines that are not part of the wheel.
- Draft the wheel again on lightweight gray 12” x 12” Bainbridge board or heavy paper, with the outer circle having a 10” diameter and the inner circle has a 5” diameter. Each section will be 120 degrees, as before.
- Carefully cut the Bainbridge board wheel into its 3 sections.
- Choose the red, yellow and blue paper needed for the wheel and its separate sections.
- Trace each board section twice onto each primary color paper.
- One set of each color will be glued to the Masonite square to make the completed wheel.
- The other set will be used in the activity as puzzle sections to form the wheel on gray felt.
- Trace each board section twice onto each primary color paper.
- Paste the first set onto the Masonite wheel. Spread the Yes Paste smoothly to prevent wrinkles. Use a good glue stick or spray glue if you prefer. Let the paste dry. It is ready to seal. Use a clear matte-finish spray product.
- Paste each primary color puzzle section onto the Bainbridge board or heavy paper you are using for the puzzle sections. Spread the paste thinly and smoothly to prevent wrinkles. Let them dry.
- Read the instructions that come with your laminating materials. To cut the laminate to fit, you can draw around one of the puzzle sections. Cover the front first with a piece of laminate that is ½” bigger all around. Cut tabs or slits about every ⅜” - ½” around the piece and bend them over to the back. Then cover the back with another piece of laminate the fits it exactly.
- Cut a gray felt square the same size as the Masonite square.
- Place the wheel on a shelf after the first color box, with the rolled felt and the wheel puzzle sections on top of the completed wheel, or place the mat to the left of it. You choose.
Materials: To make a Paper Color Wheel, professionally laminated
- 3 sheets of heavy grey cover paper 12” x 12”
- One sheet for the background of the model, one for backing the color puzzle sections, one background to put the sections on in the activity
- If you plan to eventually make all three (or four) color wheels, buy enough paper for making all the wheels, so they match.
- Utility scissors to cut heavy paper
- Red, yellow, and blue paper for the wheels you plan to make
- Drafting equipment: compass, protractor, T-square, ruler
- Yes Paste, a good glue stick, or spray glue. You choose.
- A container for the puzzle sections of the color wheel (optional)
Preparation: Primary Color Wheel, paper version
Note: Read all the directions before you begin.- Choose the red, yellow, and blue paper needed to complete the wheel and its separate parts. Buy enough of everything for three wheels.
- Cut the gray heavy stock into three squares, 12” x 12”.
- One to make the color wheel background
- One to create the background for the separate red, yellow, and blue puzzle pieces (sections). This plain gray square is ready to be laminated.
- One to cut apart to make the backing for the puzzle sections.
- Draft the wheel onto the square that will be the model wheel background. Follow steps 1—5 above under Preparation: Primary Color Wheel
- Draft the wheel again on the second square for the sections backing.
- It is not necessary to center it on the paper. Carefully cut the wheel into the three sections. Keep the scraps for other materials you may wish to make.
- Trace each piece on each primary-color paper twice.
- One set will be used to make the completed wheel model.
- One set will be used to make the separate puzzle sections needed for students to match the wheel in the activity.
- Adhere the first set of color sections to the wheel using the adhesive of your choice. Spread it smoothly to prevent wrinkles. It is ready to be professionally laminated.
- Paste the second set of color sections onto the heavy gray sections you cut out. Spread the glue smoothly to prevent wrinkles.
- Each puzzle section of the wheel, the drafted background square, and the color wheel model should be laminated with 10mil or thicker hot laminate. There are sign shops and print shops that are equipped with hot laminating machines for plastic this thick. Do not attempt to run laminate this thick through an ordinary office laminator that is not rated for 10mil or thicker.
Presentation:
- Introduce the work by its name. “This is the Primary Color Wheel.”
- Show the wheel to the children. “It is called a wheel because of its shape. It is round and looks something like a tire. It is called the Primay Color Wheel because it contains only the primary colors. The Primary Colors are red, yellow and blue. When these basic colors are mixed, they make all other colors except one.”
- Roll out the mat. Look that the model wheel and begin to match it with the puzzle sections on the felt mat. Put the yellow section in place on the top of the wheel. “Yellow belongs on the top.”
- Put your finger on the wheel and follow the yellow down until it hits the red section. ”Red is the next color.” Put the red shape to the left of the yellow shape on the felt.
- Put your finger on the wheel and follow the yellow and the red sections until it lands on the blue. “Blue is the last color on the wheel.” Place the blue section on the felt mat.
- Turn the model wheel over. “Let’s make the wheel puzzle without looking at the model.”
- Shuffle the pieces.
- “What color is on the top?” Let the children answer the question. “Yes, yellow is at the top.” Place the yellow section on top.
- Run your finger down the yellow section until you are on the felt. “What color is next? Correct, red is next.” Place the red section on the felt, next to the yellow.
- “What color is last? Yes, it is blue.” Complete the wheel.
- “Let’s check our work.” Turn the model wheel over.
- “Let’s make (say) the wheel backwards.” Repeat the steps in the opposite direction. You could just say them backwards. You Choose.
- You decide whether to use the terms “clockwise, counter-clockwise.”
Resources:
- Masonite and paint: hardware stores
- Yes! Paste – https://www.unitednow.com/product/13606/yes-paste-archival-adhesive.aspx
- Michael’s, art supply stores or school supply sites for colored paper, paste, spray glue
- Avery Permanent, Glue Stic: Office supply, https://www.staples.com/
- Item AVE98096 Model 98096
- Color Wheel Poster: Triarco.com/product/RA15407 (Not traditional)
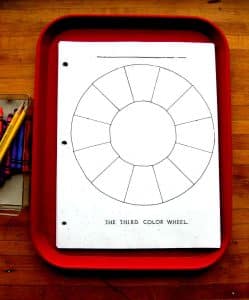
Introduction:
Provide a printed blank color wheel on 3-hole paper. The wheel can be colored using crayons, oil pastels, or markers. You could also choose to have the children draw and color the wheel themselves. You choose.- Prerequisite: Success making the Primary Color Wheel
- Direct Aim: To record the wheel
- Indirect Aim: To reinforce learned information
- Point of interest: “Will you read the first color wheel to (with) me? Can you read the wheel forwards and backwards?”
Materials:
- White paper 8½” x 11”
- Print the work sheet example from the pdf file supplied, draft it using the materials below or design one with a computer drawing program.
- Drafting equipment: compass, protractor, T-square, ruler
- Dry transfer letters and numbers if you do not have a computer
- A new thin black marker and ruler
- Red, yellow, and blue crayons, markers, or oil pastels
- A pencil
Preparation:
- Decide if you want to title the wheel, leave it blank, or provide lines for children to print their name and the name of the wheel. Use a computer to title the wheel; provide space for a child’s name and when it was done.
- Draft the wheel ½” to the right of center so it can be printed on 3-hole paper if you wish to create an art journal.
- Each segment is 120 degrees (See: Work Sheet next page).
- Draft it first with a pencil, then use a new thin black marker to ink the wheel and its sections. You might wish to practice using the marker with a compass and a ruler.
- Print copies of the worksheet and place them on a tray
- Put the crayons, markers, or oil pastels in a container. Include a pencil. Place the coloring materials on top of the worksheets.
- Install the worksheet next to the wheel.
Presentation: 5-12
- “Now that you can make the wheel and can read it forwards and backwards, I invite you to color a copy of it for your art file.”
Extensions:
- Create a large wheel using string and chalk outside, and have the children color it.
- Create with the children a large wheel to display in the school with written statements made by the children about the primary colors. Display it in the community’s Public Library.
Resources:
- Drafting tools: art, office, school supplies stores, or online
- Coloring materials: discount stores, office and school supplies stores and online
- Reeves Large Oil Pastels in 24 colors at michael’s.com
Introduction:
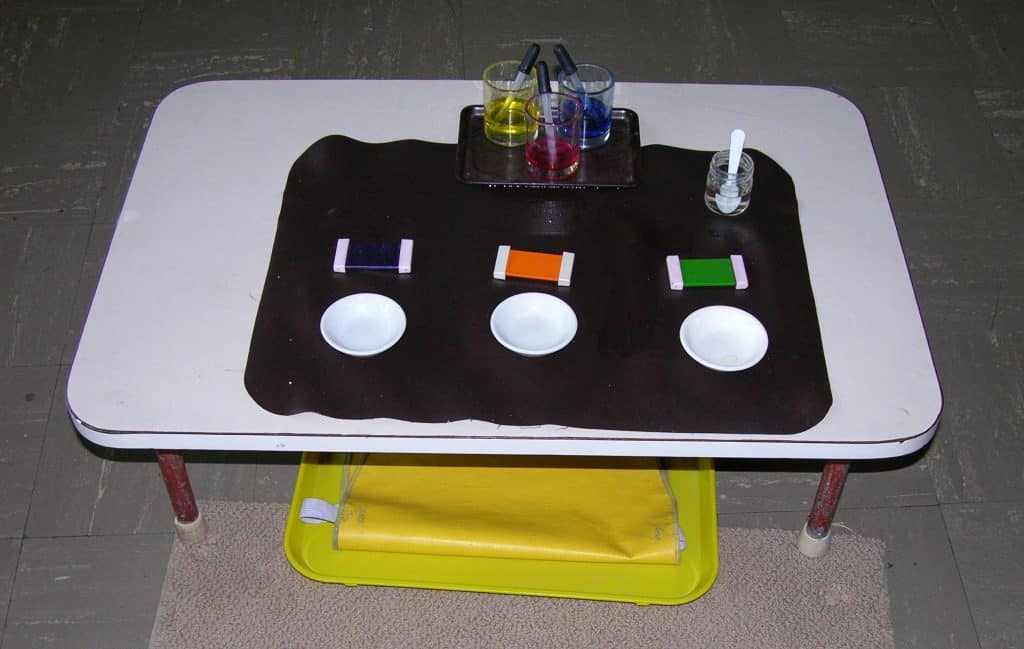
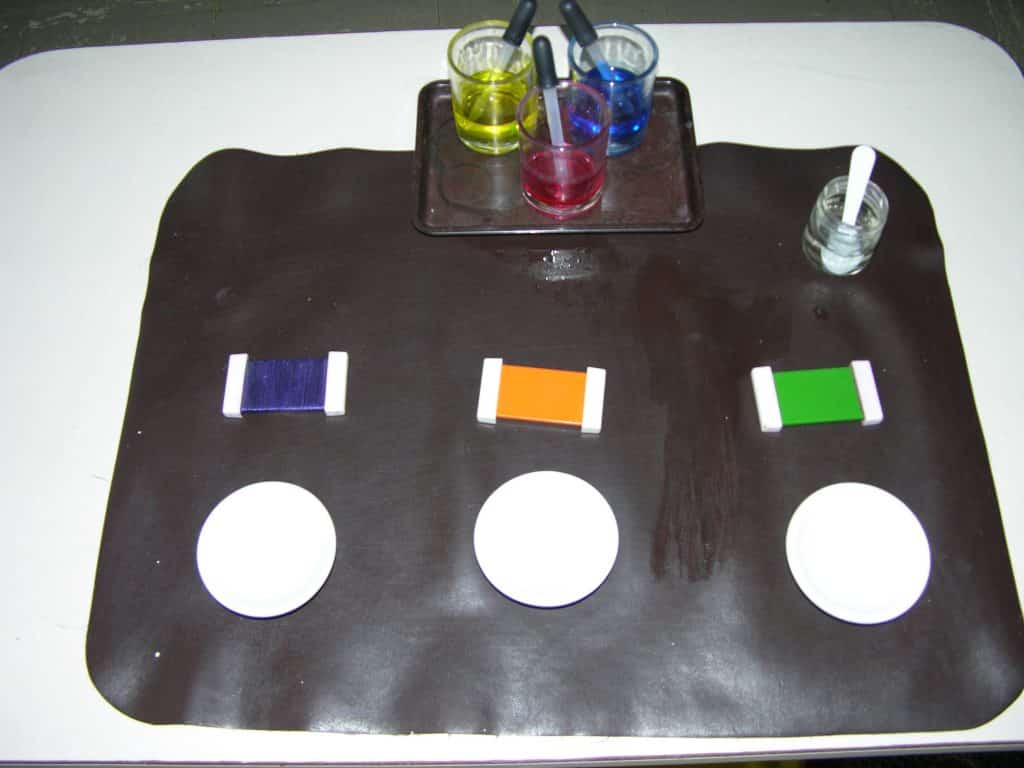
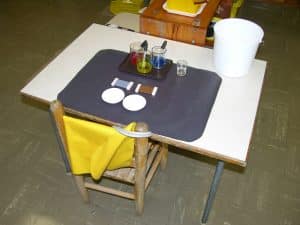
Secondary colors are very special. Each secondary color is visually in the middle between its two primary colors. Primary means basic or first. Secondary means having been derived from something primary, or is second in rank. These are wet mixing exercises, using liquid watercolor paints, which require a simple water cleanup. The simple structure for mixing secondary colors is used again and again for many color mixing exercises. Isolate each activity on a table. Primary colors are not all equal in strength. Yellow is the weakest, with red and blue being stronger, closer to equaling each other. The suggested paint used in the following activities is very strong. The paint needs to be mixed with water so all primary colors are equal in strength. This is important because the prepared colors will function as a control of error for the children. First, water down the blue. It must look blue when you put a whole eye dropper full of paint in the suggested dish. Water down the red until one dropper full of red and one dropper full of blue make a purple that matches the color tablet. Water down the yellow. The yellow paint is even weaker than the red. Test it by making green with the blue. If it matches the color tablet, it is good. Lastly, mix the yellow and the red to see it they make an orange that matches the color tablet. Adjust the colors as needed. I wish I could give you a formula for preparing the colors but I cannot. I mixed the paint sensorially. I prepared them in restaurant style water pitchers and stored then in plastic containers. Make at least a quart of each primary color.
Sequence of lessons:
- Put one secondary color mixing activity out in the environment at a time. Introduce mixing orange. Replace it with purple, then green.
- The children are then ready to have all three colors isolated in the environment at one time. Choose a special place for each one.
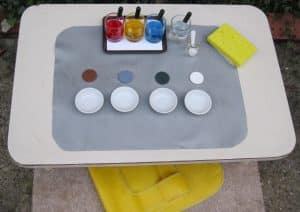
- Once they have mastered all three in isolation, the three secondary colors can be put together in one activity using all three primary colors. The color tablets are arranged in the order in which each appears in The Second Color Wheel (orange, purple, and green).
Georgie Story
When teaching 9-12 students for the first time, I was approached by a frantic, creative, and intelligent student that I had taught since kindergarten. She asked would I please tell her how to make orange. After answering her, I thanked her for reminding me that I must review prior learning so they can move on. I immediately placed color mixing and color wheel review activities in the environment. It also prompted me to institute each student making an art book or journal of things they mastered (but might have forgotten) in the 6-9 studio.- Prerequisite: Experience using an eye dropper (See Practical Life), The Primary Color Group, The First Color Wheel
- Direct Aim: To make secondary colors with watercolor paint
- Indirect Aim: To use color spontaneously, creatively, and knowingly to make art
- Point of interest: “You did not need a lot of water for cleanup. Good!”
Materials:
- Yellow, red, and blue liquid watercolor paint, diluted as above
- 1 orange color tablet, 1 purple color tablet, 1 green color tablet from the Montessori second color box, or make your own.
- An apron for each activity
- The following things will be needed for each secondary color mixing activity:
- 2 containers for primary colored paint, 1 for water and a spoon
- Note: 4 containers: when all secondary colors are mixed in one activity: 3 for primary colored paint, 1 for water, and a spoon
- 1 tip tray large enough to hold 2 paint containers for each separate color mixing activity, or tray of choice
- 1 tip tray large enough to hold 3 paint containers when all three color tablets are placed in one activity or tray of choice
- 1 white individual butter dish for each color to be mixed
- 2 plastic eye droppers for each secondary color mixing activity
- 3 when mixing all three secondary colors in one activity
- 1 small plastic or silver salt spoon for each separate color mixing activity
- A work mat for each activity
- 2 containers for primary colored paint, 1 for water and a spoon
- Summary of equipment needed: 6 containers for paint, 6 eye droppers, 3 water containers and 3 spoons for water, 3 small trays for paint, a larger tray for paint, 3 small white dishes, 3 color tablets
Preparation:
- Gather all the equipment needed.
- Prepare the paint as described in the introduction.
- Each activity will have a work mat, a tray with two containers of paint, and an eyedropper in each. Place the container of water with the mixing spoon to the right of the paint tray.
- Place the color tablet and white dish in the middle of the work space.
- The order of the color containers for each secondary:
- yellow then red for orange
- red then blue for purple
- yellow then blue for green
- Place the white mixing dish on the table.
- Place the secondary tablet to the left of the dish or above it.
- Decide where to isolate the work.
- Decide where to place the apron.
Presentation: 5-9, (9-12 Present all three together.)
- Invite the child to wear the apron.
- Demonstrate how to fill the eyedropper. Use the words “press” and “release or let go” while demonstrating.
- Invite the child to fill the dropper and put the paint into the dish.
- Invite the child to add the second color.
- Suggest the children stir the paint with the spoon. If they use their finger to mix the paint, they may wipe off their finger on their clothing or on the carpet.
- Verbalize the results. “Half yellow and half red makes orange. Orange is a secondary color. It is the color that is in the middle between yellow and red. It is a half-and-half color.”
- Assist the child to get water and to clean up the activity, or demonstrate the cleanup process. Very little water and a sponge are needed. Empty buckets at the sink when any water cleanup activity is in the environment. Refresh the sponge. (See: The Sink in Environment.)
Extensions:
- Place a beautiful clear container on the table where children are mixing all three secondary colors. Ask them to pour each color they’ve made into the glass. Sometimes it will be brown, sometimes it will be gray, or even black. Bring the container to the group so everyone sees the color made that day.
- Note: This is a way to introduce the neutral colors brown, gray, and black. White is the fourth color of the neutral group. It is present in this work as the clear water. Watercolor paint is a transparent medium. The addition of water will lighten any color. The white mixing dish makes it possible to see the color correctly. Red, yellow, and blue make every color except one, and it is not considered primary. Remember, four-color photographic printing must be done on white paper in order for the colors to “mix” correctly.
Resources:
- Eye Droppers: Carolina.com Item 736913, package of 12
- Liquid watercolor paint: Liquid watercolor: Discount School Supply 1-800-627-2829
- Small white individual dishes: White Sauce Dishes set of 4. World Market, Select size 2.75 UPC 67435
- Artist Stores will have a stacked palette which consists of three ceramic dishes and lid. The set is usually used for painting with ink. It is more expensive but very elegant.
- Small plastic tasting spoons: Amazon
- Small paint containers: use votive candle containers, restaurant supplies, discount stores, recycle baby food jars, bud vases available at Michael’s
Introduction:
There is no secondary color box unless you use the appropriate parts of the Montessori Second Color Box. Being an art teacher, I made my own color boxes; first out of illustration board colored with acrylic paint, then made out of wood and painted. They were even manufactured for a short while. The simplest presentation of the Secondary Color Group is to introduce them just as you did the primary colors. The lesson below is how I, as a Montessori trained art teacher, handled color mixing and color groups. Labeling the work needs to be done at the discretion of the teacher.- Prerequisite: Mixing secondary colors
- Direct Aim: The secondary colors and how they are made
- Indirect Aim: Prerequisite for the Neutral and Intermediate (Tertiary) Color Groups
- Point of interest: “How much do you remember about mixing the secondary colors?” Use the Second Period Lesson “What does yellow and red make, etc.?”
Materials:
- All color tablets from the First Color Box
- 1 orange, 1 purple, and 1 green tablet from The Second Color Box
- A divided container or two small identical containers
- Labels:
- The Second Color Group
- orange, purple, green
- Tray for the activity, gray felt work mat
- Three wooden “plus” signs and three wooden “equals” signs
Preparation:
- Select containers for the color tablets and labels.
- Place the 3 secondary tablets and the 6 primary tablets in separate containers, with primary on the left and secondary on the right.
- Place the work on a tray and decide where it belongs in the environment.
- Place the math symbols in a container for the presentation, if using.
- Include a rolled gray felt mat to the left of the activity.
Presentation:
- Introduce the work by its name: “This is the Secondary Color Group.”
- Place each secondary color section on the mat one under another. “Orange is a secondary color, purple is a secondary color, and green is a secondary color.” You can ask the children to say the words with you, if you wish.
- “Orange is a half-and-half color, It is half (wait for an answer).” Place the yellow tablet to the right of the orange one. “Orange is half yellow and half (wait) red.” If no one answers, supply the information. “Orange is half yellow and half red.” Place the math symbols as you speak the words.
- Proceed to purple and green, placing the rest of the primary tablets where they belong.
Extensions: Incidental Learning
- I found three plastic cylinders. One was yellow, one red, and one orange. When turned over, they oozed color from the top to the bottom sections like a lava lamp. They were placed in the concentration building section of the studio and were always used.
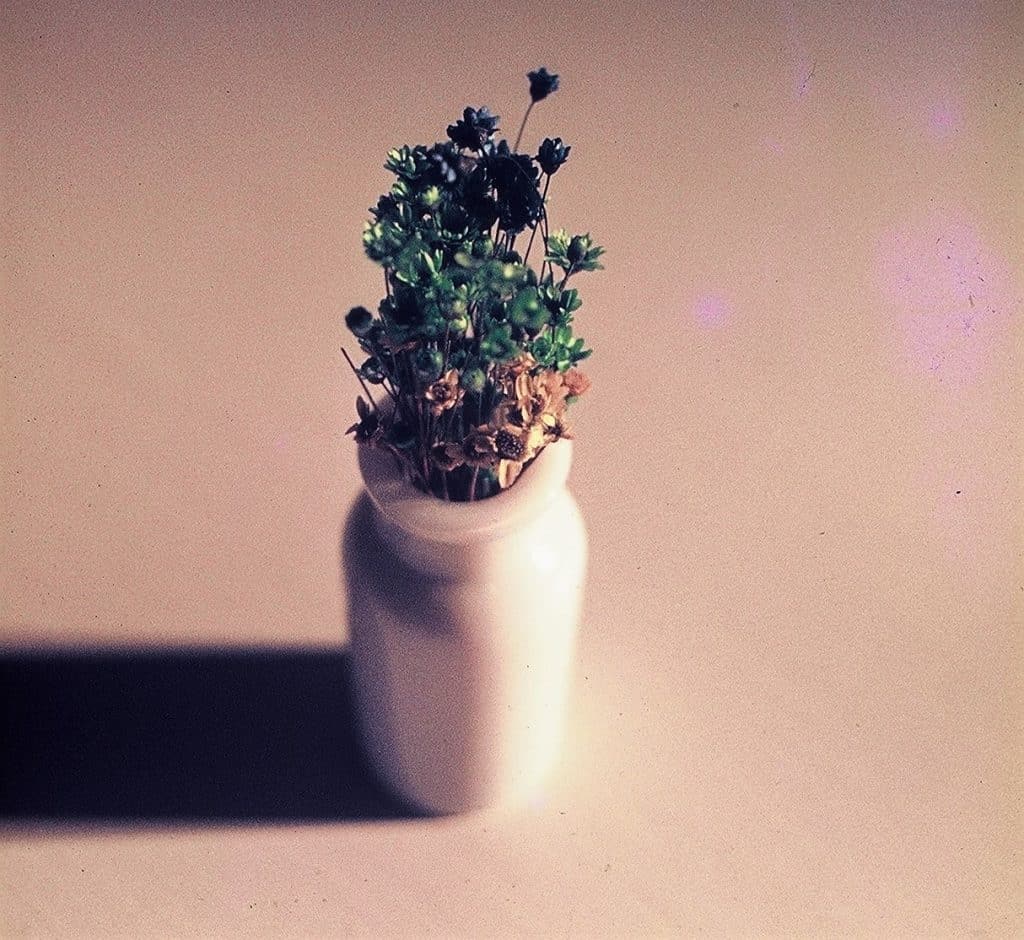
- Set up a flower arranging activity using yellow, red, and orange flowers, etc.
Introduction:
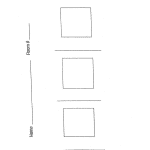
Provided here is a printed blank worksheet to record the secondary color group and how each color is made. It was designed to look like an addition problem.- Prerequisite: Success mixing all secondary colors
- Direct Aim: To record the color group and how each is made to reinforce learned information
- Indirect Aim: Prerequisite for Neutral and Intermediate Color Groups
- Point of interest: “Would you like to read the work sheet to (with) me?”
Materials:
- White paper 8½ “ x 11”
- Print the work sheet example from the pdf file supplied, draft it using the materials below or design one with a computer drawing program.
- To create your own, you will need:
- Drafting equipment, or you can use a computer drawing program
- Dry transfer letters and numbers, or use the computer
- Pencil, a new thin black marker, and ruler
- Red, yellow, blue, orange, purple, and green crayons, markers, or oil pastels
- A tray for the worksheets and a small container for the following:
- A container for crayons, markers, or oil pastels, and a pencil

Preparation:
- Print the worksheets and place them on a tray.
- Put the (crayons, markers, or oil pastels) and pencil in their container and place it on top of the worksheets.
- Place the work sheets to the right of the Secondary Color Box.
- Decide how to present the crayons or markers. Choose a container for them.
- Install the work sheet next to The Second Color Group activity.
Presentation: 5-12
- “You now know the names of the secondary colors and how they are made with primary colors. I invite you to record the information to put in your art journal.”
Extensions:
- Use this work as a writing assignment. Ask the children if they would enjoy explaining the secondary colors using words. Explain that it could be their writing assignment on their contract.
Resources:
- Drafting tools, dry transfer lettering/numbers, burnishing tool for transfer lettering: on line, art or discount stores
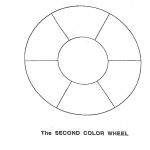
Introduction:
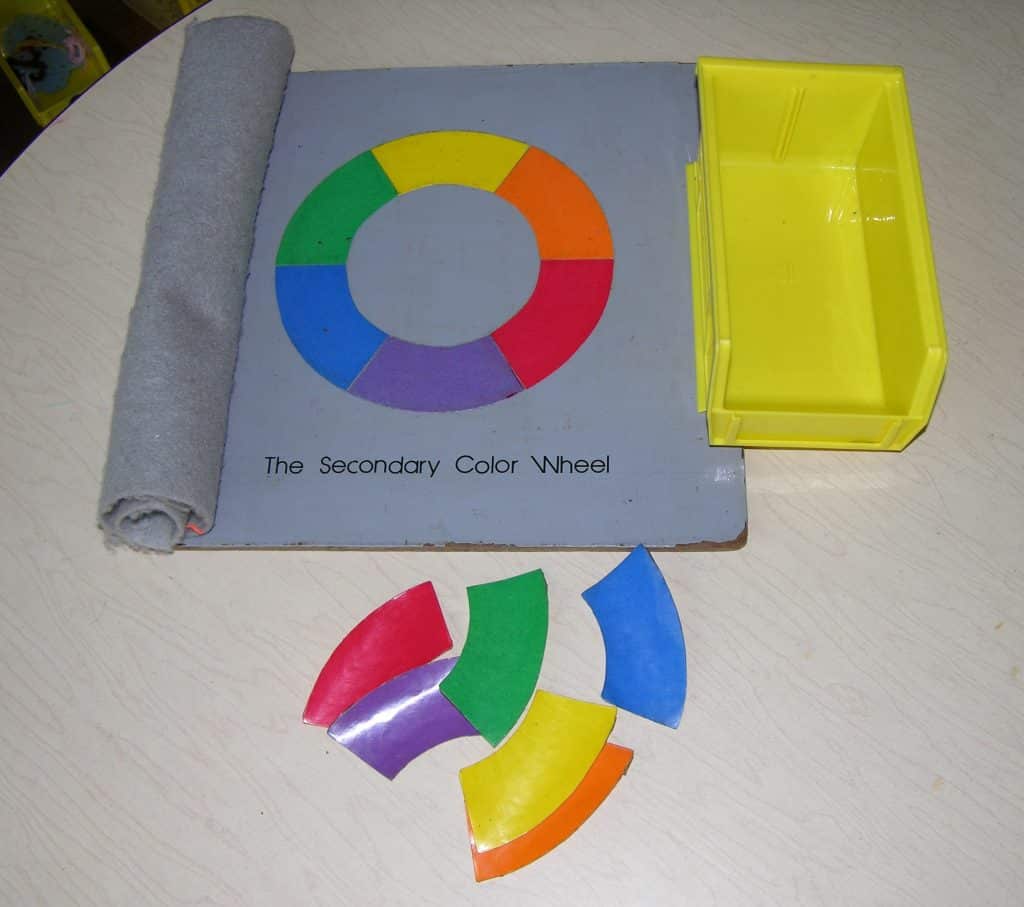
The Secondary Color Wheel is a wonderful piece of equipment. The relationships between colors that can be revealed using the wheel give rise to some of the most interesting activities that children love. The Primary Color Wheel is used to present the secondary one. It is introduced after children have had experience making secondary colors in isolated color mixing activities. The presentation of The Secondary Color wheel is a sensorial and intellectual “slam dunk.”- Prerequisite: Mixing secondary colors in isolation the Secondary Color Group
- Direct Aim: To learn The Secondary Color Wheel
- Indirect Aim: For advanced color theory information
- Point of interest: “Can you read the secondary color wheel?”
Materials:
- The model Primary Color Wheel
- The model Secondary Color Wheel
- The Secondary Color Wheel Puzzle
- All six puzzle sections of the secondary color wheel
- A square of gray felt the size of the finished wheel
- 3M wall mounts, Scotch removable mounting putty, or loops of masking tape
- The Second Color Wheel Worksheet
- Markers, oil pastels, or crayons and container
Preparation:
- Read and review the entire The First Color Wheel Lesson if needed.
- Make the model Secondary Color Wheel and all six color sections.
- Follow the instructions for making The First Color Wheel.
- Divide the circle into six sections, each 60 degrees.
- Reproduce or print the blank worksheet supplied with this lesson.
- Follow the instructions for making The First Color Wheel.
- Select the coloring material and place it in the container.
- You will also need the model Primary Color Wheel for this presentation.
- Place a wall mount, mounting putty, or tape loop on the back of the orange, purple, and green pieces of the Second Color Wheel.
- Decide where the new wheel is to be placed. Then, place the work sheet to its right.
Presentation:
- “Let’s take a close look at The Primary Color Wheel. Yellow is at the top, and if I follow the yellow with my finger, it comes to a special place where the yellow touches the red. Imagine with me, please. What if the yellow and red were paint and we mixed them together, what would they make _________(wait for answer)? Orange. So, orange belongs in this space on the Secondary Color Wheel.” Attach the orange section to the wheel. Center the orange piece.
- “If I follow the red with my finger, it comes to a special place where the red touches the blue. What if the red and blue were paint and we mixed them together, what would they make _________(wait for answer)? So, purple belongs in this space on The Secondary Color Wheel.” Attach the purple section to the wheel. Center it.
- “If I follow the blue with my finger, it comes to a special place where the blue touches the yellow. What if the blue and yellow were paint and we mixed them together, what would they make _________(wait for answer)? So, green belongs in this space on The Second Color Wheel.” Attach the green section to the wheel. Center the piece. Each color needs to be equal in size.
- “This is The Secondary Color Wheel.”
- Lay out The Secondary Color Wheel, place its background piece next to it (felt square or laminated square), and all its color puzzle pieces on your teaching mat.
- Demonstrate how to make the wheel (yellow, orange, red, purple, blue, and green). If done silently, it will go fast.
- Turn the model wheel over and ask the group to make the puzzle with you. Mix the puzzle pieces.
- “What color goes at the top, etc.?”
- Clean up the work and put it on the shelf.
Extensions:
- Make a large blank color wheel with gray or white paper and have the children cut things out of magazines to place on it. Don’t forget to make the title lettering too.
- Create The Wet Second Color Wheel that follows.
Resources: See: Resources suggested for The First Color Wheel
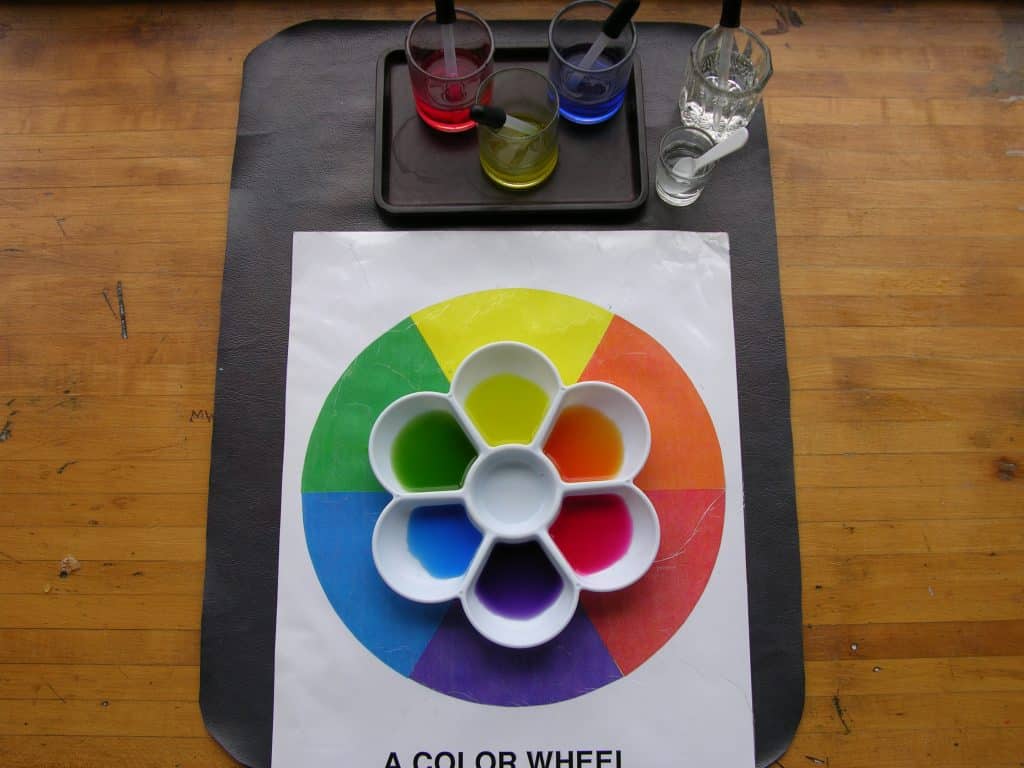
Introduction:
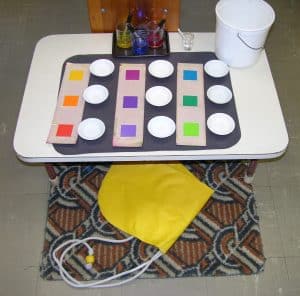
This activity is popular and it also catches children who need repetition for learning to mix the secondary colors. Give individual lessons when needed. The child must know how to use an eye dropper, so her attention is on making and placing the colors. It is a prerequisite for dull and bright color mixing.- Prerequisite: The Secondary Wheel, success using an eyedropper and mixing colors, success with water cleanup
- Direct Aim: To reinforce the secondary color wheel to reinforce mixing secondary colors
- Indirect Aim: Preparation for advanced color mixing
- Point of interest: Did you think about what color you could put in the middle of the flower palette?
Materials:
- A full sized laminated Second Color Wheel on a mat
- Watercolor paint
- A watercolor mixing set up of all three primary colors with eye droppers
- A tray for the paint containers
- A small container for water and a spoon to mix the colors
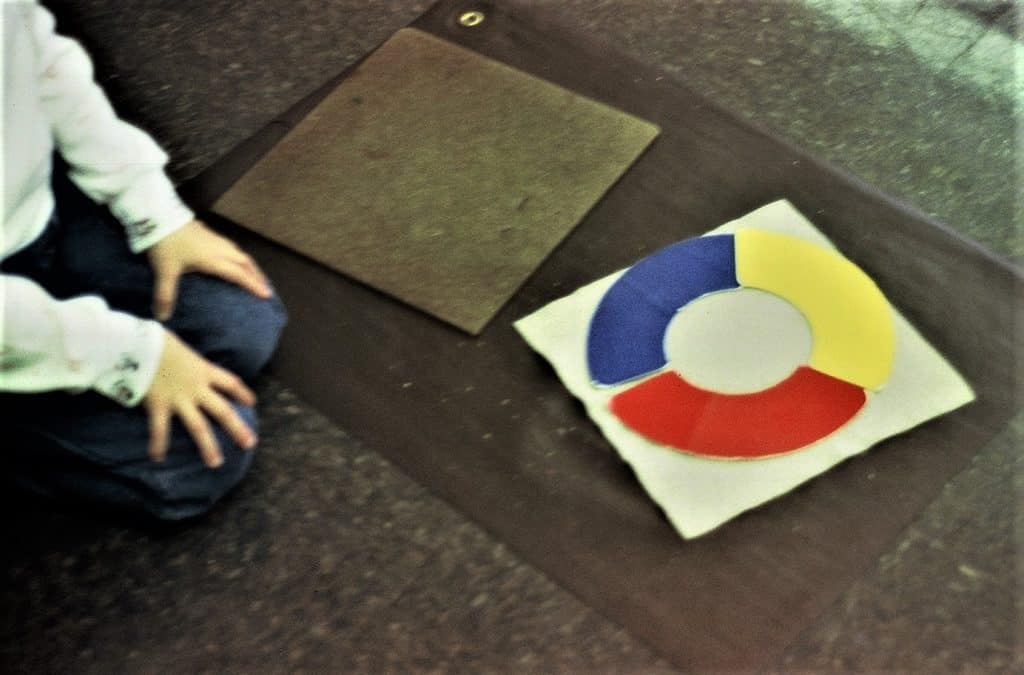
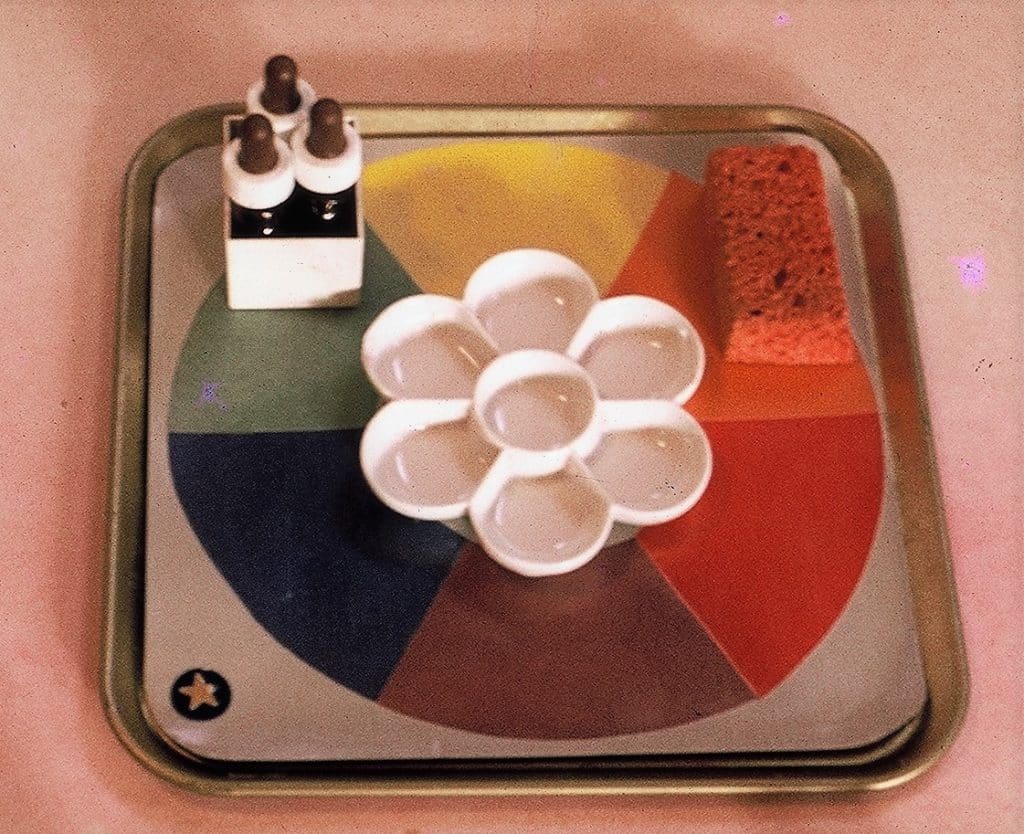
- A flower palette (see picture)
- An apron
- A container with three primary color paddles (optional)
Preparation:
- Make a copy of The Second Color Wheel and laminate it.
- Gather paint and water containers.
- Buy a flower palette (see Resources).
- Prepare the paint for mixing.
- Put the color paddles in their container if using.
- Decide where to place the apron.
- Assemble the activity.
- Place the color wheel on a work mat.
- Fill paint containers halfway and put an eye dropper in each one.
- Place the paint above the wheel.
- Place the flower palette in the middle of the wheel.
- Place the small water container with spoon to the right of the paint.
- Place the container of color paddles above the wheel and to the left a little out of the way.
Presentation: 6-9 review 9-12
- Introduce the exercise by its name.
- “Each color of the secondary wheel has a cup for paint.”
- I suggest you start with yellow.
- Assist when necessary.
Extensions:
- Make a second wheel with the secondary colors as white spaces. It is a higher level of difficulty.
- My illustration (photo) shows it upside-down for greater difficulty. Children would not stop using the simpler one.
- Both Batik and Tie Dye rely on color mixing information to be mindfully successful.
Resources:
- Eye Droppers: Carolina.com item #736913, package of 12
- Amazon: plastic eyedroppers
- Liquid watercolor paint: Liquid watercolor: Discount School Supply 1-800-627-2829
- Ceramic flower palette: #407681 schoolspecialty.com 888.388.3224
- Amazon: plastic tasting spoons
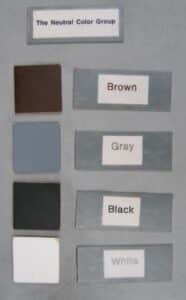
Introduction:
Gray, brown, black and white are neutral colors. Gray, brown, and black are made by mixing the primary colors Red, Yellow, and Blue. White is the only color that cannot be made by mixing the primary colors. It functions as a separate color and one that lightens other colors without changing their hue. The Neutral Color Group can be introduced now or after The Intermediary Color Group.
I chose to introduce neutral colors after the secondary color group exercises. It is easier to teach the process of mixing the neutral colors using the secondary colors orange, purple and green, which the children have just learned to mix. It also makes dulling any color easier to teach.
Prerequisites: Primary Color Group, Secondary Color group
Second color Wheel, Mixing Secondary Colors
Direct Aim: To be able to identify the group by each color and name
Indirect Aim: To creatively use the information
Point of Interest: Did you notice how special white is as a color?
Materials:
- 2 gray color tablets, 2 brown tablets, 2 black tablets, 2 white tablets in a container
- A label for each color
- A gray mat for presentation
- “The Neutral Color Group” sheet on a tray
- Crayons or markers in container placed on the tray
Preparations:
- Gather the color tablets, the labels and the mat then place them on the tray.
- Download and print the “The Neutral Color Group” worksheet.
- Download and print the “Names for neutral colors” sheet.
- Cut out and mount the lesson title and labels on card stock, then laminate the completed items.
- Place the Neutral Color Group lesson and the recording materials in order on a shelf.
Presentation:
- Present the neutral colors the same way you would present the Color Box I.
- Use the three-period lesson.
- Label the colors.
- Introduce the recording material.
Extension:
- Make the color names a part of spelling and/or language activities.
- Use the words in any writing, reading, or grammar lessons you are giving where related.
Making Neutral Color Tablets
Introduction:
I did not currently have Montessori color tablets for the above lesson. This lesson will help you create your own tablets if you wish.
I went to Michael’s Art Store and found an inexpensive package of circular wooden shapes. I chose the small circles because the other size was too big. After they were painted on all sides, they were perfect for the activity. When put in a mixing dish they looked like paint.
Materials: for 8 color tablets
- Wood or Masonite shapes (cardboard for short term use)
- You can use square, rectangular, or circular shapes. In any case, for a rectangle the largest dimension should be about 2½ inches.
- Wooden or Masonite color tablets will outlast cardboard ones.
- Masonite and wood will need to be painted (primed) white first.
- I only Painted the top surface when I made square, rectangle or triangle tablets.
- Acrylic paints in red, yellow, blue, and white
- Mixing pan
- Brush
- Water bucket, one third full
- Sponge
- Paper towels
- Work mat
- Drying surface
Resources:
- Wood shapes
- Acrylic Paint
Procedure:
NOTE: The secondary colors of orange, purple, and green will be used to create the neutral colors. Therefore, the first step in creating a neutral color is to create a secondary color. Then the third primary color is added to create a neutral color. The one exception to this rule is white. White paint can be used as a primer, if necessary.
Brown
- Mix yellow paint and just a bit of red paint to create a secondary orange.
- Add small amounts of blue paint to the orange until it creates a shade of brown that you like.
- Be certain to create enough brown paint to paint two of the wooden shapes.
- I painted the top and sides of two circular wooden shapes brown.
- I only painted the top surface when I made square, rectangle or triangle tablets.
- Set aside to dry (this will not take long).
- When dry to the touch, paint the unpainted side of each shape brown.
- Paint the whole tablet again
- Clean the brush very well.
Gray
- Mix red paint and just a bit of blue paint to create a secondary purple.
- Add small amounts of yellow paint to the purple until it turns gray or black. If it turns dull green, you
- Add red and blue to get gray or start over.
- You may need to add a bit of white to get the gray shade you prefer.
- Be certain to create enough gray paint to paint two of the wooden shapes.
- Paint the top and sides of two circular wooden shapes gray.
- Set aside to dry (this will not take long).
- When dry to the touch, paint the unpainted side of each shape gray.
- Paint the whole tablet again
- Clean the brush very well.
Black
- Mix yellow paint and just a bit of blue paint to create a secondary green.
- Add small amounts of red paint to the green until it turns black.
- Be certain to create enough black paint to paint two of the wooden shapes.
- Paint the top and sides of two circular wooden shapes black.
- Set aside to dry (this will not take long).
- When dry to the touch, paint the unpainted side of each shape black.
- Paint the whole tablet again
- Clean the brush very well.
White
- Paint the top and sides of two circular wooden shapes white.
- I only painted the top surface when I made square, rectangle or triangle tablets.
- Set aside to dry (this will not take long).
- When dry to the touch, paint the unpainted side of each shape white.
- Paint the whole tablet again
Clean the brush very well.
Introduction:
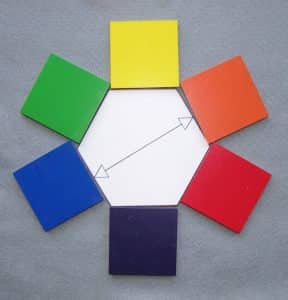
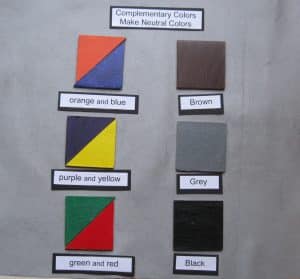
The complementary colors are Orange and Blue, Purple and Yellow and Green and Red. The relationship of the colors can be found on the Second Color Wheel. Colors across from each other on the wheel are complementary. Go through the center of the wheel to find the correct pairs.
Because each individual secondary color is composed of two primary colors, each pair of complementary colors contains all three primary colors. When complementary colors are mixed, they complete each other to create neutral colors. Each combination can create brown, grey, or black.
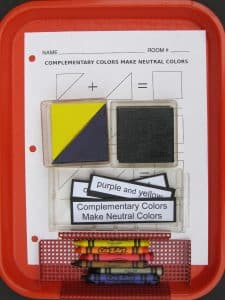
Use the sheet provided so children can record this new information.
Georgie Story
The first environment that I created was for the College of Mt. St. Joseph in Cincinnati, Ohio. It was to be a working classroom for children and an example of an alternative way to teach art. The teacher could observe the child and could work in the environment themselves when the children were not there.
I noticed a woman who was using a paint mixing activity was not happy with her work. I asked her if she had any questions about the work she was doing. She said she mixed two colors that she thought were very different from each other and with each new combination she only got brown or gray. I asked what colors she used. She had used the complementary colors. I told her most people must be taught what she had spontaneously and creatively discovered.
- Prerequisites: Primary Color Group, Secondary Color group Second color Wheel
- Direct Aim: To be able to identify and name complementary colors
- Indirect Aim: To creatively use the information
- Point of Interest: Complementary Colors are also complimentary colors because they look good together.
Materials:
- Secondary color wheel
- With arrows between complementary colors
- An alternative way of presenting a secondary color wheel
- Color tablets
- 1 orange and 1 blue triangle to make 1 brown square
- 1 purple and 1 yellow triangle to make 1 grey square
- 1 green and 1 red triangle to make 1 black square
- A label for the activity in a container
- A label for each complementary pair
- Color tablets
- Brown
- Grey
- Black
- A gray mat for presentation
- Complementary Colors sheet on a tray
- Crayons or markers in container placed on the tray
Preparations:
- Make the Secondary Color Wheel
- Draw a line with small arrow on the ends to each pair of complementary colors
- Gather the color tablets, the labels and the mat then place them on the tray.
- Download and print the “Complementary Colors Make Neutral Colors” worksheet.
- Download and print the labels.
- Cut out and mount the lesson title and color labels on card stock, then laminate the completed items.
- Place all the lesson materials on a shelf.
Presentation:
- Lay out the grey mat on your teaching space. Place all the materials on the mat ready to be laid out as they are presented.
- “You have just learned the names of the Neutral Color Group.”
- “Next you will want to know how to make them with the primary colors. Brown, grey, and black are made by using all the primary colors together.”
- “A good question then is, “how much or each of the primary colors are needed for each color?”
- “Artists and designers use Complementary Colors.”
- “When complementary colors are mixed, they complete each other to create a neutral color.”
- Lay the title at the top of the mat
- “The basic complementary color combinations are found on the Second Color Wheel which you already know.”
- Show the prepared second color wheel.
- “Colors across from each other on the wheel are complementary.”
- Go through the center of the wheel to find the correct pairs.
- Show each combination on the wheel as you continue the presentation.
- “Each of the three combinations contains one secondary color and one primary color.”
- “Each combination contains all three primary colors in the correct amounts to create a neutral color.”
- “Note. Each combination can create brown, grey or black.”
- Lay out the triangles on the mat and label them as you name them
- “Orange is across from blue”
- Make the two into a square and place the brown square across from it
- Place the labels.
- “Purple is across from yellow”
- Make the two into a square and place the grey square across from it.
- Place the labels.
- “Green is across from red”
- Make the two into a square and place the black square across from it.
- Place the labels.
- “Have your work checked and use the worksheet to record your new information.”
- Mix the tablets and reassemble the work and place it back in the environment.
Extensions:
- Add complementary and complimentary to spelling words or other language activities.
Resources:
- Wood shapes and paint
- Amazon: Darice Pie Rectangle-Shaped (50pc)
- Amazon: 60 Pieces 2x2 Wood Squares
Introduction:
Gray, brown, black, and white are neutral colors. Gray, brown, and black are made by mixing the primary colors yellow, red, and blue. White is the only color that cannot be made by mixing the primary colors. It functions as a separate color, one that lightens other colors without changing their hue. The Neutral Color Group can be introduced now or after The Intermediary Color Group.
I chose to introduce neutral colors after the secondary color group exercises. It is easier to teach the process of mixing the neutral colors if they are made by using the Complementary Colors. Each complementary pair contains the right amount of all three primary colors to create a neutral color. It also makes dulling any color easier to teach.
Use the worksheet provided so children can record this new information, if they have not already done so.
I introduced 6 to12 year old children to all three complementary pairs at one time on three different floor tables because I had enough space and equipment. Do them one at a time for 5-year-old children first then put all 3 pairs in the environment. You Choose.
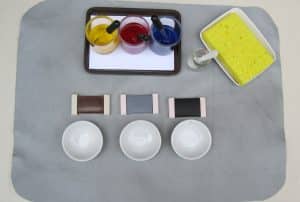
The paint I chose to use for mixing neutral colors is transparent watercolor paint. The dishes used for the mixed paint are white. The observer sees through the paint to the white dish to see brown or gray. There needs to be a lot of paint in the dish, so the white dish is not seen through the black paint which becomes opaque.
I suggest two different ways of getting black with your children.
- The first is in the Georgie Story below. Make brown into gray and grey into brown repeatedly.
- The second is to gather all the colors made for the day into one container.
- You choose. Discover a new way to handle transparent black.
Note: Complementary Colors are also Complimentary Colors because they look good together.
Georgie Story
In my last years of teaching, I often spontaneously suggested doing something in a lesson I had never tried. While teaching 5-year-old children, I asked students to see if they could change the brown they had mixed into gray or the gray into brown. They were very successful and excited by the challenge. The repeated process sometimes produced black!
- Prerequisites: Primary Color Group, Secondary Color groups Complementary colors
- Direct Aim: To be able to mix each neutral color except white
- Indirect Aim: To creatively use the information
- Point of Interest: Did you notice how special white is as a color?
Materials: for each table or workspace
- 1 grey color tablet, 1 brown color tablet, 1 black color tablet
- 1 grey tablet and 1 brown only for the 5-year-old children (See presentation)
- A work mat
- Tip trays 5” x 7” or similar
- Needed for each complementary pair
- 3 small glass containers for paint on a tip tray
- 3 eye droppers
- Red, yellow, blue liquid watercolor paint
- A small container for water and a plastic spoon for mixing the colors.
- I watched a 7-year-old wipe his wet finger on his clothing.
- A Secondary Color Wheel with arrows between complementary colors
- “Complementary Colors make neutral colors” worksheet on a tray
- Crayons or markers in container placed on the tray

- A sponge in a tray
- An apron
- A bucket of water (1/4 full) from the sink
Preparations:
- Prepare the paint. I wish I could give you a formula for preparing the colors, but I cannot. I mixed the paint sensorially. I prepared them in restaurant style water pitchers and stored them in plastic containers.
- Make at least a quart of each primary color. Remember the paint is watered down for mixing. It needs to be stronger if used for painting.
- Prepare the paint as described below.
- Primary colors are not equal in strength. Each needs to be prepared for the activity. Yellow is the weakest color. It is easily changed by both red and blue which are stronger.
- The paint needs to be mixed with water, so all primary colors are equal in strength. One squirt each of two primary colors makes a secondary color. This is important because the prepared colors will function as a control of error for the children.
- Water down the blue first. It must look blue when you put a whole eye dropper full of paint in the dish.
- Water down the red until one dropper full of red and one dropper full of blue make a purple that matches the color on a color wheel.
- Water down the yellow. It will be a little richer in color because it is easily colored by red or blue.
- Mix the one dropper full of yellow and a dropper full of red to make an orange that matches the color tablet. Adjust the colors as needed.
- Mix the yellow and the blue to see if they make a green that matches the color tablet. Adjust the colors as needed.
- Recheck the red and blue to make sure they create a good purple.
- Practice stirring the color as you add the primary color to the secondary. It often takes very little to make the neutral color.
- Place a mat on a table.
- Gather all the equipment needed.
- Each table will have
- a work mat,
- a tray holding containers of primary paint, each with an eyedropper.
- Place the small container of water with the mixing spoon to the right of the paint tray.
- Place the color tablets across the workspace.
- Place a white dish under each color tablet.
- Place the sponge on the table.
- Place apron at workspace or get one and the water as part of the presentation.
- Place the bucket of water near the work.
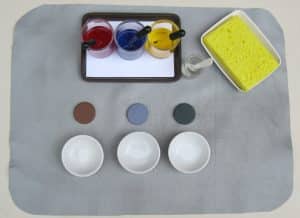
- The order of the color containers for each complementary pair.
- yellow then red for orange then blue = Brown
- red then blue for purple then yellow = Grey
- yellow then blue for green then red = Brown or Grey
- See Presentation for an explanation about black paint.
- Decide where to place the work and the aprons.
- Download and print out the “Complementary Colors make Neutral Colors” worksheet.
- Have the “Complementary Colors” lesson and the recording materials in order on a shelf.
Presentation:
5-12-year-old children
Note:
- Place the color wheel with the arrows to the complementary colors near the workspace.
- Only the brown and gray color tablets were used for the 5s.
- “You are ready to mix neutral colors using complementary colors.”
- “Orange and blue easily make brown.”
- “Notice how the colors of paint are lined up.”
- “Yellow is first then red is next and blue is last.”
- Mix the colors as you teach.
- “Use a squirt of yellow and a squirt of red to make a secondary orange. The orange looks like it is the color between yellow and red. It is not too yellow and not too red”
- “Add the blue one drop at a time and stir until you make the color of brown you like.”
- Demonstrate how you like to use both hands. One hand holds the eye dropper of paint and the other holds the spoon and stirs.
- “See if you can create grey.” Stop the lesson here. You choose.
- OR: Continue the lesson.
- The colors you used to make brown can also make grey.
- “Use the paint colors in reverse order “
- “Blue is used first then red is next and yellow is last.”
- “Start with blue watercolor paint. Add the red paint to make a secondary purple. The purple looks like the color between red and blue. It is not too red and not too blue”
- “Add the yellow paint drop by drop. It will not take a lot to make gray. Too much yellow and the color turns muddy green.”
- “Keep changing brown into grey and the grey into brown. Black has been made that way.”
- “We can collect all the brown and grey paint we make each day. Maybe we will get black.”
- “Black is easy to make with tempera paint.”
- Present Purple and Yellow as above
- Present Green and Red as above
An Alternative Arrangement of the Colors for a Review Lesson
Presentation:
- Mix the colors in the following order.
- Yellow to red for orange then add blue for brown
- Yellow to blue for green then add red for brown for grey
- Red to blue for purple then yellow for grey
Georgie Story
I was a Fine Arts major in college with an emphasis on drawing and painting. I was not permitted by my professor to put black paint on my palette. I had to make it myself using complementary colors.
Extension:
- To increase the level of difficulty of the activity for 6 - 12-year-old children, place the primary colors of paint in red, yellow, and blue in that order on a tray.
- Place a container of clear water with an eye dropper to the right of the primary colors. It reintroduces white as a separate but important member of the neutral group not made by mixing the primary colors.
- Place the white color tablet and dish after the black.
- The activity tests the student’s knowledge of the complementary colors to create neutral colors.
- Make the color names a part of spelling and/or language activities.
- Find, with the children, other meanings of the word neutral.
Resources:
- Medicine Dropper, Pack of 12: Carolina.com Item 736913
- Liquid watercolor paint: Discount School Supply 1-800-627-2829
- Soy Sauce Dish, pack of 10: Amazon
- Small plastic tasting spoons, pack of 500: Amazon
- Small paint containers: use votive candle containers, discount stores, recycle baby food jars
Tip trays for color containers: check at restaurant supply stores
Introduction:
There are six intermediate colors. The names of each intermediate color are composed of a primary color name and a secondary name separated by a hyphen.
- Yellow-Orange and Red-Orange
- Red-Purple and Blue-Purple
- Blue-Green and Yellow-Green
- While there is only one secondary color named orange, purple or green, there can be many intermediate colors with the same name.
- An intermediate color does not represent two primary colors equally.
- The primary name precedes the secondary name which indicates the primary color that predominates.
- Each intermediate color on a traditional color wheel represents its middle most color between the primary and secondary color.
Prerequisites: Primary and Secondary colors, First and Second Color Wheels
Direct Aim: To be able to identify intermediate colors and their names
Indirect Aim: To creatively use the information
Point of Interest: Were you surprised that there can be more than one intermediate color with the same name?
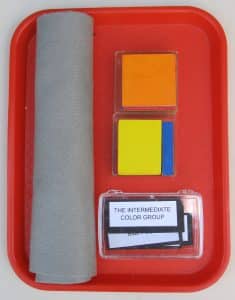
Materials:
- Intermediate Color tablets in a container
- Primary Color tablets for each intermediate color in a container
- Labels in a container
- Pencils
- A grey presentation mat
- The Intermediate Color Group worksheet
- Crayons, markers, or colored pencils in a container
- Crayon sharpener
- Two trays
Preparations:
- Download and print the “The Intermediate Color Group” worksheet.
- Download and print the Labels. Place in a container.
- Choose between black printed labels or the outlined ones.
- Color in the outline labels if chosen
- Cut out and mount the lesson title and labels on card stock or cardboard. You choose.
- Mount labels on card stock or cardboard.
- Laminate the labels.
- Put the following on a tray.
- 2 containers of color tablets
- A rolled presentation mat.
- Put the following on a tray.
- The Intermediate Colors worksheet
- Labels in a container
- Crayons or markers in a container.
- Place The Intermediate Color Group lesson and the recording materials in order on a shelf.
- Choose between black printed labels or the outlined ones.
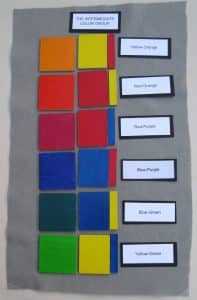
Presentation: 5–12-year-olds
- Roll out the presentation mat.
- “There are six intermediate colors with six different names. Let’s look at each of them.”
- On the left, place the intermediate colors on the mat loosely in a small pile so parts of most can be seen.
- “The name of each intermediate color is composed of a primary color name and a secondary color name, separated by a dash (or hyphen).”
- “This is yellow-orange. It is an orange color that looks more yellow when compared to the secondary orange.”
- Show the yellow-orange tablet.
- Place the tablet to the left at the top of the mat.
- “This is red-orange. It is an orange color that is more red when compared to the secondary orange.”
- Show the red-orange tablet and place the tablet on the mat under the yellow-orange tablet.
- “This is red-purple. It is a purple color that is more red when compared to the secondary purple.”
- Show the red-purple tablet and place it on the mat under the red-orange tablet.
- Repeat this process with the blue-purple, blue-green, and yellow-green tablets.
Note:
- This ends the lesson for 5-year-olds. Use the three-period lesson to learn the color names.
- Use games to test their color memory. Continue the lesson at another time or not. You choose.
Continue the lesson for children 6 or older:
- “Let’s look at how each intermediate color is made from two primary colors.”
- On the right, place all the larger primary-colored shapes and the smaller primary-colored shapes in two piles so parts of each can be seen.
- Lay out the vocabulary cards. Label the work at the end or as you make each color. You choose.
- “Yellow-orange is made with a lot of yellow and a small amount of red.”
- Place a large yellow shape and then place a small red shape next to the yellow-orange color tablet.
- Place the color name if you choose.
- “Red-orange is made with a lot of red and a small amount of yellow.”
- Place a large red shape and then place a small yellow shape to the right of the red-orange color tablet.
- “Red-Purple is made with a lot of red and a small amount of blue.”
- Place a large red shape and then place a small blue shape to the right of the red-purple color tablet.
- Repeat this process with the blue-purple, blue-green, and yellow-green tablets.
- Label the work if not already done.
- Present the worksheet. “The worksheet looks like an art math problem. A lot of yellow plus a little red make Yellow-orange etc.”
- “You can finish the worksheet now or wait until after you mix the intermediate colors.”

Extensions:
- Make the color names a part of spelling and/or language activities.
- Introduce the hyphen as a punctuation mark.
- Used between parts of a compound word or name.
- Used between syllables of a word, especially when divided at the end of a line of text.
Resources:
- Wood shapes for making color tablets
- Bainbridge Board
- Dick Blick: Bainbridge Cold Press Illustration Board
- Acrylic Paint
Introduction:
Intermediate means “coming between two things in time, place, or,
Character, etc.” An intermediate color comes between two colors. The two colors are determined by the name of the intermediate color.
Yellow-orange comes between yellow and orange. There are many colors named yellow-orange. On a color wheel yellow-orange represents the middle-most color between yellow and orange. Red-orange represents the middle-most color between red and orange and so on.
It is important when mixing the intermediate colors that the secondary color be mixed first so the child can judge when the middle-most intermediate has been made. Color tablets or examples of each of the colors are present to facilitate the mixing of each color.
If time and equipment is not limited, you can set up three different workspaces, one for each pair of intermediate colors and their related secondary color.
- Prerequisites: Primary, Secondary and Intermediate Color Groups. First and second Color Wheels, Mixing Secondary Colors
- Direct Aim: To be able to mix Intermediate Colors
- Indirect Aim: To use the information and experience creatively. Preparation for the Third Color Wheel
- Point of Interest: Do you remember what makes a color intermediate?
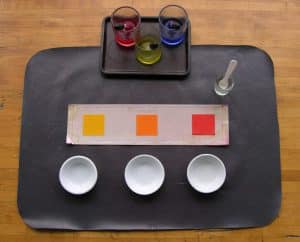
Materials: for each color mixing workspace
- Example of the colors to be mixed
- yellow-orange, Orange, red-orange
- red-purple, Purple, blue-purple
- yellow-green, Green, blue-green
- Red, yellow, and blue washable watercolor paint
- 2-6 containers for paint
- 2-6 eye droppers
- 1-3 Tip Trays 5” x 7” or similar size
- 1-3 work mats: 1 for each workspace
- 3 sets of color examples: each have 1 secondary, 2 intermediates
- A small container for water and a plastic spoon for mixing the colors.
- I observed a 7-year-old wipe his wet finger on his clothing.
- An apron
- A bucket with a little water and a sponge from the sink
Preparations:
- Prepare the watercolor paint for mixing.
- Add water to the paint. Test the paint to make sure the colors easily make orange, purple and green.
- For more detailed instructions see “Mixing Neutral Colors.”
- Gather all the equipment needed.
- Each workspace will have
- a work mat,
- a tip tray holding 2 containers of primary paint, each with an eyedropper.
- Place the small container of water with the mixing spoon to the right of the paint tray.
- Place the color examples or tablets across the workspace.
- Place a white dish under each color example.
- Place the sponge on the table. (Optional)
- Place apron at workspace (Optional)
Presentation:
- Get an apron, water, and a sponge as part of the presentation.
- “You are ready to mix the intermediate colors.”
- “The examples of each of the colors are present to help you mixing them.”
- “It is important when mixing the intermediate colors that the secondary color be mixed first.”
- “This is so you can better judge when the middle-most intermediate has been made by comparison.”
- “You will be making three oranges not one.”
- Mix the colors as you teach.
- “Make the secondary orange first.”
- “Use yellow first then add red until you make a secondary orange. The orange looks like it is the color between yellow and red. It is not too yellow and not too red.”
- Demonstrate how you like to use both hands. One hand holds the eye dropper of paint and the other holds the spoon and stirs.
- “Make yellow-orange first. Yellow-orange is a color that is between yellow and orange. There are many colors named yellow-orange. You want to create the middle-most yellow-orange. Start with yellow then add drops of red until you have made a yellow-orange that matches the example.
- “Make red-orange next. Remember that yellow is not as strong as red. Start again with yellow and add the red. This time the middle-most color is to appear to be a color that is between orange and red. You may need to go back and forth when adding the two colors to create the color you need.
- Present the 3 Purples and the 3 Greens as above.
- Have the children complete the Intermediate Colors Worksheet if they have not yet done so.
Extensions:
The Nine Colors
- Present all three intermediate color mixing setups together.
- Arrange them under each other.
- Create a better name for this exercise than the one I used.
Resources:
- Medicine Dropper, Pack of 12: Carolina.com Item 736913
- Liquid watercolor paint: Discount School Supply 1-800-627-2829
- Soy Sauce Dish, pack of 10: Amazon
- Small plastic tasting spoons, pack of 500: Amazon
- Ask for 3 or 4 spoons when buying ice cream.
- Small paint containers: use votive candle containers, discount stores, recycle baby food jars
 Tip trays for color containers: check at restaurant supply stores
Introduction:
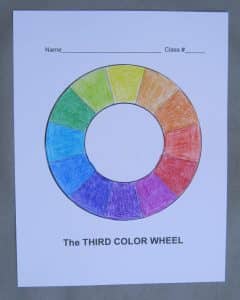
The blank printed color wheels that are presented in these lessons are to be colored. They document the four color groups the children have learned. The third color wheel presents the primary, secondary and intermediate colors in clockwise order like the original wheel. Its design reveals relationships between the colors which help explain complementary colors and the next color lessons.
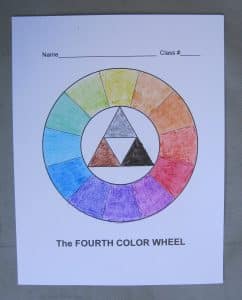
The Fourth Color Wheel illustrates all four color groups learned. The Neutral Color Group occupies a triangle in the middle of the fourth wheel. White is in the middle of the other three colors. White is completely alone in the center because it is not a color that can be made by combining the primary colors but is a member of the neutral group.
The original color wheels are protected by copyright laws. The design of the original wheel is simple, direct, and visually logical. Commercially available color wheels must have a design visually different from the original ones and from each other. Commercial color wheels can be visually complex and are read counter-clockwise.
Prerequisites: All Color Groups: Primary, Secondary, Intermediate and Neutral
Mixing Secondary, Complementary, Neutral, and Intermediate colors
Primary and Secondary Color Wheels
Direct Aim: The ability to place colors on a wheel to reveal their relationships
Indirect Aim: Preparation for advanced color lessons
Point of Interest: Color wheels are basic learning tools. They help explain some of the next color lessons.
Materials:
- Colored copies of The Third Color Wheel and Fourth Color Wheels
- Blank copies of The Third Color Wheel and Fourth Color Wheels
- 2 Trays for the copies of the wheels.
- 1-2 containers each for Crayons and/or Markers You choose.
- All the colors can be found if using crayons
- Note: Good markers of all the colors that are needed are difficult to find or very expensive. The colors may not exactly match the traditional colors
- If you choose to use markers, the paper the children use will buckle when wet but flatten when dry. Include this information in your presentation.
- A commercial color wheel of your choice
- Several copies of Color Mixing Guide (small instructional color wheel) (See Resources.)
- Be careful with these color wheels – even laminated ones can be damaged if they get wet.

Preparations:
- Display the commercial color wheel in the environment.
- Download the color wheel worksheets
- The Third Color Wheel Worksheet
- The Fourth Color Wheel Worksheet
- Make 3 Copies of each wheel on 80 lbs. paper.
- Color one with crayons and one with markers.
- Laminate the wheels
- Cold laminate crayon wheels.
- Print the wheels on copy paper and place on trays.
- 1-2 sets of Crayons and Markers, in containers.
- Put small instructional color wheels in a container.
- Place copies of each wheel on trays.
- Place the crayons and markers (if using) in containers.
- Place the small instructional color wheels in a container.
- Place the materials in the environment.
Presentation: 6–12-year-olds
- “You have successfully learned four color groups. When these colors groups are placed on color wheels, they represent the basic information needed to understand advanced color lessons. This information will help you make art and appreciate the art made by others.”
- “The Third Color Wheel is composed of the primary colors, the secondary colors, and the intermediate colors.”
- “Yellow is at the top of the wheel at the 12 o’clock position. Notice the wheel is read clockwise.”
- Point out each color on the wheel as you give their order.”
- “Next are the three oranges: Yellow-orange, orange and red-orange. They appear at 1, 2, and 3 o’clock.”
- “Red is next. It is at the 4 o’clock position.”
- “Next are the three purples: red-purple, purple, and blue-purple. They appear at 5, 6, and 7 o’clock.”
- “Blue is next. It is at the 8 o’clock position.”
- “The three greens are next: blue-green, green, and yellow-green. They appear at 9, 10, and 11 o’clock.”
- “Use an appropriate colored crayon to fill in each section. You may need to go over and over with the crayon to make the color rich.”
- “If you choose to use markers, the paper will buckle when wet but flatten when dry.”
- “Have your work checked. See if you can recite the order of each color both forward and backwards. Remember the commercial wheels are read backwards and you will be ready to do that.”
Extensions:
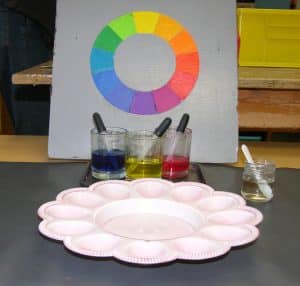
The Wet Third Color Wheel: 6-12 years
Materials:
- A laminated Third Color Wheel
- A plastic tray for deviled 12 eggs
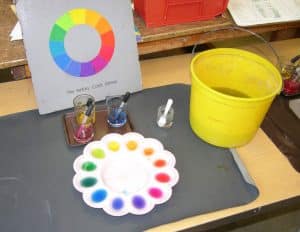
- White spray paint
- A plate holder or equivalent
- A work mat
- 3 containers of watercolor paint: red, yellow, and blue
- A tip tray
- 3 Eye droppers
- A small container of water and a spoon (Optional)
- A work space
- An apron
- A bucket and sponge from the sink
Preparation:
- Spray the back of the egg holder with white spray paint and allow to dry.
- Prepare the watercolor paint for mixing. See Mixing Neutral Colors for detailed instructions.
- Cover the workspace with a mat.
- Install the color wheel at the top of the workspace in the plate holder or equivalent.
- Put paint in containers and add the eye droppers. Place on a tip tray.
- You choose the order. Y R B: easier or R Y B: more demanding
- Add the small container and mixing spoon if using.
Presentation:
- “Start the work by putting on your apron and getting water and a sponge at the sink.”
- “Put yellow in the first space at the top of the egg holder.”
- “The wheel is your guide so yellow-orange is next.”
- “Continue to fill each space.”
- “Have your work checked.”
- “Use the sponge to clean the paint out of the egg holder.”
- “Clean and store the bucket and sponge at the sink.
- “Return the apron.”
Poster size color wheel magazine collage
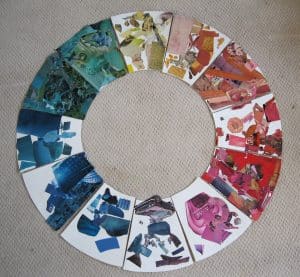
Materials:
- Large format reproduction of either The Third Color Wheel Worksheet or The Fourth Color Wheel Worksheet.
- Print out a single copy of the document.
- Cut off the verbiage at the top and bottom, leaving only the wheel.
- Take this to a copy shop and have it reproduced at a larger size.
- An ample supply of color magazines and/or color newspaper ads
- Scissors
- Glue sticks
Presentation:
- Suggest to the children that they cut out objects of one color from magazines or color newspaper ads that match the colors on the color wheel.
- Paste each object where it belongs on the color wheel.
- Decide with the children when the collage is finished and where to display it.
Resources:
- Crayons
- Markers
- Cra-Z-Art 50 Super Tip Washable Markers
- You must find the markers you need for the wheels the children are making.
- A smaller set of markers, from any manufacturer, may suffice for primary and secondary colors.
- Intermediate colors will be harder to find.
- Faber-Castell DuoTip Washable Markers
- You must find the markers you need for the wheels you are making for the environment
- Amazon search: ‘Adult coloring markers dual tip’
- You must find the markers you need for the wheels you are making for the environment.
- Commercial color wheel
- Richeson Extra Large Color Wheel
- Color Wheel Kid's Educational Print
- This is a digital download only! You would have to find a way to print it at a size of your choosing.
- Color Mixing Guides (small instructional color wheel), pack of 2
- Medicine Dropper, Pack of 12: Carolina.com Item 736913
- Liquid watercolor paint: Discount School Supply 1-800-627-2829
- Hard-boiled egg tray with 12 oval shaped sections: Dollar General
- Small plastic tasting spoons, pack of 500: Amazon
- Ask for 3 or 4 spoons when buying ice cream.
- Small paint containers: use votive candle containers, discount stores, recycle baby food jars
- Cra-Z-Art 50 Super Tip Washable Markers
Introduction
Having knowledge of the four color groups is the foundation for many advanced color lessons. The children have experienced many color mixing lessons and this hands on activity brings together the color group information into an orderly review.
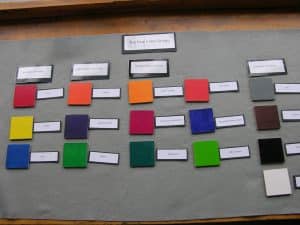
The primary colors red, yellow, and blue are the first color group. When mixed, these colors can make all the other basic colors except white. White cannot be mixed by using the primary colors. It is a hue on its own and can be used to lighten other colors.
The secondary colors orange, purple (violet) and green are the second color group. They are the hues that are visually balanced. Each secondary color appears to be the middle color between the two primary colors that create it.
The intermediate colors are variations of the secondary colors that are not balanced. The group can also be called the tertiary color group. Tertiary means third in order or the third level. Each color exhibits the richness of having various amounts of a primary color. Instead of there being only one orange, purple or green there are many, each expressing a different visual quality. Each intermediate color has two names that let you know which primary color is being expressed in abundance. Each intermediate color on a color wheel represents what appears to be the color that is in the middle between the primary color and secondary color of its name
The Neutral Color Group is black, white, grey, and brown. All but white can be mixed using the primary colors. All of them are special colors because they can be a part of any other color scheme.
Prerequisites: Color mixing activities using watercolor paint
Direct Aim: To know the relationship between colors
Indirect Aim: To creatively use color to express an idea
Point of Interest: What are your favorite colors? Can you name them?
Materials:
- 16 Color Tablets in a container
- Labels: in a container
- A Presentation Mat
Preparation:
- Download the labels
- Print, mount on black heavy paper, laminate, and trim.
- Place the color tablets in a container.
- Place the labels in a container and place next to the color tablets.
- Place the tablets and labels on a tray.
- Decide where in the environment to put the lesson.
- Roll up the work mat and place it next to the tray holding the tablets.
Presentation:
- Bring the lesson tray to the presentation.
- Unroll the mat.
- “This lesson is about the main colors we can use to make art. They are organized into four groups. You have used paint to mix the colors that are in each group. Having knowledge of the four color groups is the foundation for many advanced color lessons.”
- Lay out the title label.
- Lay out each color group on the presentation mat as you introduce it.
- “The first color group is the Primary Color Group. The word primary means first. The primary colors are red, yellow, and blue. When mixed they disappear and create the other three color groups. Only white cannot be mixed.
- Lay out the color group label.
- “The next group is called the Secondary Color Group. They are Orange, Purple, and Green. Each is a balanced color. Each secondary color visually appears to be the middle color between the two primary colors that create it.
- Lay out The Secondary Color Group label.
- “The third group is called the intermediate color group. Intermediate means in between.”
- “The intermediate colors are between a primary color and a secondary color. They are yellow-orange, red-orange, red-purple, blue-purple, blue-green, and yellow-green. There can be many intermediate colors with the same name. It depends on the amount of the primary color in the mixture.”
- The intermediate group can also be called the tertiary color group. Tertiary means third in order or the third level. This name is important to know because you will be working with a commercially made color wheel that identifies the third color group as Tertiary. Tertiary is a more sophisticated or advanced title for the group.” Tertiary (tûrˊshē-ĕrˊē)
- “Each intermediate color on a color wheel represents only the one intermediate color that visually appears to be the color in the middle between the primary color and secondary color of its name.”
- Lay out The Intermediate Color Group label.
- “The Neutral Group are colors that are made by mixing all three of the primary colors. The neutrals are brown, grey, black, and white. Only white cannot be made using the primary colors. It is a hue unto itself. It can, however, lighten any color.”
- Lay out The Neutral Color Group label.
- To involve the children in the lesson, have individuals match the color labels with the color tablets.
Extensions:
- Use words from the lesson as spelling words.
Resources:
- The next lesson “Making Color Tablets” suggests how to make the tablets for this lesson and for others that will follow.
Introduction:
Georgie Story
When I started giving color mixing lessons, I could use tablets from Montessori color boxes. However, there were few tablets to represent the intermediate colors. I decided to make the color tablets I needed. I used high quality art board and acrylic paint. Later, my father made tablets out of wood for each color group plus tablets to represent how each group was mixed. Even later, a Montessori Materials company liked my color tablets and agreed to make and sell them. I did not make the intermediate and neutral group materials. At present the company no longer exists.
Color tablets can be made with paper, cardboard, wood or plastic. Paper is easy to make, however, not all colors will be available. If found, the paper could be very costly. Even if laminated they will not last long. Cardboard will have a longer life, but the material does not feel nice when worn. I suggest you use thin wood and paint it on both sides. I cannot suggest making them out of plastic. Somehow plastic and Montessori seem not to be a good fit! You choose.
Decide whether you want to make one or two of each color. Having two will make a matching game for 3-9 year old children. Having two of each color will allow you to have two color advanced experiences in your environment at one time. You choose.
It is strongly suggested that you read the Extensions Section before making color tablets. There are several interesting exercises that can be done using the color tablets.
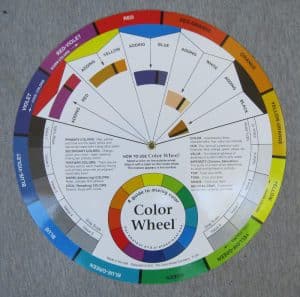
Materials:
- 1-4 color wheels: “Color Wheel: A guide for mixing color for amateur and professional use”
- See Resources
- You will use the front side of the Color Wheel for making color tablets.
- You will use the back side to study color schemes.
- Wood, Masonite, or cardboard shapes (cardboard for short term use)
- 2½” is a good size. You choose or use what is available.
- A parent or friend may have the skills and equipment to make the tablets out of wood.
- Red, yellow, blue, white, and black acrylic paint
- White acrylic “gesso” paint
- Apron
- Mixing pan
- Brush: Flat edge if possible
- Very small paint roller
- Scraps of heavy paper to make a test strip of each color
- Paper or other material to cover the workspace
- Water bucket
- Sponge
- Paper towels
- A drying mat
- Choose a recycled material that can be thrown away.
Preparation:
- Plan to make the tablets yourself or create a work crew.
- Decide where to work.
- Use the materials list to bring all the materials and equipment you will need to make the tablets.
- Cover the workspace with newspaper or other material.
- Put on your apron.
- Get the water and sponge.
- Decide where to put the tablets to dry.
- Lay out your drying mat.
Procedure:
- Place the “Color Wheel, A guide to mixing color” near your workplace.
- Keep the wheel away from water which can easily damage it.
- Put White Acrylic paint “gesso” in a mixing pan.
- Paint the top, sides, and back of each tablet.
- Use a brush or small roller
- Let dry.
- Clean the brush very well after each color.
- After the brush is cleaned, dry it with a paper towel to make sure it is clean, and no color remains.
- Create yellow, red, and blue color tablets.
- Making two tablets of each color in a group is optional. See Extensions
- Mix yellow paint with a bit of red paint to create secondary orange tablets.
- Put a small sample of the paint color on a scrap of heavy paper.
- Compare the color of the paint mixture to the orange section on the outside edge of the color mixing guide.
- Continue to adjust the proportions of yellow and red paint in the mixture until you have an exact match to the orange of the color mixing guide.
- Paint the orange tablets.
- Make yellow-orange and red-orange tablets the same way.
- Use the above technique to mix yellow and blue paint to make a green that matches the green section on the outside edge of the color mixing guide.
- Paint the green tablets.
- Make yellow-green and blue-green tablets the same way.
- Mix red and blue paint using the above technique to make a violet (purple) that matches the violet section on the outside edge of the color mixing guide.
- Paint the violet tablets.
- Make red-violet and blue-violet color tablets the same way.
- To make neutral tablets: Make orange paint, then add small amounts of blue to the orange until it creates a shade of brown that you like.
- Paint the brown tablets.
- Mix yellow paint with a very small amount of violet paint to create a shade of grey you like. (Note that if too much violet is added to yellow, it will turn dull green.) Add white if you wish a lighter grey.
- Paint the grey tablets.
- Paint white and black tablets.
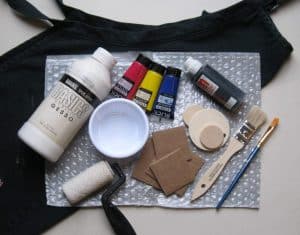
Resources:
- Amazon: Guide to Mixing Color Color Wheel
- Wood shapes
- Acrylic Paint
- Amazon
- A small roller: available in a paint department of large hardware store
Extensions
Bright and Dull Color Matching
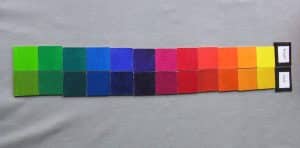
- Make a tablet for each of the primary, secondary and intermediate colors that are dull.
- Use the complimentary color of each color to create a dull example. It takes very little of the complementary color to make the color slightly dull. Make it as close as possible yet not as bright. See photo.
- Make labels.
- Give the matching lesson.
Making a Gray Scale for Matching
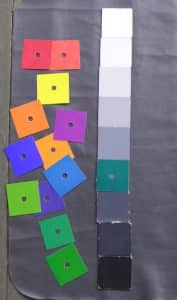
There is a Grey Scale on the “Color Wheel, A guide to mixing color”
The lightness or darkness of a color is called its value. The values of this scale are numbered from 1 to10.
- Make a tablet to match each value.
- Start with value 10 White.
- Make a white tablet for the scale.
- Mix white paint with a very, very, small amount of black paint.
- Match it with value 9.
- If it is too dark, try again.
- Continue to make the next value.
- Match each tablet to the next value number on the scale.
To find the approximate value of any color using grey scale tablets
- Cut and laminate squares of different colors the size of the value tablets.
- Punch a hole in the center of each color.
- To find the approximate value of a color, place the square on the value scale until you find the value it best matches.
- Put the matched color to the right of the value tablet it matches the best.
- This lesson makes visible the value of each color in relationship with each other. The child can see in general which colors are light, which are medium in value, and which are dark.
Matching colors and ranking them with a commercial product
- Grey Scale & Value Finder
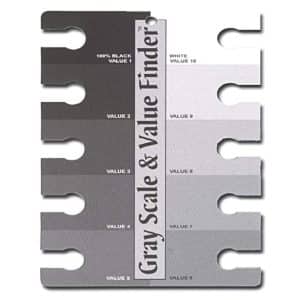
- The finder is one piece with 10 values
- A keyhole opening in each value allows you to place the hole over a color to find its approximate value.
- This finder will rank the values of each color in a similar way to the color tablets.
- Munsell-Accurate Value Gray Scale for Artists, Designers, Quilters, etc.
PHOTO: munsell accurate grey scale.jpg
- The scale is laminated and has 17 values which are perceptually equal.
- The scale is more accurate because there are more levels to define the values of each color.
- Because it is laminated, a dot of paint can be placed on the scale at several places to find its value and then removed.
- The holes around the scale can be used to find the value of each color.
- There is no place on the scale for black or white. No black or white paint is dark enough or light enough to register on the scale.
Resources: Needed
- Amazon: Grey Scale & Value Finder
- Amazon: Munsell-Accurate Value Gray Scale
Introduction
A color scheme for any work of art can be the spontaneous choice of colors used by the artist to express the idea of the work. Traditionally, a color scheme can be colors that relate well based on their position on a color wheel.
The neutral color group black, white, grey, and brown can be added to any color scheme. The neutral colors by themselves can be the color scheme of a work of art.
Using the commercial Color Mixing Wheel suggested, you can discover and record a great number of individual color schemes. The eight major color schemes are monochromatic, analogous, complementary, split complementary, triad, rectangular tetrad, square tetrad and neutral.

Prerequisites: All Color Wheels, The Four Color Groups
Direct Aim: To recognize color schemes in works of art
Indirect Aim: Creative use of the expressive qualities of traditional color schemes
Point of Interest: Were you surprised that there are so many color schemes?
Materials:
- 2 or more Small commercial instructional “Color Mixing Wheels”.
See Resources.
- A large color wheel displayed in the environment. See Resources
- 16 color tablets that comprise the four color groups
- See Making Color Tablets.
- Color Scheme Vocabulary Cards
- Color Schemes Worksheet
- A work mat
Preparation:
- Install the commercial color wheel in the environment.
- Put two or more Color Mixing Wheels in a container. Place it on a shelf.
- Put the 16 color tablets in a container with its work mat. Place them next to the “Color Mixing Wheel”.
- Make Vocabulary Cards.
- Download the vocabulary cards and the matching color scheme names.
- Print, laminate, and trim the vocabulary cards.
- Place the vocabulary cards in a container and place them next to the color tablets.
- Download and print enough copies of the Color Schemes Worksheet to go around.
- Put the worksheets on a tray with a container of pencils.
- Take time to investigate the new color wheel. It contains a lot of information. Your lesson will go smoother if you are familiar with moving the wheel to gather information.
- Hold the wheel in one hand and move the open lacy structure with one finger or holding edge of the first circle.
Presentation: Color Schemes: Three lessons
Part 1: The front of Color Wheel and how to use its features
- Bring a color mixing wheel to the presentation.
- “This is a Color Wheel with information about mixing colors. It is made of laminated thin board or of plastic.
- “It has three layers: one large circle in the middle and a smaller circle on either side.
- “The smaller outer circles can be moved around to reveal important information. Hold the center circle with one hand and use the other hand to move an outer wheel.”
- “Spend time before doing this work to move the wheel around and to read the information that can be found on it.”
- “This piece of equipment is called a Guide for mixing colors “
- “The first side of the wheel is about the 12 colors of a color wheel. The colors are placed next to each other on the outer edge of the wheel.”
- “Inside each color is its name.”
- “There is printed Information about the three color groups that are on the wheel. “
- The intermediate group is called the tertiary color group. Tertiary means third in order or the third level. The word tertiary is a more sophisticated or advanced title for the group.” Tertiary (tûrˊshē-ĕrˊē)
- “The moving piece shows what happens if you add yellow, red, blue, black, or white to any color.”
- “Move white to red and it produces pink.”
- “Move yellow to Yellow-Green and it produces a lighter more yellow yellow-green.”
- Move any primary color to its complementary color to show how it makes a neutral color. “Blue on orange makes a grey color.”
- “Also printed are the characteristics of color Hue, value and intensity.”
- “Hue is the name of each color; Value is the Lightness or darkness of each color and intensity it the brightness or dullness of each color”
- Notice that there is a 10 step grey value scale that starts with white and ends with black.
- “Use Caution! Keep the wheel away from water which can ruin it.”
Part 2: The back of Color Wheel and how to use its features to find color schemes
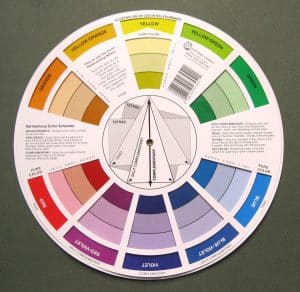
- “The second side of Color Wheel is about color schemes and how to use the mixing guide to identify them.”
- “A color scheme for any work of art can be the spontaneous choice of colors used by the artist to express the idea of the work.”
- Lay out the 16 colors on the work mat while teaching.
- “Our lesson today is about colors that look good together. They are called color schemes.
- “The color schemes found on the mixing wheel are colors that relate well together based on their position on a color wheel.”
- “Some color schemes are simple, others are complex.”
- “The neutral colors are special. One or more of their colors can be added into any color scheme.”
- “Once you know the eight common color schemes you will be able to recognize them in finished artwork.”
- If you allow children to select the beginning color, you may need to borrow color tablets from an already made scheme. You choose.
- Ask a child to choose their favorite color from the color tablets for the first color scheme (optional). Display the color tablet chosen by the student.
- “A Monochromatic Color Scheme uses only one color because mono means one. All the shapes and or lines in the artwork can be lighter, darker in value, brighter or duller in intensity but are all the same color or hue.”
- “However, any or all of the neutral colors can be added to a monochromatic color scheme.”
- Show where the color is on the wheel. “Each color and its name are found on the outer edge of first side of the wheel.”
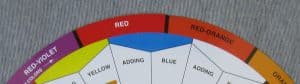
- Ask a child to choose one color to start the next color scheme.
- Display the color chosen. Make the scheme as you teach.
- “An Analogous Color Scheme uses 2-5 colors that are next to each other on the wheel.”
- Work using the wheel. “Find the color on the outer edge of the mixing wheel and count five colors in a row. Each color is analogous to the one ahead of it and behind it.”
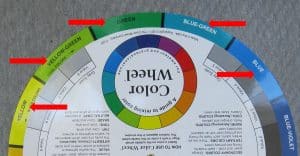
- Name color #1 and color # 2 out loud. “What color name did the two have in common?” Wait for the answer. “That is what makes them analogous.”
- Repeat the previous step for each succeeding pair of colors: #2 and #3.
- “Each color is analogous to the one ahead of it or behind it.”
- Ask a child to choose one color for the next color scheme.
- “A Complementary Color Scheme uses any color on the wheel and its complement which is the color directly across the wheel from it. The two colors complete each other. That means when mixed they make a neutral color.”
- Show what you are doing as you do it. “On the back of the wheel, you will find a bold straight line with an arrow on both ends.” Move the arrow to the chosen color and it then points to its complementary color. Name the two complementary colors and lay out the matching color tablets.
- Ask a child to choose one color for the next color scheme.
- “A Split Complementary Color Scheme uses any color on the wheel and the two colors on either side of its complement.”
- Move the wheel to the chosen color.
- Review the name of the chosen color, its complement, and the two colors on either side. “The three colors form a white isosceles triangle on the wheel.”
- Pick out and display the three color tablets. First the original color chosen by a student then the other two.
- Ask a child to choose one color for the next color scheme.
- “A Triad Color Scheme uses three colors that form an equilateral triangle on the wheel. The syllable tri always means three.”
- Show where the triangle is on the wheel. “It is the light grey triangle.”
- “First, I find the chosen color and move the triangle to it in order to find the other two colors.”
- Pick out, name, and display the three color tablets that make up the triad color scheme based on the original color chosen by a student.
- Name out loud the three colors chosen.
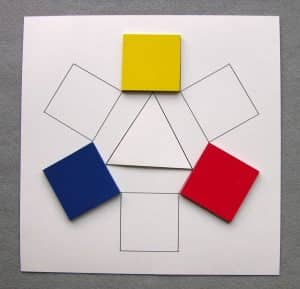
- You choose a color for the next color scheme.
- “A Tetrad Color Scheme uses a set of four colors that are two sets of complementary colors. Tetrad mean a group of four.”
- “The tetrad color schemes create a rectangle or a square inside the 12 colors of the color wheel. The rectangle is medium grey, and the square is darker grey.”
- There are three gray shapes to help you find color schemes.
- Light gray for Triad schemes
- Medium grey for Rectangular Tetrads
- Dark grey for Square Tetrads
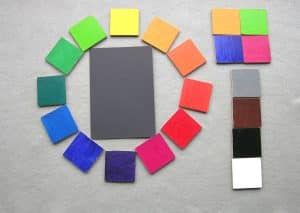
- “Rectangular Tetrads can consist of two primary colors and two secondary colors that are complementary or four intermediate colors that are complementary that creates a rectangle inside the 12 colors of the color wheel.”
- Lay out a rectangular tetrad color scheme. Name out loud the two complements.
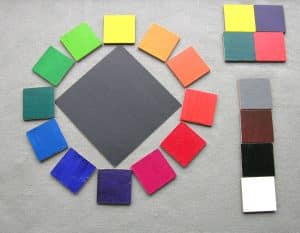
- “Square tetrads can consist of one primary color and its complement and two intermediate complementary colors…
- “…or one secondary color and its complement and two intermediary complementary colors that creates a square inside the 12 colors of the color wheel.”
- Lay out a square tetrad color scheme. Name out loud the two complements.
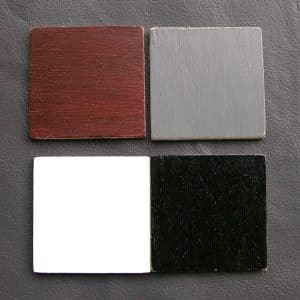
- “The Neutral Color Scheme uses any or all of the neutral colors.”
- Pick out and display the neutral color tablets that make up the neutral color scheme. “Black ink on white paper is a neutral color scheme.”
- “The neutral color group is special. One or more of the neutral colors can be added to any of the other color schemes.”
Part Three: Present the Vocabulary Cards
- Bring the Vocabulary Cards to the lesson.
- Lay out the mat.
- Lay out the cards.
- Lay out the color schemes names.
- Have the group take turns reading the definition cards and matching the color scheme name with each definition.
- As each color scheme name and definition are matched, have the group take turns creating an example of that color scheme with the color tablets.
Extensions:
A Class Project: Color Schemes
- Create a project with your students. Ask them if they would like to use the color mixing guide to illustrate with words and color the possible color combinations of each color scheme.
- Ask the children to use their math skills to figure out how many different possibilities there are in each color scheme. There are twelve colors on the wheel.
- The first task is to design how to record each color scheme.
- What visual way can each color scheme be shown with color tablets or words, or both color tablets and words.
- Decide where to keep the color scheme collection in the environment.
- If the group wishes they can decide where to exhibit the project for others to see, enjoy or use.
- Will there be a public opening?
- Will a student write a newspaper article?
Spelling Words
- Make important words from the Color Schemes presentation into spelling words.
Resources:
Amazon:
Dick Blick:
Color Schemes Recorded
- Monochromatic Color Schemes: 12 colors plus 3 neutral colors (15)
- Analogous Color Schemes: Not recorded, too many variations possible
Complementary Color Schemes (6)
- Yellow & Violet
- Yellow-Orange & Blue-Violet
- Orange & Blue
- Red-Orange & Blue-Green
- Red & Green
- Red-Violet & Yellow-Green
Split Complementary Color Schemes (12)
- Yellow & Red-Violet & Blue-Violet
- Yellow-Orange & Violet & Green
- Orange & Blue-Violet & Blue-Green
- Red-Orange & Blue & Green
- Red & Blue-Green & Yellow-Green
- Red-Violet & Green & Yellow
- Violet & Yellow-Green & Yellow-Orange
- Blue-Violet & Yellow & Orange
- Blue & Yellow-Orange & Red-Orange
- Blue-Green & Orange & Red
- Green & Red-Orange & Red-Violet
- Yellow-Green & Red & Violet
Triad Color Schemes (4)
- Yellow & Red & Blue
- Yellow-Orange & Red-Violet & Blue-Green
- Orange & Violet & Green
- Red-Orange & Blue Violet & Yellow Green
Rectangular Tetrad Color Schemes (6)
- Yellow & Violet & Orange & Blue
- Yellow-Orange & Blue-Volet & Red-Orange & Blue-Green
- Orange & Blue & Red & Green
- Red-Orange & Blue-Green & Red-Violet & Yellow-Green
- Red & Green & Violet & Yellow
- Red-Violet & Yellow-Green & Blue-Green & Red-Orange
Square Tetrad Color Schemes (3)
- Yellow & Violet & Red-Orange & Blue-Green
- Yellow-Orange & Blue-Violet & Red & Green
- Orange & Blue & Red-Violet & Yellow Green
Introduction:
The colors of the fourth color wheel can be divided into two groups that define each color as having a feeling of temperature. The colors from yellow to red-purple are considered warm while the colors from yellow-green to purple are considered cool. The warmest color is red-orange and the coolest is blue-green. The neutral colors also have a feeling of temperature. Browns and tans feel warm while greys and blacks feel cool.
The feeling of warm or cool can be found even within one color. Hansa Yellow is cool when compared to Cadmium yellow. Jars or tubes of warm black and cool black paint are available to buy. The same is true of white.
Color used in any art form helps express the idea of the work. A painting of a summer sky will look more realistic and create the feeling of space if the sky overhead is clear blue and the sky closer to where it meets the earth is light blue-green.
Entire paintings can have the feeling of warmth or coolness by the colors used to paint the idea.
When a museum decides to make reproductions of paintings in its collection it must first photograph each one and “White balance” the camera. That means the photographer has selected a white portion of the work or is using a white card to adjust his camera. In this way, all the other colors photographed will be adjusted relative to the white to obtain the most accurate representation of the colors of the whole work. Matching reproductions of a single painting might show a difference in color temperature. One reproduction can look warmer and the other look cooler. That is because of the difference in the white balance tools used by different photographers. Always, the best way to see a work of art is to go to the museum where is housed.
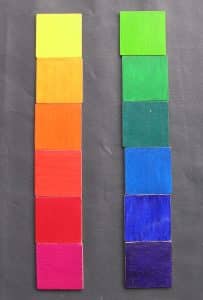
Prerequisites: All Color Wheels
Direct Aim: Learn the warm and cool colors
Indirect Aim: To be able to use the temperature of colors creatively
Point of Interest: Did you find it interesting that colors in a painting can have temperatures?
Materials:
Note: Use the color wheel the children know for the lesson.
Give the lesson again next year if a larger one is known.
- A color wheel for the lesson
- A color wheel displayed in the environment
- Warm and Cool Color Worksheet
- Crayons, markers, or oil pastels
- Pencils
- One large reproduction of a warm painting
- One large reproduction of a cool painting
- Matching Game
- Postcards
- Labels
- Warm and Cool Paintings
- Warm Paintings
- Cool Paintings
- A tray for the worksheet, pencils, markers or crayons and labels
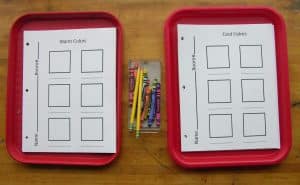
Preparations:
- Have a copy of the lesson of the most advanced color wheel your students have studied.
- Install a large color wheel in the environment for future color lessons (optional: could be commercial).
- Download the Warm Colors Worksheet and Cool Colors Worksheet.
- Install on a tray
- Put the coloring materials and pencils in a container. Place it on the tray.
- Select a cool painting and a warm painting and display them in the environment.
- Label them
- A Warm Painting
- A Cool Painting
- Create a matching game of reproductions of warm and cool paintings
- Collect the postcards to use for the game. Have the same number of each kind.
- It may take time but find two reproductions of the same painting where one is warm, and one is cool due to differences in the “White Balancing Process”. Assuming that you have found these, be certain to explain the white balancing process during the lesson.
- Label them
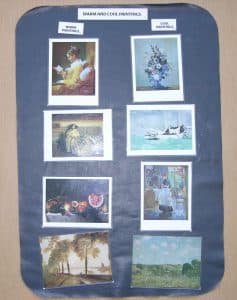
- Make labels
- Warm and Cool Paintings
- Warm Painting
- Cool Painting
- Put the postcards and labels in a container and place the game next to the worksheet
- Warm and Cool Paintings
Presentation:
- Show the children the color wheel you have for the lesson
- “Each of the colors on this wheel can be defined as having a feeling of temperature which is either warm or cool.”
- “Which colors do you think look warm?”
- Let the children think for a while and accept all their answers.
- “Which colors look cool?”
- Again, let the children think for a while, and accept all their answers.
- Sweep your finger down the wheel as you talk. “Traditionally, the colors yellow, yellow-orange, orange, red-orange, red, red-purple are considered warm.”
- Sweep your finger up the wheel as you talk. “The colors purple, blue-purple, blue, blue-green, green, yellow-green are traditionally considered cool.”
- “The colors on the right-hand side of the wheel are warm and the colors on the left-hand side are cool.”
- “Which color seems to be the warmest?” Wait for the answers.
- “Which color seems to be the coolest?” Wait for the answers.
- “They are complementary colors directly across from each other on the color wheel.”
- “Traditionally, the warmest color is red-orange and the coolest is blue-green.”
- “The neutral colors also have a feeling of temperature. Browns and tans feel warm while greys and blacks feel cool.”
- “The feeling of warm or cool can be found even within one color.”
- “Hansa Yellow paint is cool when compared to the warmer Cadmium yellow.”
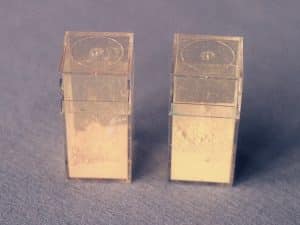
- “Jars or tubes of warm black and cool black paint are available to buy. The same is true of white.”
- Introduce the worksheet. “The Warm and Cool work sheet and crayons (markers) for this lesson are on the shelf.”
- “Next to the recording work is a matching game for you to enjoy.”
- Give a matching lesson if needed.
- “Have your work checked.”
Resources:
Postcard Reproductions
Introduction
Color has three qualities: hue, value, and intensity. There is a fourth quality: Color interaction. Colors interact and influence each other. This is most easily seen when afterimages are isolated. This lesson explains how Joseph Albers, a twentieth century painter, used color interaction as the ideas behind his paintings and prints.
This is a simple and an exciting lesson to give. It is presented as I gave it while I was teaching. Most of the important pieces of information are included but more are possible. I suggest you refer to the two articles listed under resources to creatively embellish what I did. These two articles supply both written information and illustrated information that can easily be made into learning materials for all ages. I strongly suggest that this be a topic to use to begin teaching the art of research using the internet. It combines art, science, and writing skills.
Prerequisites: The Four Color Groups, Complementary Colors
Direct Aim: To learn complementary colors of afterimages
Indirect Aim: To use afterimage information creatively to enjoy works of art made using the interaction of color
Point of Interest: How excited were you to see an afterimage color that existed only in your brain?
Materials:
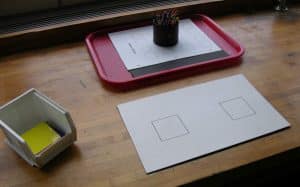
- Color tablets or squares of colored paper, in a container
- A large white board with two outlines of squares
- Afterimage worksheets on a tray
- Crayons, markers, and pencils in a container
- 1 8.5” x 11” piece of red paper
- 1 8.5” x 11” piece of white paper
Preparations
- For the lesson,
- Install the red piece of paper on a plain white surface where students can see it.
- Install the white piece of paper next to the red paper, about 8”-10” away.
- For the environment,
- Select a table for the work.
- Place the container of color squares on the left.
- The white board with the two outlined squares to the right.
- Place the worksheet tray with recording materials above or beside the work.
- The work can be placed on a shelf. You choose.
Presentation:
- “The title of this lesson is about ‘Afterimages’. The word ‘image’ can be defined as ‘a representation of shapes, forms and colors to represent a person, place, or thing’.”
- “‘After’ can be defined as ‘being next in time or place’.”
- “So, let’s do that.”
- “Let’s look at an object right in front of us. It’s a piece of red paper. I ask you to look at this rectangular image while I count out loud to thirty.”
- Count out loud to thirty, quietly, while the children stare at the red paper.
- “I ask you now to look at the piece of white paper beside it.”
- “What did you see?”
- Wait for the answers.
- “Would you like to tell me what you saw?”
- “Can you name the color?”
- “What happened to it?”
- “Where do you think it came from?”
- “The second color is called an afterimage. That’s the color you see after studying the red rectangle.”
- “We see colors because there is a very small place in the back of our eyes that has three different kinds of cones that allow us to see colors and details. Each responds to red, green, or blue light.”
- “When you look at the red rectangle the red cones respond telling your brain that the paper is red.”
- “When you looked at the red paper for 30 seconds the red cones became fatigued or tired leaving the green and blue to mix and be seen as one color.”
- “The afterimage color disappears when the red cones are revived mixing all three cones to create white light. The white paper is then seen.”
- “The second color is the complementary color of red.”
- “You have studied complementary colors before.”
- “The first complementary colors you studied were colors that happened when you mix paint together.”
- “Paint complementary colors when mixed make black, grey, or brown.”
- “The afterimage colors together make white light, which is similar to the light that comes from the sun.”
- “Now there is a whole new group of primary, secondary, and complementary colors to explore.”
- “The color CYAN is a new color to learn. It is sold in art stores.”
- “The primary colors are red, green, and blue.”
- “The secondary colors are yellow, purple (magenta), and cyan.”
- “To end our lesson let’s use a second primary color to make another afterimage.”
- Show the two different work sheets.
- “When you do the work, you can record your answer with colors or with words. You choose.”
Note: You and your students can decide how much work is to be done.
Extensions: Color Interaction
Introduction
The idea is to place a small piece of grey paper in the middle of two different colors to see if the two grey papers look different.
Materials:
- 4”-5” squares of rich, intense basic colored paper, in a container
- Squares of light medium grey paper, 1.5” square, in a container
- Plain white board
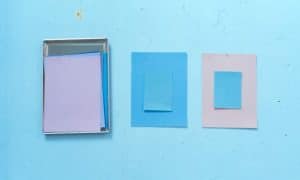
Presentation:
- Choose 2 very different color squares and place on the board away from each other.
- Place a grey square in the middle of each.
- Do the grey squares have a different color?
- If it does not work, change the size of the paper, and use a lighter color of grey.
- Ask the children to share their results.
Extension: Afterimage Exhibition
Introduction
After the main afterimage lesson is completed, you can ask your students if they would like to create an exhibition to share afterimage designs they have created. If they agree, give this lesson. Please note that this is a suggested activity that I wish I had done while I was teaching.
Choose a place to put the exhibition in your school. Will you have an opening? Will you need an invitation for parents? Will you invite other classes to see the exhibition? Next, invite the children to think of a place outside your school to put the exhibition.
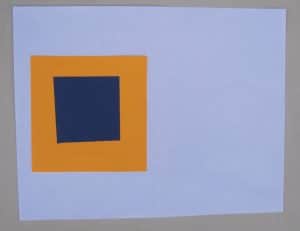
Materials:
- Squares of colored paper, in a container
- A tray of paper left over from creating the squares
- Plain white 8.5” x 11” copier paper on a tray
- Scissors, rulers, pencils in containers
- Stencils for shapes other than squares on a tray
- A compass
- Glue sticks (no school glue) in a container
- Paper trimmer (optional)
- Several rolls of removable tape
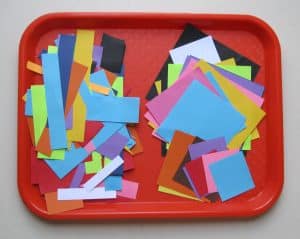
Preparations: For making the afterimages
- Cut the squares and place on a tray.
- Place scraps of paper made by cutting squares on a tray.
- Assemble all the materials and equipment on a table or on shelves for easy access.
- Make an example for the presentation. Choose two squares.
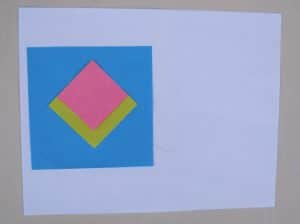
Presentation: Making afterimages for the exhibition
- Fold the paper as you teach. “Carefully fold a piece of copy paper in half. Open the paper, turn it over, and fold on the crease again to flatten the paper.”
- “The crease divides the paper in half and makes two rectangles and the crease is not easily seen.”
- “The paper design you create for the afterimage will be mounted on the right-side of the paper and the left-side will remain open to receive the afterimage.”
- “Squares of paper and scraps of the same paper can be used to make your design. You have both color and shape to use. You also have scissors to change shapes.”
- “When color is the main way to express an idea, the shape of the paper must be simple. The square has four equal sides and four very stable square angles.”
- Make a design with two colors as you teach. “Take two squares of contrasting colors, and place the smaller square atop the larger one.”
- Use the paper you folded. “Place the combined squares on the right-side rectangle.”
- “Count to thirty as you stare at the design you have created, then look at the plain white left side to see the afterimage.”
- “Try changing the colors in the afterimage design, and look again.”
- “Experiment. Use the scraps and/or the squares to design another idea. Look at the afterimage it produces!”
- “You can always make two or more designs. Remember we may only be able to exhibit your favorite one.”
- Glue your squares to the paper as you teach. “Place a line of glue across the top of the square and across the bottom. Turn it over and center it on the right-side of the exhibition paper between the crease on the paper and the edge of the paper.”
- “Also make the space above the square a little smaller and the bottom a little larger. You might want to practice placing the paper before you put the glue on. Ask for help if you need it.”
- “Make sure you have your name on the back of your paper.”
- “Your design is ready to exhibit.”
Preparations: For the exhibition afterimages
- Name tags
- Design name tags for each piece
- You and the children choose.
- Make the tag separate and placed under the work to the left
- Print the information at the bottom of each artwork
- Name and age?
- Instructional Poster: the one used for the classroom presentation.
- Create a title for the exhibition. Suggestions
- NOW YOU SEE IT, NOW YOU DON’T!
- IT’S SCIENCE NOT MAGIC
- Design an invitation.
- Use removable tape to hang the work.
Presentation: for The Exhibition
- “In the back of our eyes there are cells called cones that are sensitive to red, green, or blue. They combine to allow us to see one million different colors.”
- “To make an afterimage, stare at the red rectangle of paper. I will count to thirty slowly.”
- “Now look at the white rectangle.”
- “The afterimage appears. The afterimage of red is a blue-green color called cyan.”
- “The red-sensitive cones become fatigued or tired and turn off, leaving the green and the blue cones to mix and create the blue-green afterimage.”
- “It disappears.”
- “The afterimage color disappears when the red cones are revived. The red cones mix with the green and blue cones of the afterimage to create white light. The white paper is then seen again.”
- “Enjoy our exhibition entitled “NOW YOU SEE IT, NOW YOU DON’T.”
- “It is the art afterimages created by our class.”
Resources:
- Amazon: Origami Paper Double Sided Color - 200 Sheets - 20 Colors
- Online articles
- Scientific American: Spooky Science: Discovering the Eerie Colors behind Afterimages
Science Buddies: Are Your Eyes Playing Tricks on You? Discover the Science Behind Afterimages!