How the organization of the studio, the equipment, and the school day promotes art in the classroom
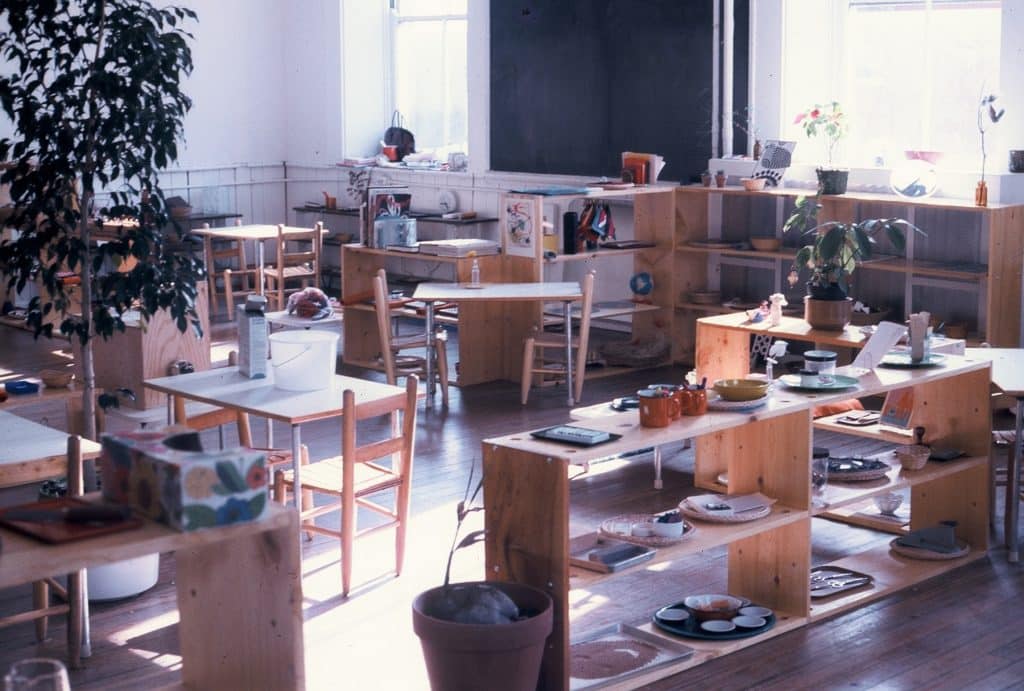 I designed 12 Montessori art studios over the 33 years that I practiced as a Montessori art specialist teaching 5 -12 year olds at Sands Montessori for the Cincinnati Public Schools. I found that one studio could service preprimary and primary students, switching back and forth with modifications, but 9 -12 children needed a larger environment that only serviced them.
For the first 3-4 years of our school’s existence we serviced children 5-9 years of age. There were Kindergarten only classrooms. The kindergarten teachers, in one year, prepared our students to seamlessly enter into the lower primary classes serving 6-9 year olds. After 4 or 5 years, the 9-12 environment was opened. Even later, 3-6 environments were established, but only kindergarten students came to the art studio. The maximum number of students in the school ranged from 550 to 700. During most of my teaching career, I taught in three environments called studios, with an assistant teacher. For the last five years, I worked by myself because of budget restraints. Without an assistant, it was a 7 AM to 7 PM job on weekdays, and required at least six to eight hours at school every weekend.
There were several important, positive features of each of the spaces that became studios. There was at least one sink, room for an open space to accommodate 24 people for group lessons, storage spaces, north light, enough electrical outlets, and lastly, a place for a kiln that was safe for the children and safe for the kiln.
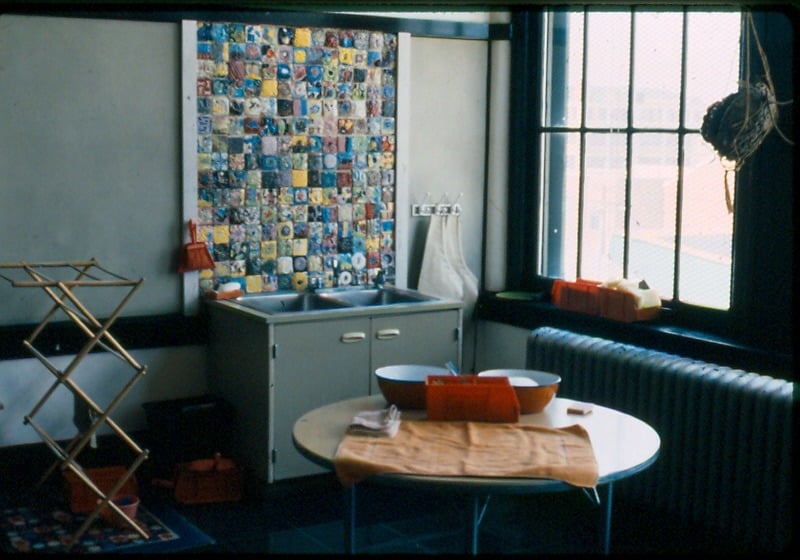
Wet Work: near Sink
- Practical Life
- Art Forms requiring significant water
- “Special work” requiring water cleanup
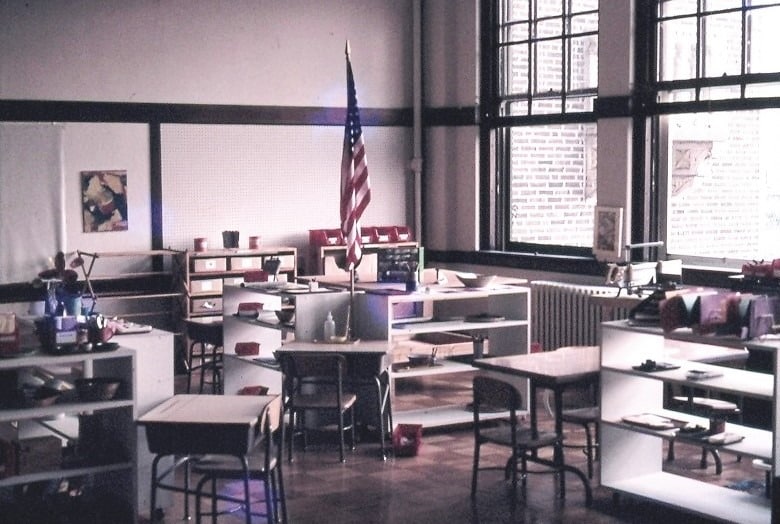
Dry work: far from sink
- Dry art forms
- Dry “Special Work”
- Place dry work anywhere in a Montessori environment to which it relates, e.g., straw construction with the geometry work.
 The Architecture of the Day was how the day of events was structured in each studio. It was repeated each time a class came to their studio, no matter what level it was. It varied only for total school happenings such as snow days, auditorium presentations, or all school meetings. The following is a detailed description of a day.
The Board of Events: 5-12
The board was a written schedule which was read with the students at the beginning of the class. It created a common classroom experience for each class at that level. It functioned to communicate to the children what new work they could expect to experience and what their obligations would be during that class. It was a group contract. The affirmation for that class period was the last line on the board. It was said out loud by the group, and some 9-12s wrote it in their journal (optional work). The school’s arts schedule was established before the beginning of the year so each class period could be given a number (Class #1, Class #2, etc.). All teachers knew when their class would be having art, music, and physical education for the whole year.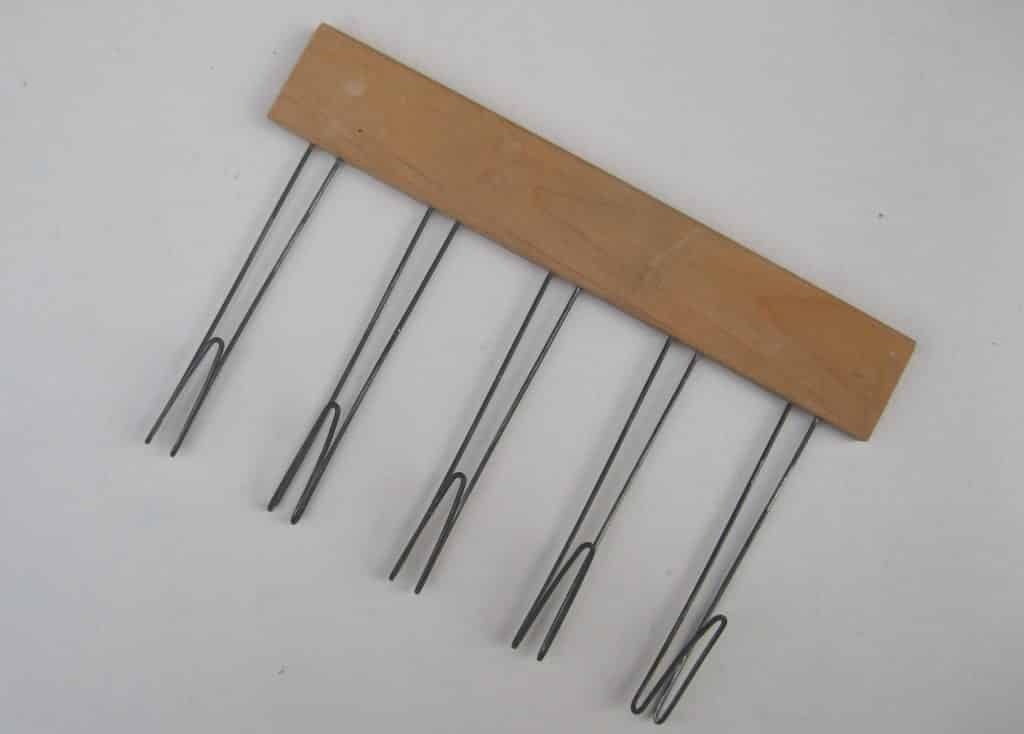
Materials for the Board:
- A chalk board, a white board, or Lined Lecture Pad and easel
- A staff line maker (Staff Liner) for chalk or dry-erase markers (Amazon: https://amzn.to/33v2qMz)
- Chalk, dry marker, or pointed marker
- A pointer
Preparation for the Board:
- Prepare art materials for the lesson and for the children to use.
- Create a Work Plan for 9-12 students (detail at end of this section) if using.
- 5-12 All materials and equipment were arranged on a mat or low table, ready for the group presentation. Individual lessons were given when needed.
- The Architecture of the Day was displayed.
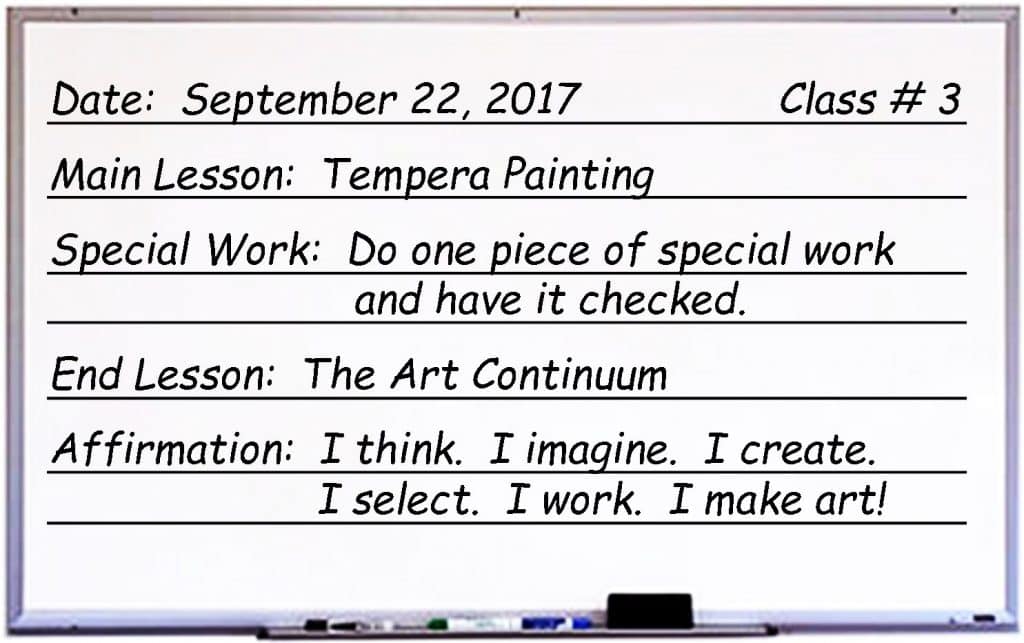
A Sample Board: 5 -12 (sample is for a 6-9 class)
- Date: September 22, 2017 Class # 3
- Main Lesson: Tempera Painting
- Special Work: Do one piece of special work and have it checked.
- End Lesson: The Art Continuum
- Affirmation: I think. I imagine. I create. I select. I work. I make art!
The Front Door: 5-12
The Front Door introduces the classroom, and needs to be well designed, to the point, welcoming, positive, with identifying remarks. It tells everyone what they can expect to find inside. On an arrow shaped poster it might say “The 9-12 Art Studio: This way to Success.”At the Door: 5-9
The 6-9 students were individually greeted at the door and asked to take a seat on the line. When I was teaching alone, the kindergarteners followed me into the room and we all sat down together around my teaching mat, but they each were greeted as I dismissed them from the lesson to choose their work.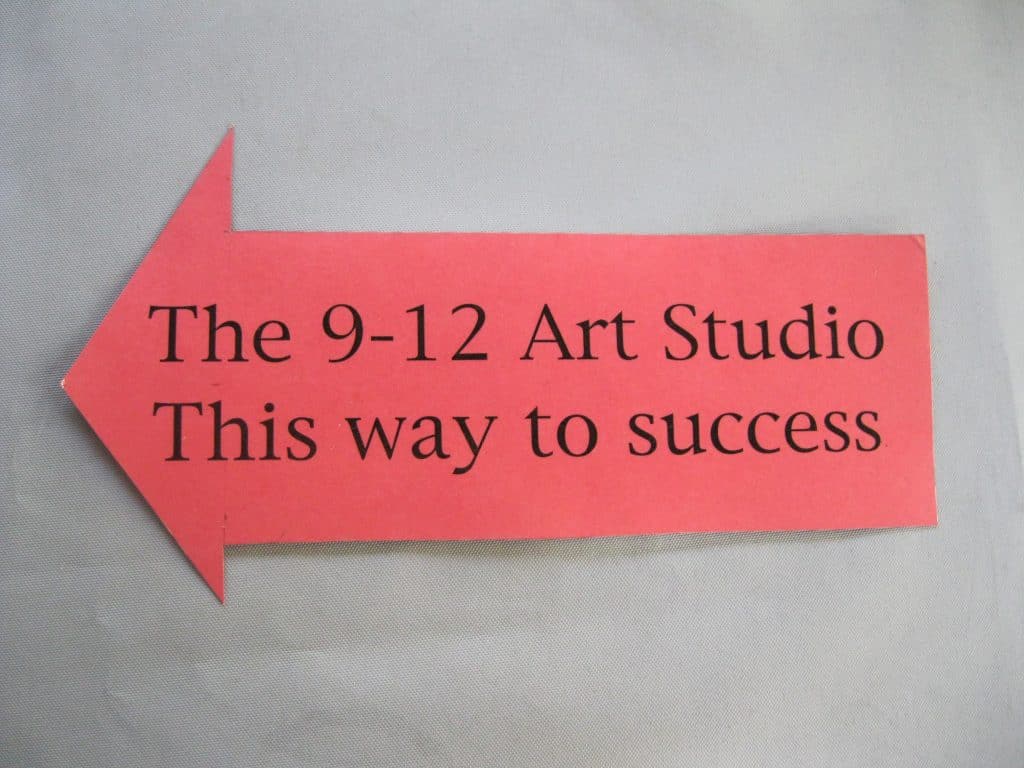
At the Door: 9-12
Students were greeted at the door and went to their assigned seats after picking up their art journals. New groups and seat assignments changed every quarter or when their classroom teacher changed them. For presentations that required lots of space, the students made a large circle around a permanent manual arts work table that had storage drawers and cupboards beneath. It was the size of an extra long queen sized bed. There was a horseshoe table and a white board for general meetings and lessons requiring less space.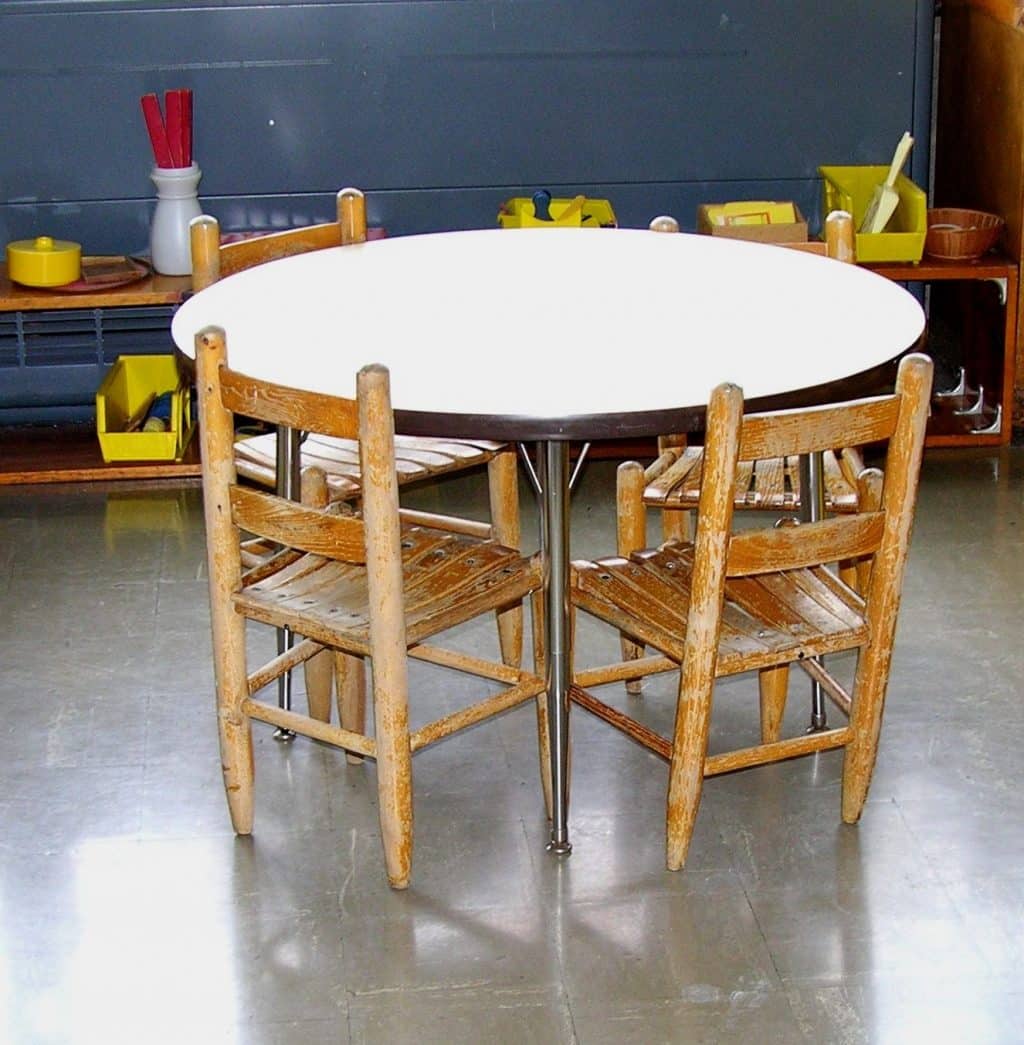
The Furniture
5-9 Studios:
The furniture in the 5-9 Environment had to be able to accommodate both the kindergarten classes and the 6-9 students. I designed wooden modular shelf units that were 1’ to 4’ high in 3’ sections that my father put together. The following is a list of other furniture from the last environment (see photos). They were made, bought with grant funds, owned by the school system, or bought with money generated by fund raising projects sponsored by the Art Department.- 5 one person “floor tables” made from sink cutouts with a sit-upon rug
- One round table for 2 to 6 people when needed with 24” metal stools
- 4 large rectangular tables with plastic chairs or stools if needed
- 2 small tables with wooden chairs for 2 persons
- 1 round wooden table with wooden chairs for 4 people
- Parents made a 40” x 4’ x 4’ collage table that had a storage shelf below. It could accommodate from 4-6 people.
- Parents made a 4’ x 4’ carpeted platform 15” high.
9-12 Studio:
There was no room for an open space in either of the upper elementary studios.- Students sat at rectangular tables on 24” metal stools.
- In one building, I had 30 built-in cubbies in the front of the room under two huge combination bulletin/slate boards to store and display “Special Work.”
- In one studio, “Special Work” was isolated on three desks and 2 shelving units.
- The shelving was a mix of my wooden shelving and deep plastic laminate units on wheels.
- In one building, a long butcher block counter ran the entire length of the both studios. It held a variety of art forms and special work activities. The windowsill above the counter was a great storage space.
The 5-9 Open Space
- When adequate space was available, children gathered for presentations and meetings on a circle made of black electrical tape.
- One studio required a yellow semicircle shape for the kindergarten students and an inverted trapezoid for the 6-9s.
- Both groups used the open floor space to attend group presentations and to do “Special Work.”
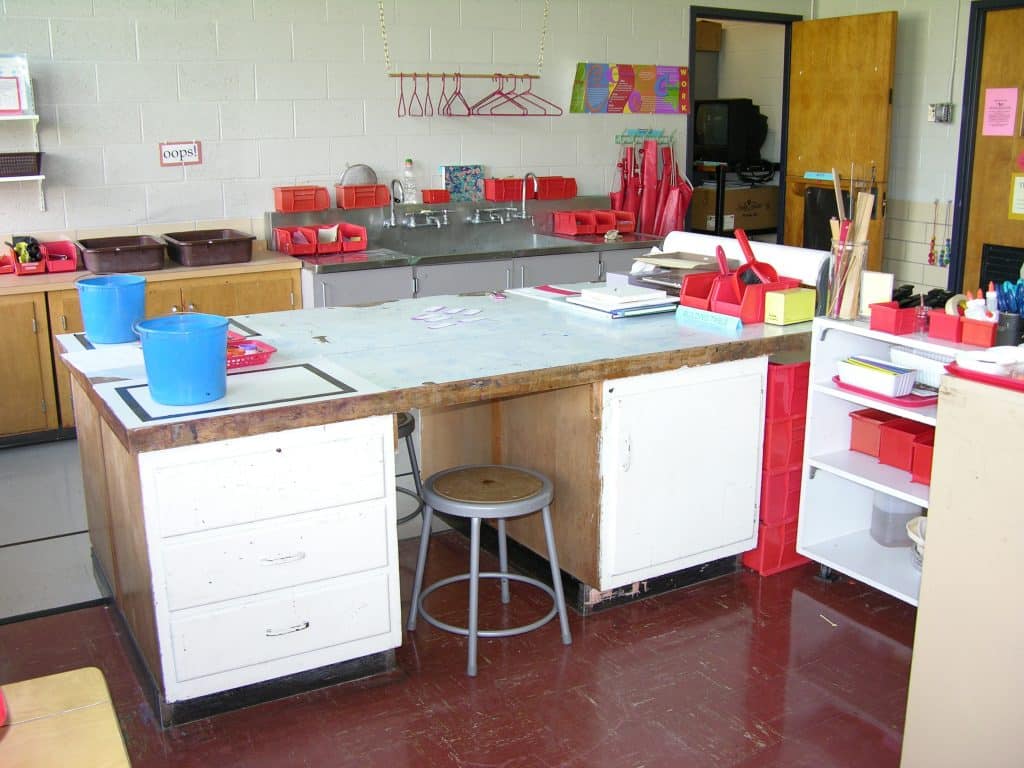
The 9-12 Open Space
- In one building, there was a 4’ x 8’ carpeted platform 15” high for presentations. The children gathered around it on their stools.
- Another building had a manual arts island for lessons that were physically large, and a horseshoe shaped table in front of a whiteboard for lessons needing less space.
Aprons: 5-9
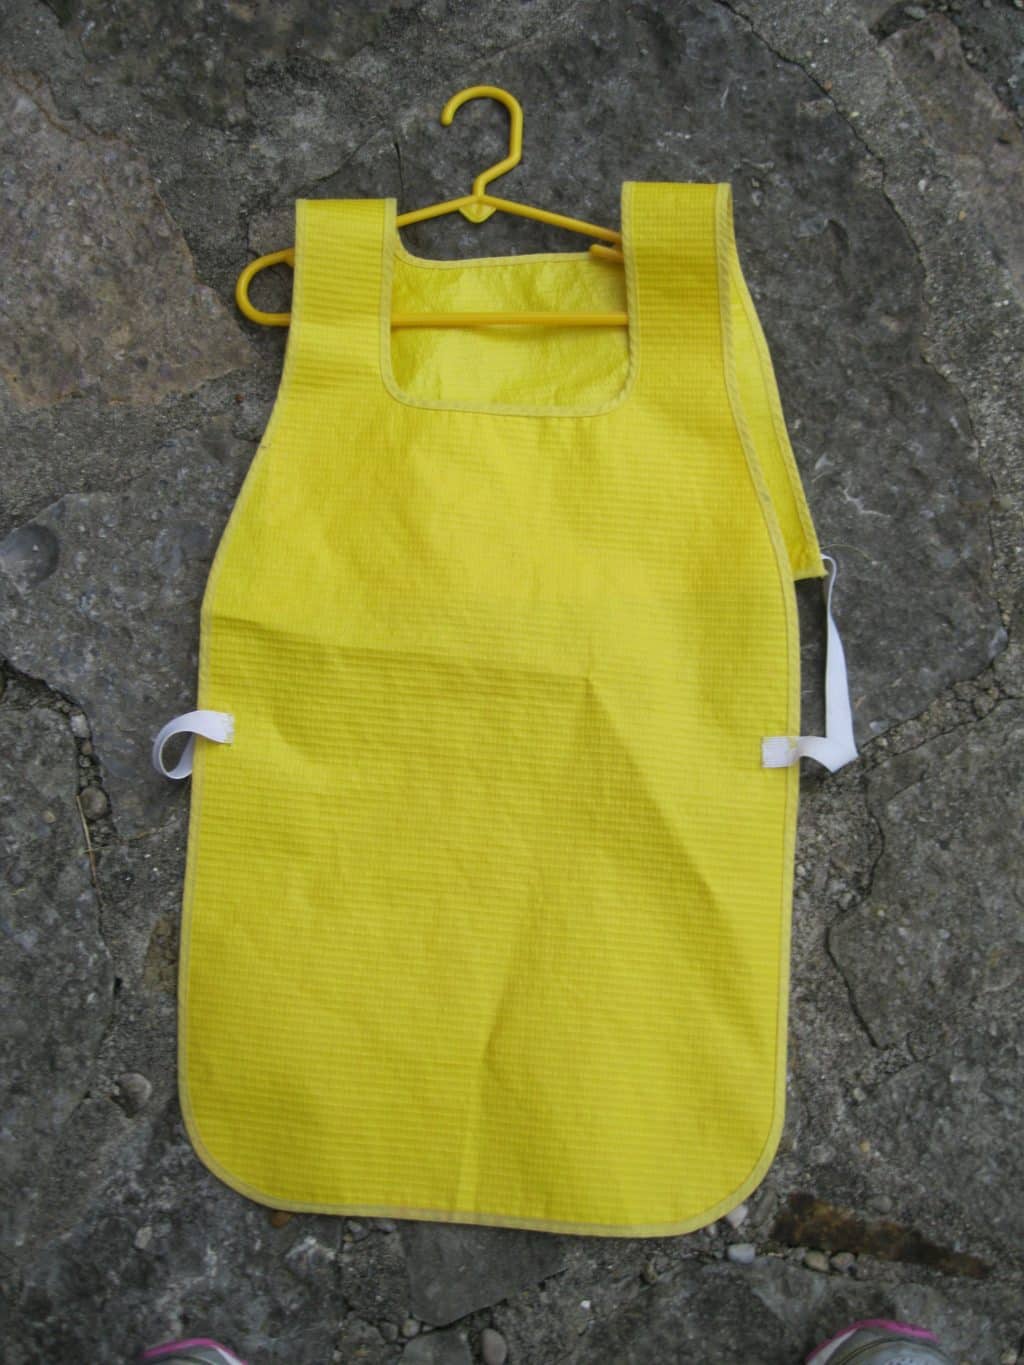
Aprons that pull over the head with under arm elastic are the best design for 5-9 students. While they are commercially available, they can be made by you or a parent. The fabric to be used is important since some plastics (PVC) emit toxic fumes. Consider a safer alternative plastic such as PEVA. Some 9-12 children can still use the 5-9 sized aprons, but a larger size is needed by most.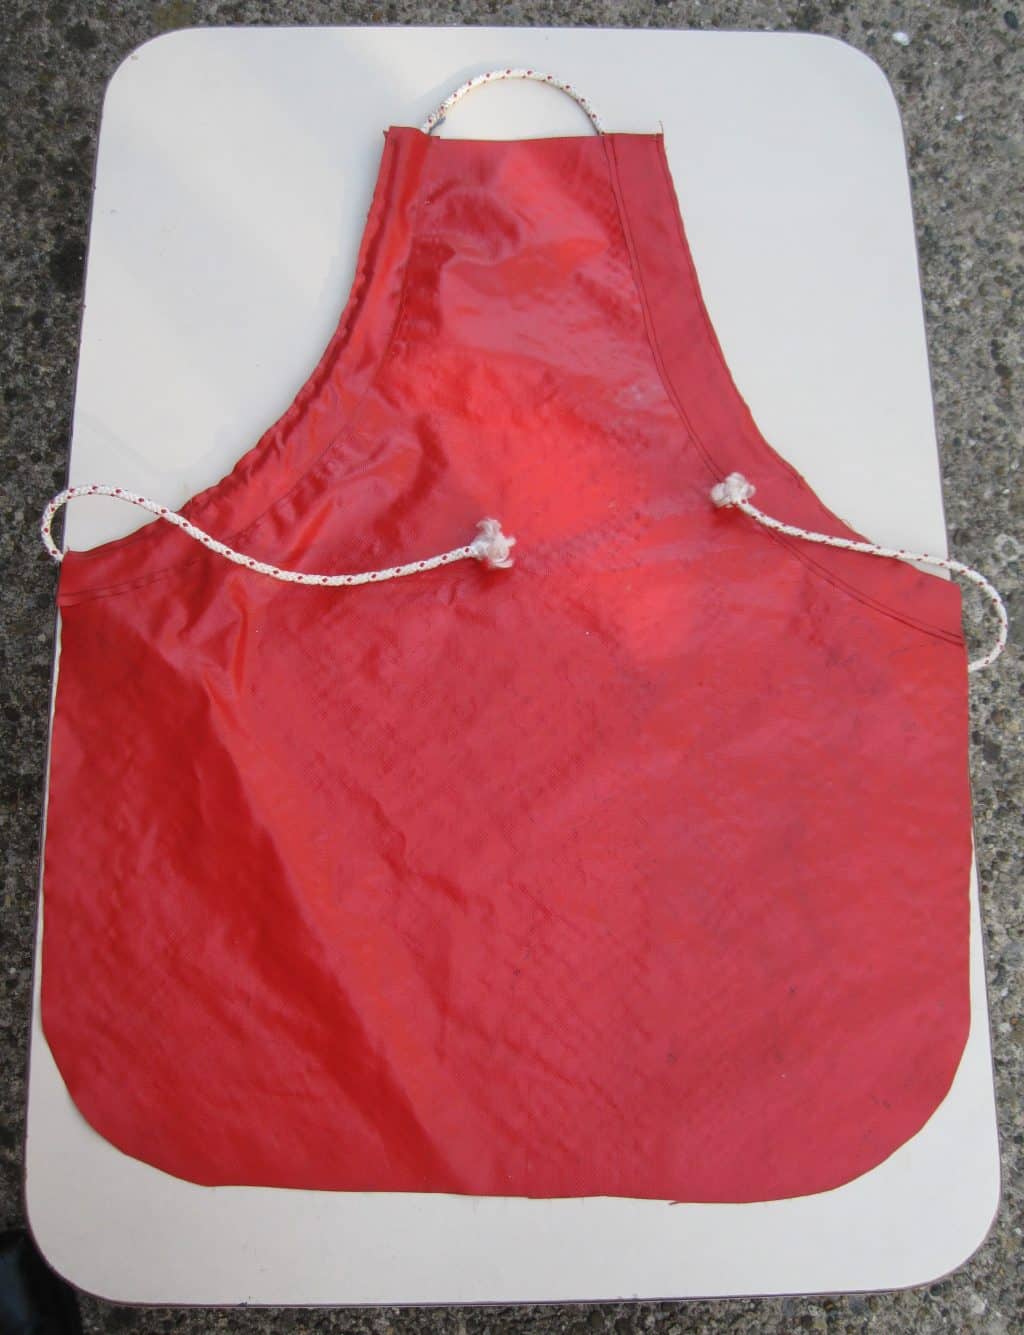
Aprons: 9-12
My original Studio aprons are fine for 9-12 students, but were more difficult for 5-9 students to use, since it required them to tie a knot behind their backs. They were made out of non toxic plastic material and were strung with clothesline rope and had wooden beads to keep the rope from sliding out of the apron. Ones that just pop over your head are the most practical. Buy an apron you like and reproduce it. Regardless of its design, it must repel water.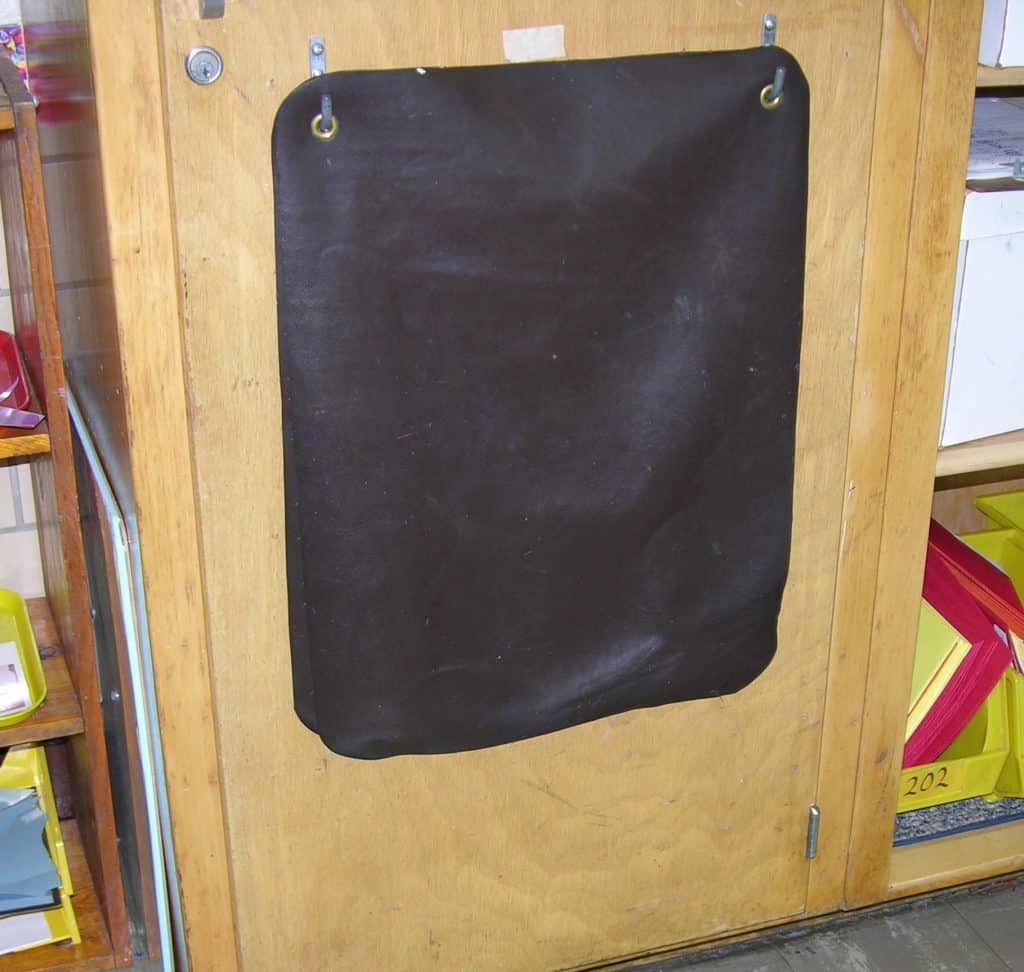
Floor/Work Mats: 5-9
Floor mats are needed when any work is done on the floor. The mats delineate the space that is being used and contains the materials being used. All mats in the studio were made out of plastic and hung on the wall. The largest mat could accommodate the long rods, the middle size was the size of a desk or small table, and the smallest were for individual work.Floor/Work Mats: 9-12
There were no floor mats for 9-12 students since all work was done at tables. There were medium, desk size, and individual size work mats provided where needed on the tables. If the project was unusually large, and often was, a heavy commercial plastic drop cloth was used. At times, each level needed to use the large blue drop cloth.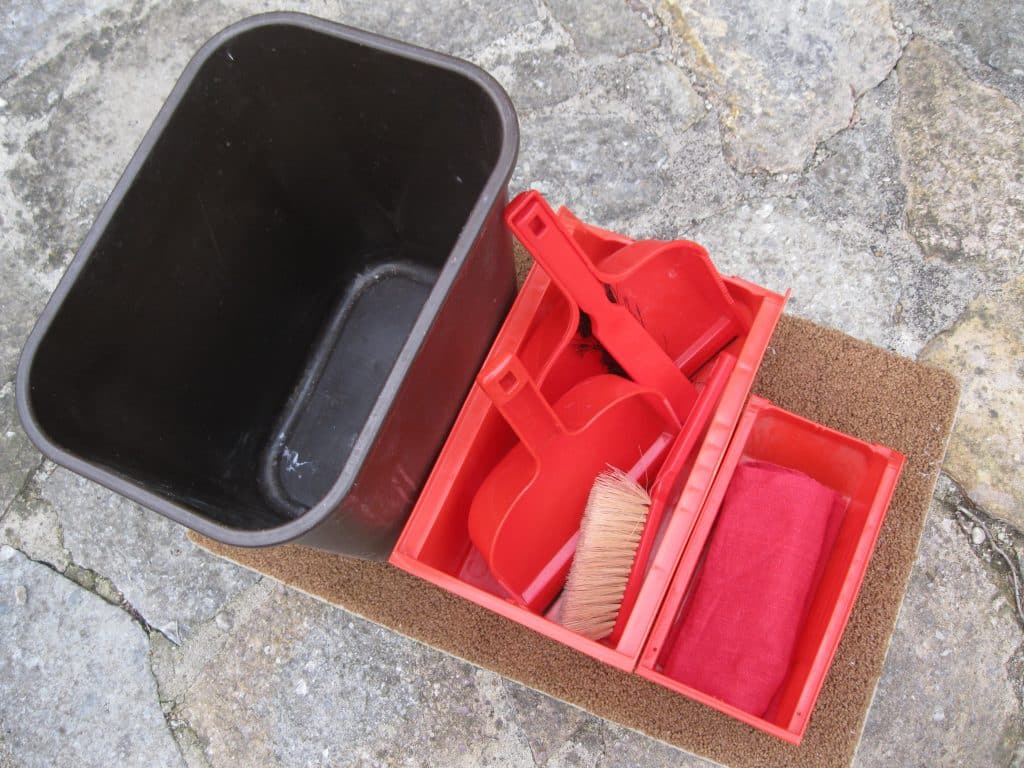
Trash Cans: 5-12
Place a regular sized trash can in the room in two places, but not near the main door to the room. Put one near the sink and one near activities that consume paper, i.e., the Collage Center, Origami, etc. Place several small brush and dust pan sets in containers on shelves around the room where small bits of materials make their way to the floor.Recycle Box
Use a real box that needs to be recycled, and label it “Recycle Box.” The container then will be a clue. Let the children decorate it.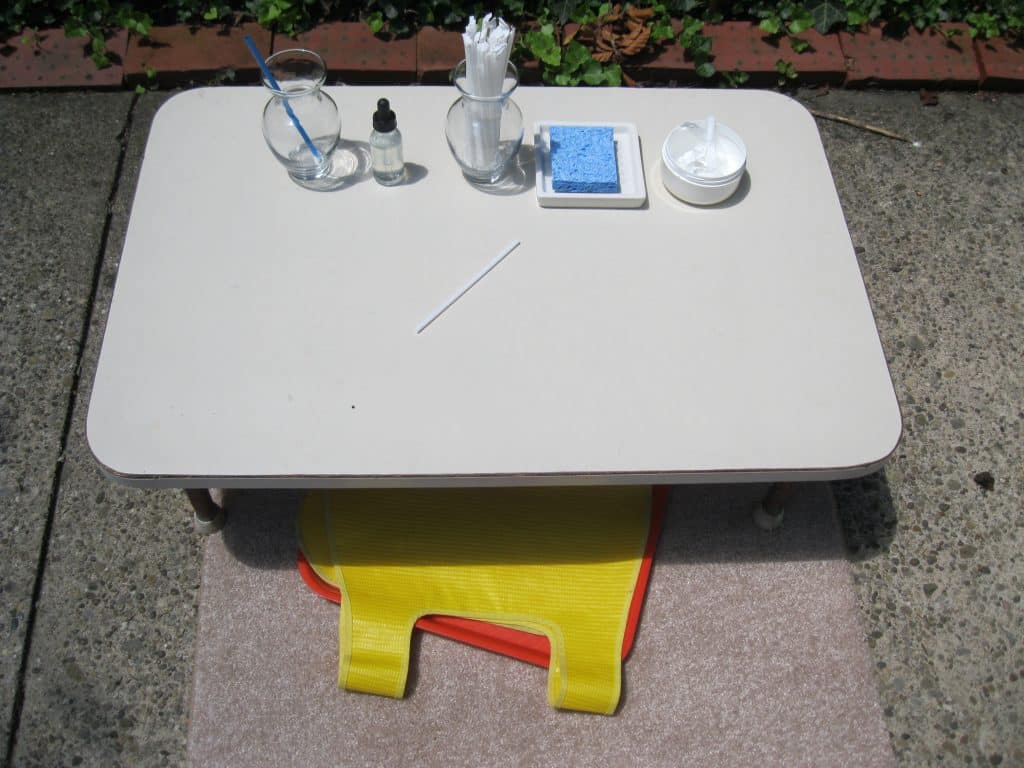
Rugs: 5-9
Individual rugs in front of low tables are needed for comfort. Small sample rugs that are a perfect size can be found at rug and discount stores.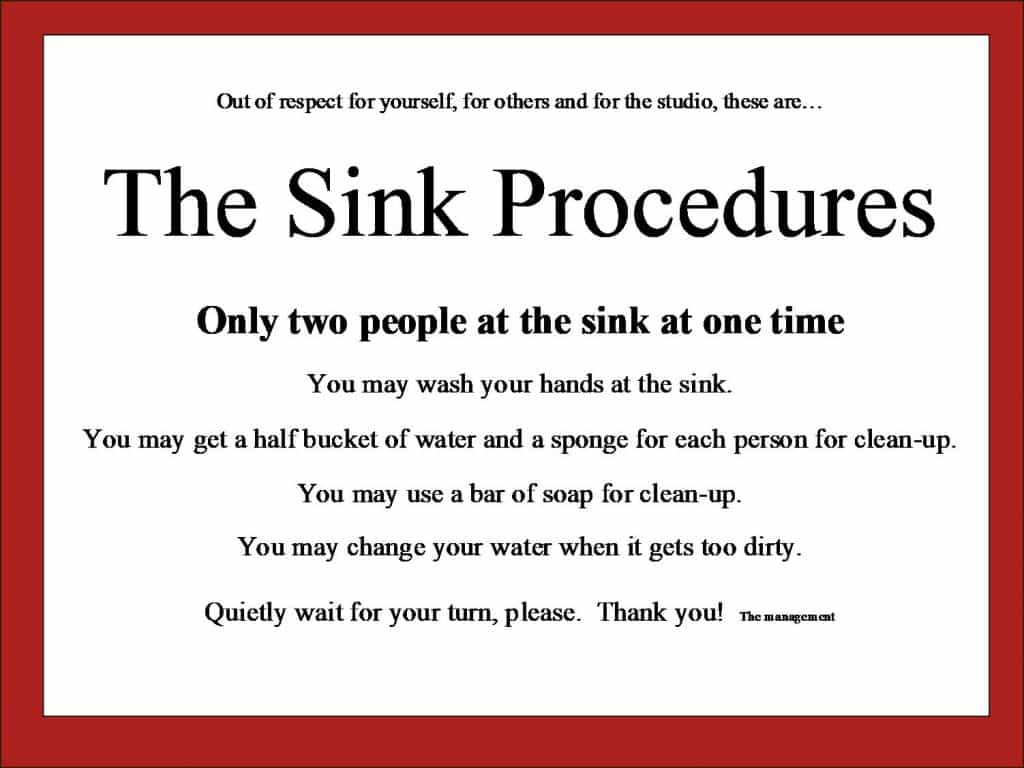
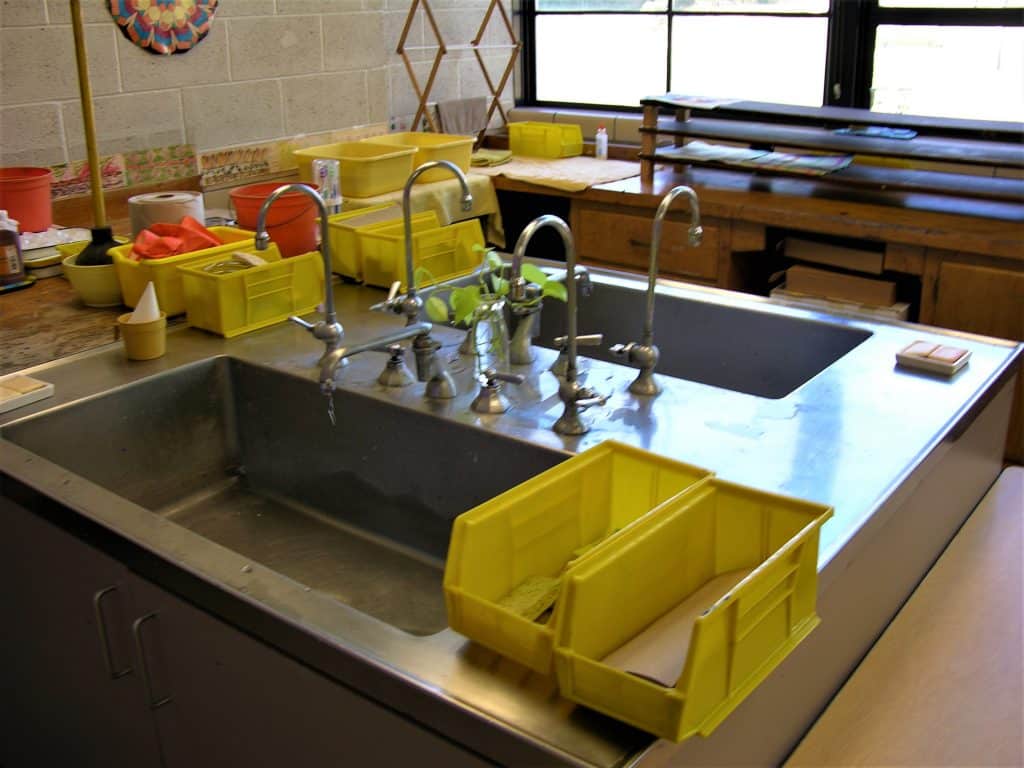
Materials: On top of the sink
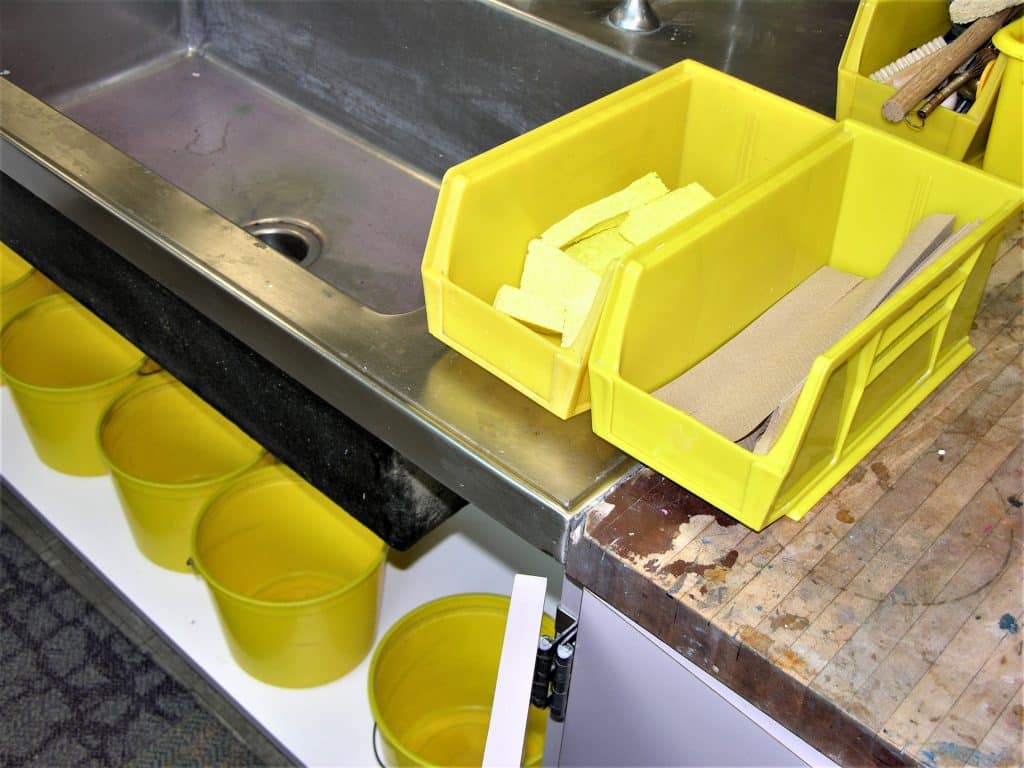
- Liquid soap in a container or several small soap cakes in a dish
- 12 damp, hand sized sponges in a container
- Paper towels in a container or dispenser
- Hand Lotion: K-9 use a little lotion, 9-12 use a lot: in containers
- Paper Cups in a container if no drinking fountain is available in the room
- A special container close by with:
- 2 small, cheap, plastic paint scrapers
- 2 small sponges with a scouring side
- 2 metal spoons
- 2 pair adult rubber gloves, 2 pair small gloves for children
- A whisk broom
- Anything else you discover you might need
- Keep a simple box of common tools handy, but out of reach of children
Materials: Under the sink
- 8 one gallon buckets
- 2 larger buckets for big spills
- Store them behind the small ones if you have room, or very near by.
Near the sink:
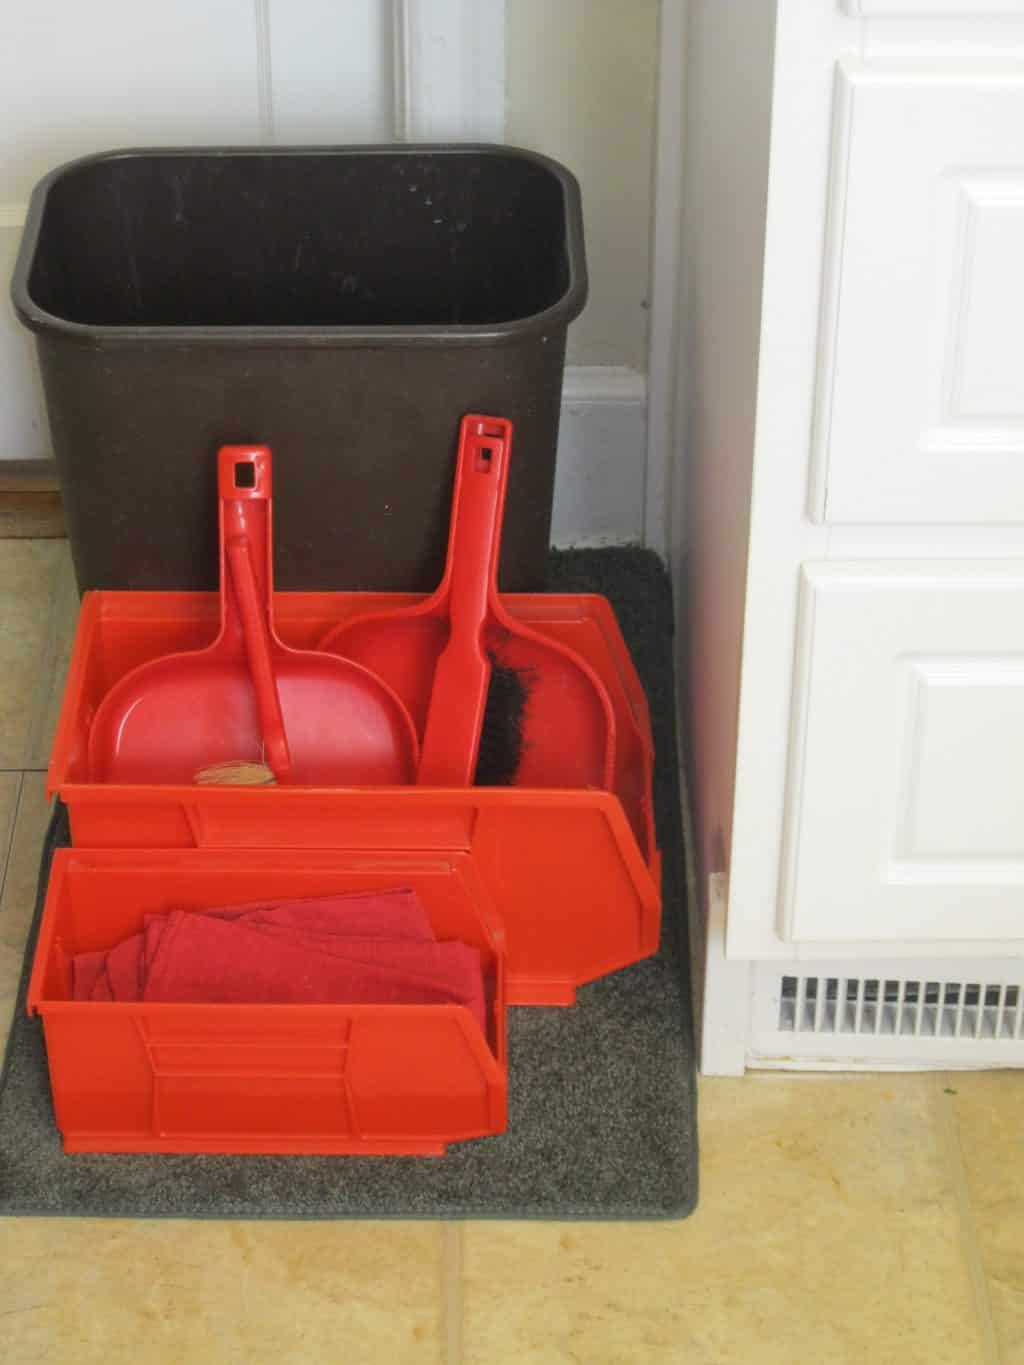
- Trash can on a rug big enough to hold:
Materials: 1 or 2 adult sized hand broom and dust pan sets in a container
Note: I had one full sized broom for use if it was necessary. It was stored out of sight.- 8-12 folded “shop cloths” in a container
- A small basket or other container for laundry
- Note: Paper towels are for drying clean hands only and for papier mâché. Repeat this reminder often.
Preparation:
- Assemble the sink area above and below.
- Cut cello sponges in half.
- Sponges need to be damp when placed in the container for the day.
- At the end of the day, clean the sponges in antibacterial soap and water and replace often or when dirty.
Extensions:
See: Cleaning Stations under Practical LifeResources:
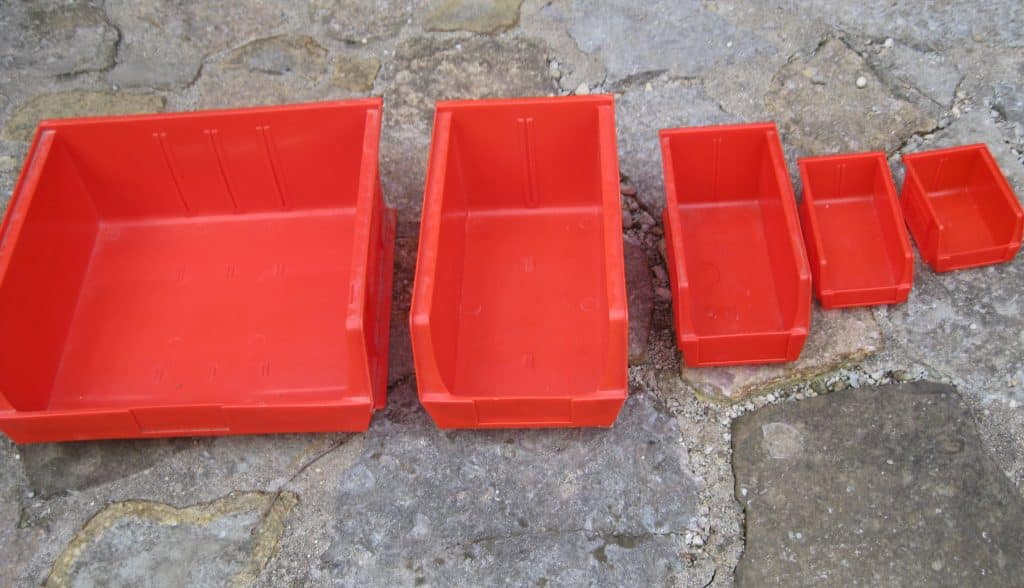
- Stackable AkroBins: organize and isolate materials and equipment https://monsterbins.com/akro-bins/stackable
- Extra Small: 30210 – for staples, paper clips, name tag strings, erasers
- Small: 30220 – for markers, glue bottles, paper fasteners, art materials
- Medium: 30230 - for sponges, paper towels, shop cloths, finger paint containers, many art forms
- Large : 30240 – for special work file folders, 9-12 art journal
- Extra Large: 30250 – for finished work, blocks, 3 dimensional collage materials, wood for sculpture, balloons for papier mâché
- Small rugs are found in carpet and discount stores.
- Individual soaps are sold in bulk. Share the cost with other teachers.
- Brooms and tools: discount stores.
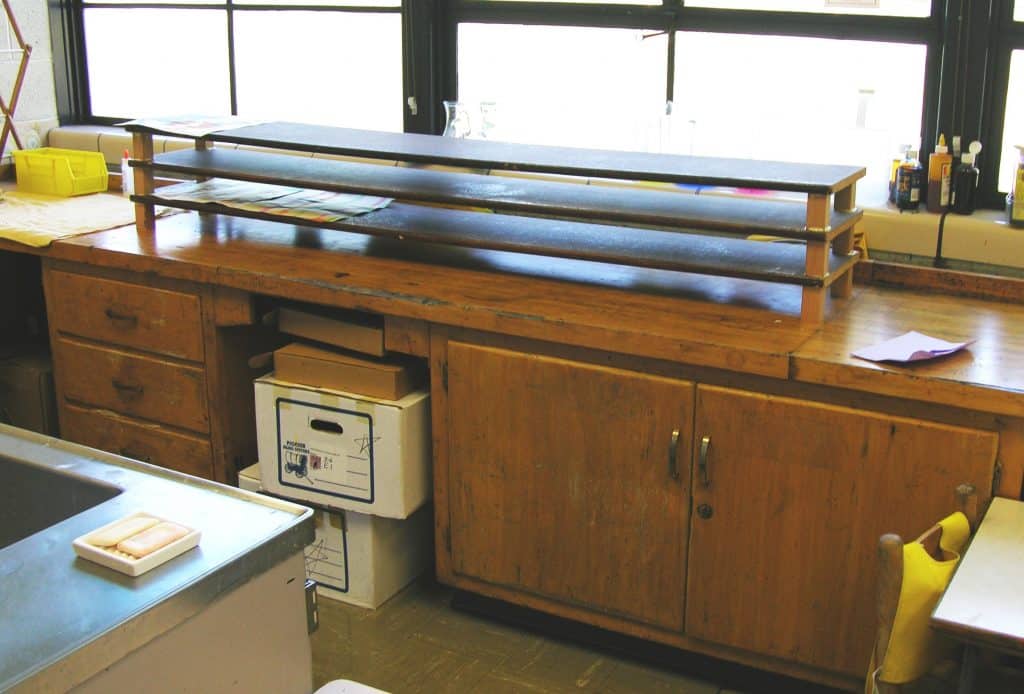
Two Dimensional Work:
- Clothes (horse) drying rack (5-9)
- Empty classroom shelving
- Special shelving for drying work
- Commercial drying rack (9-12)
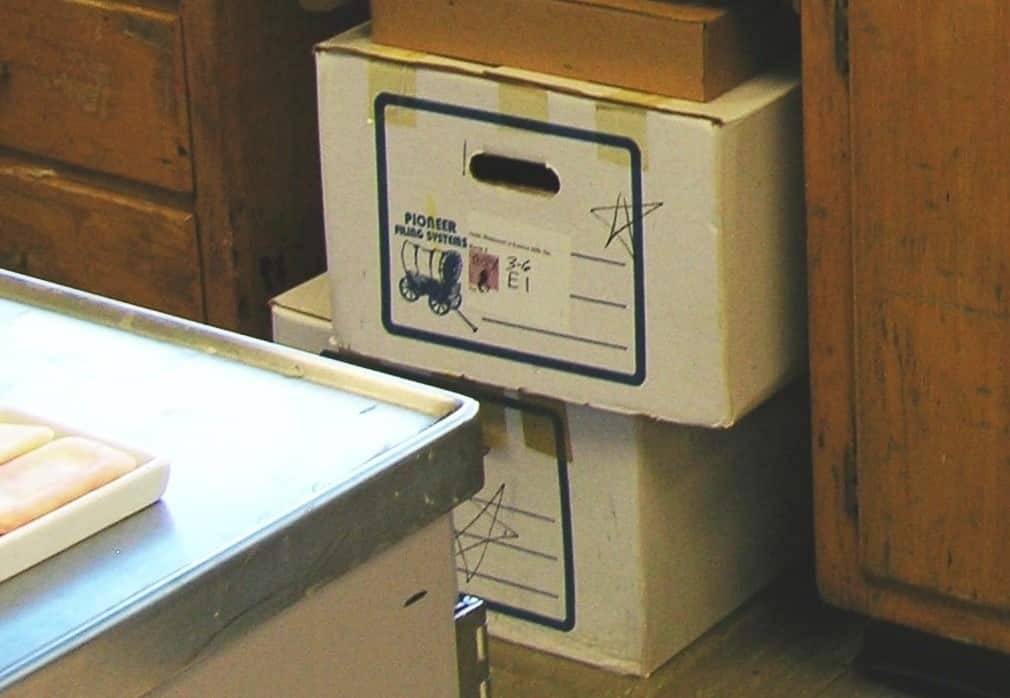
Three Dimensional Work:
- Bank box for dry work
- Metal rack that is made to hold glasses for dish washing
- Storage shelving
- Hang from a rope from the ceiling, across windows, or from light fixtures.
- Note: It is important to store unfinished three dimensional work in a space not easily accessible by students.
Drying Spaces for Clay Work
- A closet
- A closed cupboard
- Note: Clay requires a long, slow, drying period so as not to crack. Before firing in a kiln, the material is weakest when bone dry. It is easily broken when carelessly moved. Keep drying pieces away from the children. They love to touch beautiful things and can easily break them from lack of experience.
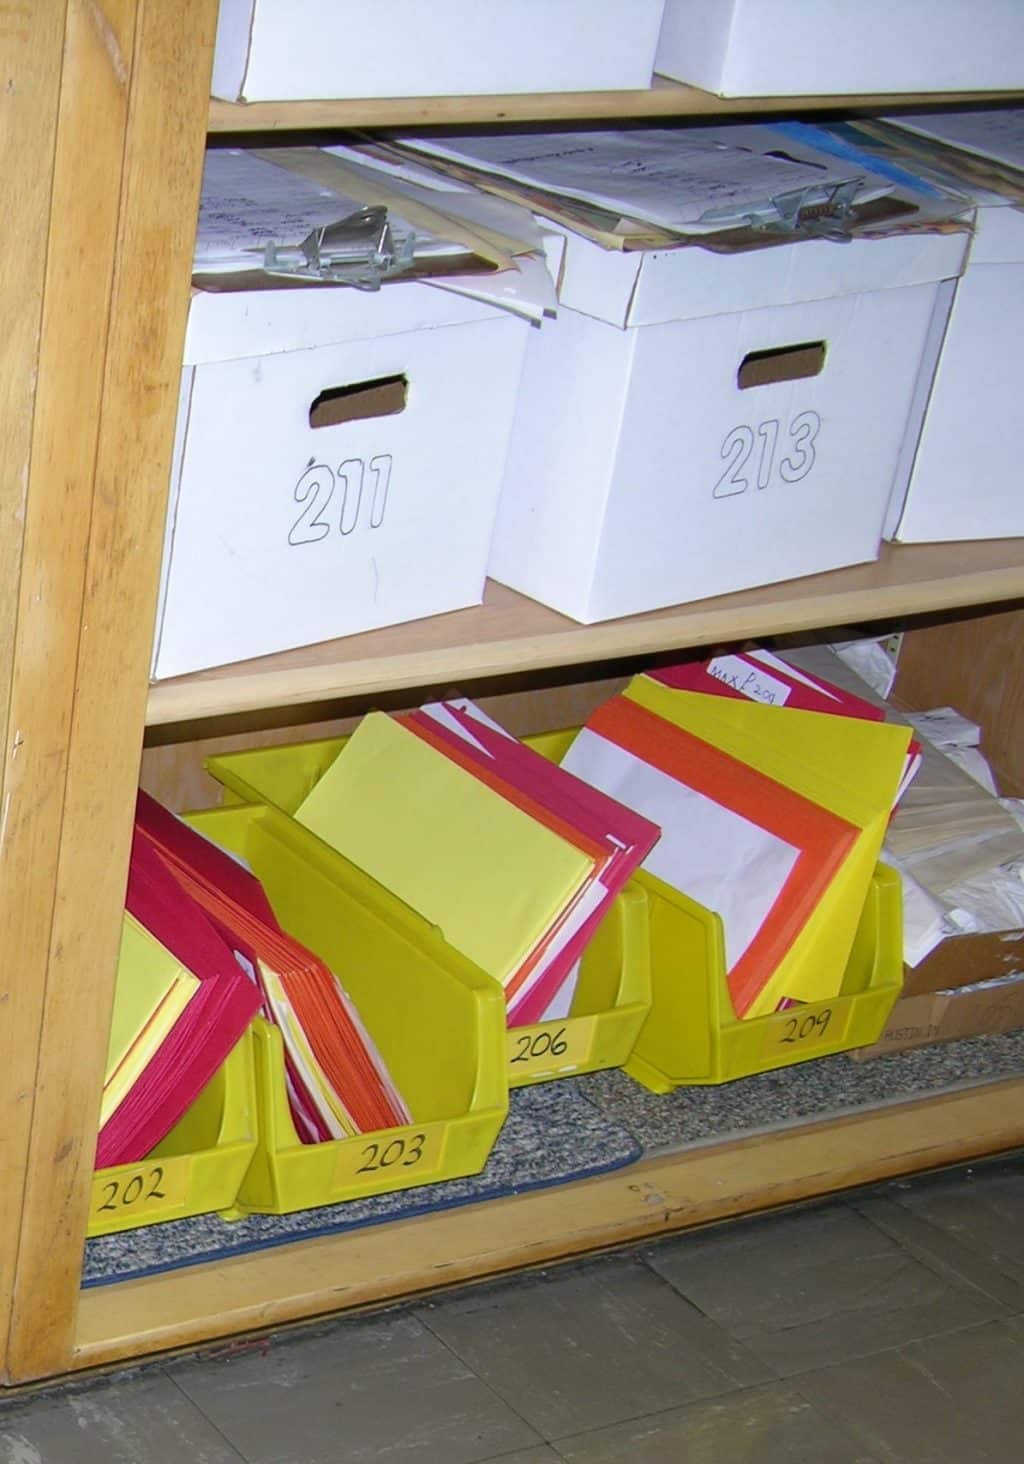
Unfinished & Finished Work Boxes: label all
- Lidded File Boxes
- Label the box, e.g., Room 205
- All Special Work done by 5 year olds was stored in their new 6-9 folder at the end of the year.
6-9 Finished Special Work Storage:
- Stored in file Folders, color coded by grade level (red, yellow, and blue), 1 folder per child
- 6-9 Art Form Checklist
- New elementary students were given a checklist for their folder. Everyone’s list was checked and brought up to date at the end of every year as Special Work.
- File folder storage container: AkroBin # 30240, labeled
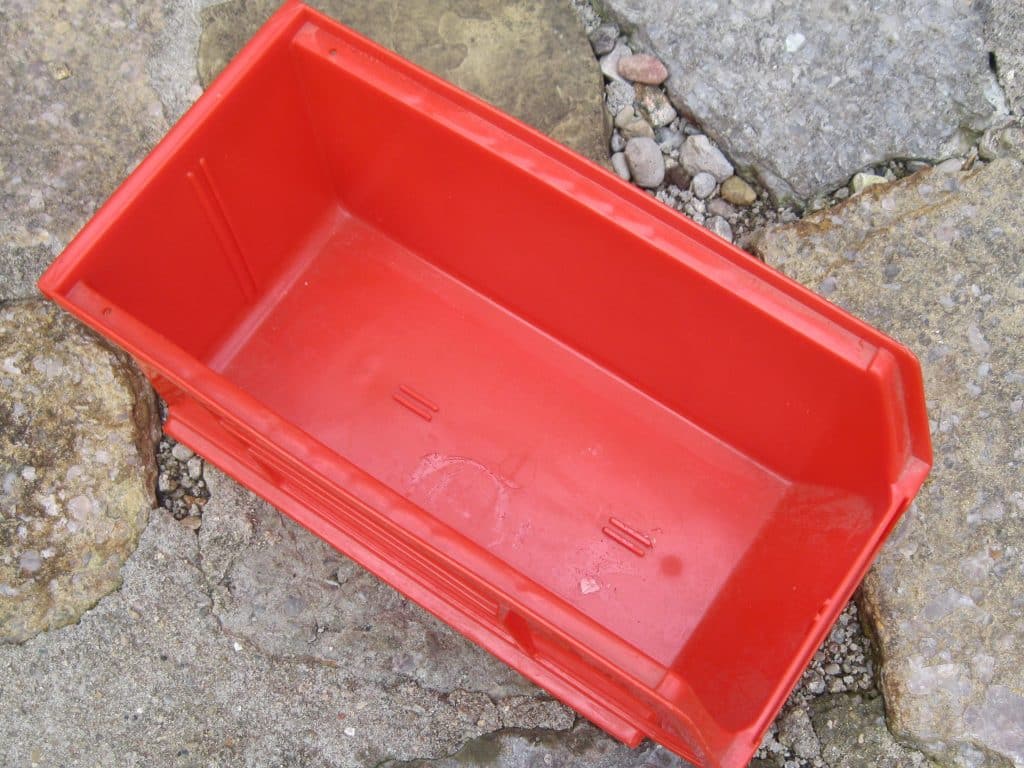
AkroBin #30240
5-9 Finished Artwork:
- Extra large AkroBin # 30250, labeled (or find product called “Basic Stack Basket” at the Container Store) 9-12 Art Journal:
- The Art Journal was made at the end of the 6-9 cycle.
- Use a 3 ringed paper notebook with front and back pockets, or something better.
- Begin the journal with general information pages like the school rules, classroom rules, and the 9-12 Art Form Checklist, plus the stored items from the 6-9 file folder. Unfinished 9-12:
- Bank Box
- Unfinished work plans and all two-dimensional Special Work (evidence of learning) were stored in their Art Journal
- Art Journal Storage Box: AkroBin # 30240 Finished 9-12:
- Dedicated shelf or shelf unit
- A large Extra Large AkroBin # 30250
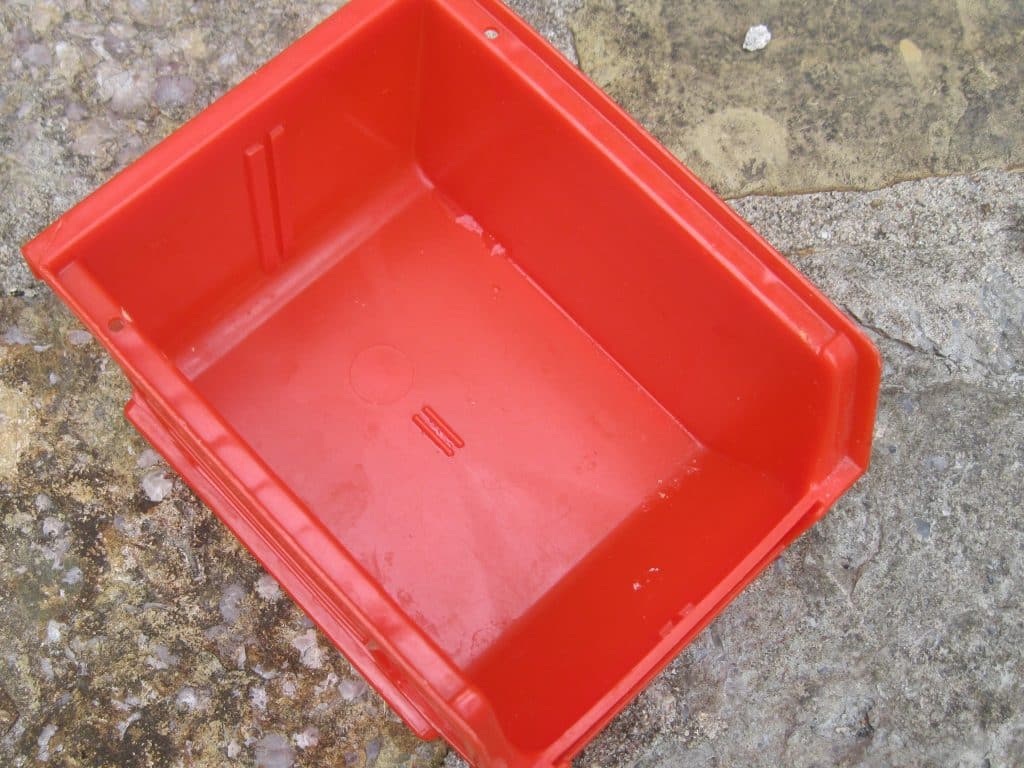
AkroBin # 30250
This work station is for children to get what they need to identify their work, date it, and/or prepare it for exhibition. Design it to be a standup space (no chair) with the finished work box beneath it. A tall school desk is perfect for students because of its flip top, storage space, and just the right amount of space underneath it for the 5-9’s Finished Work Box. Public schools often hold sales of unused furniture.
An entire shelving unit may be needed for 9-12 students. Use the top of the shelf for all the identification materials such as pencils, tags, instructions etc. Use the lower shelves for two and three dimensional work. There may even be room for the Unfinished Work Box.
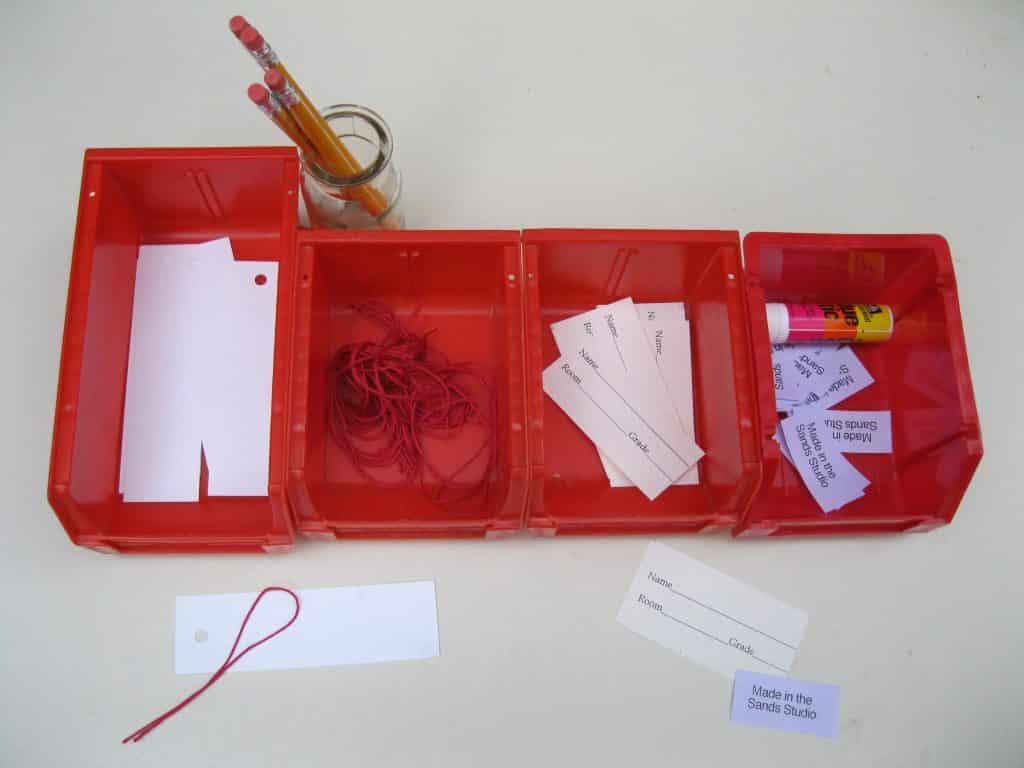
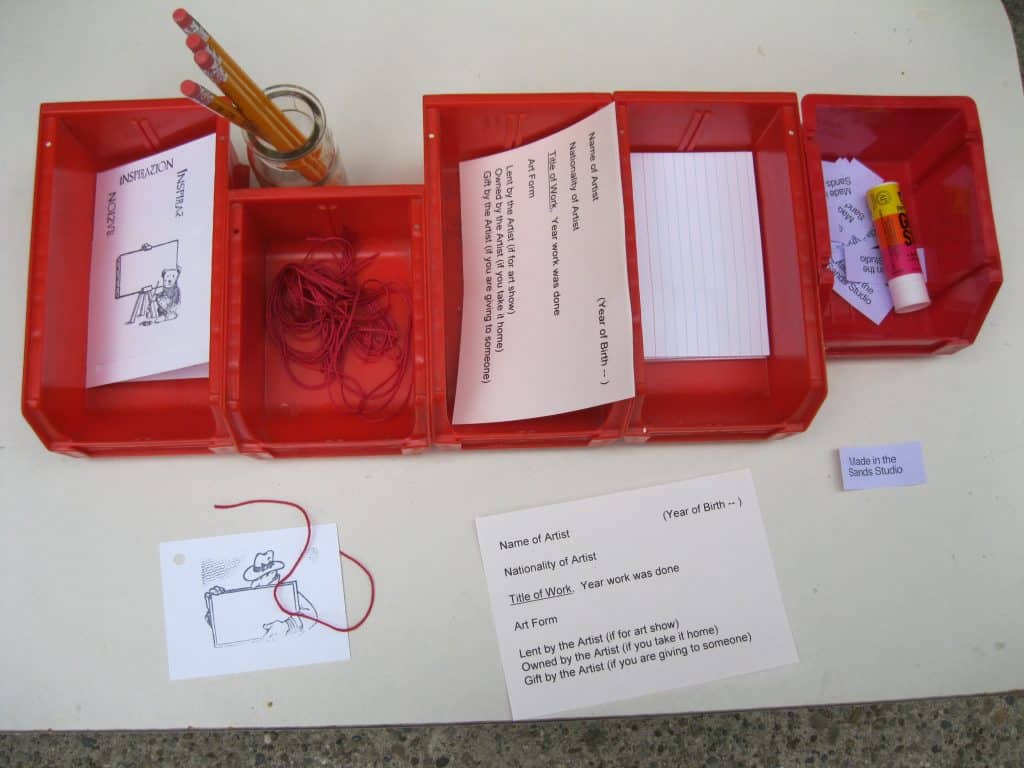
Materials: 5-9 ID Center
- Pencils
- Name tags and name tag strings for three dimensional work
- 5” x 8” plain, white file cards
- Carpet thread (string) or #3 crochet thread
- 1/4” Hole punch
- Date stamp (optional)
- Simple identification tags for exhibition pieces (5-9)
- A printed tag that requires only the Child’s name, room number, and age. Media and title are optional.
- Paper clips (to attach the identification tag to the name tag)
- Tags for the back of work that say where it was made (optional)
- A Glue Stick
- Containers for the above items
Preparation:
- Choose the containers for each part or item.
- Cut file cards into tags 5” x 1¼”.
- Punch a hole near the end of each tag.
- Cut name tag strings.
- Use a 4” x 4” piece of mat board or thin wood. Wrap the string around 10 -15 times and then cut the strings in half. Change the size if needed.
- Design an Exhibition Tag or use the one provided.
- Reproduce it on cover paper or oak tag paper.
- Cut it apart.
- Print the sheet of “Made in_________,” and cut apart.
- Label the Finished Work Box.
- Assemble the station near the door.
Note: Keep the recycle and unfinished boxes far away from the finished work station. Younger children may be confused, especially if they look similar.
GEORGIE STORY
When first working with 9 -12 people, I had a difficult time getting my students to put their names on three dimensional work. It occurred to me that the tags I provided were big like those needed by younger children. I found a number of cute and/or funny rubber stamps that were meant to be used for making name tags or short notes. The students took great care in choosing just the right one.
It was important to me that 9-12 children’s artwork be exhibited in a professional manner. I wanted my 9-12 students to appreciate their own work, so it was always matted or mounted. I went to our city’s biggest art museum and copied its way of tagging work to use with my older students. I was shocked to find that many of our children did not know the meaning of the word nationality. We as adults can sometimes miss the obvious.
Materials: 9-12 ID Center:
Note: The 9 -12 station requires different name tags, exhibition tags, and finished work spaces. Place the station as close as possible to the storage area.
- Pencils
- Name tags and name tag strings
- 4” x 6” plain, white file cards
- One or more rubber stamps (See: Georgie Story above)
- An ink pad
- Carpet thread (string) or #3 crochet thread
- 1/4” hole punch
- Date stamp (optional)
- A Museum Identification tag (required for all finished work)
- Tags for the back of work that say where it was made (optional)
- A Glue Stick
- Paper clips (to attach the identification tag to the name tag or Art Journal)
- Containers for above items
Preparation:
- Choose the containers for each part or item.
- Cut 4” x 6” file cards in half (3” x 4”).
- Print the tags.
- Punch a hole in the upper left-hand corner of each tag.
- Cut name tag strings.
- Use a 4” x 4” piece of mat board or thin wood. Wrap the string around 10 -15 times and then cut the strings in half. Adjust size if needed.
- Print the sheet of “Made in_________,” and cut apart.
- Make several laminated copies of the instructions for a Museum Identification Tag.
- Use the tag provided below or create your own.
- It can also be made into a book with step by step instructions.
- Provide ruled 3” x 5” file cards.
- Label the Finished Work Box.
- Assemble the station.
Museum Identification Tag: 9-12
Full Name of Artist (Year of Birth)
Nationality of Artist
Title of Work, Year work was completed (Note the Underline)
Name of Art Form
Choose one:
Lent by the Artist (if work is to be exhibited)
Owned by the Artist (if you want to take it home)
Gift by the Artist (if you are giving it to someone)
Note: Step by step instructions for making a book are below.
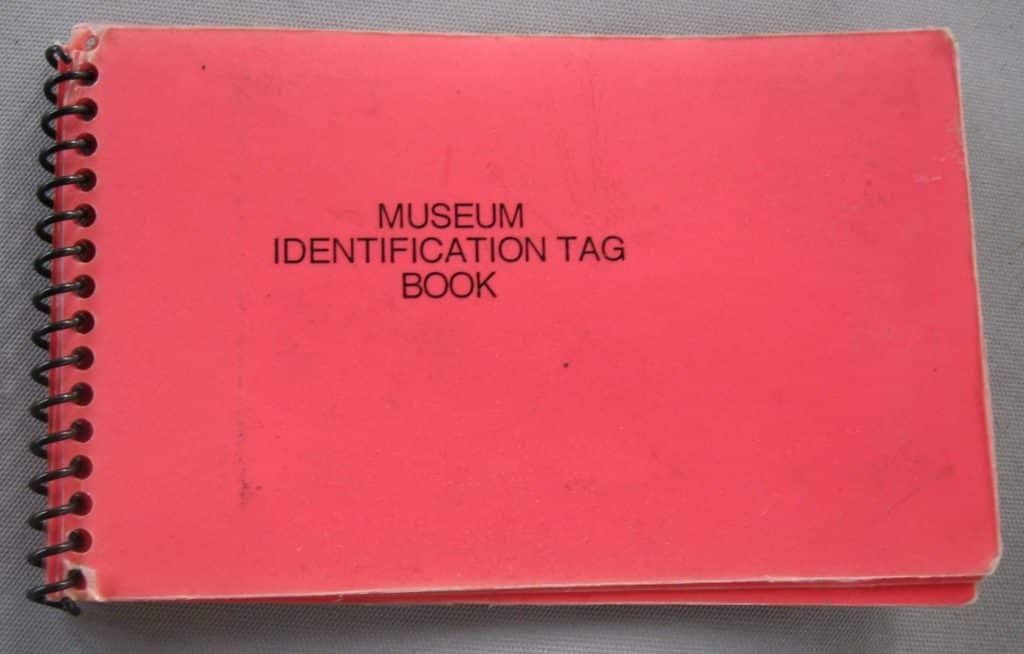
A Museum Identification Tag Book: 9-12
Use a lined 3X5 card you will find on the door desk.
- Write your full name on the left-hand side of the first line. On the same line as your name line, write the year you were born on the right-hand side. Put a hyphen after the year of your birth and put the year and the hyphen in parentheses.
David G. Smith (1995- )
- Skip a line.
- Write your nationality on the left-hand side of the card
David G. Smith (1995- )
American
- Skip a line.
- Write the title or the name of your work. Underline the title or name. Follow the title or name with a comma. Write the year the work was completed.
David G. Smith (1995-)
American
The Windy Valley, 2004
- Skip a line
Write the name of the art form. The first page in your art journal has a list of art forms. Which art form did you do?
David G. Smith (1995- )
American
The Windy Valley, 2004
Painting
- Skip a line.
- Write: Lent by the Artist if you want your work exhibited.
- Write: Owned by the Artist if you want to take it home.
- Write: Gift from the Artist if you plan to give it to someone.
David G. Smith (1995- )
American
The Windy Valley, 2004
Painting
Lent by the Artist
GEORGIE STORY
Resources:
- See: https://monsterbins.com/akro-bins/stackable
- For all AkroBins sizes
- Bank Boxes and lidded file boxes: office supply stores, discount stores, Amazon (most have lettering and lines on them)
- Plain lidded file boxes for unfinished artwork 5-9:
The Container Store : “Our Best Box,” white, $3.99 each
SKU# 200300: 16½” x 12½” x 10¾”
https://www.containerstore.com/s/our-best-box/d?productId=10001328
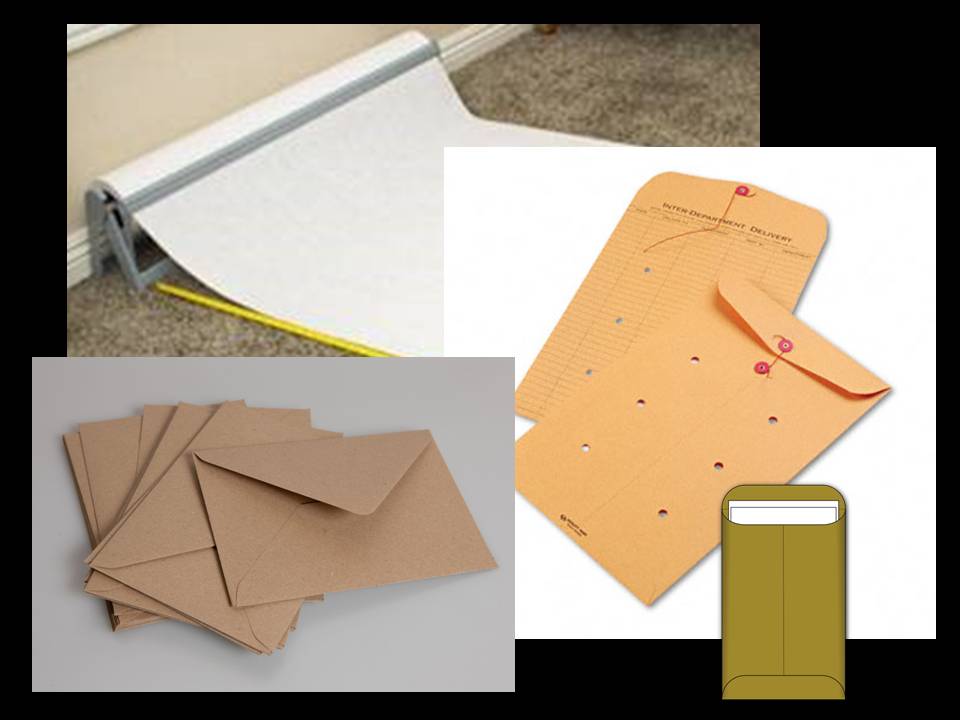
- Paper Bags: a must for clay bisque pieces:
- Brown or white sold in bands; #2 (very small), #4 (small), #6 or #8(medium), #12 (large)
- Roll of Kraft Paper (brown), Butcher Paper (white), 24” or 36” (I had both.)
- Paper Roll Cutter (I had one for each size of paper.)
- Envelopes in containers for Finished and Unfinished Work: 5 -12
- Coin envelopes
- Letter envelopes
- Manila envelopes
- Stapled copy paper to make larger envelopes
- Fold the paper to create a 2” flap at the top.
- Staple the sides at the top, in the middle, and at the very bottom, so nothing can roll out.
- Fold down the flap.
- Use any clean recycled paper.
- Use Kraft Paper (Butcher Paper) from a roll for super, custom sized envelopes.
Resources:
- Paper bags: B&G Paper Products, https://www.bgpaper.com
- (717) 354-4658, The cost of 100 bags varies by size
- Amazon, Wal-Mart
- Envelopes: Staples, Wal-mart, Amazon
- School Supply Company:
- Rolls of 40 lb. white or brown Butcher Paper (Kraft Paper) 36”, 24”, and/or 18”
- Butcher Paper Roll Cutter
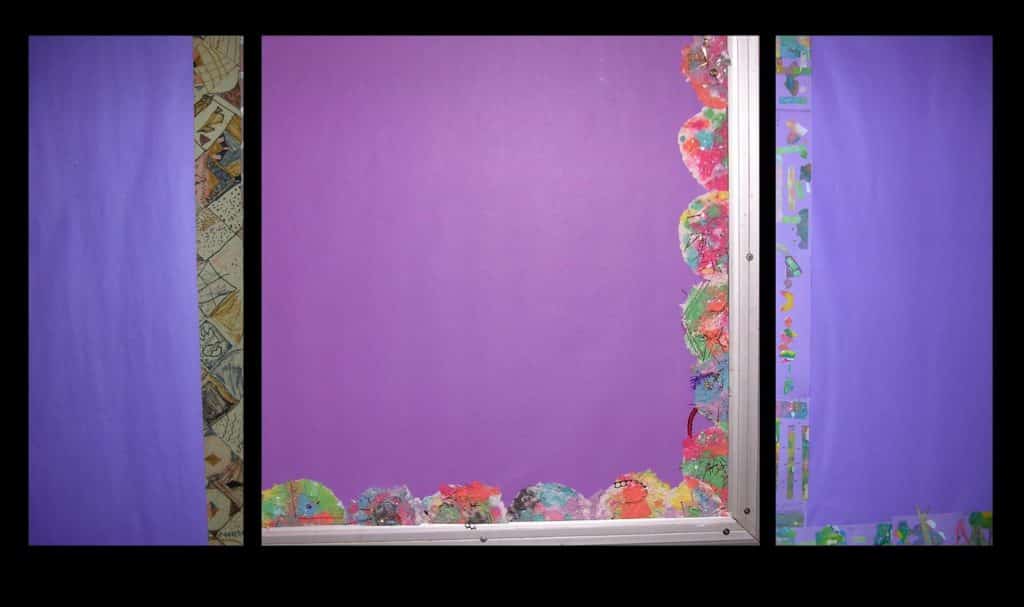 Introduce making your own borders. Use an art form present in the environment such as small Kirigami shapes made from a color mixing experience. (See: Color in Understanding Art). Using images from a cultural study or math experience produces interesting ideas. Establish one color for the border paper for greatest harmony. If the border changes color, the design elements on the border need to be SIMPLE and REPEATED.
Note: Bulletin boards can be designed to present a lesson and then be a place for the children to go to check their own shelf work. (See: The Art Chart: Traditional Ideas, Art Continuum)
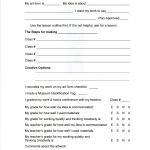
The 9-12 Work Plan Annotated
Name: and Class # or Date when started: is straightforward information. My Idea is about: I allowed that part of the plan to be left undetermined if needed. It is also possible to start on a work and change its idea in midstream. Making art can be so intuitive that an artist can start an artwork and not realize its meaning until after it is done and contemplated. Plan approved: I signed off on the plan. This was my way of knowing what each person or group of people were doing and when it was started. This was especially important when I was working alone. The steps for making: This lists what steps were taken to create the artwork and when they were taken. The steps were demonstrated during a formal lesson. Each art form in the room had its steps outlined and placed in a menu holder as a reference tool that accompanied the equipment. I put the steps in the work plan so that only the date the step was taken needed recording, so they would have more time to do the interesting work available to them. Use what best serves you and your students. Creative Options: How can something you made be used in a different way? For example, two girls were weaving on a small loom but were less than half finished. It was very close to the end of the year, so they decided to make their unfinished weaving into a necklace, instead of storing it for the summer. Students used hand colored finger painted monoprints on different papers to make note cards, gift tags, origami, kites, or books, etc. The whole idea of the “Creative Options” is to invite the person to “imagine outside the box.”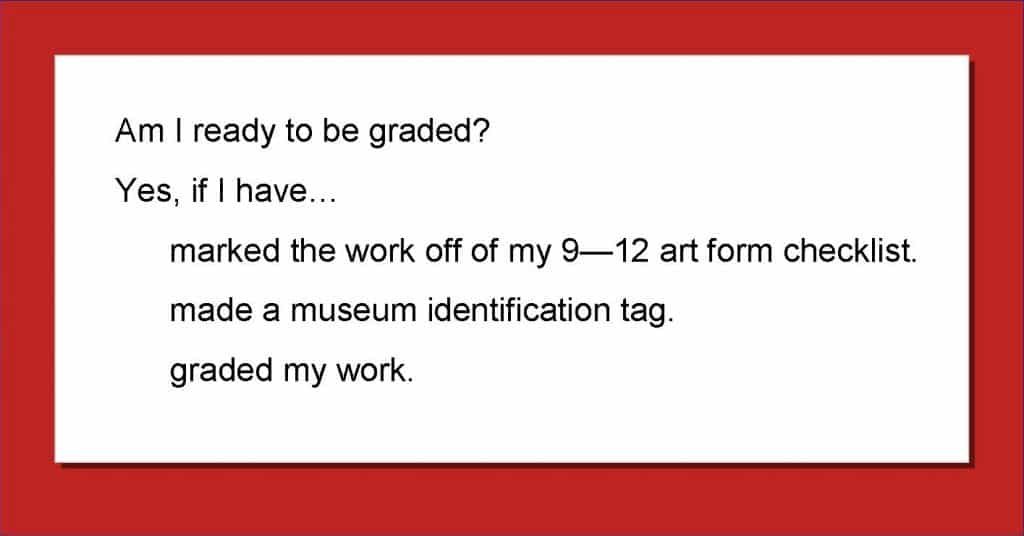 Grading Process:
I recorded my work on my art form checklist. _____
I made a Museum Identification Tag for my work. _____
I graded my work & had a conference with my teacher. Class #_____
These three instructions were included in the plan to remind students to prepare their work for grading. Make them into a poster or small handbill you can give to students who need to be reminded. The Museum Identification Tag was paper clipped onto the work plan. Some people made them way before they were finished with the work.
E: S: N: U:
The whole school used Excellent, Satisfactory, Needs Help, and Unsatisfactory as its grading scale. “Excellent” meant for me that the work was the best they could do at that time. As a college arts instructor, I gave separate grades for creative thinking, craftsmanship, and attitude. I wanted my younger students to think about themselves in those terms also. I sometimes accepted their grades even when I disagreed with them. I would share my thinking with them. They would underestimate or overestimate themselves equally. Most of the time (90%), they were honest with themselves. What about the other 10%? Well, we are all human sometimes. That’s why we have insurance.
Comments:
Comments could be made by the student or the teacher. I invited students to comment on their work. If it is left blank, use the space for your positive statements or suggest the artist ask a classmate to write a review.
Grading Process:
I recorded my work on my art form checklist. _____
I made a Museum Identification Tag for my work. _____
I graded my work & had a conference with my teacher. Class #_____
These three instructions were included in the plan to remind students to prepare their work for grading. Make them into a poster or small handbill you can give to students who need to be reminded. The Museum Identification Tag was paper clipped onto the work plan. Some people made them way before they were finished with the work.
E: S: N: U:
The whole school used Excellent, Satisfactory, Needs Help, and Unsatisfactory as its grading scale. “Excellent” meant for me that the work was the best they could do at that time. As a college arts instructor, I gave separate grades for creative thinking, craftsmanship, and attitude. I wanted my younger students to think about themselves in those terms also. I sometimes accepted their grades even when I disagreed with them. I would share my thinking with them. They would underestimate or overestimate themselves equally. Most of the time (90%), they were honest with themselves. What about the other 10%? Well, we are all human sometimes. That’s why we have insurance.
Comments:
Comments could be made by the student or the teacher. I invited students to comment on their work. If it is left blank, use the space for your positive statements or suggest the artist ask a classmate to write a review.Storage spaces for your materials can be as important as your classroom space. If it is not organized as mindfully as your environment, the disarray can create stress.
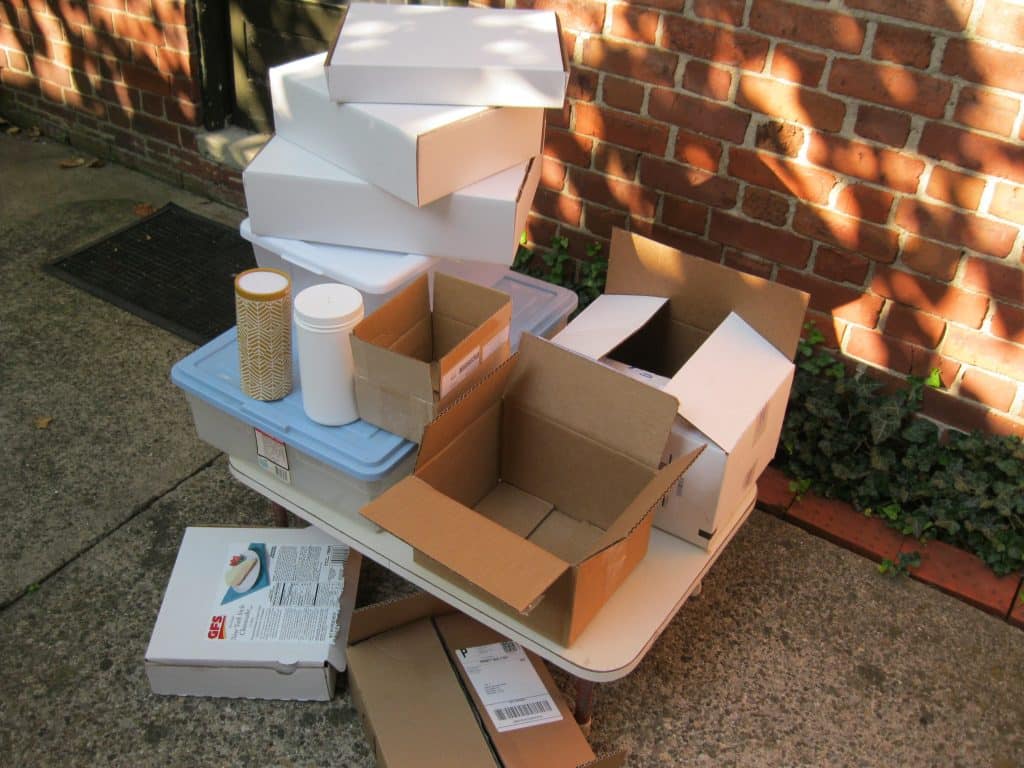
When I retired I took what was mine and put it in a 10’ x 10’ rented storage space. I gave half of it away. I gave books that I could part with to the public library. I threw a third of what was left away and still had too much. I hope the following suggestions will encourage you to reorganize and simplify your educational belongings.
- Decide to spend time designing your storage spaces. It may be best to do it a little at a time.
- Keep the consumables close at hand in appropriate containers.
- Put all printed materials in a file cabinet by subject matter.
- Choose a variety of containers. A large plastic container can be eventually too heavy to move or can be a dumping place for a variety of “stuff” that can get lost. Dump it out and sort usable things into smaller containers. You will find lots to throw out.
- Just like reevaluating your clothing each season, you can reevaluate the things you have not used in a long time such as old faded colored paper, or aged classroom containers.
- Have an open vertical filing box for all the kinds of paper you use. Give each color of paper its own slot. Arrange them using your understanding of color theory.
- Take home any materials that belong to you if they are not being used.
- Make a list of things you would like to have and make room for them.
- Store all large rolled charts vertically. Put them at the end of a shelving unit between it and a wall. Put a rug on the floor to protect the bottom edge.
- When possible, store learning materials in the boxes they came in.
- Start collecting plastic food containers in which to store things like beads, math materials, or paper fasteners. Label them with a permanent marker. Rectangular containers stack well. White cylindrical plastic food containers often have a removable plastic label.
- Ask your students to help with the sorting chore, especially on rainy “in days.” Read them a story or play music while they work.
Materials:
- A variety of boxes: Collect boxes that you receive from having items sent to you. Break them down until you need them.
- A roll of packing tape
- 2 Permanent Markers
- Mailing boxes that are made in various sizes in both brown and white cardboard
- Large mailing labels to identify the contents put in used boxes
- Plastic sweater boxes or larger yet shallow boxes
- Large shallow boxes (under the bed kind) to hold large reproductions
Resources:
- Brown cardboard boxes: Staples, Amazon (search different categories)
- White cardboard mailing boxes: Staples, Amazon
- Recycled boxes
- Plastic boxes: discount stores, food stores, Amazon (Warehouse Deals)
- Recycled cylindrical plastic lidded containers that held food

