Teaching artistic concepts using the Montessori sensorial equipment
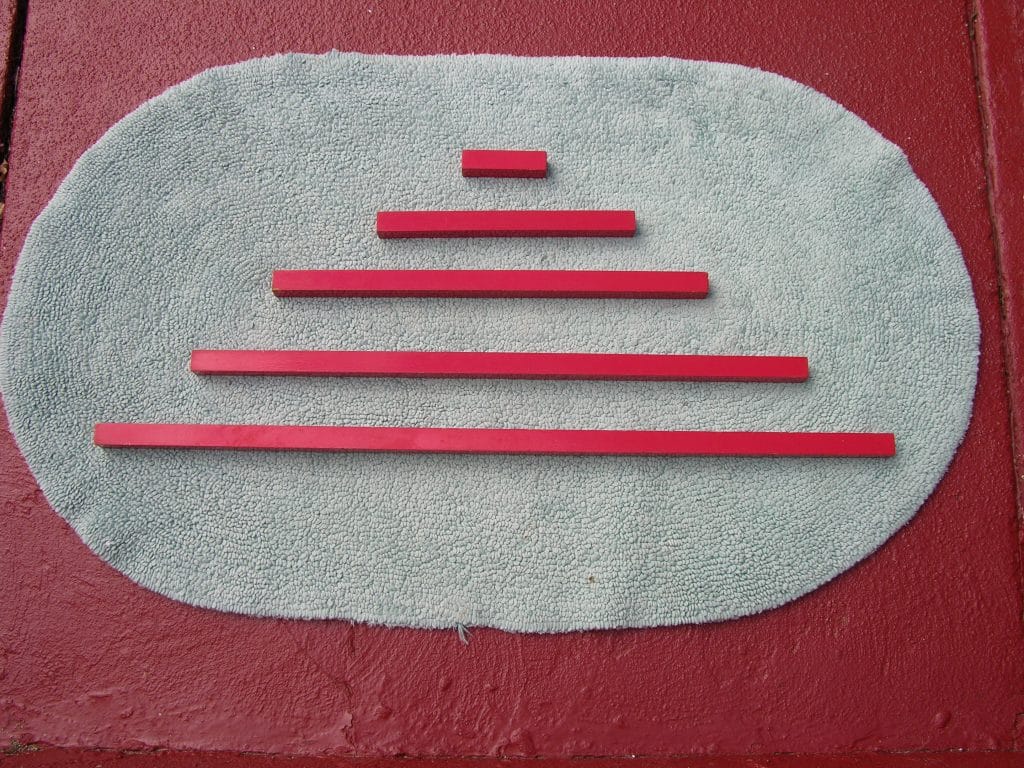
Montessori Sensorial Materials present the child with a plethora of learning and creative opportunities. It was the sensorial materials that captured my imagination when first seeing a Montessori environment. For me, they embodied art concepts. I had to learn their math and language implications. You can teach for thirty years and still find new lessons in them.
The following lessons are given after the classic ones are presented. They are each extensions that demystify an art concept. Most are 5-7 years of age appropriate, but are equally appropriate for younger children when simplified. If elaborated upon or extended, they are appropriate for older elementary students.
Since all art concepts are to be presented sensorially first, the traditional materials act as models or prototypes for art extensions. Often, practical life activities give rise to art extensions.
During my interview with Hilda Rothschild for the graduate Montessori Education Program at Xavier University, although I had never seen the Montessori sensorial materials – the pink tower, the second cylinder block, and the rough and smooth boards – I used them to demonstrate to her how they could be used for teaching art.
Introduction:
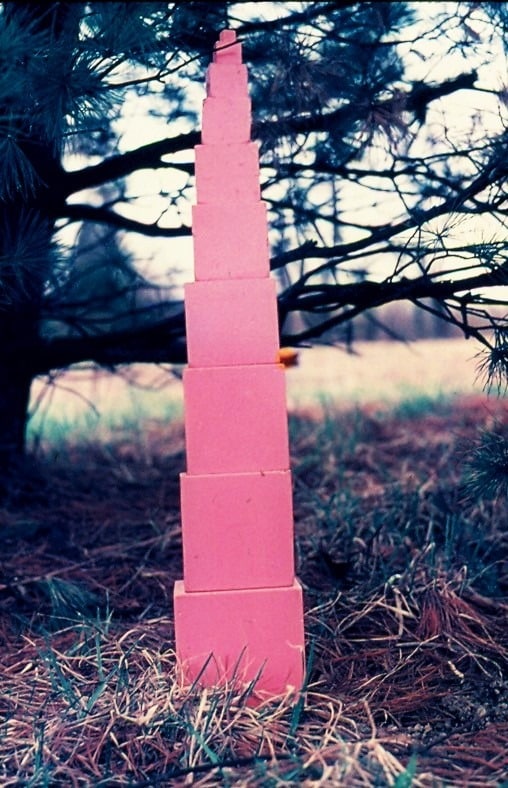
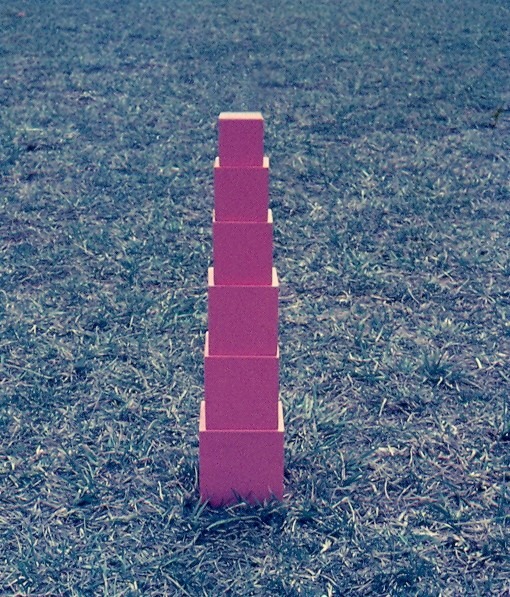
The Pink Tower is a gradient system which becomes a tool for introducing one of the characteristics of aerial perspective. Objects far away from the observer appear to be smaller in size than they really are (See: The Art Chart: Principles of Organization: Space). My art studios were always located off long hallways in which I could give this lesson. If you must do this in your environment, reduce the number of cubes you use to fit the space you have.
GEORGIE STORY
- While practicing doing the pink tower lesson, I was shocked that l had chosen the second largest cube to begin the rebuilding of the tower. How could I not see the largest cube? I corrected my mistake and went on to rebuild the tower, but the experience stayed with me.
While observing in a 3-6 environment, I witnessed a three year old make the same mistake that I had made. What a gift that was for me! Learning is a process. If you are new at doing something, age is not always a predictor of immediate success. Sometimes success is a matter of experience.
- The Children’s Studio was located in a building that overlooked the Ohio River and the Kentucky hills. The first time I ever gave this lesson on perspective to second and third grade students, one child in the group related that he finally understood why his little brother insisted that the houses in Kentucky were play houses. Now, He had a new way to explain the phenomenon to his sibling.
- Prerequisite: Experience building the Pink Tower and using it creatively child can close one eye or cover it with their hand
- Direct Aim: Objects appear smaller than they are when seen from a distance
- Indirect Aim: Preparation for the study of perspective, art appreciation, and freehand drawing
- Point of Interest: “While you are on the playground, find an object that looks smaller only because it is so far away.”
Materials:
- Cubes # 5, 6, 7, 8, 9, 10 (Is there an old Pink Tower in storage which has these cubes to use?)
- A small swatch of pink plastic or cloth with a ¼” inch black dot in the middle to represent “the point of view”
- A tray to hold the activity
- A rug to lie down on if not working on carpeting (pink yoga mat?)
Preparation:
- If using the needed cubes from an old Pink Tower, place the materials on a shelf with other activities that relate to understanding art, which I called “Special Work” (See: Environment: Special Work).
- Place the cubes and point-of-view cloth on the tray.
- Place the rug next to the tray.
- If using the full pink tower from the environment:
- Put an empty basket and the point-of-view cloth on the tray.
- Place the tray and the rug next to the pink tower.
Presentation: 6-9
- If you are using the pink tower present in the classroom, place the smallest four cubes in a basket and leave them in the space reserved for the tower. Place the rest of the cubes on your tray with the point of view cloth. Take the tray and the mat to your teaching space.
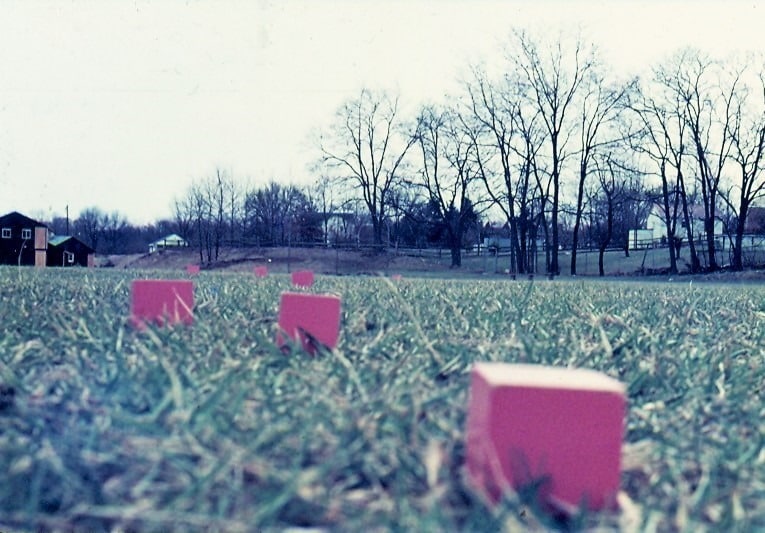
- Introduce the work as “The Pink Tower Layout.” Explain that the lesson is an advanced art lesson, unlike the lesson they were given as three year olds. This lesson demonstrates that objects appear smaller the further away they are from you.
- “We are going to arrange six cubes of the pink tower on the floor and make them appear to look like they are all the same size.”
- Lay out the rug on the floor. Place the “point of view” at the top of the rug.
- “This is the point or place we will use to see the cubes. It is called “The Point of View.”
- “Watch how I prepare the activity.”
- Put the smallest cube (#5) on the floor about 12”-18” from the rug. Place the next cube (#6) next to cube # 5.
- “Watch as I prepare to do this work” Lie tummy down on the rug. Place your chin on the dot representing the point of view.
- Ask a child to replace you on the rug. Check with the child to see if the second cube appears larger than the first.
- Ask the child to relax and close one eye. Hold the larger cube by the sides and slowly pull the cube back. “Tell me to stop when they both look the same size.”
- Ask the child to close both eyes and rest a second or two. Then, ask her to check the work again. “Do the cubes still appear to be the same size?” Adjust if needed.
- Ask another child to take her place, and put cube #7 next to cube #6. But before the process is repeated, make sure the observer can see the front of all three cubes. Ask the first child to join your work.
- Emphasize how to hold the cube by its sides, so as not to cover the front of the cube which is called its “face”.
- Ask the first child to pull the #7 cube back until all three match.
Note: The observer is comparing the front faces of the cubes.
- Ask the child to relax and close his eyes for a moment, then open his eyes and check the work again. “Do the cubes appear to be the same size?” Adjust if needed.
- Continue until all the cubes have been laid out and each child has practiced both looking at and pulling back the cubes.
- Give each child in the group the opportunity to see the finished work. Allow the children to make slight adjustments.
Presentation: 5
Use fewer cubes. Start with cube #7 and then work with what is left.
Presentation: 9-12
Note: I never gave this lesson to my 9-12 students, because they knew the work so well. I did have the activity in the room if they wanted to do it. They often taught it to new students. If your students would be uncomfortable working on the floor, take them to the lunchroom and work on a long line of table tops. If you introduce it in warm weather, it could be done on the grass. It’s just harder to see the results. The first time I photographed this activity, I did the layout on the lawn outside the environment where I was observing, even before I started training.
Extensions: 6-12
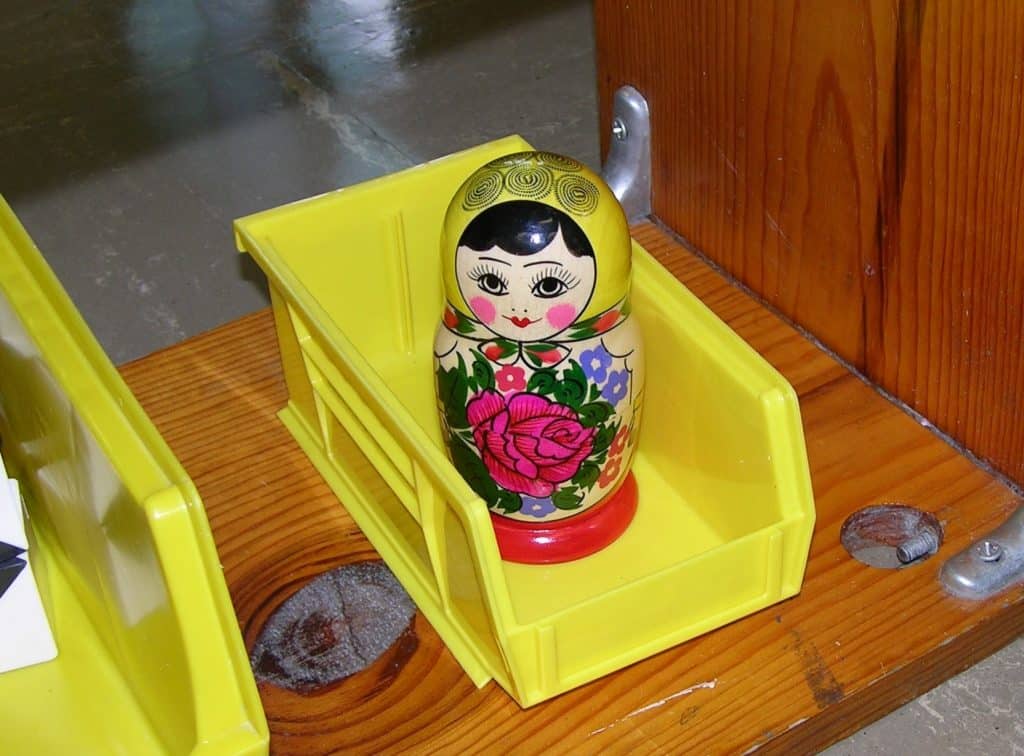
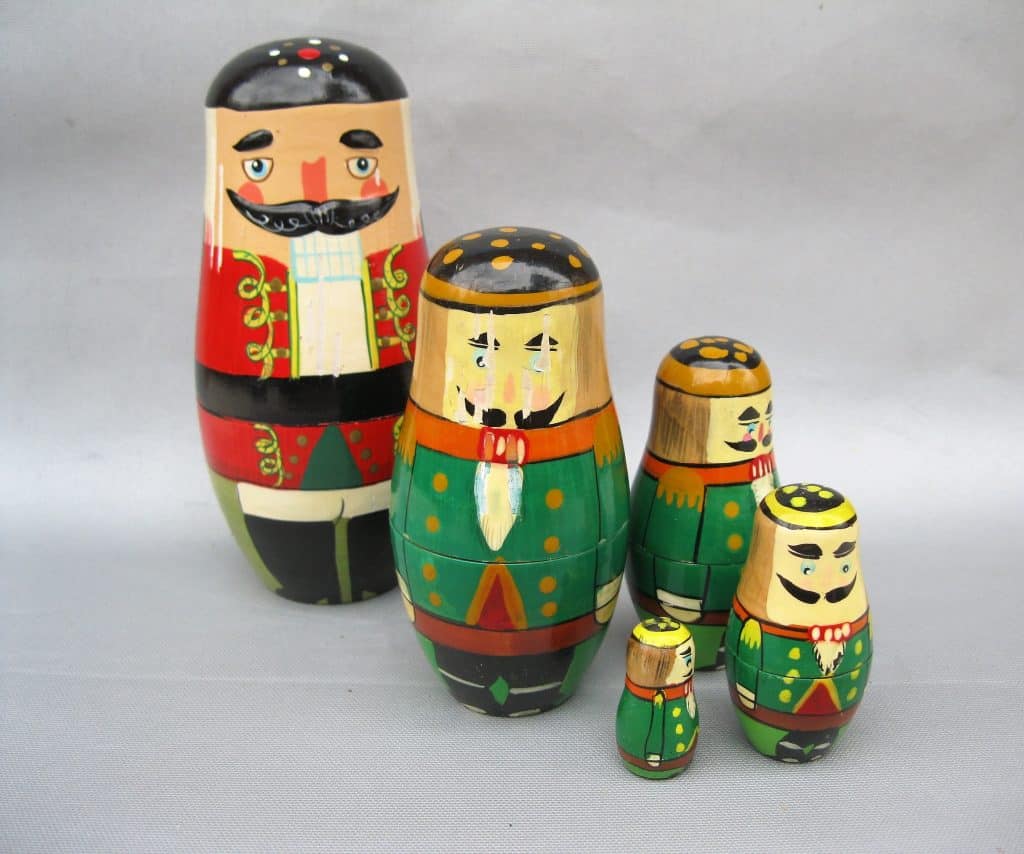
- Use nesting dolls as the next activity after the cubes. Use the small-medium size doll as the starting size and match the larger dolls to it. This activity has the added advantage of embodying all three characteristics of aerial perspective. With distance, objects appear to lose size, lose brightness of color, and lose details - especially details. Discuss what your students observed. Cover each of the three characteristics. Get your poster of The Art Chart out. (See: The Art Chart) Explain that using these characteristics is one of the ways space is suggested in drawings and paintings.
- Take your students outdoors and observe distant objects. “Would you like to learn how to hold a big house (tree, truck, flag pole, etc.) between two fingers?”
- Demonstrate how to completely extend your arm. It will not work if they bend their arms, so check and correct their work if needed.
- Close or cover one eye.
- “Find the object of your choice and put it between your forefinger and thumb. You know that we can not really do that, so why does the object look so small?”
- Have a student walk away from the group and stop when the group can hold the person in their fingers.
Resources:
During the end of the year holidays, you can find nesting dolls that are relatively inexpensive. I have a tin soldier doll that is charming.
Introduction
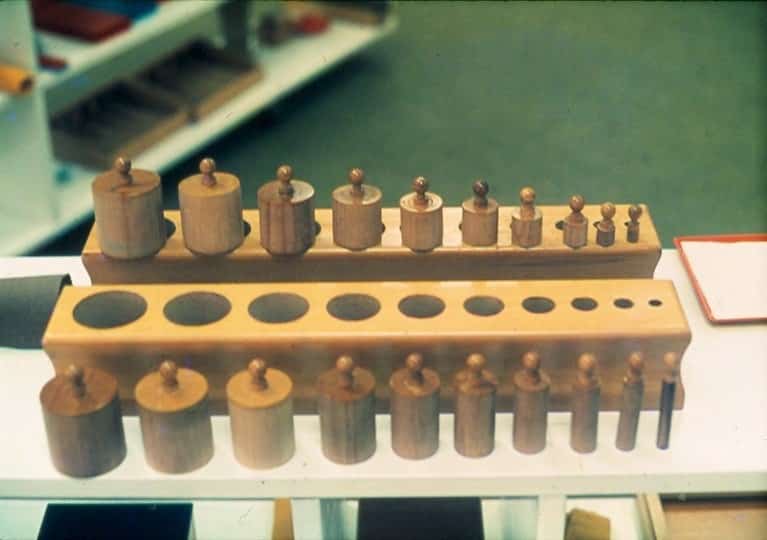
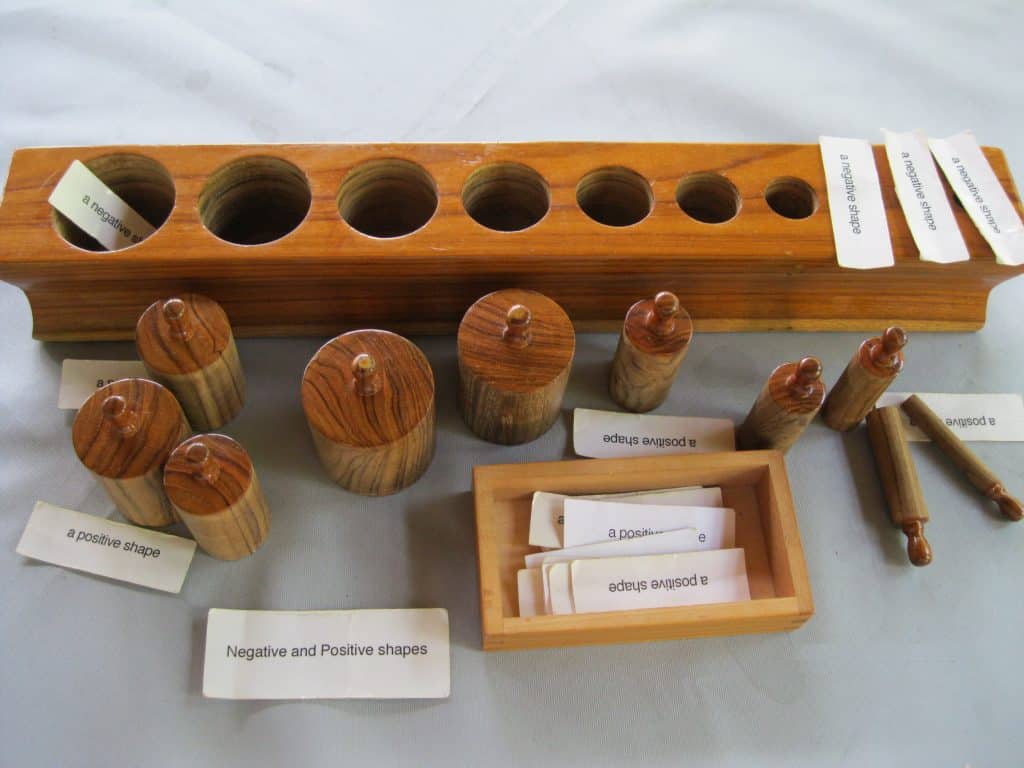
The second Knobbed Cylinder Block is a perfect piece of equipment to introduce negative and positive shapes. All four Cylinder Blocks consist of both positive and negative shapes. All four blocks are an example of how a single shape’s spatial characteristics can be altered without losing the shape’s integrity. This lesson is appropriate once the children understand the concept of zero. Like zero, a negative shape is made out of something but not anything. The negative shapes in all four cylinder blocks are made out of actual space because they are three dimensional. Negative shapes on the two-dimensional plane of a drawing or painting only represent space. In any case, all visual arts take up physical space (See: Understanding Art I). Three-dimensional space is an equal partner with the building materials chosen in designing architecture. Utilizing material and space, the architect designs the size, shape, and character of spaces for our use. We see the beauty and excitement of the positive shapes of the structure, and also feel and experience the design of the negative spaces. An architect delights, surprises, intrigues, and controls us with designed spaces as well as with the designed structure. Note: It will help your students if you make an effort to use the word “space” a lot prior to giving this lesson.- Prerequisite: Classic lessons with the Cylinder Blocks Geography lesson: Water, Land, and Gas Spindle Boxes
- Direct Aim: To introduce negative and positive shapes
- Indirect Aim: To recognize negative and positive shapes around us as well as in art to use negative shapes as well as positive shapes when drawing, painting, sculpting, etc.
- Point of Interest: See if you can find (recognize) at least two negative shapes here in the environment.
Materials
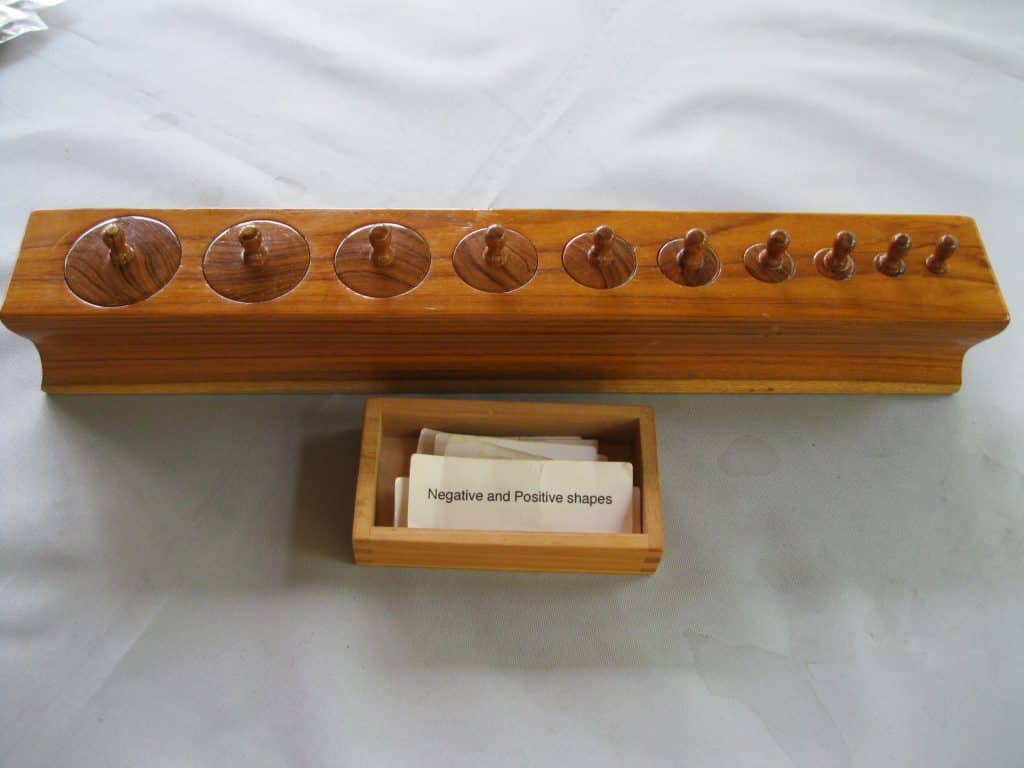
- The Second Cylinder Block
- Title Label: Negative and Positive Shapes or Negative and Positive Cylinders. You choose.
- 10 Labels: Positive Shape or Positive Cylinder
- 10 Labels: Negative Shape or Negative Cylinder
- A container for the labels to be placed next to the block
- The largest Knobless cylinder for that block
- A tray for all the materials: optional
- A piece of 8½” x 14” white paper for the presentation only
Preparation
- Make and laminate the labels.
- Select the container and tray.
- Assemble the activity.
- Decide where it belongs in the environment.
- Note: While I was teaching, I made all the labels out of cover paper that was then laminated. Students liked to place the label for negative shapes into the block. The labels were folded by the children to fit into the smaller cylindrical shapes.
- Instead of replacing them like I did, I suggest you make them out of strips of mat board that match the width (diameter) of each cylinder, but are all the same length. You could change font sizes too. Make extras for each cylinder.
Presentation 5-9 (9-12 review if necessary or never introduced)
- Introduce the work as “Negative and Positive Shapes.” Announce this lesson as an advanced art lesson using the Knobbed Cylinders from their preschool experience.
- Begin the lesson by removing each cylinder and identifying it. “This is a cylinder made out of wood.” Often I invited the children to say the words with me.
- “All of these cylinders are made out of wood, and so is the block in which the cylinders rest.”
- “The wooden cylinders are called positive shapes because they are made out of wood. All positive shapes are made out of a material we can feel, see, or touch, such as metal, glass, cloth, clay, or even living stuff.”
- Hold the block up so the children can see the holes.
- “The holes that hold each cylinder are also cylinders, and like the wooden cylinders, they are made out of something you can name.”
- At this point in the lesson the children usually say they are made out of air. “It is true that air fills the negative cylinders, because gas surrounds our planet.” Congratulate your students for remembering the Land, Water, and Gas lesson.
- “The holes are called negative cylinders because they are made out of this stuff.” Wave your hand around in the air. “The stuff is filled with air and it has another name. If we went outdoors the air would be there, and also this stuff would be there... Is everyone ready for the answer?” Give them time to think. “All negative shapes are made out of space.”
- Each cylinder has a special space in the block where it can be stored. Each space is also a cylinder.
- Continue the lesson by pointing to each cylinder in the block and identifying it. “This is a negative cylinder made out of space.” Invite the children to say the words with you.
- “Remember, space is just like zero. It is something, but not anything. It looks like nothing but it has great meaning... Each negative cylinder is a different size, which matches just one of the positive wooden cylinders. They are opposites and they match.”
- It has happened that some children have difficulty accepting the hole as being a shape. If that happens, start by reviewing the characteristics that are present in both the positive and negative shapes. “Both have a circle at the top and at the bottom, and a straight side that follows the circles. It is difficult to see the circle at the top, so I will put this Knobless cylinder in so you can actually see it.”
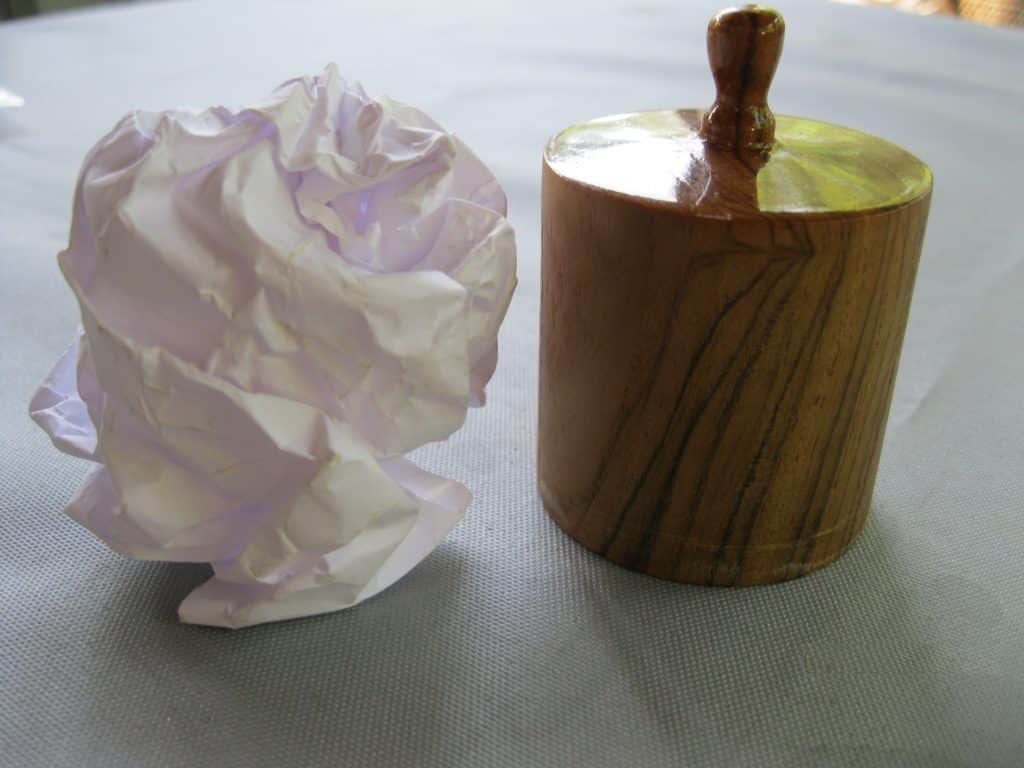
- "The side is called a cylindrical surface. It is curved, not flat like the circles." If more proof is needed, use a sheet of paper 11” x 14” to stuff into the widest negative cylinder. Then ever so carefully, pull it out of the block so the children can see that it is a cylinder.
- Present the largest knobless cylinder as the positive representation of its negative space.
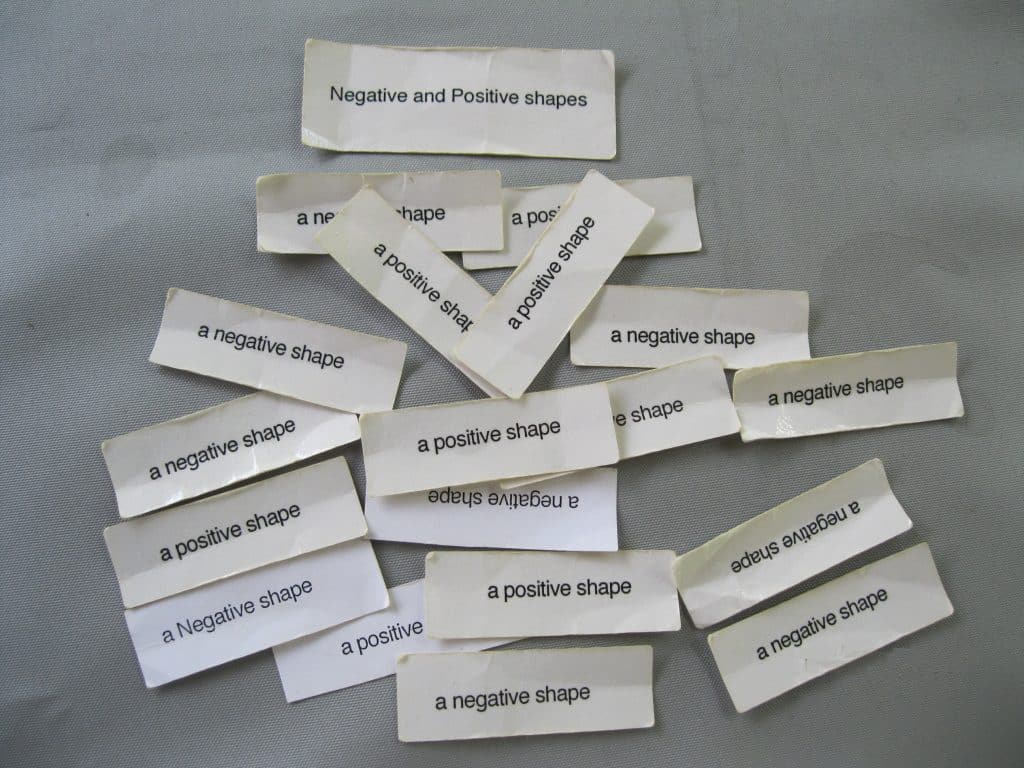
- Finish by labeling each shape. “This is a positive cylinder made out of wood and this is its negative cylinder made out of space”. Invite the children to label the shapes for you.
- Return the labels to the container. Mix them.
- Restore the block.
Extensions:
Note: There are several ways to embellish this lesson. The following are some suggestions I have used.- Ask, “Which kind of shapes in the block are larger - the negative or the positive? Why is that so?
- “The whole universe is one big puzzle of negative and positive shapes.” Ask the children to imagine what the universe would be like if it had only negative shapes. Also imagine what it would be like if it were made only of positive shapes. They understand it almost immediately, and their answers are interesting, sensitive, and often amazing.
- At the end of the morning (day), or while waiting for some reason, make negative shapes with your body parts. Find negative shapes in the environment (inside or outside).
- Discuss doors and windows, the flow of space within a room, and/or the entire school.
- Discuss the difference between private and public space.
RESOURCES
- Amazon Search for montessori cylinder blocks
Introduction:
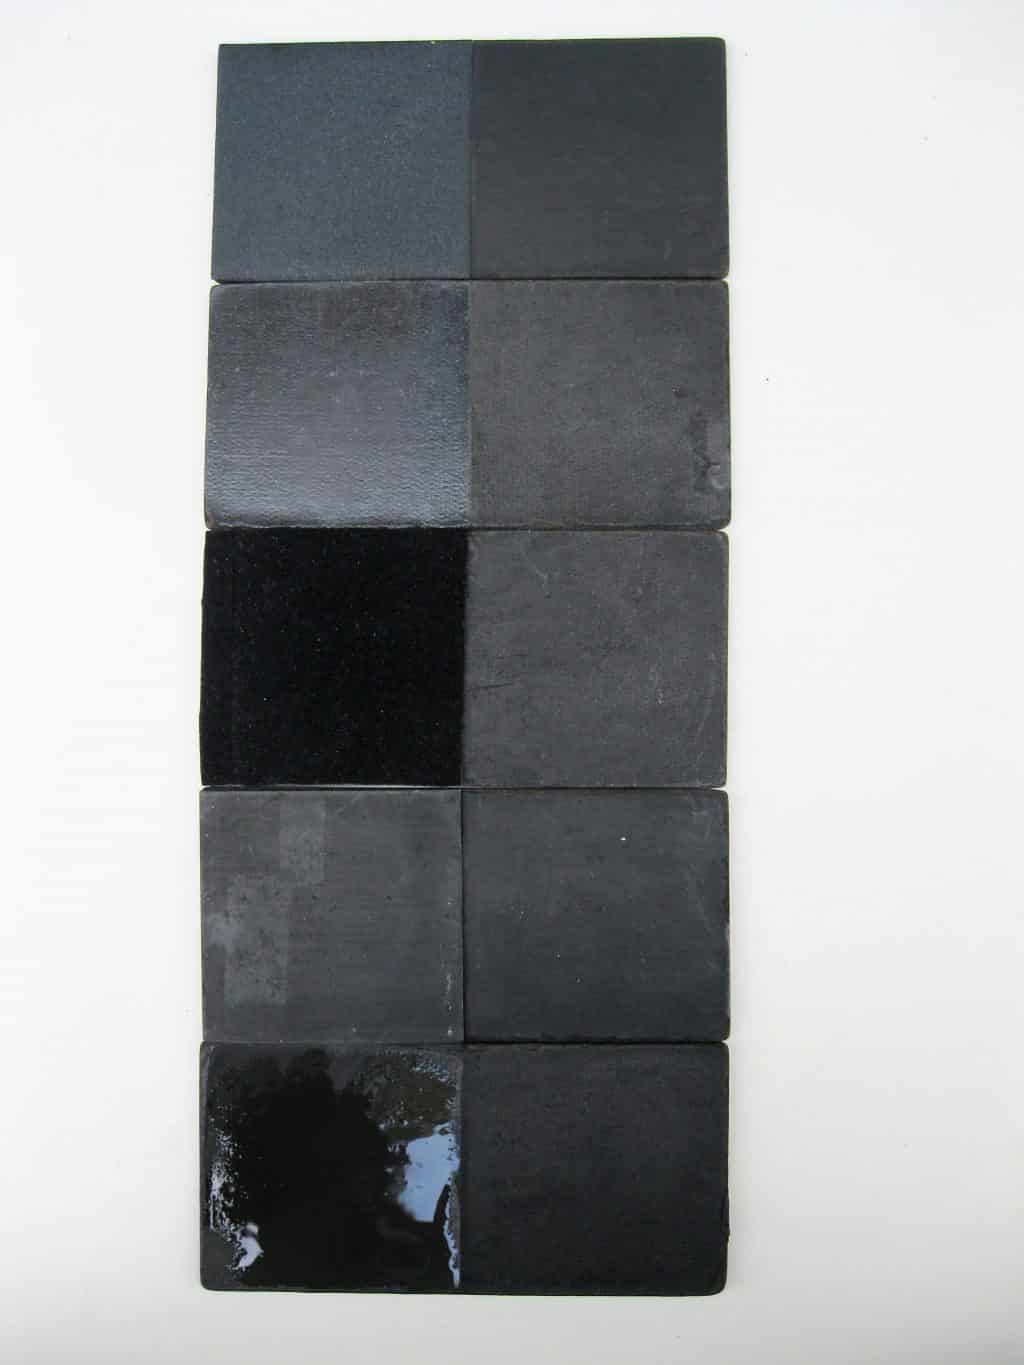
Texture is a word that describes how something feels when you touch it. The Montessori Rough and Smooth Board is the educational model with which to begin exploring texture with children. However, there are eight more basic textures, the knowledge of which would be useful in making and experiencing works of art. This includes shiny and dull, soft and hard, cool and warm, wet and dry. I made a board for each pair using the dimensions of the original board. Instructions to make the tablets are provided below as part of the preparation for the lesson. The texture tablets activity is an attempt to isolate, as much as possible, each set of textures. However, you will notice there is only one shiny side, one cool side, one rough side, one wet side, and one soft side. The other side of each tablet is exactly the same. Somehow, young children never notice it or call attention to that fact. It is a wonderful teachable moment should it happen to you, since all objects have more than one texture. The traditional Rough and Smooth Board are usually rough on one side and smooth on the other. All textures present on the traditional board are rough, smooth, shiny, dull, dry, warm, and hard, but not wet, soft, or cool. All objects – and even people – have multiple textures. In addition to the ten actual (touchable) textures presented in this lesson, there are three other kinds of textures that can be created visually in artwork. The other three are simulated, abstract, and invented, (See the book: Art Fundamentals, Theory and Practice, any edition), all of which are more easily taught when grounded in the experience of actual textures. Note: Children easily mix up rough and smooth with soft and hard. Separate them when using all of the tablets in a lesson.- Prerequisite: Rough and Smooth Board All the refinement exercises
- Direct Aim: To introduce basic textures
- Indirect Aim: Basis for advanced texture lessons
- Point of Interest: 6-12: See if you can identify all the textures that can be found on the brush you used in this activity. Answer: All 10, if you are using a wooden handled soft, wet-haired brush.
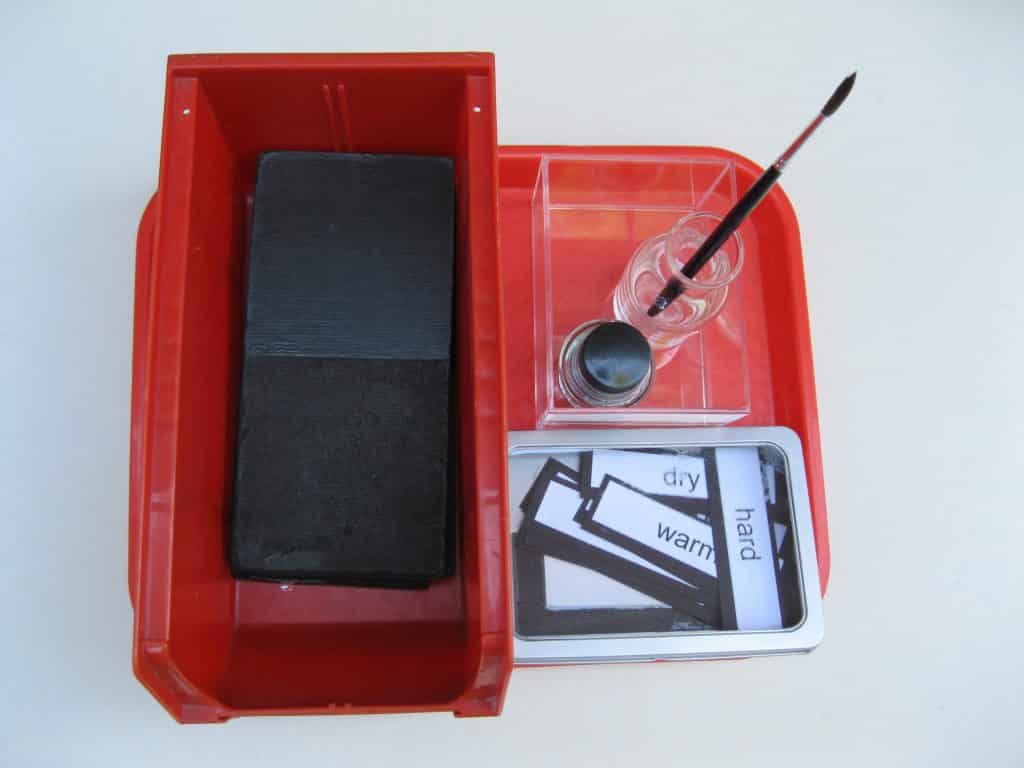
Materials: 5-12
- 5 texture tablets, each 4” x 8”, made on Tempered Masonite from hardware store or building supply store
- A container for the tablets (AkroBin # 230-1)
- Labels for the activity
- Large label: “Actual Textures” or “Real Textures”
- 10 texture name cards: smaller labels
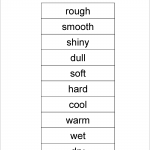
- Laminating material for labels
- A #7 black handle watercolor brush from school supply or art stores.
- A bottle to hold the brush
- A small lidded container for pale blue water (use empty ink bottle)
- A container for the bottle with brush and water container
- A tray or container for the activity
- A set of objects to use for simple and advanced texture lessons; 5-9
- A basket or other container for 4 or 5 pairs of objects
- Each pair should be as close as possible in size and color but different in texture.
- Rough and Smooth: rocks, sponges, shells, pieces of cloth and/or paper, nuts, etc.
- Warm and Cool: metal and wooden rulers, metal and bamboo or plastic spoons, metal and plastic cups, wood and metal drawer pulls, wooden and ceramic small figures
- Soft and Hard: 2 brushes, 2 sponges, 2 cloth pieces (canvas and silk), 2 balls, 2 small toys
- Shiny and Dull: two pennies, 2 different pieces of paper, 2 small holiday ornaments, 2 painted cubes
- Wet and Dry: 2 pieces of brown paper towels, 2 dark pieces of cloth, 2 rocks, 2 sponges (done after float and sink)
- A set of objects to use for an advanced actual texture lessons: 9-12
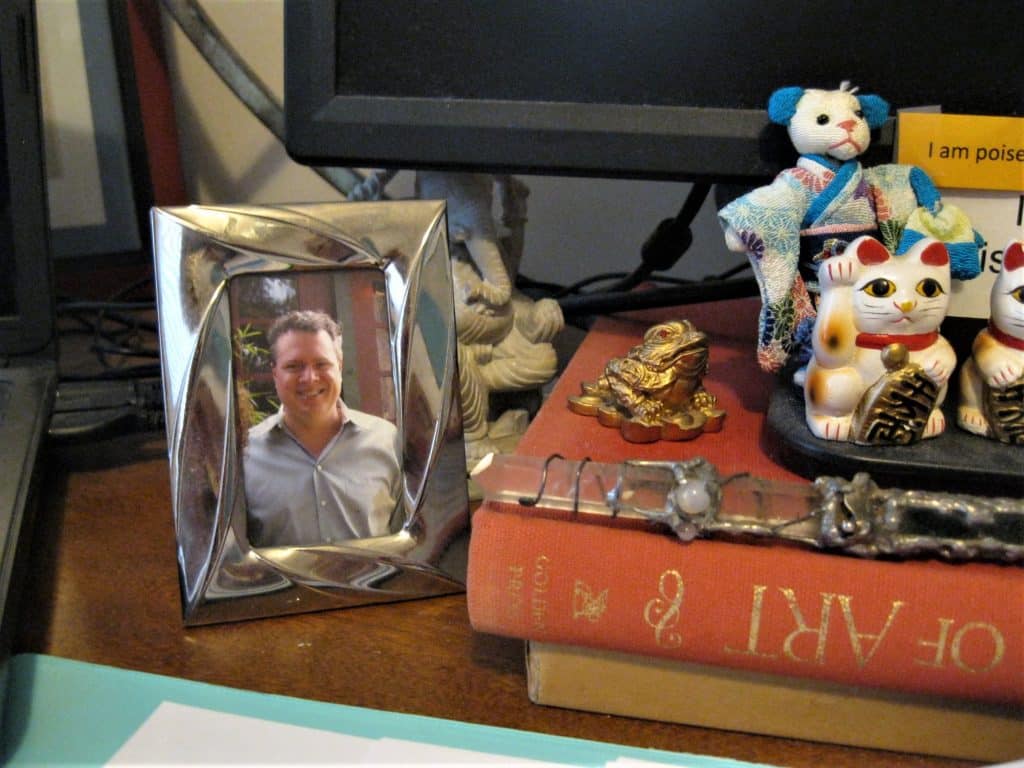
- Gather 5 very interesting objects (see photo) so the 9-12 students can analyze, find, and record the textural characteristic of each object.
- Include an object that is damp.
- With the help of your students, design a recording system for this activity.
- Gather 5 very interesting objects (see photo) so the 9-12 students can analyze, find, and record the textural characteristic of each object.
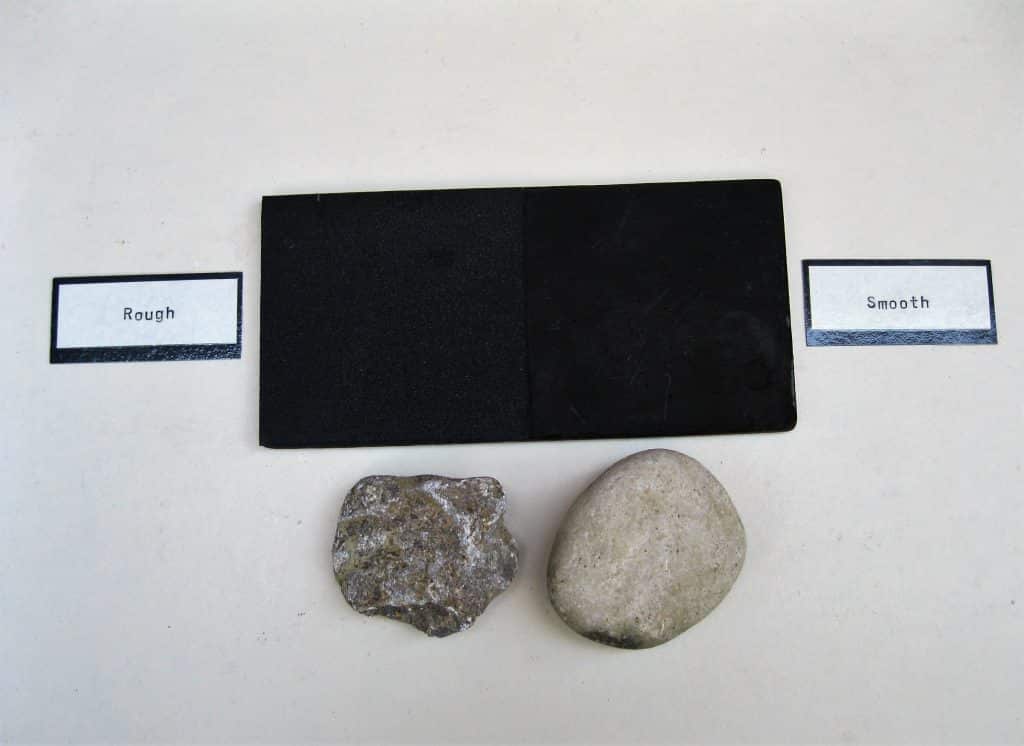
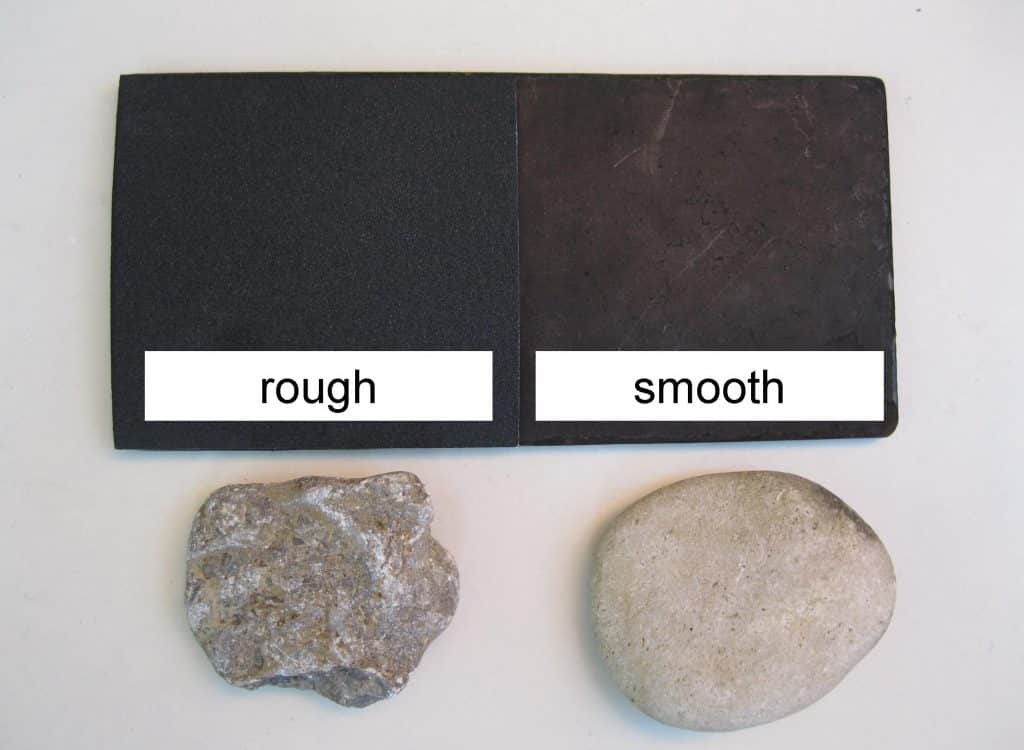
Preparation: 5-12
- Make the texture tablets as follows:
- Cut tempered Masonite into rectangles the size and shape of Montessori rough and smooth board. My tablets were 4” x 8.”
- Each tablet consists of two square spaces.
- Each tablet will accommodate two opposite textures.
- Paint only the top and side surfaces of each board with permanent black ink such as Higgins, from an art supply store.
- Make the left-hand side of the top of each tablet as follows, using the appropriate adhesive.
- Use a black sandpaper square, for Rough (test with your fingers).
- Use a 4” metal square (edges smoothed) painted with ink, for Cool. The metal square for my tablet was cut and smoothed at a local, family owned hardware store.
- Paint or spray high gloss polyurethane on the left-hand side, for Shiny. Find polyurethane at hardware stores.
- Use thick black square pad of soft or fuzzy high-pile material, for Soft.
- Wet and Dry tablet only needs a black marker line or a groove down the middle. The left-hand side is wet in the activity with the brush and water supplied.
- The right side of each tablet is the plain, inked square of Masonite representing the opposite of the texture on the left.
- Note: All the right-hand sides are smooth, dull, hard, warm, and dry, as no object is ever only one texture.
- Gather the objects you need for the lessons.
- Gather all the containers you will need.
- Make and laminate the title and texture names cards.
- Put blue water in its container. Put the brush in its container.
- Assemble the activity.
- Cut tempered Masonite into rectangles the size and shape of Montessori rough and smooth board. My tablets were 4” x 8.”
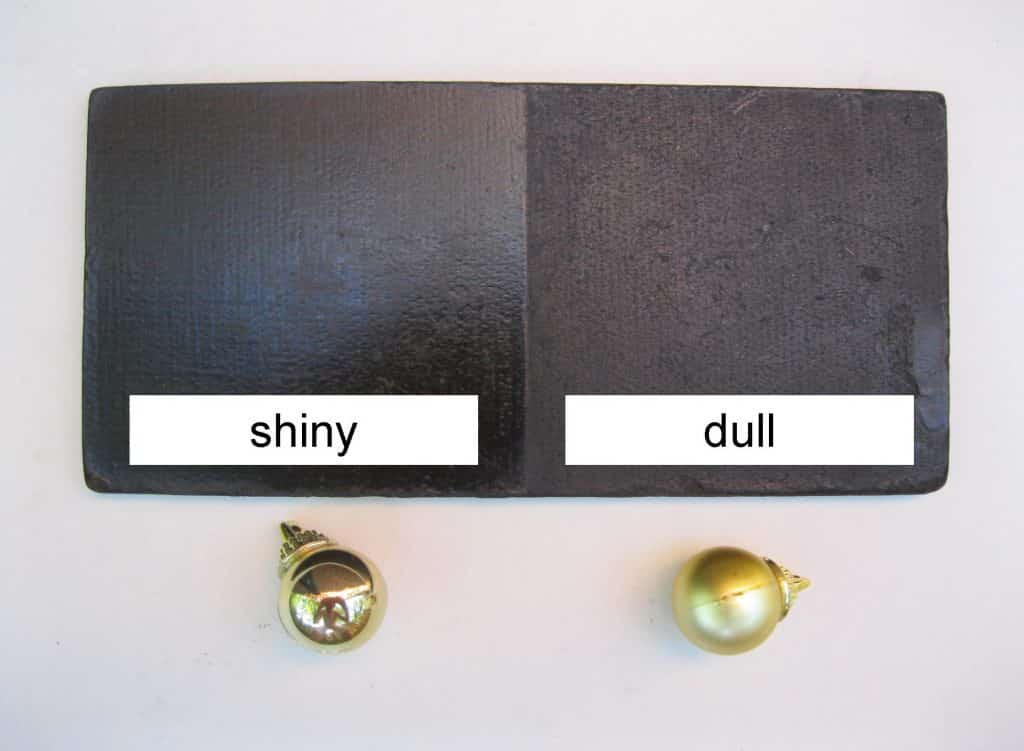
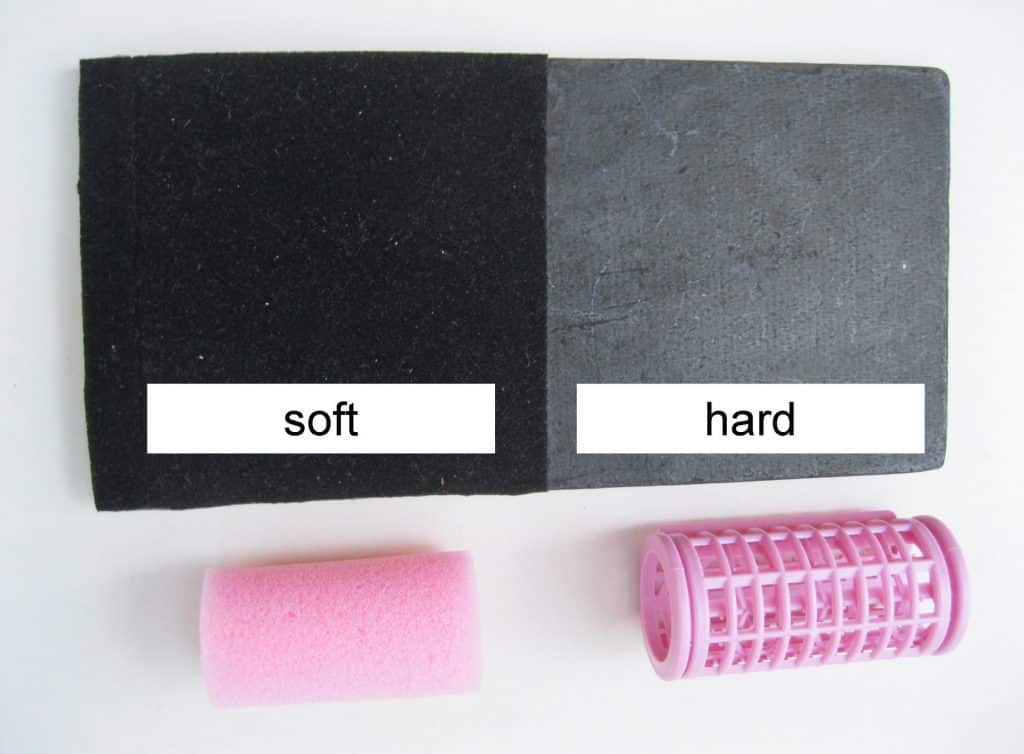
Presentation: 5
Introduction:
Introduce the texture tablets one at a time. This will give you time to make them. Add each one to your environment as you finish it. Find two perfect example objects to put with each tablet. It may take a little time to gather more. Go with whatever you have at first. Have fun finding new examples to use.Suggested Sequence of Introduction:
- Rough and Smooth
- Shiny and Dull
- Soft and Hard
- Cool and Warm
- Wet and Dry
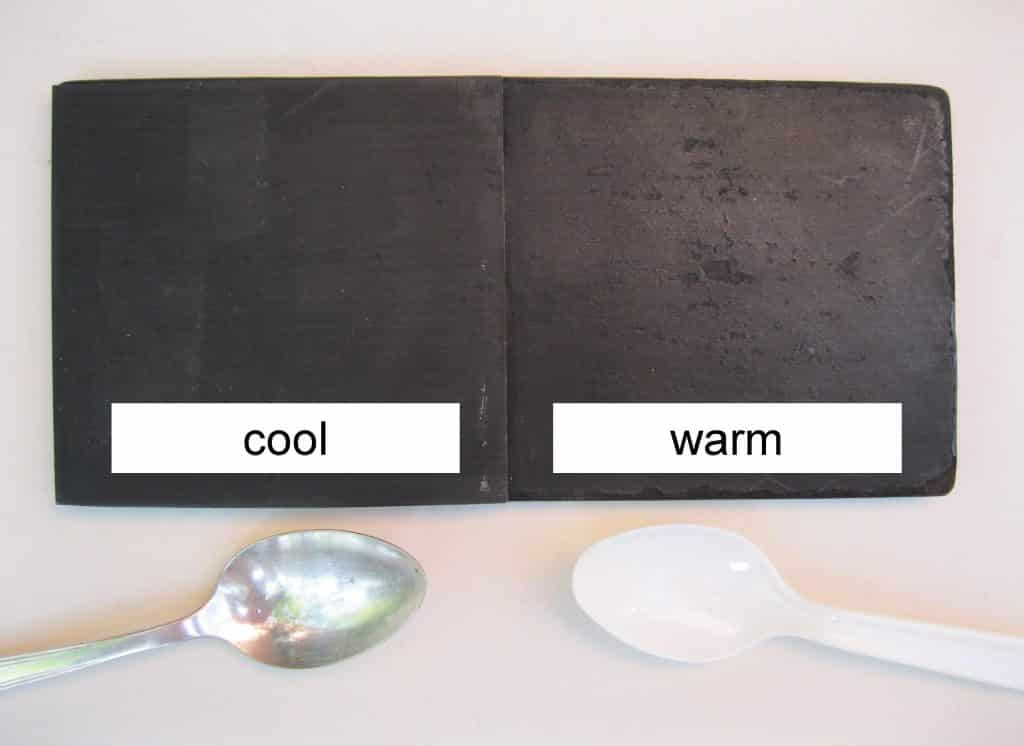
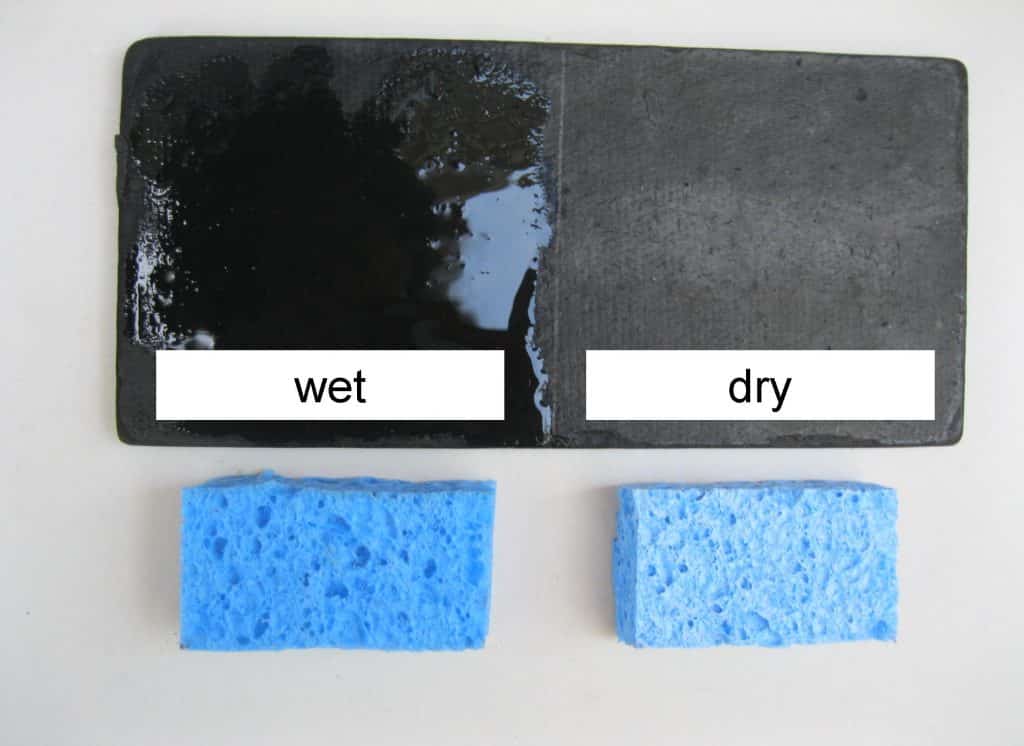
Presentation: 5 (6-9 if it was never given in 3-6)
- Introduce the meaning of the word texture. “Texture is a word that tells us how things feel that are around us. All things around us have texture. Most of them we can feel, and some we can see and These tablets are meant to be touched.”
- With your hand palm down, gently sweep over the left side, then the right. “This is rough. This is smooth. Rough and smooth are opposite textures.” Introduce opposites if needed, e.g. up-down, day-night, fast-slow.
- Each child touches the tablet and repeats the names.
- Match the example object or objects in the basket.
- Place each pair of objects below the appropriate sides of the tablet (see photos).
- If reading-level appropriate, introduce the labels: Real Textures: rough and smooth.
Presentation: 6-9
Note: How many tablets you introduce at a time is up to you. I introduced all five tablets at one time. I also gave this lesson every year to 6-9 students.- Introduce the meaning of texture (See above presentation).
- Introduce each texture tablet.
- With your hand palm down, gently sweep over the left side, then the right. “This is rough. This is smooth. Rough and smooth are opposite textures.” If needed, review opposites, e.g. up-down, day-night, fast-slow.
- Each child touches the tablet and repeats its name.
- Place rough on the left. Do the same for soft, cool, shiny, and wet.
- Continue to introduce each tablet, placing the new texture pair in line under the first.
- Demonstrate putting the water on the last tablet. It may soak into the wood and require a second dousing. I always suggested that the children touch the dry side first. I gave them permission not to touch the wet side if they did not want to get wet.
- Introduce the labels starting with the title “Actual Textures” then the texture names (at the discretion of the teacher).
- Demonstrate putting the work away, placing wet/dry on top so it can dry easily.
Extensions: 6-9, (and 5, if they are ready for it)
- Play a game. A child picks a texture label and then must find an object in the environment with that texture (Second Period).
- Present a basket of selected example objects for the work. A child selects an object and identifies one texture (Third Period).
Advanced Basic Textures Lesson: 9-12
Introduction:
Give the 6-9 Lesson, if your students were never exposed to it. Otherwise, briefly review the lesson and give the following one.- Prerequisite: Texture Tablets 6-9
- Direct Aim: To recognize and identify the 10 basic textures in real objects
- Indirect Aim: Preparation for Advanced Textures which are not touchable
- Point of interest: Have you discovered any textures your teacher did not choose to identify?
Materials: 9-12
- Choose an object that you would enjoy using only for the presentation.
- A collection of 5 or 6 very interesting and unique objects in a container for the activity
- Include a #7 black-handled paint brush. When the brush is wet, it has all ten textures
- An interesting container for the students objects
- 4 cards titled Ten Basic Textures, listing all ten texture names as opposites. Print from image included to make 4 cards.
- Pencils/pens and paper for recording the textures experienced when touching each object.
- With your students, design a way for the answers to be presented, leave it up to each person to think of their own way or reproduce the provided Textures Worksheet. My students had a Journal in which to store their finished special work.
Preparation:
- Choose your object and the students’ objects.
- Place the students’ objects in their container.
- Choose containers for pens/pencils, paper and The Basic Texture Cards in containers.
- Place everything on a tray.
Presentation:
- Give the 6-9 presentation if it is needed. Follow it on another day with the 9-12 lesson.
- Bring your object and the lesson to your teaching mat.
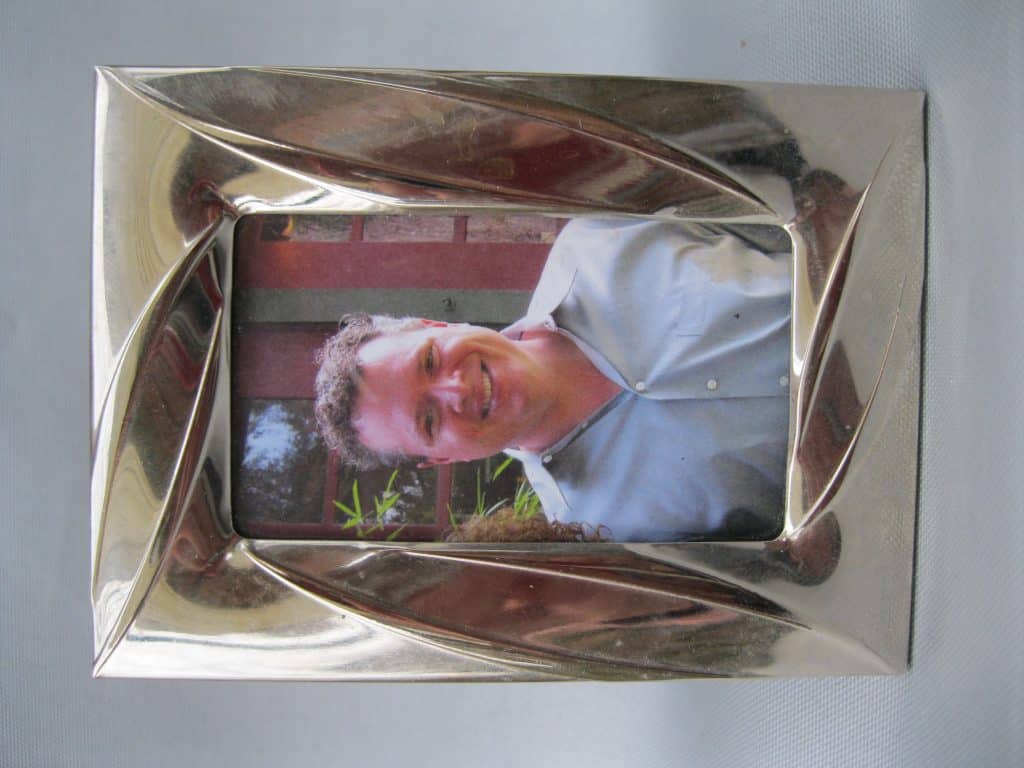
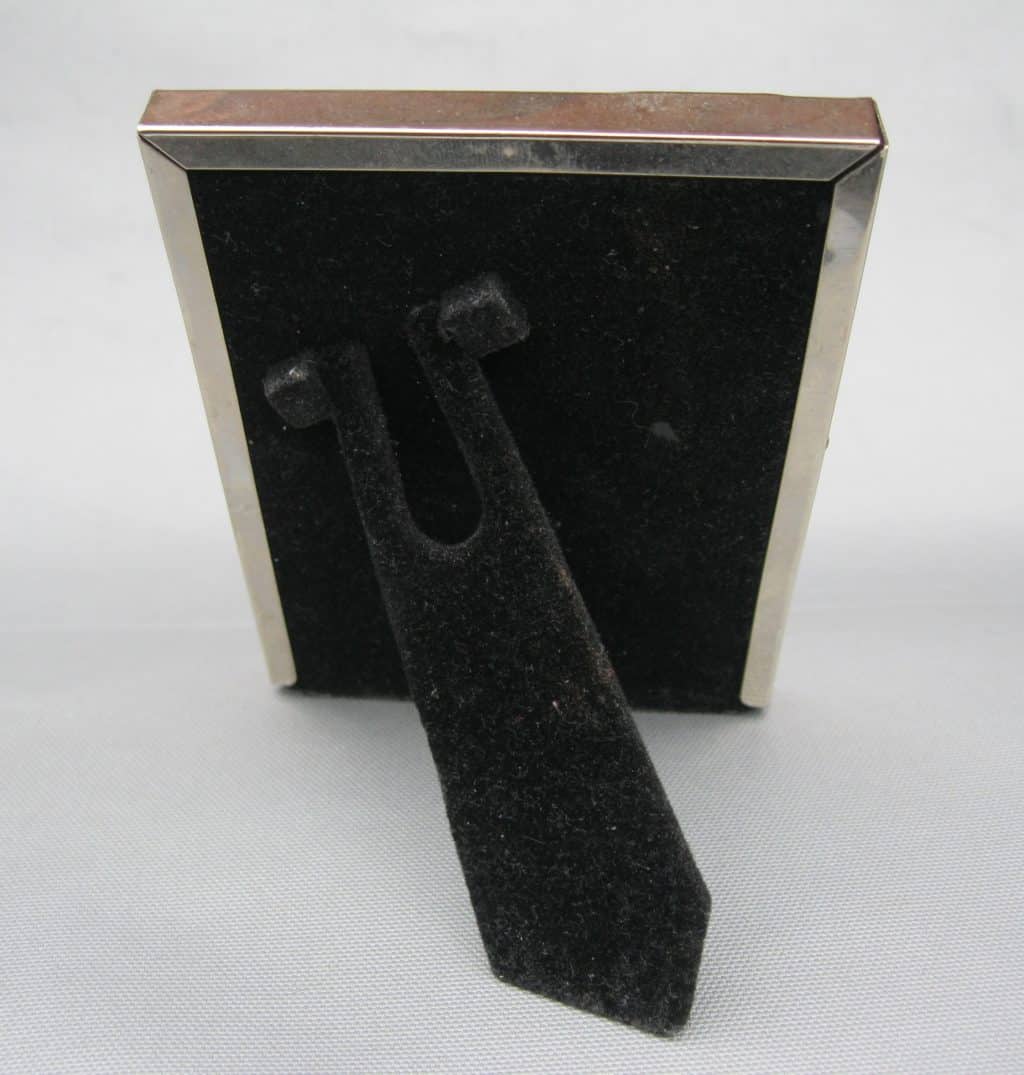
- “You already know that there are 10 basic textures. I have chosen 6 interesting objects for you to investigate. So I decided to choose an object for my lesson. It is a framed picture of my son that sits on my desk next to my laptop. When I put it in my hand I immediately feel the frame is cool. Hand it to the next person. What do you feel? I agree. The back has a fuzzy surface that is soft.”
- Pass the object around the circle and record the textures the children find. The framed picture was cool, warm, shiny, dull, dry, soft, hard, rough and smooth. No part is wet.
- Invite your students to choose at least 4 objects for their work.
- “Use the Ten Basic Textures card as a guide for your investigation.”
- “You are invited to bring an object from home that belongs to you to share in the investigation of basic textures.” (Optional)
Extensions:
- During a harvesting season, a fresh piece of ripe fruit might be an interesting group activity. A ripe, cold, peach would naturally be wet and juicy.
- Extend your discussion of texture by asking the children, “Have you discovered any textures your teacher has not used? Can you think of good reasons why they would not be introduced in the studio?” (Let the children think of other textures. Possibilities include: slick, sticky, slimy, oily, pointed, sharp, blunt, hot, cold, freezing, powdery, rubbery, sandy, granular, rocky, crisp, soggy, flakey, mushy, etc.)
Resources:
- Yard sales, thrift shops, craft shows, museum shops, ethnic stores, and antique malls are all places where interesting objects can be found.
- It is amazing what can be found at curbside on garbage day.
-
Three Advanced Textures
-
The Art Golden Beads
