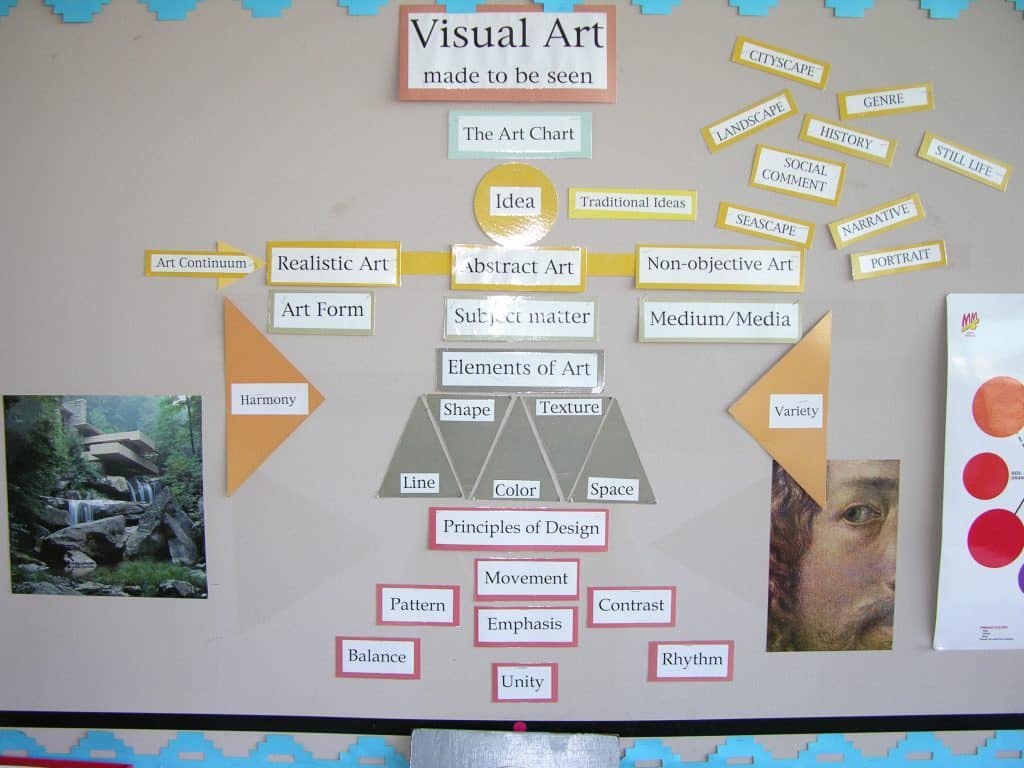
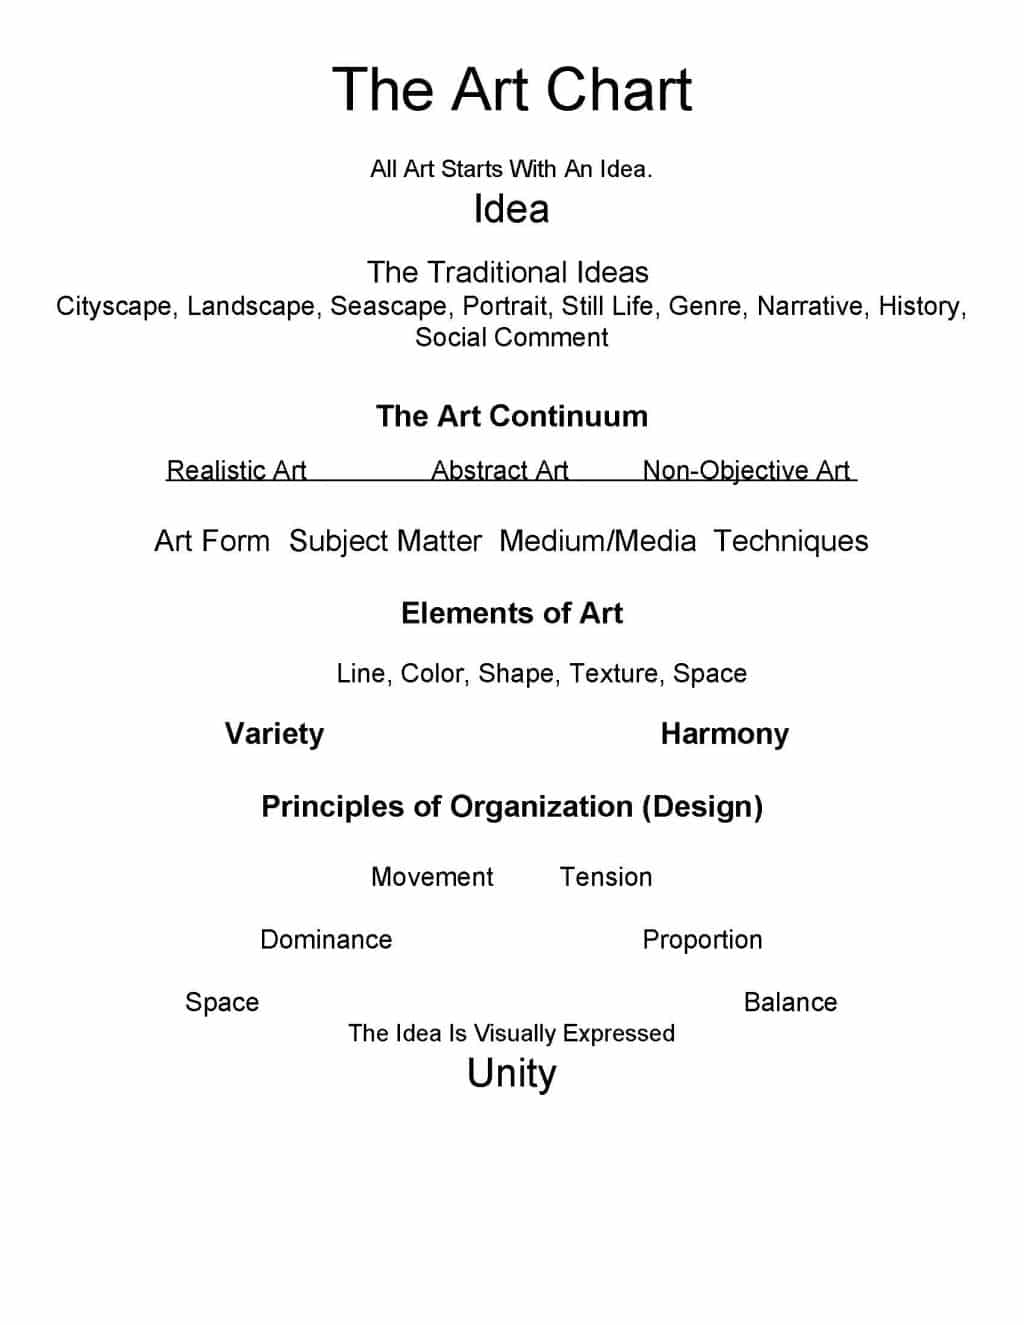
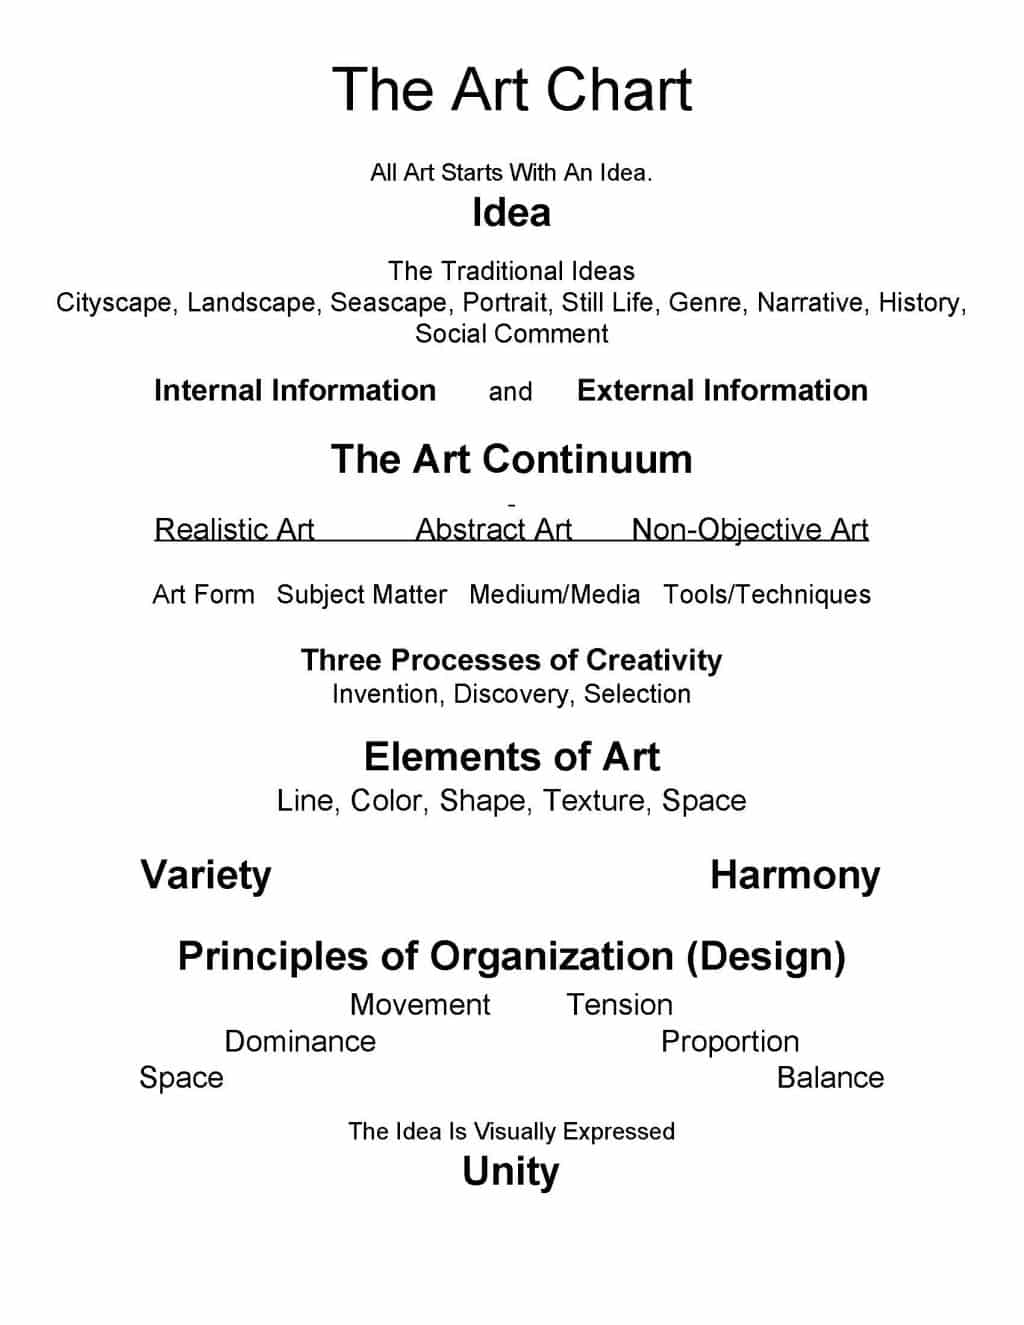
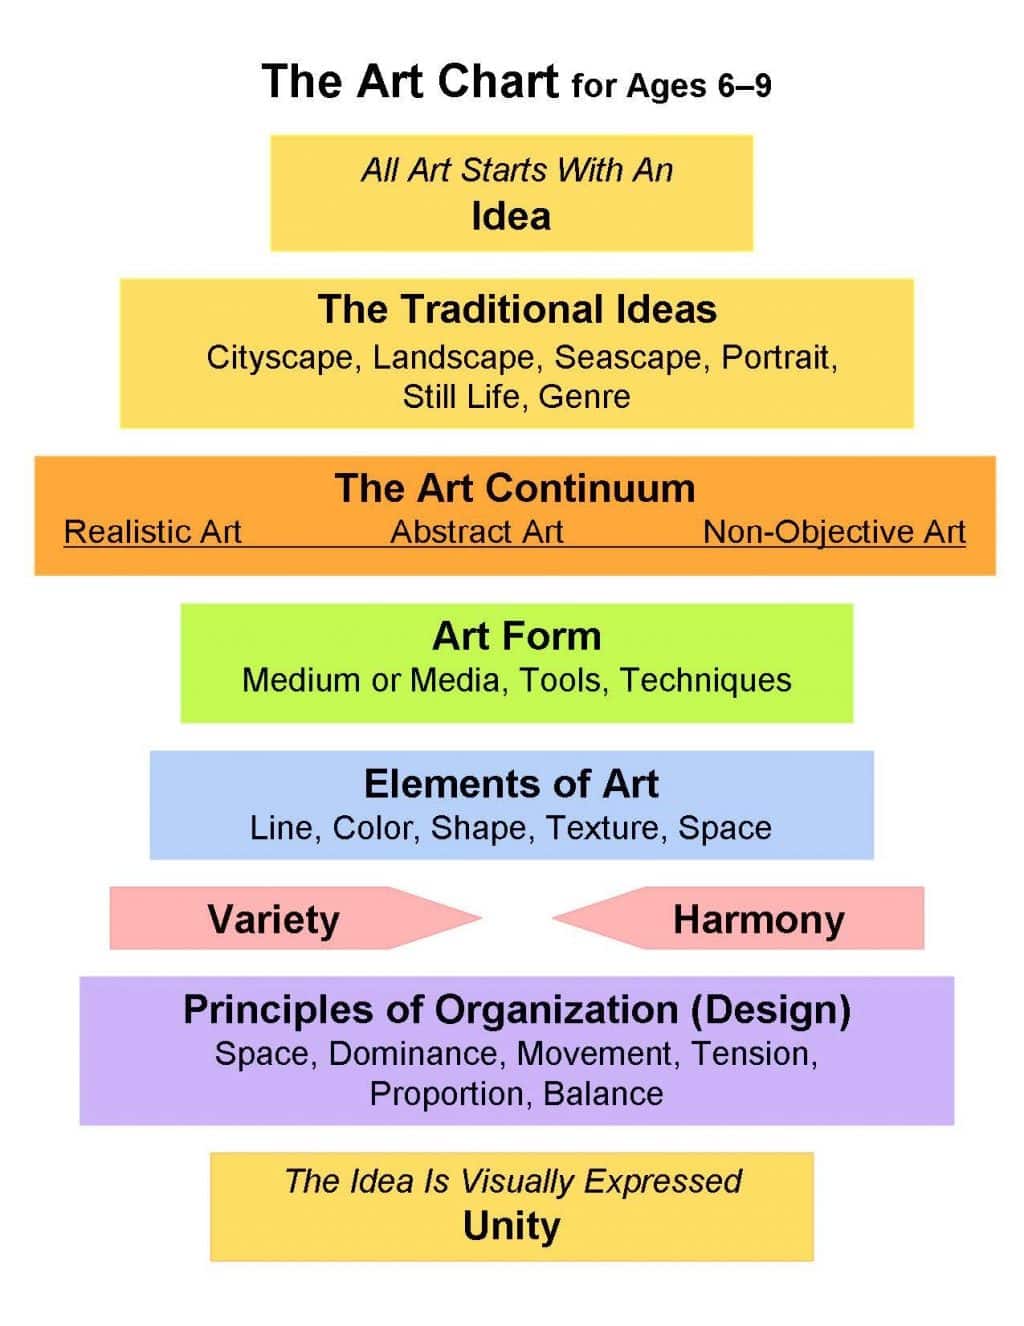
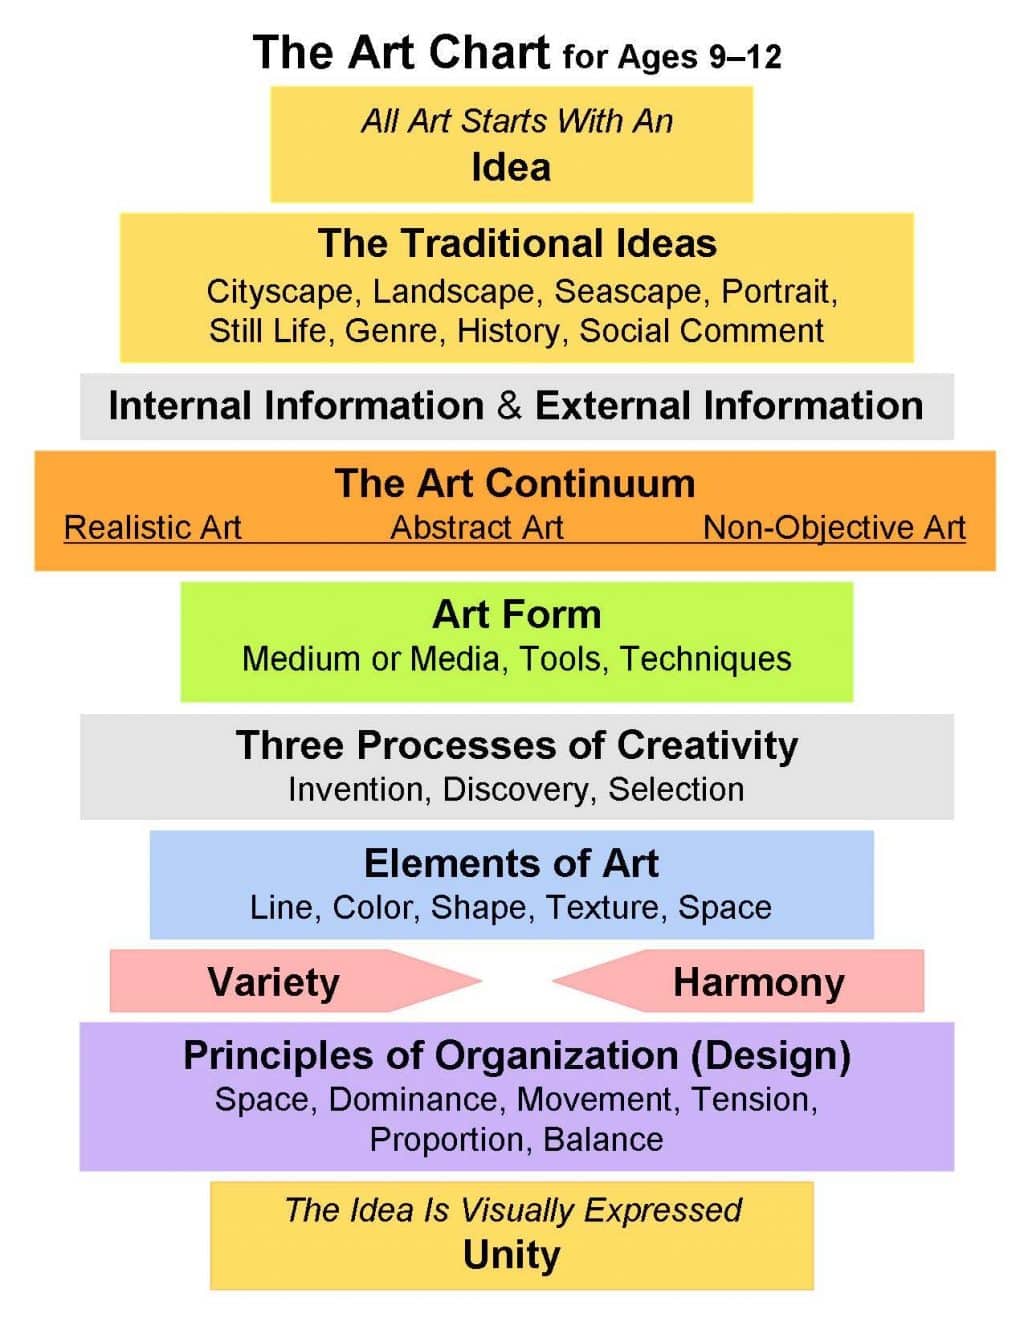
Delineates all the aspects needed to create a work of art, starting with its idea
Dr. Montessori developed elaborate charts and graphs to accompany lessons. The MAM Art Chart is a framework for art lessons that demystifies the key components of how visual information is communicated. The study of the chart provides tools for understanding one’s own artwork and that of others. It outlines the information a person needs to aware of to better appreciate, communicate and support their own (or someone else’s) reaction to a work of art. These are the criteria for visual analysis, art criticism, and art appreciation.
It is not necessary to present the Art Chart in a sequence that begins at the top and ends at the bottom. This makes it possible to introduce it in parts more appropriate for five-year-olds. Then when children are introduced to the Chart as elementary students, they will be familiar with some of its beginning parts.
The chart is a referral instrument for any art lesson. Go to the chart each time you give an art lesson, and relate the learned concepts to the relevant components of the chart. In this referral process, the children will learn what to call the concepts behind their creativity, and will have their own idea validated by knowing there are terms to describe it.
GEORGIE STORY
The MAM version of The Art Chart was developed after I heard a story related by a second grade teacher from another school. She had decided to give her own art lesson when no substitute was available for their absent art teacher. She got a reproduction of a famous painting and led a discussion about it. She was disappointed that her children did not know they were looking at a painting, what materials made the painting, and did not know the names of common ideas such as landscape and portrait. My curiosity led me to reproduce her lesson, thinking that my students would be able to discuss paintings because of all the lessons they had received. To my chagrin, my students did only a little better than hers. That day, I started designing the kind of art chart I needed and the kinds of lessons I would need to give.
I found a chart published in Art Fundamentals in its 1981, fourth edition, and in all later editions. To be more useful to students, this version of the chart needed additional components to complete a comprehensive framework for art appreciation. These additions are included in these MAM lessons, and represent contributions incorporated from lessons given by Dr. Hermine Feinstein, Dr. Helen Wessel, and Dr. Terry Barrett, as well as from my own experience as a working artist and teacher.
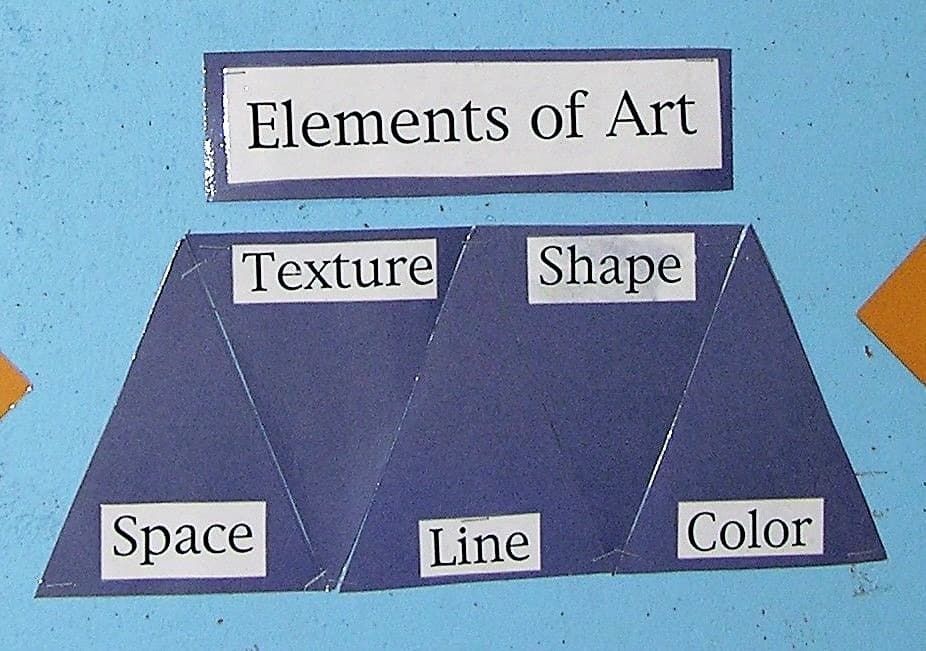
- Reference to The Art Chart can begin at age 5 (or any age), with the five Elements of Art – the building blocks of every visual artwork – that are so related to the sensorial materials in the environment. See the photo here for a way to display the Five Elements in isolation for 5-year-olds. These elements continue to be fundamental for all visual artists of any age.
- Idea is at the top of the chart, because an idea starts the process of making a work of art (See: Generating Personal Ideas for related lessons).
- The Traditional Ideas are next. They are examples of themes that have inspired ideas in artists throughout history (See lessons in this section).
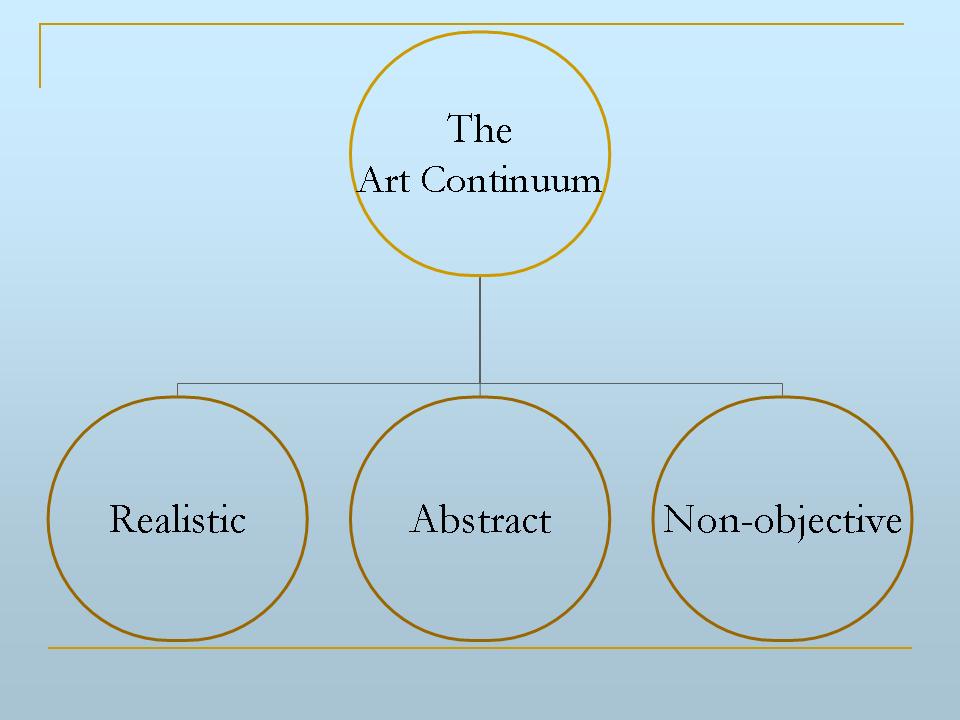
- The Art Continuum presents three main ways an idea can be expressed (See lessons in this section).
- Elements of Art may be the first part of the chart presented, but the Elements are displayed under the continuum, because any artwork is made with the same five elements, no matter where the work belongs on the continuum (See: Understanding Art I & II and The Sensorial Materials for related lessons).
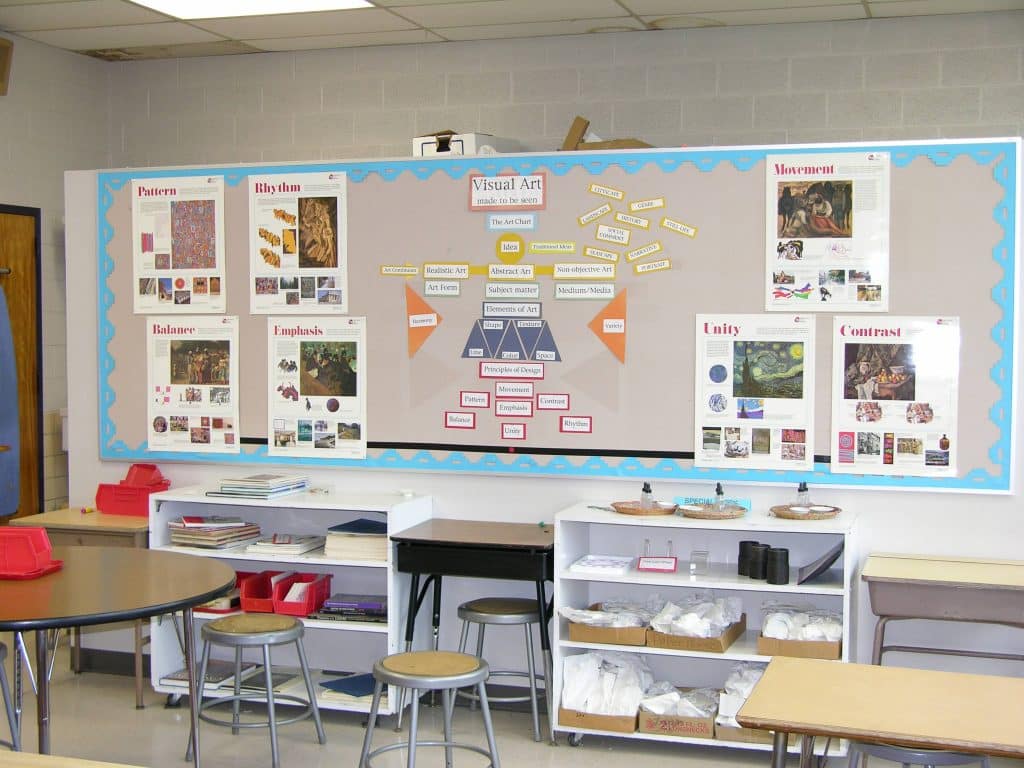
- Idea – All art starts with an idea (See Generating Personal Ideas)
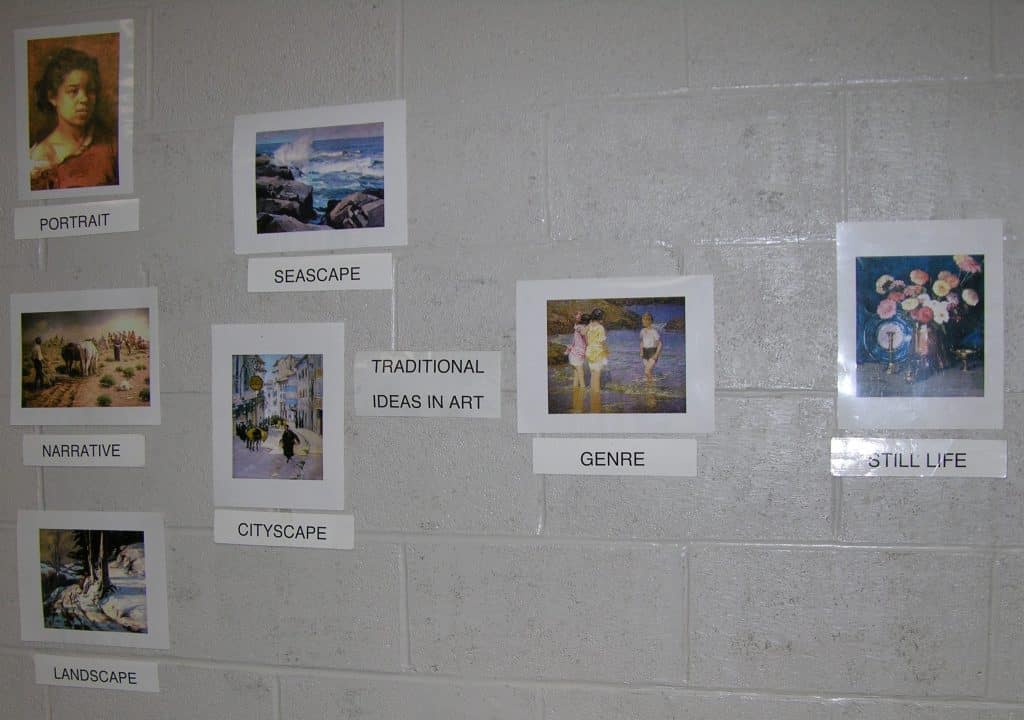
- Traditional Ideas – Ideas expressed repeatedly over time, such as Landscape, Cityscape, Seascape, Portrait, Still Life, Genre, Narrative, History, Social Comment (See lessons in this section)
- Internal and External Information – Internal: found within the work of art External: found in sources outside the work (See explanation in this section)
- The Art Continuum – Three main ways to express an idea, or any in between (See lesson in this section)
- Art Form – Medium or media used, tools and techniques employed (See Art Forms I, Art Forms II, and beyond)
- Three Processes of Creativity – Invention, Discovery, Selection (See explanation in this section)
- Elements of Art – Line, Color, Shape, Texture, Space (See lessons in Sensorial Materials and Understanding Art I, II, and beyond) (See photo for a good way to isolate these elements for age 5)
- Variety and Harmony – Variety: Involving difference or uniqueness Harmony: Involving repetition of elements or themes (See lesson in this section)
- Principles of Organization (Design) – There are many, including Space, Dominance, Movement, Tension, Proportion, and Balance (See lessons in Sensorial Materials and Understanding Art I, II, and beyond)
- Unity – The idea is visually expressed (See explanation in this section)
- Ocvirk, Otto G. et al. Art Fundamentals: Theory and Practice. 8th ed. New York: McGraw Hill, 1997. (4th Edition has the early chart).
- I recommend this volume. Buy any edition. It will serve as a quick reference for teachers who have had little art education. It is filled with illustrations of different art forms. Pages can be used immediately in the environment or serve as a model for materials needed.
- Barrett, Terry. Criticizing Art. Mountain View, CA, Mayfield Publishing Co.,1994.
- This is a clearly written volume that is a delight to read.
- Feldman, Edmund Burke. Becoming Human Through Art. Englewood Cliffs, N.J. Prentice-Hall, 1970. Chapter 12.
Introduction:
Many of the following lessons use reproductions of artwork. You will need to help your students understand that the reproductions they are seeing are printed photographs of works of art. Looking at a photograph imposes limitations to the experience of a work, compared to seeing the original painting or sculpture. While you are free to use any appropriate images for lessons, I suggest you use as many as possible from museums in your area. At some point your children will be visiting museums. They will be delighted to see images that seem like old friends. Then, move out to resources further away, using reproductions from museums your children may be visiting during out of town field trips or family vacations. Museums always have special exhibitions, and you will wish to prepare your students to see them. Use the museum catalog that is printed for the exhibition to get information about what will be seen. Use the best photographs of the exhibition’s most notable works to make presentation materials. The following lessons will help your students appreciate the limitations of reproductions.Introduction:
Give yourself time to prepare these materials. Find reproductions of one painting in several sizes. With reproductions of the same work of art, it will be easy to see variations of color and feeling from one print to another. Choose a painting that is not too large, and match its size and shape as a sheet of gray paper. This will provide a rough sense of the original painting’s size. Think of a clever title for the bulletin board, or words such as “Which one is the real Raphael?” The answer, of course, is the one in the museum.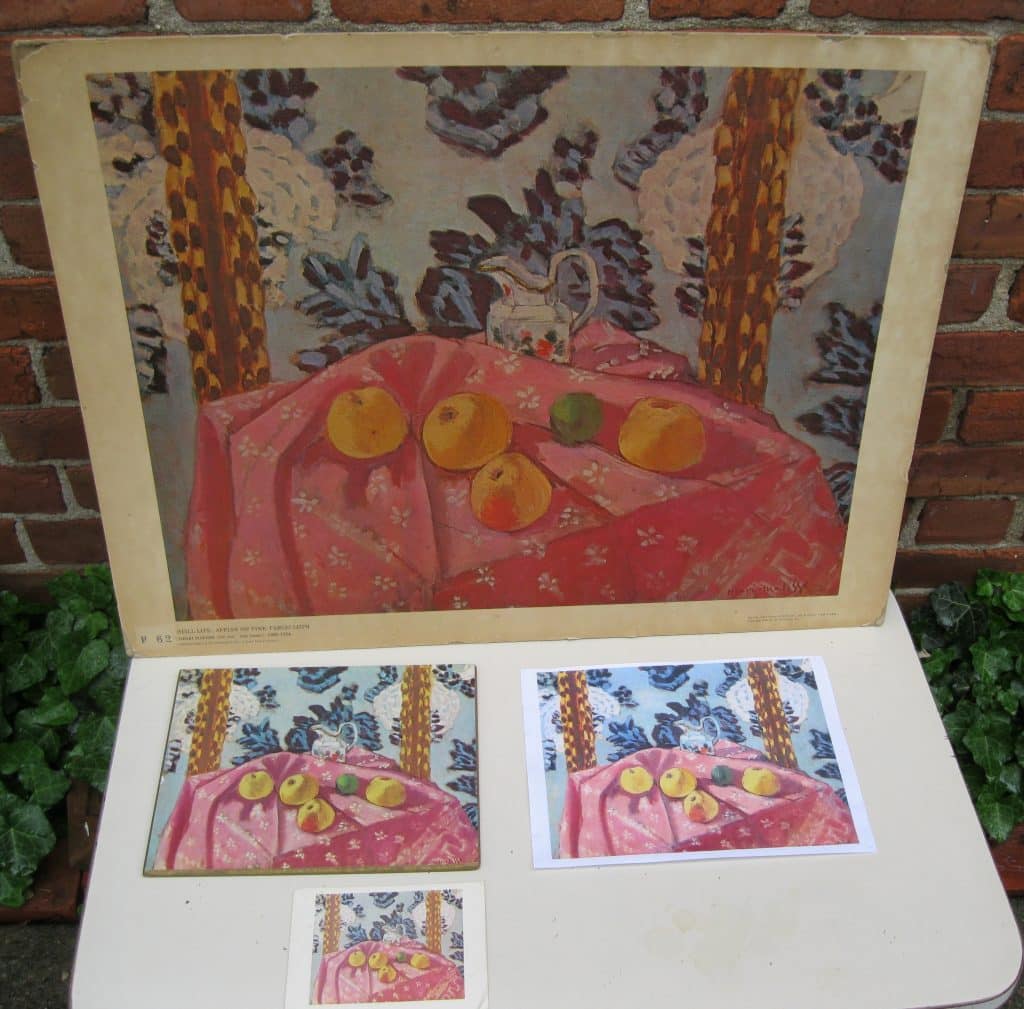
- Prerequisite: Matching games using art images
- Direct Aim: To introduce the necessity of using reproductions of artworks
- Indirect Aim: To discover and understand the limitations of reproductions
- Point of Interest: Which one is the real work of art?
Materials:
- 3–4 reproductions of the same work of art: a poster size, a postcard, a note card, and two different sized reproductions from a book or magazine
- Note: I used a still life by Matisse (see photo) which is in the National Gallery in Washington, D.C., but reproductions of this work are not being sold. Instead, consider using reproductions of The School of Athens by Raphael, for which many resources are listed below in Suggested Bulletin Board.
- A rectangle of gray paper matching the size and shape of the original work
- Note: If you use The School of Athens, which is 16′ 5″ x 25′ 3″, compare the size of the original to the same size wall of a room or building nearby.
- Printed title for the bulletin board
- Museum Identification Tag for the work (see: The Environment)
Preparation:
- Choose a work of art and gather its reproductions.
- Laminate the reproductions if needed.
- Make the title for the board and make the Museum ID Tag.
- Create the shape and size of the original artwork with gray paper, or choose a color that is appropriate. I used pink for the Matisse painting because there was a lot of pink in the painting.
- Install materials on the bulletin board.
Presentation: 6-12
- Introduce the work by its name.
- “What you are seeing are called reproductions. A reproduction is a printed picture of a work of art, but not the real thing. The real work of art is in a museum, public space or private collection.” Explain that you and the children would have to travel by plane, train, bus or car to see the painting in the museum (name the museum).
- “Reproductions are still helpful because we can see pictures of lots of art that may be too far away for us to easily visit. Reproductions can also be used to learn about art and artists.”
- “However, there are things we cannot experience, e.g., surface texture and/or brush strokes, original colors, and scale compared to human body size, because we are seeing only a picture of the real work of art.”
- “Look at all the reproductions. How are they different?”
- Possible differences:
- They are different sizes.
- You do not know how big the original is.
- The colors are not exactly the same from print to print (indeed it’s possible that no reproduction will match the original colors).
- You cannot see the paint.
- You cannot see the frame.
- You are not able to read the written information that the museum has placed next to this work of art.
- “This is a piece of paper (mat board) that is the correct size of the original work. In a museum it would probably also be in a frame. A reproduction of an artwork can be printed in any size, and does not always help you visualize its original size.”
- Often, information about the original is printed beside the work, such as the name of the artist, when he/she lived, where they were born, the size of the work, and a word or two about what it is (Oil Painting, Wooden Sculpture).”
- “We will still learn a lot from reproductions, and I hope you will be able to experience some of the real works of art you find so wonderful, amazing, exciting, and beautiful.”
Suggested Bulletin Board:
Use a large reproduction of The School of Athens by Raphael:- ArtImagePublications.com – search for School of Athens
- Allposters.com – search for item 7615713
- Nasco Arts & Crafts 1.800.558.9595
- Cumming, Robert. Annotated Art, The world’s greatest paintings explored and explained. New York, Dorling Kindersley 1995, page 32–33.
- To view a video about the painting: https://www.khanacademy.org/humanities/ap-art-history/early-europe-and-colonial-americas/renaissance-art-europe-ap/v/raphael-school-of-athens
- Briere, et. al. Make Art a Part of Your Curriculum Success, A resource for any classroom, 2nd Edition. Canada and USA, Art Image Reproductions Inc. 2004, page 219. https://artimagepublications.com/product/make-art-a-part-of-your-curriculum-success/
Extensions:
- It is possible to present reproductions of other art forms (drawings, prints, sculptures or photographs as well as paintings) for variety, especially if it is a review lesson.
- If you do this with 9-12 year olds and have the space somewhere in your school, let them choose a big sized painting. Then, have them reproduce its shape in a neutral color (Craft Paper) and put a small reproduction next to it. Let them write the Museum Identification Card (See: The Environment) for the project and include any educational information they have created (External Information).
Resources:
- National Gallery of Art
- Mail order information: (202) 842-6002
- West Building Store: (202) 312-2667
- Concourse Store: (202) 312-2658
- For online shopping, go to https://nga.gov , click on Shop, click on Prints and Posters. After it displays the list of posters, click on View All at the top of the list.
- Find a work of art and click on it. This will isolate the work. Put your cursor anywhere on the print and it magnifies that section.
- Lots of information is available. You will find the name of the artist, the title of the work, the # of the reproduction, its cost, a description of the work (click More displayed at end), and background information about the artist (click More).
- Use reproductions from local museums as much as possible.
- Calendars often feature one artist or a “school” of art.
- Search amazon.com for Aline D. Wolf: Child Size Masterpieces. Use these as suggested by author or use to structure other activities.
- Art Image Publications 1.800.361.2598 artimagepublications.com/
- Click on Store, click on a painting. Explore the many choices.
- Nasco Arts & Crafts 1.800.558.9595
- https://www.enasco.com/c/Education-Supplies Search: Product Number 9723580 for Famous Art Prints; the collection has a small reproduction of the Raphael painting.
- Crystal Productions 1.800.255.8629 crystalproductions.com click on Prints/Posters, CDs, and/or DVDs
- All Museums reproduce parts of their collection. Contact them.
- Buy online by an artist’s name, school, or by key words.
Introduction:
Reproductions are printed with four or more transparent colors of ink on white paper. The “halftone” dots of color are too small to be seen without a powerful magnifier such as a photographer’s loupe, jeweler’s eye loupe, or a linen tester (thread counter). A magnifier on a tray with several postcard reproductions is all you need. The children will use this magnifier to test everything in the room, looking for printed material. Find an outdoor advertising company that still makes printed billboards. The image is made to be seen from far away, so the dots of ink are large shapes and easy enough to see up close. If you ask for a piece of an advertisement for your classroom, they may give it to you. Pop artist Roy Lichtenstein used “Ben-Day dots” in his paintings and prints to add color and texture appropriate to his frequent subject matter of comic strip images. https://lichtensteinfoundation.org
Note: The halftone printing process is credited to British scientist William Henry Fox Talbot in 1852. Ben-Day Dots are named for Benjamin Day Jr., the American who created the printing method in 1879.
Prerequisites: First Color Box, color mixing exercises (see Understanding Art II); names of colors, the ability to cup a hand over one eye
Direct Aim: To see how the overlapping ink creates new colors
(emulates color paddles)
Indirect Aims: To introduce 4-color printing, to see how the primary colors and black ink on the white paper produce all the colors
Point of Interest: What surprised you about seeing printed materials as dots?
Materials:
• A linen tester, or one of the other magnifiers named above
• 3 or 4 postcard reproductions
• A tray for the above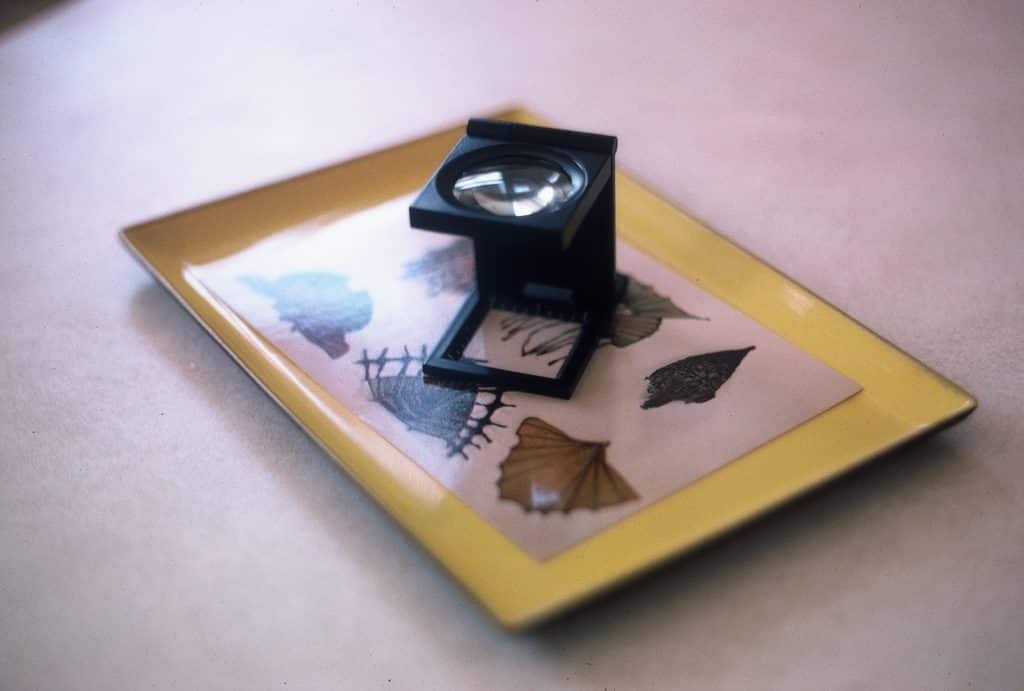
Preparation:
• Collect the needed materials and equipment.
• Assemble the activity.
Presentation: 5-9, (9 -12 if never introduced before)
• Introduce the work by its name.
• Demonstrate how to open the magnifier.
• Demonstrate how to cover one eye.
• Choose a reproduction and place in front of you in a well-lit space.
• Place the magnifying glass on the card and move it around.
• Offer the work to a student and the other members of the group.
• Offer external information about printing, from Introduction above.
Extensions:
• Make a basket containing a magnifier and an assortment of objects that are printed in four colors.
Resources:
• Amazon.com: linen tester
Introduction:
All art starts with an idea or intention which may be very simple and immediate or planned over time – sometimes a long time. Children can be supported in finding their own ideas from preschool on. When continuously presented with positive affirmations, they can call upon their own interests and sensitivities as sources for self expression. A whole section of lessons is devoted to the importance of personal ideas (See: Generating Personal Ideas). Over time, the children are given lessons and activities that help them to use their own ideas. While children are given the opportunity to create individual works of art, they are also able to plan and create works as a group. Everyone’s input is given voice, and then the final plan is voted upon. Children will agree with and accept an idea, even if it is not their own. They seem to understand what is best for the whole when working in a group. They are able to plan an idea that may be beyond your abilities, and you may need to seek help from other adults in order to make it happen.
Artists often leave behind clues in a work of art that help the observer to grasp the artist’s intentions. If a landscape painting has tiny people doing something, they are just part of the total picture, but not more important than any other part. It is still a landscape. If the idea is about color, then the shapes used will be simple and regular, like squares and rectangles. The age of an artwork may be revealed by people’s clothing, or interior features of a room, or the materials with which it was made. The time of day or season of the year may be clues to the idea. The clues are related to subject matter – things you can name – defining something about the idea.
Introduction:
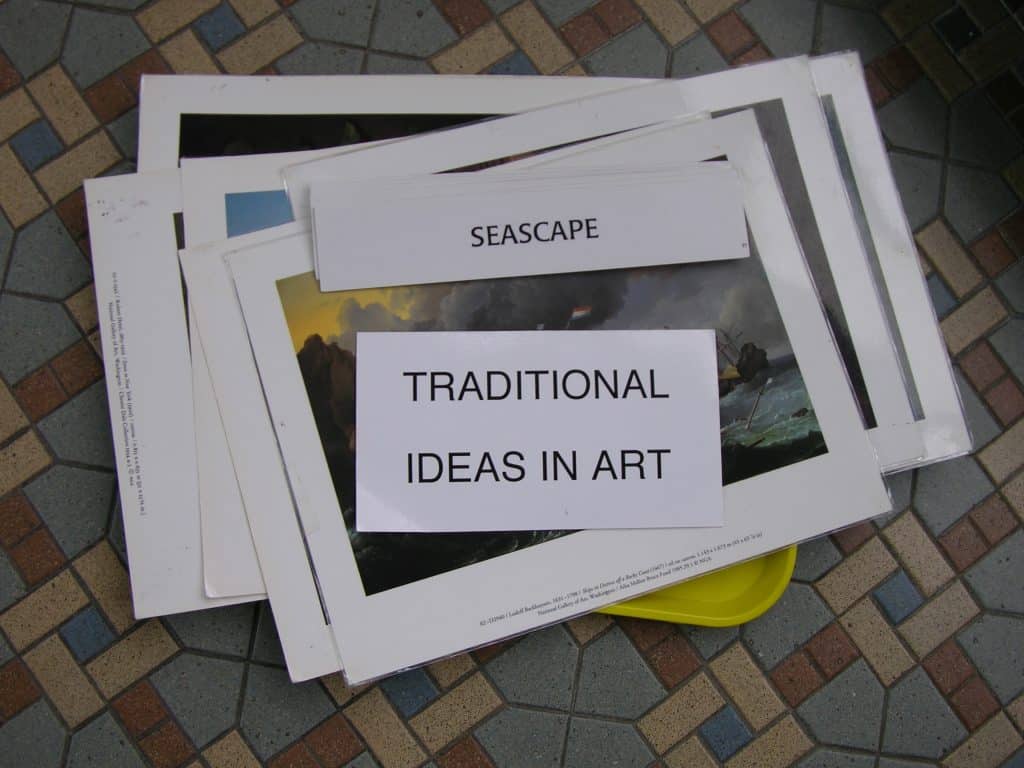
Some ideas have been used since the beginning of our visual history. These are ideas that can be found in most any museum. These “Traditional Ideas” are so prevalent that they have identifiable characteristics and names, such as Portrait, Landscape, Genre (everyday life), Cityscape, Still Life, Seascape, Narrative, History, and Social Comment. For the children, they are concrete examples of what an idea is.
It is possible to find artwork that could meet the criteria of more than one traditional idea. It is also possible that an avant-garde video piece, sculpture, tableau, or performance art could be seen as being a variation of one or more of the traditional ideas. The history of each of these ideas is an interesting study.
Introduce the ideas two at a time for the youngest students. Then, reinforce them with a sorting game and vocabulary cards. For beginning elementary students, introduce three or four at a time.
The first seven traditional ideas can be introduced to children 5-9. Wait to introduce the History and Social Comment ideas until the children are nine to twelve years old. Many of these works of art deal with very negative, serious, or frightening ideas.
Start with portrait and landscape, since most students have had their picture taken, and landscape photos are often made on vacations. A selfie is a self-portrait made with a phone, usually to share on social media networks. However, many famous artists have made self-portraits, e.g., Rembrandt, Van Gogh and Chuck Close.
Only a quick review will be needed for upper level students unless this is their first formal experience with these ideas. Play a game with them. Display an example of each and see which ones they know and which ones need to be introduced. See a suggestion for introducing portrait under Presentation: 9-12.
Note: All presentations, no matter what level, involve naming what is seen in the painting, e.g., people, objects, places, events, time, temperature, weather, season, lines, shapes, texture, and colors. The named things seen in an artwork constitute its subject matter. Not only is this the first step in the process of art criticism, but it is essential to understanding the commonality shared between realistic art and non-objective art in the next lesson.
- Prerequisite: Affirmations leading to ideas, drawing and/or painting activities
- Direct Aim: To introduce an idea as an intention
To introduce and define the traditional ideas
To introduce and define Subject Matter
To start the study of the Art Chart - Indirect Aim: To prepare students to identify the ideas to use them for creative self expression
- Point of Interest: Suggest that students look for these ideas displayed in homes, offices, books, magazines, stores, or even on a computer screen.
Materials:
- Large reproductions for each of the Traditional Ideas for the presentation, at least 11” x 14” or poster size (see Resources).
- Note: Choose reproductions that are non-ambiguous and straightforward.
- A table easel to display each idea (optional)
- 1-3 postcards or small reproductions for sorting during the lesson
- A container for the presentation postcards
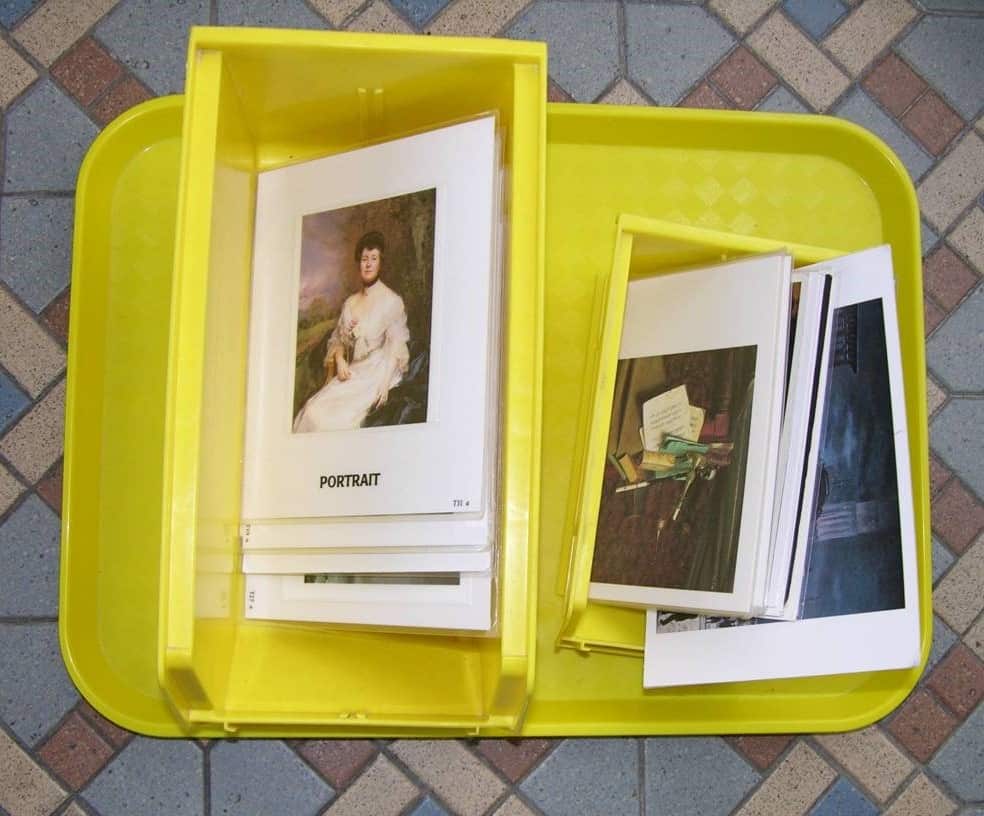
- 4 or 5 postcards of each idea presented for an independent sorting activity. The number of cards for each idea is a control of error.
- Cover paper or heavier, and laminating material
- Laminating Material
- Containers for the postcards
- A tray for the independent activity
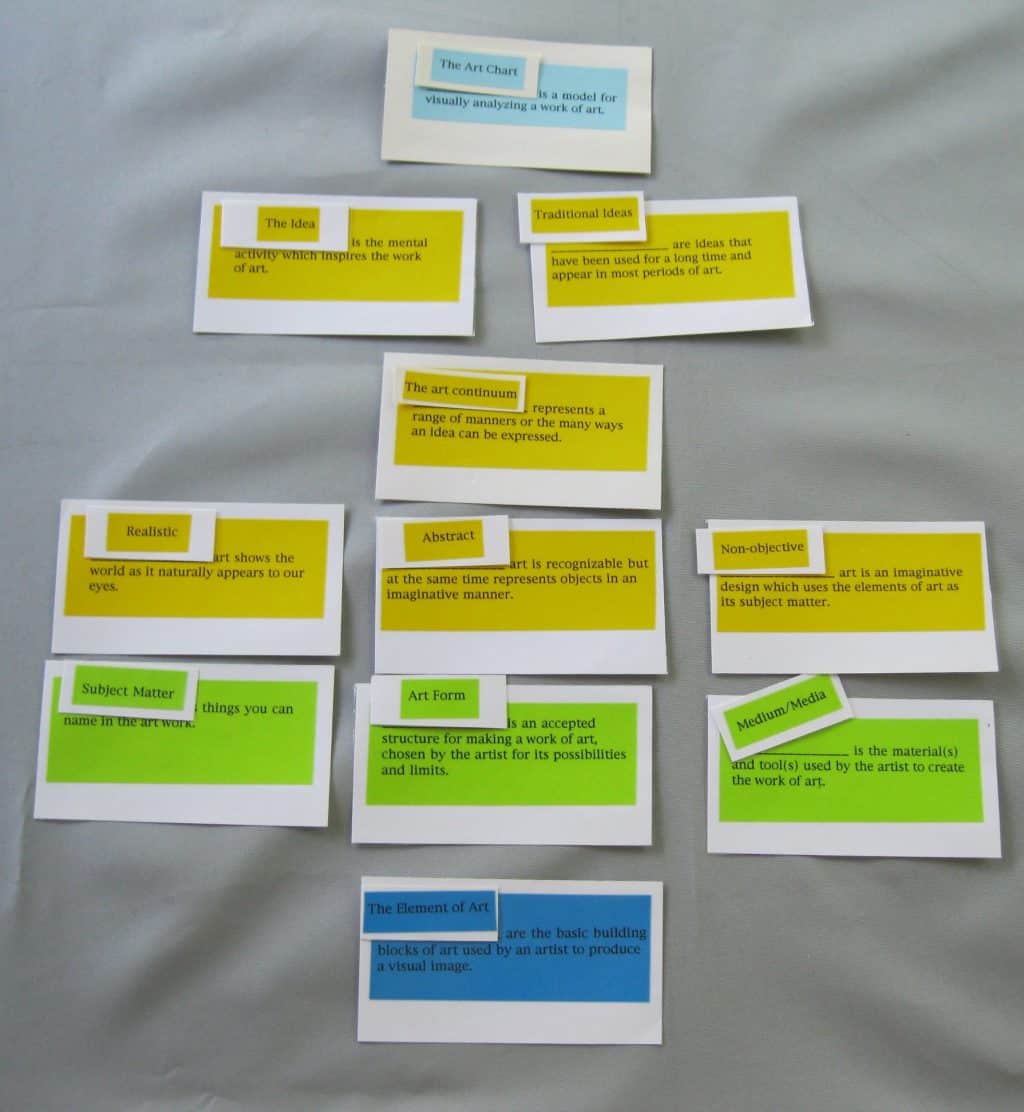
Note: After this lesson is complete, the beginning section of The Art Chart can be made into a bulletin board. The Art Chart can be presented in the classroom with only the words The Art Chart, Idea, and The Traditional Ideas displayed. Build the chart as you introduce its parts.
The Art Chart
All Art Starts With An Idea
Idea
The traditional Ideas: Portrait Landscape Genre Still Life Cityscape Narrative Seascape History Social Comment
Preparation: for the presentation
- Choose the reproductions you will need.
- Make the sorting game for the presentation (1-3 reproductions).
- Mount a postcard for each idea with its name beneath it on larger cards.
- Laminate the postcards
- Make a sorting game for the environment.
- 4-5 postcards of each idea
- To make the sorting game, mount a postcard for each idea with its name beneath it on larger cards. Make a set of vocabulary cards at the same time using the same reproduction with its name detached (label) for the next level of difficulty.
- Note: Keep enlarging the sorting game as you introduce more ideas.
- Assemble the work for the presentation.
Preparation: For The Art Chart bulletin board (see photos)
- Make all the Art Chart bulletin board labels and title.
- Title the board: The Art Chart. Use bigger letters than illustrated.
- In small letters center the words All Art Starts with an Idea.
- Place the word Idea in the middle of a 6”- 8” circle (yellow or color of your choice).
- Make a title label for The Traditional Ideas, and add the individual labels as you teach them (all yellow or color of your choice) under the word Idea.
- Add a small reproduction (optional), or have a place where labeled reproductions are displayed. Add to the display as you introduce each traditional idea.
Presentation: 5-9, 9 -12 as needed
- Introduce the work by its name.
- Give a brief story about Traditional Ideas. Use information from the introduction above if you wish.
- Place a reproduction of a Portrait so everyone can see the work. If using 11” x 14” reproductions, walk around the circle so each person can see it better before discussing what is seen. Your introductory remarks can be said as you do this.
- Suggest that everyone look at the painting and name things that they see. Introduce the word “subject matter” as the term for what they are naming.
- Ask questions that would help children to concentrate on what they see in the painting if needed.
- “What does the artist want us to see? What is the artist telling us? What is important for us to see? Yes, it tells us what this person looks like.”
- Show a Landscape and again study the painting as suggested above.
- Sort the presentation postcards with the group.
- Have the shelf work with you so you can place it in the environment at the end of the lesson. If the work is not ready at presentation time, let them know when it is ready. You will not need to present the shelf work separately because you incorporated it into your presentation.
Presentation: 9-12
- In the book The History of Art by H.W. Janson, 1962, on page 474 (page 600 in the 3rd edition) there are two small black and white reproductions of an artist’s work. One is a study sketch for a portrait that is realistic and looks much like the gentleman. Next to it is the finished portrait by Ingres, also in black and white, but the man appears much more powerful and much more of a leader. Copy them and/or enlarge them as an interesting addition to the lesson. What does the comparison tell you?
- “This is a portrait. Have you ever had portraits made of you?” Immediately define the idea with the children’s help. “What words do we need to use that will tell others what a portrait is?” While you have defined the word in your lesson, let them contribute. They may come up with something better than “A portrait is a work of art that tells us what a person looks like.” “What do you know about this person by looking at the painting?” “Does this person look like they could be living today? What do you see in the painting that tells you that?”
- Note: Share with your students that the portrait painter needed the person to sit still for a long time. Similarly, in old photographs the person had to sit for a long time without moving because the film – which was less sensitive to light back then – needed enough time to make the picture. Painted or photographed, the people wanted a serious record of their being. Why are the subjects of these old portraits typically not smiling? If you Google this question, the results reveal an interesting insight into times past.
Sequence of Shelf Activities for Traditional Ideas 5-12
- Sorting game which includes all ideas presented so far
- Create a grand sorting game after all the ideas have been presented, with 4-5 examples of each.
- Vocabulary cards which includes all ideas
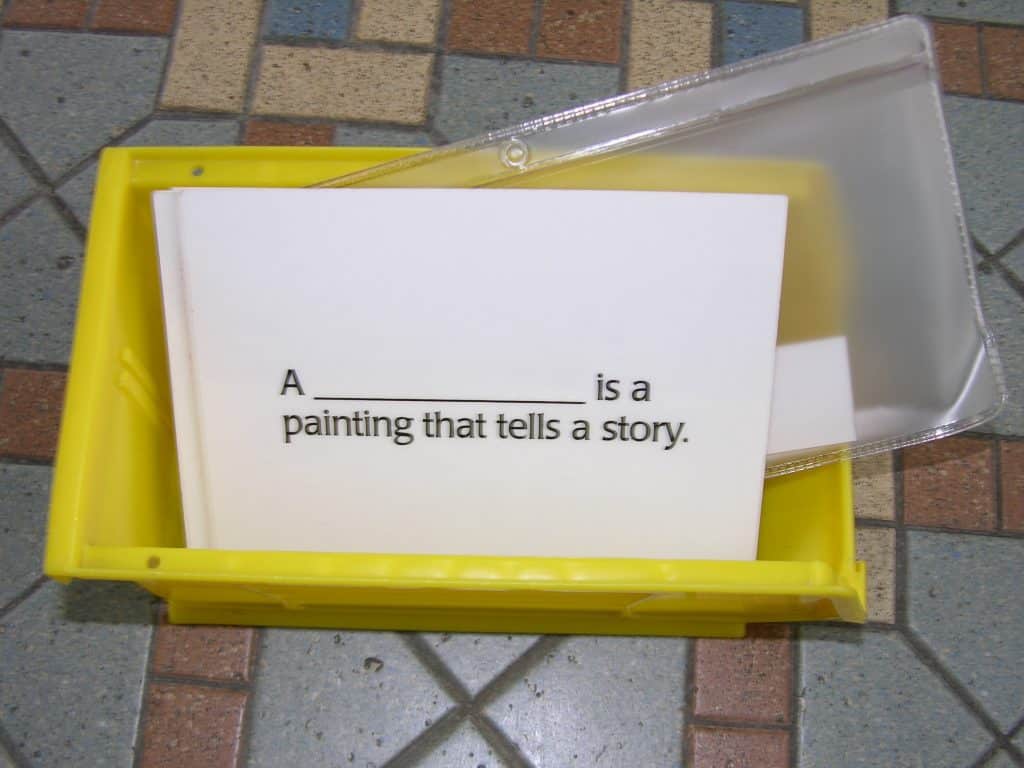
- 6-12 definition cards with a blank for the idea name
Suggested Definitions:
Note: Each of the following definitions uses the word “painting”, though these ideas are present in many different art forms. Since paintings are used to present the ideas, the word is part of each definition. The definition can be enlarged upon during a review lesson or sorting game, when a variety of art forms can be represented. The word “painting” can be replaced by the phrase “a work of art” or the word “artwork.” If you choose, you can give the lesson with a variety of art forms from the beginning. I chose not to for simplicity, to isolate the idea, not the art form. You might consider asking your 9-12 students to help you write their definition cards. They might use words that are different than what you might use.
- A Portrait is a painting about how a person or a group of people look.
- A Landscape is a painting about how the land looks.
- A Cityscape is a painting about how a city looks.
- A Seascape is a painting about what the ocean looks like.
- A Still Life is a painting of things that do not move, like fruit, flowers, and furniture.
- A Genre painting is about what people do in everyday living.
- A Narrative is a painting that tells a story.
- A History painting is about an idea taken from history or literature.
- A Social Comment is a painting that shows how the artist feels about a particular subject or event.
Extensions:
- Suggest that students may want to use the introduced ideas for their own work. Use an idea for the presentation of a new art form.
- Mix all the small reproductions (postcards) you have and ask the 9-12 children to sort them. Let them choose the best examples to use for a grand sorting game for the 6-9 studio.
- Suggest 6-12 students make digital photographs using the introduced ideas. See how many can be done in the environment and on the school grounds.
- Use art forms other than paintings, such as sculpture, printmaking, drawing, and photography, to create an advanced sorting game.
- After all have been presented, plan a field trip to a museum to identify the ideas. Once there, distribute large labels and have the children place them on the floor under the artwork in each gallery. Also, have a label for each child to indicate the artwork they like best. Let the museum know what you plan to do with the printed labels, and ask for permission to do so. They may have a docent or a program that would serve your purpose. Let the children discover that not all art can be described as being one of the Traditional Ideas. If they do notice, let them know that you will next be giving a lesson that will explain that observation (The Art Continuum). Congratulate them for their discovery about ideas.
- Provide images that represent more than one idea, or have a child choose a reproduction that does, and let them explain how. Have them write their observations. Let the children present their work to one another.
- Select childrens’ own works to relate to components of The Art Chart.
Suggested Reproductions: See: Resources
- Portrait: National Gallery (nga.gov). Mary Cassatt, #584538, Little Girl in a Blue Arm Chair, 11”x14”
- Landscape: nga.gov, Albert Bierstadt, #674611, Mount Corcoran, 11”x14”
- Cityscape: nga.gov, Claude Monet, #545935, The Houses of Parliament, Sunset, matted 11”x14”
- Seascape: allposters.com, to Art Prints, to Fine Art Prints, Vincent Van Gogh, The Sea at Les Saintes-Maries-de-la-Mer, 14” x 11”
- Still Life: nga.gov, John La Farge, #674604, Flowers on a Window Ledge, 11” x 14”
- Genre: nga.gov, Winslow Homer, 693469, Boys Wading,11”x14”
- Narrative:
- https://artimagepublications.com/product/la-pinata/ for print ID 181, Diego Rivera, La Piñata
- History: https://www.allposters.com/ to Art Prints, to Fine Art Prints,
Emanuel Leutze, Washington Crossing the Delaware River,
36” x 24” or 14” x 11”. Use the title in Narrow Your Results if needed.- Do research about this image; many historical inaccuracies are in the painting. See: https://www.khanacademy.org/humanities/art-americas/us-art-19c/romanticism-us/a/leutze-washington-crossing-the-delaware and scroll down to Poetic License.
- Social Comment: https://amazon.com Search on Classic Art Poster Dorothea Lange, to find Migrant Mother,1936,
- Research Dorothea Lange for information about the subject.
Resources:
- Weil, Lisl. Let’s Go to the Museum. New York: Holiday House, 1989.
- Read this little book for information. Then read parts of it that would be of interest to your students. If you wait until you have introduced all the ideas, your students will know how much more they know than what is found in the book. It does a great job of explaining the contributions made by museums.
- National Gallery of Art
- Mail order information: (202) 842-6002
- West Building Store: (202) 312-2667
- Concourse Store: (202) 312-2658
- For online shopping, go to https://nga.gov , click on Shop, click on Prints and Posters. After it displays the list of posters, click on View All at the top of the list.
- Find a work of art and click on it. This will isolate the work. Put your cursor anywhere on the print and it magnifies that section. Lots of information is available. You will find the name of the artist, the title of the work, the # of the reproduction, its cost, a description of the work (click more), and background information about the artist (click more)...
- Use reproductions from local museums as much as possible, so the children have the best chance of seeing the works in person.
- Calendars often feature one artist or a school of art.
- Search amazon.com for Aline D. Wolf. Child Size Masterpieces. Use these as suggested by author or use to structure other activities.
- Art Image Publications 1.800.361.2598 artimagepublications.com
- Click on Shop, then on Art Reproduction, to see all 377 images.
- For help, call the 800 # and talk with Frençoise.
- Nasco Arts & Crafts 1.800.558.9595 enasco.com See: Product # 9723580
- It has a small reproduction of the School of Athens painting.
- Crystal Productions 1.800.255.8629 crystalproductions.com … click on Prints/Posters, CDs, and/or DVDs
- All Museums reproduce parts of their collection. Contact them. It is fun to email a museum in another country to find a reproduction not available in the above resources.
- Images can be bought on the internet by an artist’s name, school or even by key words. They are sometimes pricey.
Introduction:
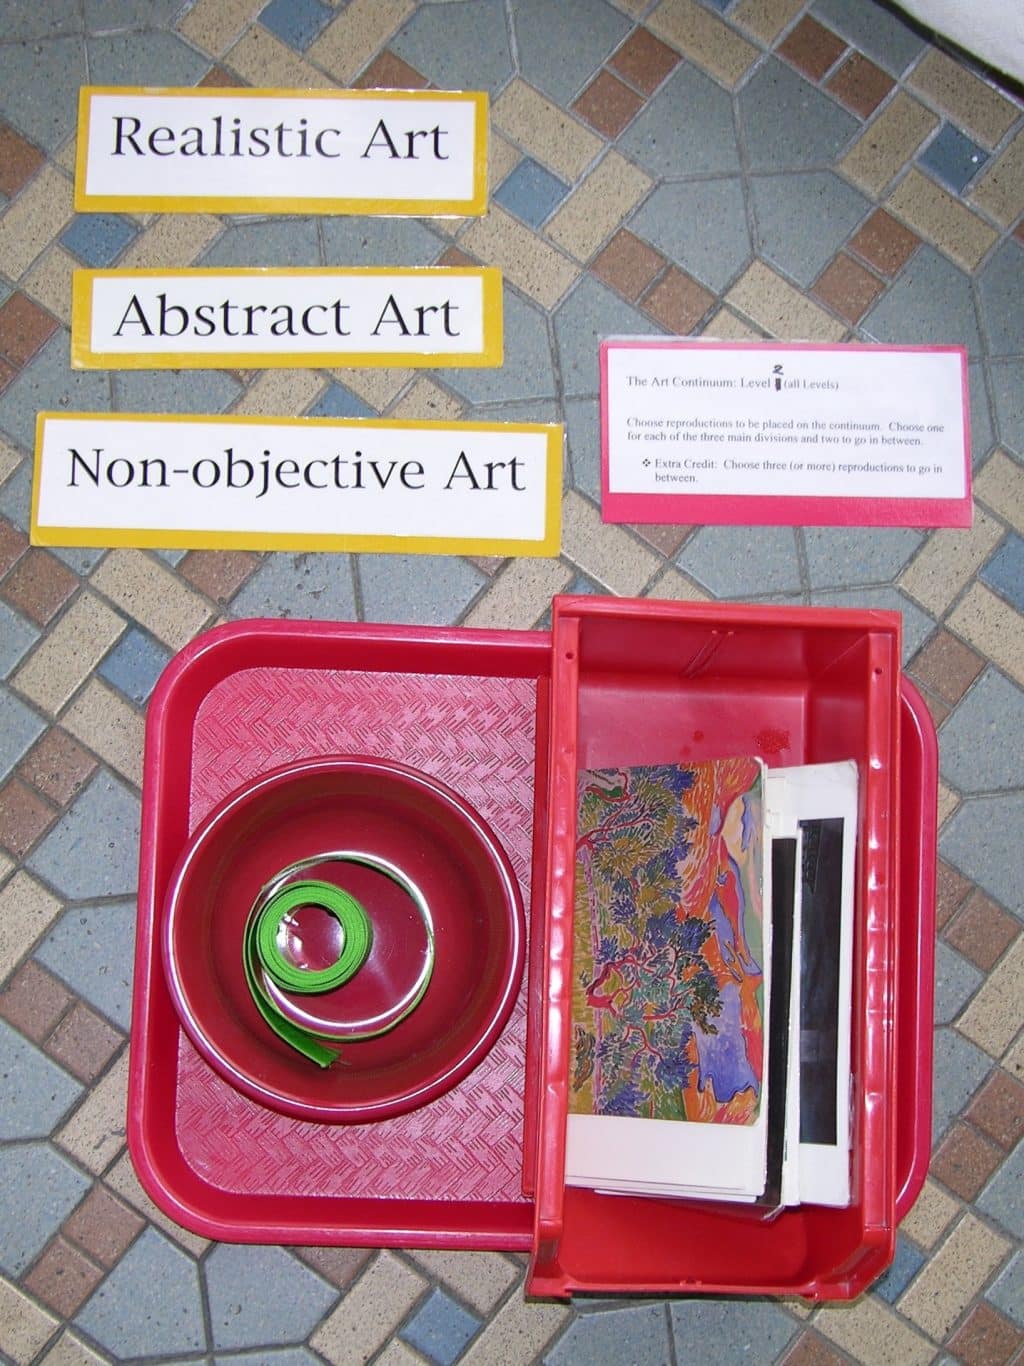
The Art Continuum presents three different approaches to visualizing an idea. The continuum is a line that has three dots to represent the three approaches. On the left end is realistic art and on the opposite end is non-objective art. Both are made with the same elements of art, which are line, shape, color, texture, and space. Both follow the same principles of design. It took centuries and the advent of photography for artists to brave letting go of realistic art and for them to create new visual expressions for their ideas. The dot in the middle is last to be presented. It represents those works of art that are abstract. After studying the first two opposite approaches, a five-year-old can understand why abstract art belongs in the middle of the continuum. If realistic and non-objective lie on either end of the line, then abstract is easier seen as having a combination of the characteristics of the two opposites.
There are those who think non-objective art belongs to a subcategory under abstract art. I like the three on a straight line. I think it is easier to comprehend the characteristic likenesses and differences of each. It is for us to present the approaches without revealing our personal preferences. A person who can appreciate all three equally has a better chance of not missing something new and expanding.
People of all ages are fascinated by an artist’s ability to represent the world around them realistically on a two dimensional surface. If asked what makes a person an artist, a child will say an artist can draw. When people learn that I am an art teacher, they often confess they do not know how to draw. Drawing is,
however, a skill. Using one’s drawing skills creatively is what makes the artist, whether the idea is expressed realistically, abstractly or, non-objectively. It is the idea behind the work that motivates the approach in which it is expressed.
Note: If this lesson is not given before the children leave the first year of the lower elementary level, it will be more difficult for them to comprehend and appreciate the three different approaches. It is even easier if they are exposed to this lesson on the preprimary level.
- Prerequisite: Study of the Elements of Art and Traditional Ideas Understanding of what is meant by “subject matter”
- Direct Aim: To expand on the definition of visual creativity
- Indirect Aim: To be able to recognize three different ways to express an idea, and any other way of expression in between them
- Point of interest: Ask the children where they would place their latest finished work on the continuum. Accept their answer without an evaluative comment.
Materials: 5-12
- A bulletin board or open wall space at least 5’—6’ wide
- A reproduction of Realistic Art, 11” x 14” up to 18” x 24”
- A reproduction of Non-Objective Art, 11” x 14” up to 18” x 24”
- A reproduction of Abstract Art, 11” x 14” up to 18” x 24”
- A roll of black plastic electrical tape
- Three red 1” coding dots
- Three labels: Realistic Art, Abstract Art, Non-Objective Art
- A poster or bulletin board of The Art Continuum
- 1 or 3 postcards of each approach for the presentation
- 4 or 5 postcards of each approach for an independent sorting activity
- Tray for the sorting game
Preparation: 5-12
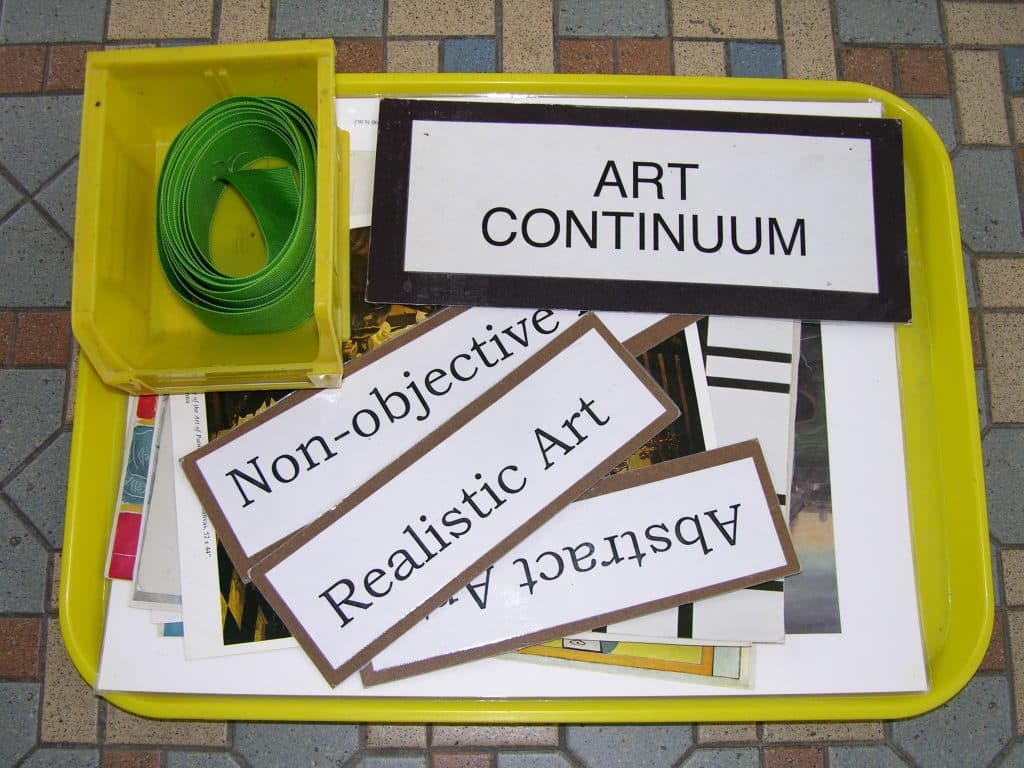
- Make a bulletin board entitled “The Art Continuum.” For this lesson, this will be a large-scale version of the Art Continuum component of The Art Chart.
- Choose the reproductions. Note: Leave the reproductions up on the Continuum board for a couple of weeks after you have presented them, so the children can study each close-up.
- Install the black tape line across the board. It must be long enough to accomodate the reproductions and have empty space between them.
- Place a red dot on the black tape at each end and one in the middle.
- Place the name labels under the line. Realistic Art is on the left end, Non-Objective Art on the right end, and Abstract Art in the middle.
- Keep the names under the line, not extending beyond the line.
Presentation: 5-12
Note: You will also be focusing your attention on the “Internal Information” provided by the work itself (Terry Barrett. Criticizing Art, Understanding the Contemporary. Chapter Two)
- Make the presentation at the board.
- “This is The Art Continuum. It is a line that can be as long as we wish to make it. In your imagination, it could be so long that it goes out of the room, out past our city, out past the Pacific Ocean and the Atlantic Ocean, and on out into the universe forever (open your hands and arms to show it extending out through the walls!). Then, all the artwork ever made by people could be put somewhere on the line. For our lesson the continuum will be the size of our bulletin board. There will be enough room to put examples of the three basic approaches to making art on our line and have plenty of space in between them.”
- “To understand how the line works, you have to know what opposites are. You already know that. What would you say is the opposite of up? Correct, down is the opposite of up. Both are directions but they are quite different directions. If I row my boat down the river I will arrive at a different place than if I rowed my boat up the river. What is the opposite of daytime? (Summer? or happy? etc).”
- “On the continuum, Realistic Art is placed at the beginning of the line and at the end of the continuum is its direct opposite, Non-Objective Art. Each of them express an idea, but they look very different because their ideas are very different. They are placed opposite each other on the line for that reason. They are opposites.”
- “Let’s look at realistic art first. Realistic artwork is always about something you have seen before or know about, like the sky, people playing, a woman on a horse, a snow covered forest, or flowers on a table. The painter uses color, lines, shapes, texture, and space to paint what looks like the texture of skin or the open space above the earth called sky. The finished work, when hung on a wall, will use up space. All art uses up space, no matter what it’s about.”
- “Now, let’s go to non-objective artwork at the opposite end of the continuum. The painter also used color, line, shape, texture, and all the space the idea required. Each of the elements only represents itself. The lines are lines that break up the space of the canvas. The shapes are just shapes, and the color makes the shapes and the lines more interesting. The texture is real. It is paint on the cloth. The real painting has a surface that is smooth or rough. The painter wants us to see the lines, shapes, and colors working together. Instead of showing you something you have seen before, the artist is showing how the elements work together to express the painter’s idea. If the idea is about color, then the shapes are very simple and few like squares and rectangles. This is so you can see how the color makes you feel. Otherwise, you will see the interesting shapes first.”
- “Now that you have seen the two very opposite approaches to presenting an idea, you are ready to consider Abstract Art that occupies the middle of the continuum. I think you can figure out why. Anyone care to make the first observation?”
- Note: Should the children fail to respond to your invitation to explain abstract art, see how well you would do first, then read on.
- “Abstract art is in the middle because it is a mixture of both realistic and non-objective. It shows things that are real that you have seen and can identify by name. However, the painter has simplified the subject matter by removing all the details needed to make it look real. Wavy blue lines now represent water, etc. The lines, shapes, and colors are as important as what they represent. The space is flat. There is no feeling that you could walk into the painting. Realistic texture is not represented. There is no flowing cloth, human hair, living trees, or rushing water.”
- Have children identify where the postcards belong on the continuum. Place the independent work in the environment.
For a simplified version of the 5-12 Presentation above, the lesson can be given to children as young as five in the second half of your school year. To understand the simplification, become familiar with the full lesson above.
- When giving the presentation, use 3” wide grosgrain ribbon to represent the continuum line
- Place it on the floor for more impact and accessibility
- Make the ribbon long enough to accommodate the size of the reproductions you’ve chosen for the three points and space between
- Paint three red circles on the ribbon or use large buttons, to represent the three points on the continuum.
- Place a reproduction representing each of the three approaches above the ribbon, at the point where it belongs
- Present a reproduction of realistic art
- Start at the left end of the ribbon
- Hold up the reproduction so everyone sees it
- Tell them what makes this realistic art, using the description in the full lesson
- Place the reproduction above the ribbon at the left-hand point
- Present a reproduction of non-objective art
- Walk to the right end of the ribbon
- Hold up the reproduction so everyone sees it
- Tell them what makes this non-objective art, using the description in the full lesson
- Place the reproduction above the ribbon at the right-hand point
- Move to the center point of the ribbon, hold up the abstract example, and ask the students how they know it belongs there.
- If no child responds, then either give the explanation of abstract from the full lesson above, or put this simplified version away and consider presenting it again before the end of the year.
Note: Make a poster of the continuum with postcards, as a research tool to which the children can refer when doing shelf work. Be ready to introduce the example of abstract art when you know the children are ready for it.
Extensions:
- Enlarge the independent work. Choose 2 reproductions that would best be placed between the three main approaches. Add four more reproductions. Keep enlarging the work.
- Have 9-12 students choose the next round of reproductions that can be laid out for the 6-9 students
- Review the continuum using sculptures, drawings, or prints, instead of paintings.
- Select childrens’ own works for them to decide where the work would belong on the Art Continuum.
Note: Below are resources for a review lesson of the Art Continuum to introduce upper elementary students to artwork with a common social comment idea. All three places on the line have a painting that clearly addresses the horrors of war. The presentation isolates the idea, as well as demonstrates the effectiveness of each approach.
Resources:
Suggested Reproductions: 9-12
- Realist: Francisco Goya. The Third of May,
- Amazon: Art Reproductions Goya Third of May
- Art.com Goya Third of May
- Abstract: Pablo Picasso. Guernica. 1937.
- Online: All Posters.com and Art.com
- Non-Objective: Robert Motherwell. Elegy to the Spanish Republic, 3.18 artimagepublications.com
Note: These will not be all the same size.
Suggest Reproductions: 6-9
- www.artimagepublications.com for all reproductions below
- Realist: Francisco de Goya, Don Manuel Osorio Manrique de Zuniga, Code: D200903 1.13 (a little boy with a big name)
- Abstract: Roy Lichtenstein, Mustard on White, Code: D200655 216
- Non-Objective: Frank Stella, Darabjerd III, Code: D200947 2.26
- 2 choices of reproductions to go between Realistic and Abstract
- Amedeo Modigliani, Alice, Code: D201305 101
- Henri Rousseau, Exotic Landscape, Code: D200973 3.22
- 2 choices of reproductions to go between Abstract and Non-Objective
- Pablo Picasso, Three Musicians, Code: D201035 5.24
- Joan Miro, Hirondelle/Amour, Code: D200966 3.16
Georgie Story
The Ohio Arts Council created Summer Workshops for teachers – to introduce us to art forms such as photography, film making and computer art – that took place at one of our Universities. We were housed in dorm rooms and worked all day and night on our projects. We learned from college professors who were also known working artists. Along with our workshops, we were introduced to art criticism by Terry Barrett who, at that time, taught at Ohio State University where he was one of the most popular professors.
His lectures were informative and interactive which brought art criticism alive and accessible to all. With the teachers (who were mostly women), he used advertisements for clothing and skin care products from slick Women’s magazines. Professor Barrett also worked with our 5-year-olds at Sands using empty food boxes with which they were familiar. The concepts of Internal and External Information come from his book Criticizing Art, Understanding the Contemporary. (See: The Art Chart Bibliography above).
Introduction to Internal Information and External Information:
Internal information is the first step in art appreciation or criticism; it is obtained from what a person sees in a work of art and the feelings and questions the work engenders. External information is gathered from many other sources outside the artwork and answers questions about the artwork and about the artist that are not available from simply viewing the work. When a person has enough of both kinds of information about the work, it can result in a sense of personal appreciation in the viewer, validating their experience of the artist’s visual expression.
Our 5-year-olds had studied the human body, so when introduced to the term internal information as 6-year-olds, they easily understood the concept involved. It is important to ask questions if the children seem to need help to see more than they have reported. IT is equally important to listen to their answers.
When presenting the lesson to 6-9 students I used an 11” x 14” reproduction to introduce internal information. I then shared the external information which I found outside the viewing of the work. I explained that I find good information in books, magazines and newspaper articles, and by searching online using the name of the artist or the title of the work. For 6-9 students the external information was always given. For 9-12 students how to find external information was taught. Often my 9-12 students used artists or art period to do classroom research projects. They made timelines and bulletin boards with their work.
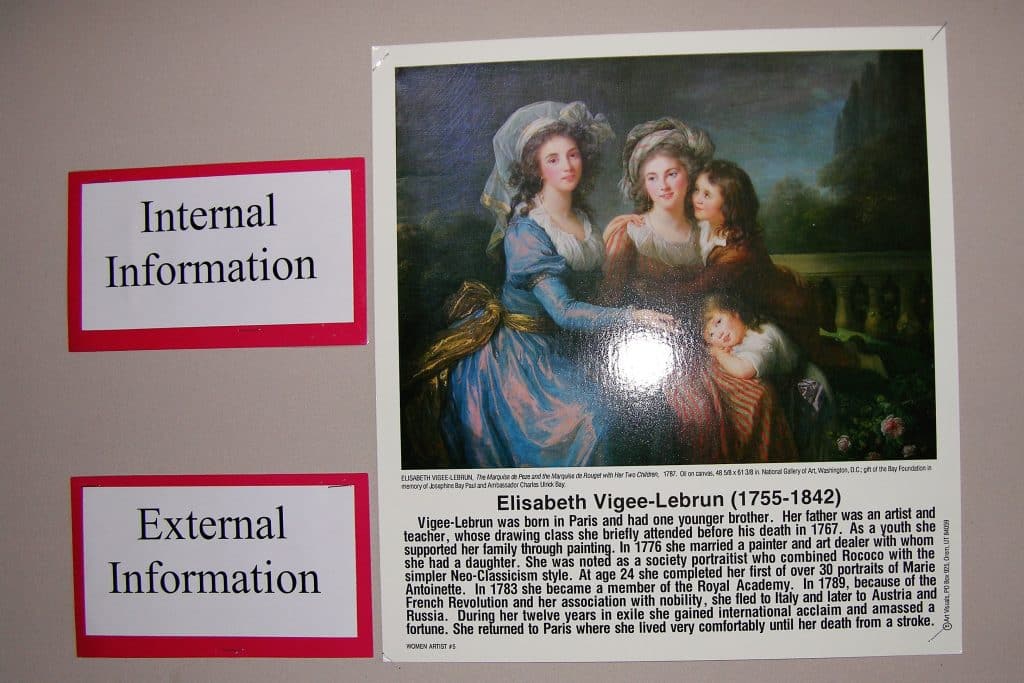
For 9-12 students I found a series of reproductions of women’s art that was meant to be used during March to honor women. Each reproduction occupied the top portion of a small poster, and underneath was external information about the artist and her work. (See photo here). This set seems to be no longer available, but a good alternative is Modern Art Poster Set from Nasco in Resources below. I also made individual folders for works of architecture, sculptures, and photographs, including newspaper and magazine articles that served as external information.
Internal Information and External Information: 6-9, 9-12
- Prerequisite: The Art Chart lessons: Traditional Ideas and The Art Continuum
- Direct Aim: Preparation for art criticism and art appreciation
- Indirect Aim: To understand the art of other people; to introduce researching art
- Point of interest: Choose an artist whose work interests you and use internal and external information to describe how interesting and creative that person’s work is.
Materials: 6-12
- A reproduction of “Watson and the Shark” by John Singleton Copley
Note: I gave this presentation to 6-9 children. They figured out what was happening and why the young man was in the water. They were happy to hear that the young boy survived and prospered. No parent reported bad dreams. An alternative presentation using a different work of art is provided after this one that is equally interesting.
Preparation: 6-12
- Choose the size of the reproduction
- Research information about the painting (see Resources for information about the painting)
- If possible, compare the size of the painting (6’ x 7½’) to a wall that is part of their environment or to a public space in the building as part of your presentation.
Presentation: 6-12
- Introduce the presentation by its name
- Keep the painting face down. “This lesson is about how to gather information about a work of art. There are two ways. One is called Internal Information because the information is inside the work of art. It is the part of the work that you see. All you need to do is to look at the art and think of words to describe what you are seeing and feeling.”
- Present the painting. “This is a painting called Watson and the Shark. It was painted by an American while living and working in England. This is called a History Painting because this really happened”
- This is an exciting painting. The children will be able to tell you what they are seeing and how they are reacting to the subject matter. Best of all they will have lots of questions. This will help you to introduce the second way of gathering information.
- The following are suggested internal information questions:
- What is happening to the young man in the water?
- What do you think the young man was doing in the water?
- What are the men in the boat doing?
- Why does he appear so white?
- What clues are there in the painting that tell when this took place?
- “The painting is exciting and it makes you want to ask questions about what else happened to the young man in the water.”
- “Does the painting tell you what happened to the young man? No, it does not”
- “The second way of gathering information is called External Information. External means outside. The answers are found outside the painting. The answers can be found in books, magazines and newspaper articles, and by searching online using the name of the artist or the title of the work. I found a lot of external information for this presentation because I too wanted to know what happened. The answers are not just about the 14-year-old sailor but also about the painter John Singleton Copley.”
- Proceed to answer your students’ questions using your research.
Resources:
- https://www.nga.gov/collection/art-object-page.46471.html
- The Museum Identification information is beside the painting
- Read the Overview under the painting
- https://www.nga.gov/collection/highlights/copley-watson-and-the-shark.html
- Scroll down the page. At the bottom, there is also an opportunity to download the image.
- The book Make Art a Part of Your Curriculum Success contains biographies of many artists, including John Singleton Copley. Find the book online at https://www.artimagepublications.com/product/make-art-a-part-of-your-curriculum-success
- Nasco Modern Art Poster Set: https://www.enasco.com/ Search Product # 9711343. Each image is accompanied by external information.
An Alternative Lesson for Internal Information and External Information:
Materials: 6-12
- 1 or 2 large reproduction(s) of M.C. Escher work
- Reptiles 21” x 25” and/or Drawing Hands 26” x22”, 1948
- see Resources below
Preparation: 9-12
- Choose the reproduction
- Research information on the internet: M. C. Escher
- Investigate the different websites that deal with his work
- His play on words is like his visual illusions – unique and clever. Include his quotes in the external information you present.
- Example: “Only those who attempt the absurd will achieve the impossible. I think it's in my basement... let me go upstairs and check.”
Presentation: 9-12
- Introduce the presentation by its name. “This lesson is about how to gather information about a work of art. There are two ways. One is called Internal Information because the information is inside the work of art. It is the part of the work that you see. All you need to do is to look at the art and think of words to describe what you are seeing and feeling.”
- Present the reproduction. “This is a reproduction of a lithograph done by a Dutch artist named M. C. Escher. His most famous works are images that look convincingly real but, under closer observation, are not possible. Like Pablo Picasso he has created many ways to express his ideas.”
- “What do you see and feel?”
- Listen to their observation and choose the best timing to introduce the second way of gathering information.
- “The second way of gathering information is called External Information. External means outside. The answers are found outside the painting. The answers can be found in books, magazines and newspaper articles, and by searching online sources by using the name of the artist or the title of the work. I found a lot of external information for this presentation because I too wanted to know how Escher got his ideas.”
- Proceed to share your external information.
Resources:
- www.nga.gov/collection/prints.html
- Scroll down right side to M. C. Escher — Life and work \ Overview
- Internet search on “M. C. Escher quotes” for insights into his thinking.
- Amazon.com: “M. C. Escher Calendars” and “M. C. Escher Books”, e.g., “Taschen Icons M. C. Escher", and “M. C. Escher Prints” (Look at all the sizes and costs of the reproductions called Drawing Hands and Reptiles.)
- Public Library to find books you might want to purchase elsewhere.

