Activities and lessons that teach the control of water and the importance and fun of order and cleanliness
 Practical Life / Daily Living Activities, as seen from an art education perspective, center on the acquisition of two important skills: the ability to control the materials and tools needed for each art form, and the ability to clean and restore the activity. Only starting from a clean work space can one discern what needs to be done in order to restore the area. Children need the opportunity to make messes and successfully handle their cleanup, which usually means knowing how to control water. The development of the art environment follows the development of the children’s cleanup skills. This way, both the children and adults can relax and learn from each new upward step in difficulty and complexity.
 The Montessori Curriculum is rich with appropriate practical life activities. Simple activities involving transferring small amounts of liquid only require the basic skills of putting an apron on and off, plus controlling the water. Later, the simple activities can be designed to have a higher level of difficulty in order to add interest. It is an added level of difficulty to carry water to and from a sink. The Montessori Art Mentor (MAM) activities presented here are ones that strongly build cleanup skills children favor.
 In order to help your day to go well, prepare extra materials, such as pitchers of colored water, or anything that might be used up. If everything is at hand, replenishing is easy even while the children are still working. Use only materials that will not stain clothing or furnishings.
When there is no time left for another cleanup lesson, call upon a child more for help. It is very possible this kind of help will be spontaneously offered.
Note: When a child is having difficulty doing any work that involves a motor skill, your verbal directions may have little meaning. If needed, you can ask the child if you might join in their work. This means your hands are over the child’s, moving them as needed, so as to help them experience the task. Using a sponge may require such a direct lesson. The lack of having such a lesson could discourage children from choosing the work. A child is not always aware of his/her need for help, and your suggestion of help may be what will engage the person with the work. Cutting with scissors is another activity where direct help may be needed. It is difficult to coordinate cutting with one hand and moving the paper with the other. (See: Basic Skills) Learning to weave on a simple loom, wrapping the sticks to make a God’s Eye, or painting with your fingers may also require direct intervention. These activities are covered in other MAM Curriculum sections.
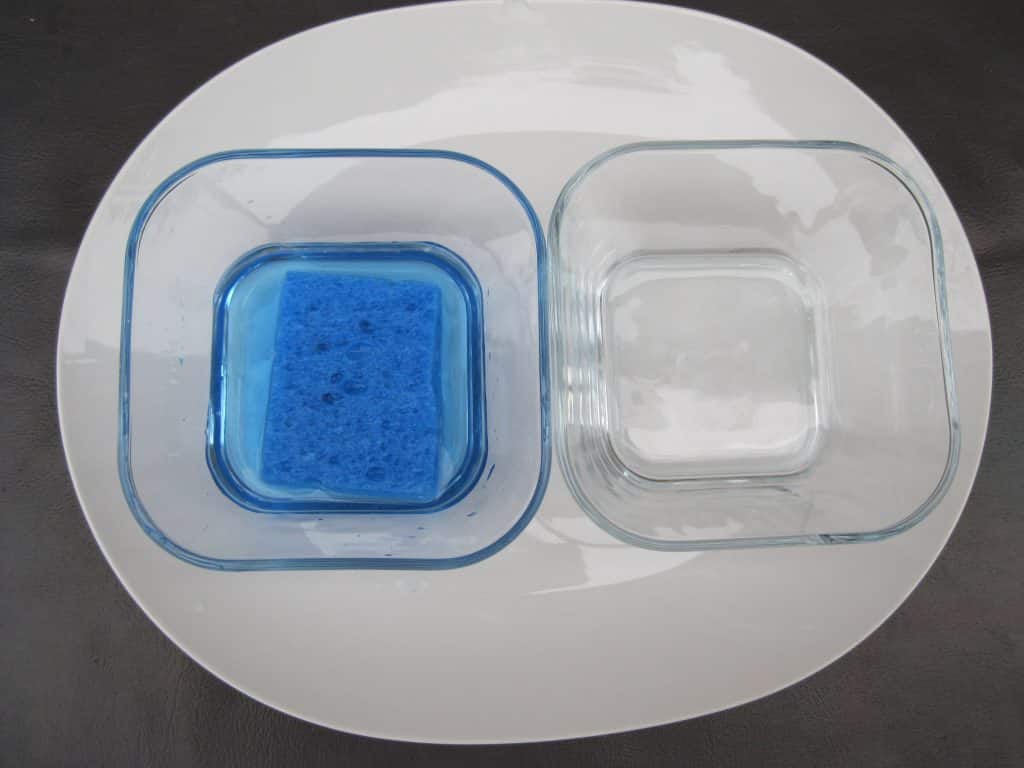 Understanding how to use a sponge is critical to cleaning up messy art forms. Isolate the skill in the daily living area. There are two steps to the lesson, with just water and a sponge that are important. Place this activity on a table with other water activities, or isolate it by itself.
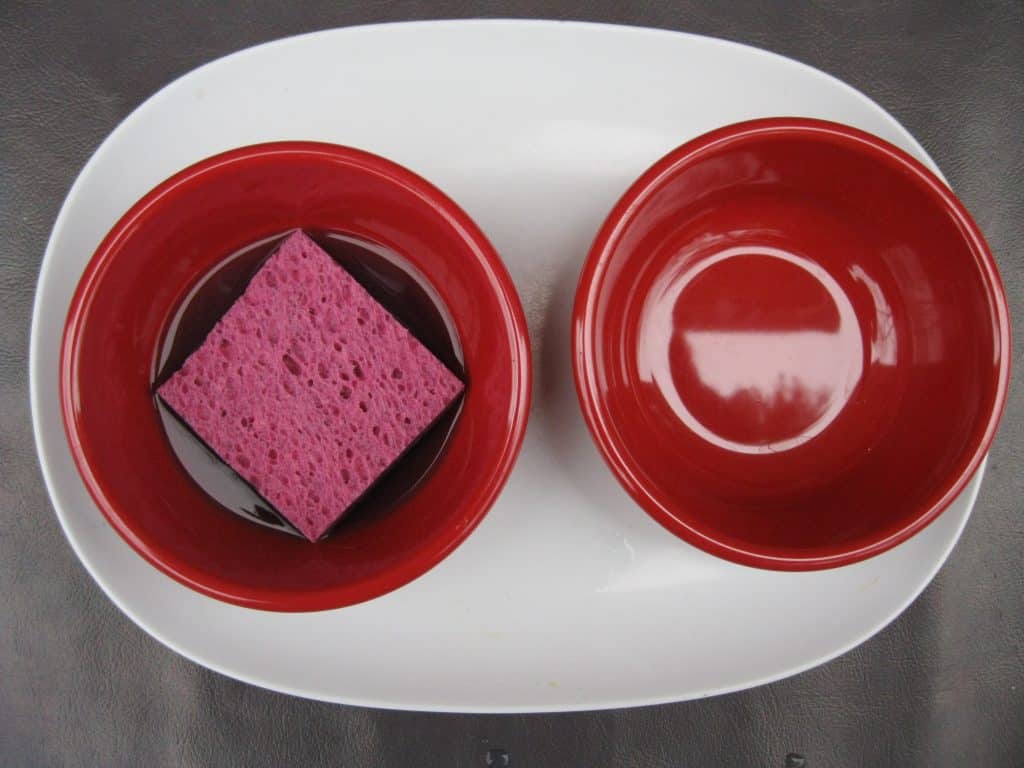
- Prerequisite:Dry traditional Montessori practical life activities
- Direct Aim: To control the water
- Indirect Aim: To work with art forms that involve water cleanup
- Point of Interest: What does the child need to notice or consider the next time they do the work? Is all the water back in the container? Is the sponge damp, not filled with water? Is the floor at my work space dry? Is the table dry?
Materials
- An apron for the activity
- A round cylindrical sponge that fits a child’s hand
- 2 small round bowls
- Start with a half gallon bottle of very light blue water to replenish activities. The color helps children to see the spills. Using water of a new color will prolong the children’s interest in the activity.
- A tray to hold the two bowls, or a place on a table for water activities
Preparation
- Make round sponges to fit round bowls. Dampen a regular sponge and cut it first into a square, then into a circle, using utility scissors. Make several.
- Choose the dishes and tray for the activity.
- Make colored water.
- Assemble the activity. The sponge and water go in the bowl on the left. The right bowl is empty. The amount of water is a control of difficulty.
- Decide where to put the activity and its apron. Isolate it or place on a table with other water activities.
Presentation: 3-9
- Wash your hands.
- Note: This lesson can be done silently first, then explained verbally.
- Put your apron on. Have the child put the apron on. Help the person if needed.
- Demonstrate how to squeeze the sponge. Hold up your open hand palm down and slowly curl your fingers into a fist. “Watch what I do with my hand. That is how you squeeze a sponge.”
- Pick up the wet sponge. It will be dripping. “This sponge is full of water. It can’t hold any more, so it is dripping. I’m going to squeeze my hand around the sponge just a little to stop the dripping. Now I can move my hand to the empty bowl and squeeze the rest of the water into it.”
- Continue to move the water. Involve the child when the person seems ready.
- Reverse the process.
- Check for spilled water. Place the sponge back into the water.
- Remove your apron and remind children where the apron is kept if needed.
Extension:
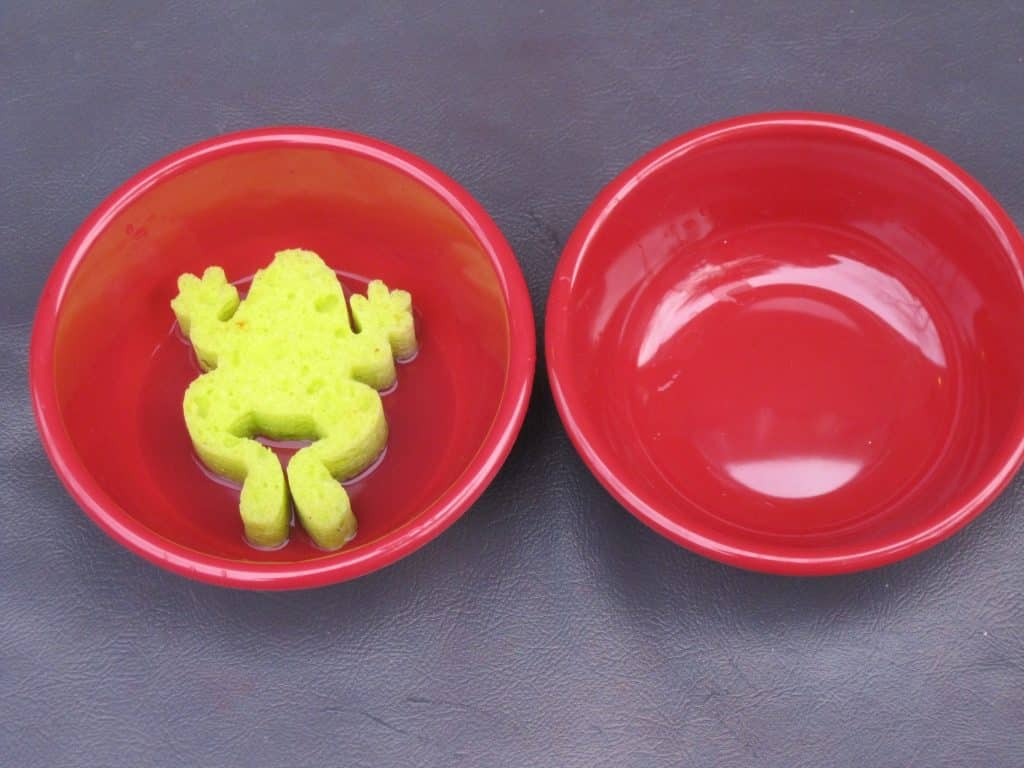
- Die cut sponges are available in a variety of shapes such as frogs, faces, or ships. Have fun!
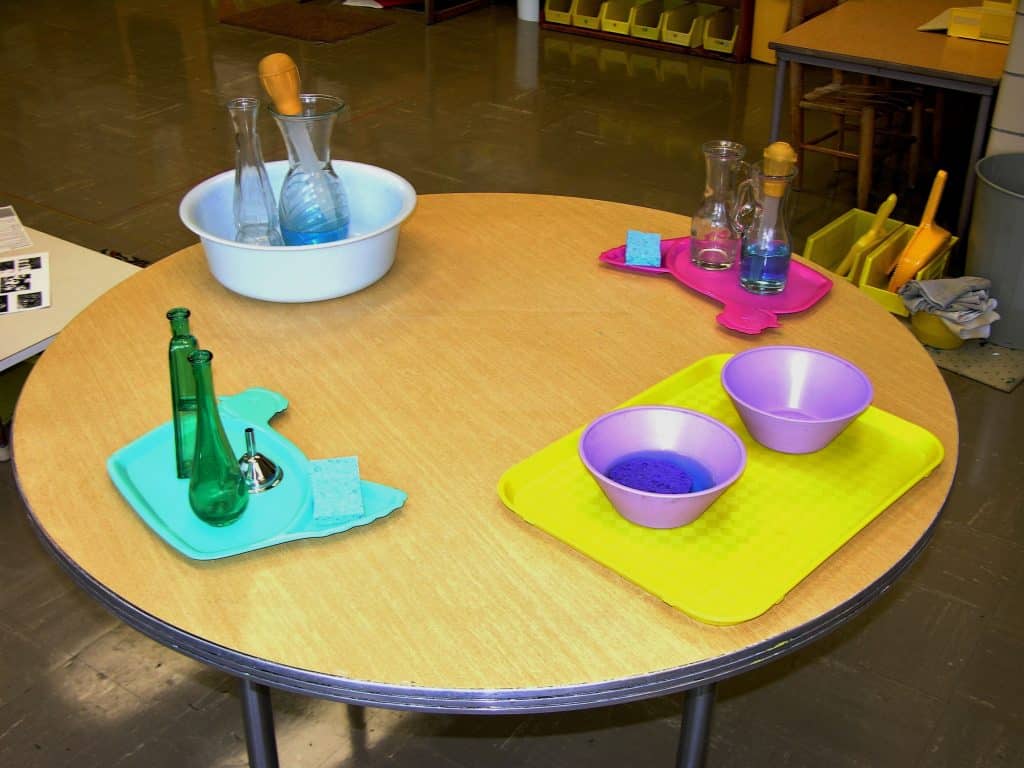
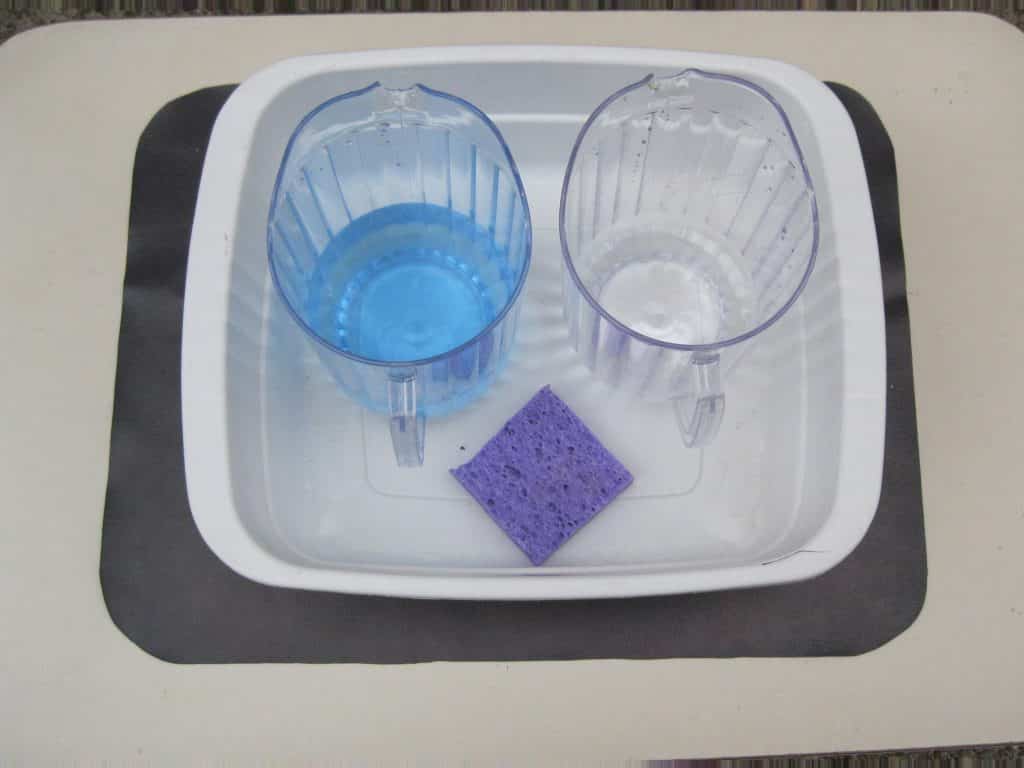 Children are attracted to big work. The amount of water used and the containers used to house the activity control the level of difficulty. Start with a little water and increase the amount over time. Start by putting water activities in containers with high side walls such as dish washing pans or hospital care pans. Progress from the pans to trays with low sides, then to platters and then place the activities directly on the table. Change the color of the water to help sustain interest in the work.
Note: Have children wash their hands before choosing the work. If they don’t, you could find yourself with very dirty water in these exercises.
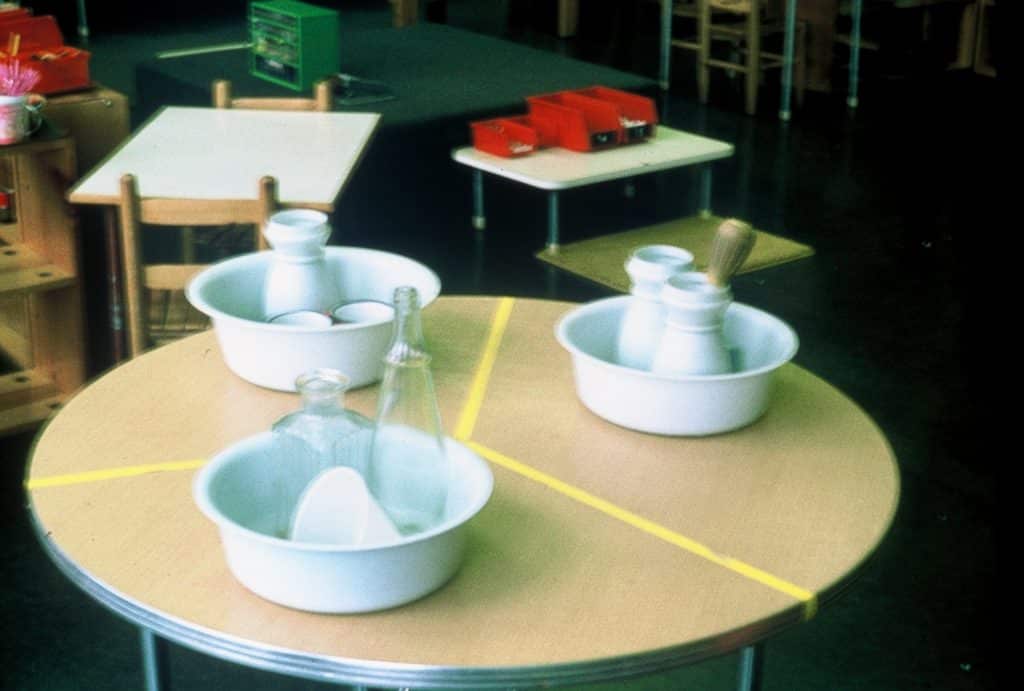
- Prerequisite: Small daily living activities involving water, washing hands
- Direct Aim: To control the water
- Indirect Aim: To work with art forms that involve water clean up
- Point of Interest: Suggest what each student might wish to notice the next time they choose that work. Is all the water back in the container? Is the sponge damp, not filled with water? Is the floor at my work space dry? Is the table dry?
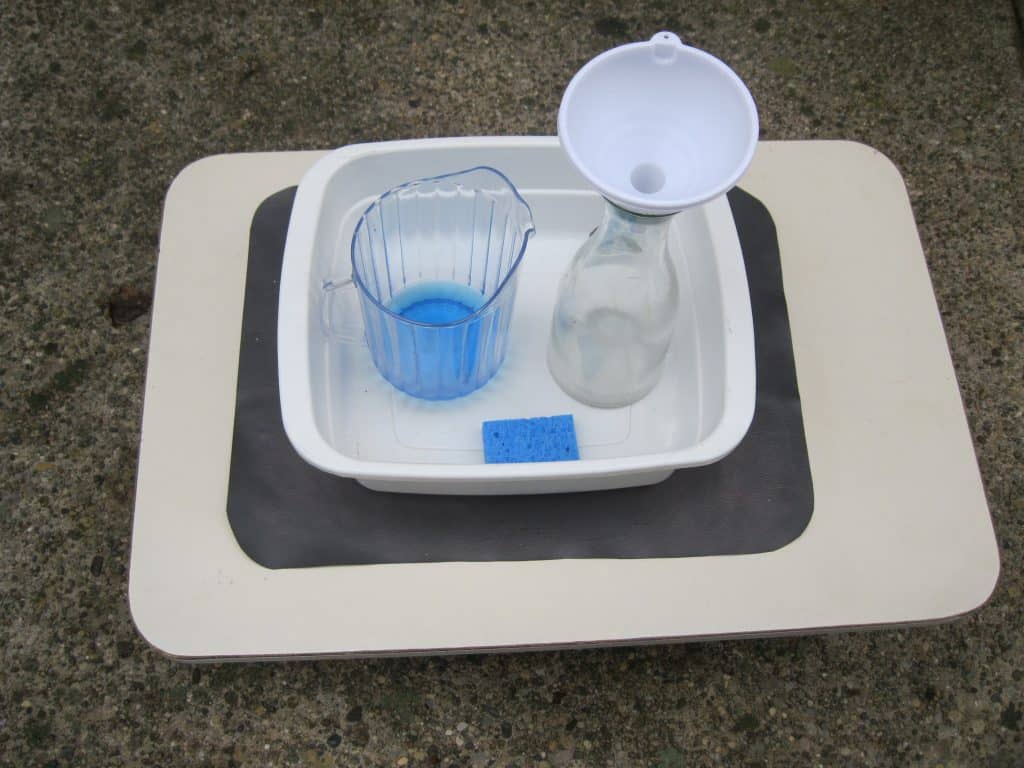
Materials:
- Aprons, one for each activity
- Sponges, one for each activity
- Small dish pans to contain each activity
- Pitchers of light blue water to replenish activities. The color helps children to see the spills.
- Bottles of all kinds and shapes
- A funnel
- Cooking basters: one big and one small
- Choose ones with colored bulbs.
- Hand beater and high walled container with liquid soap, or a small amount of water and soap with a wire whisk in a round bowl like what is used to hand whip cream
- A basket or container of shop cloths
- Dirty linens basket next to the waste basket, hand brooms and dust pans all on a rug
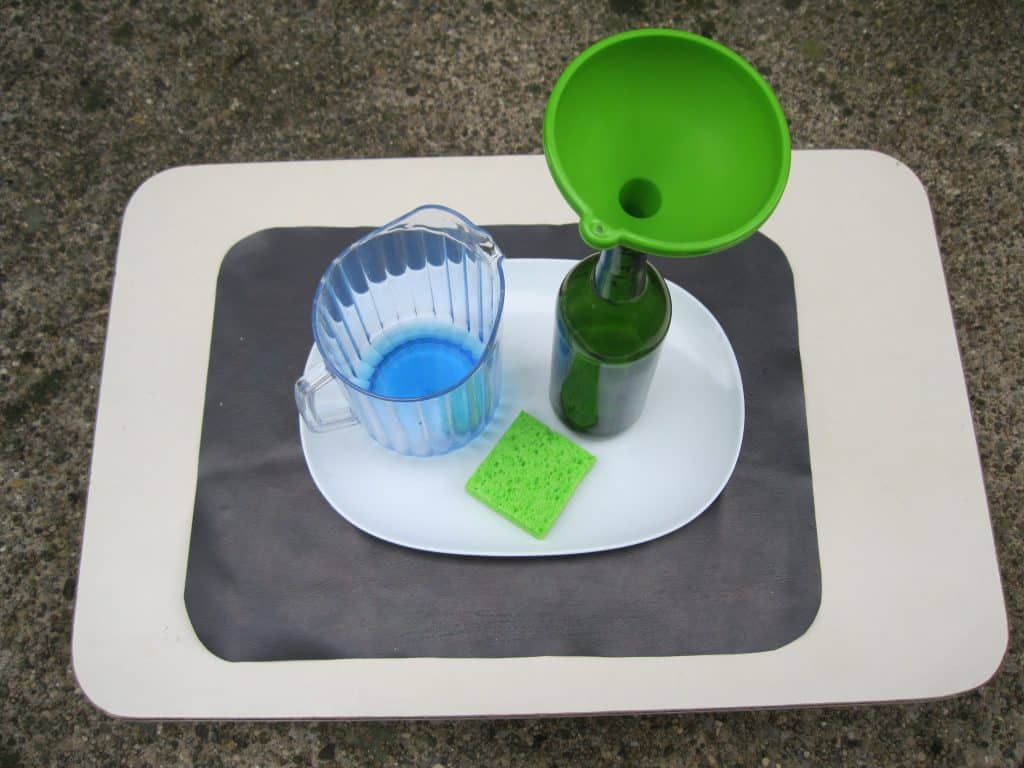
Preparation:
- Put each activity together. Add water and a damp sponge.
- 2 bottles or pitchers for pouring, a damp sponge, in a dishpan
- 2 bottles, a funnel, a damp sponge in a dish pan
- A hand held beater, high walled container, sponge, a little liquid soap and water, or a small amount of water and soap with a wire whisk in a round bowl like what is used to whip cream by hand
- The bowl and whisk is a higher level of difficulty. Present the prepared water in a small pitcher.
- ¼ cup of soap and water (¼ teaspoon soap to each cup of water)
- Add sponging if there is room on the table.
- Isolate each work on a table. Plan where to put the aprons. Place them on hooks, backs of chairs, or folded on trays under the table. Introduce them one at a time.
- Put all the activities on one table with the aprons under the table or nearby.
- Mix colored water and store in large plastic bottles or restaurant water pitchers.
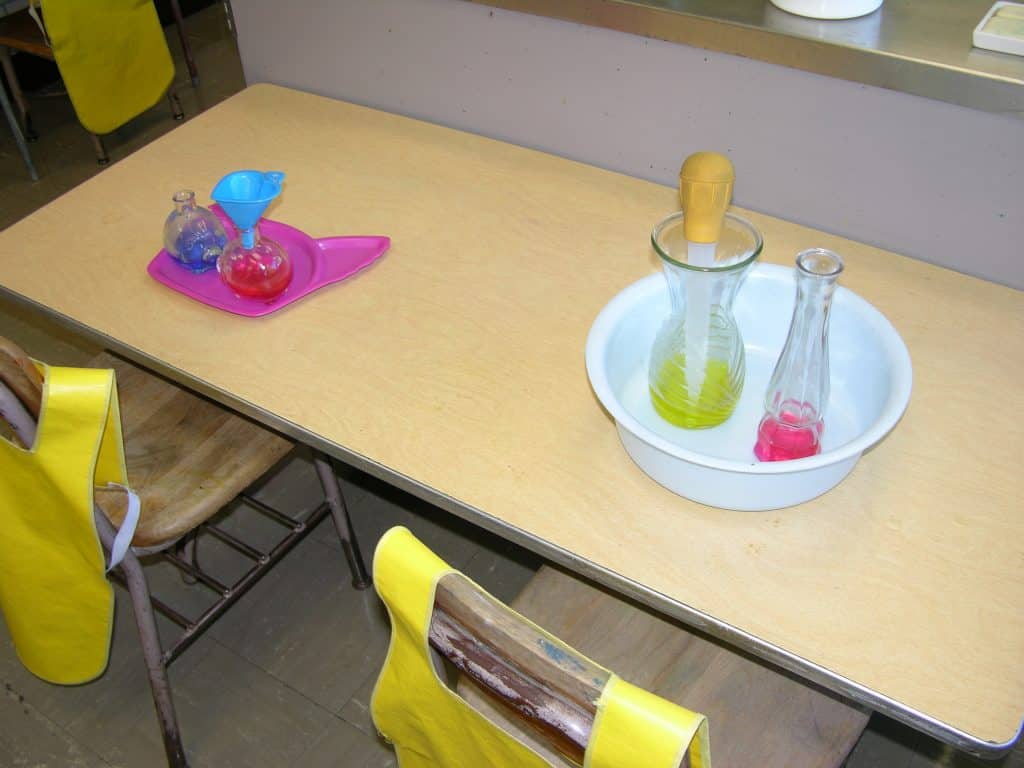
Presentation: 5-9
- Introduce each work by its name.
- Put your apron on and have the child do the same.
- Quickly demonstrate how to do the work.
- Demonstrate how to check for spills and clean up the activity with the sponge. Return spilled water to a container.
- Turn the work over to the child.
- Be available to assist the child to put the apron away.
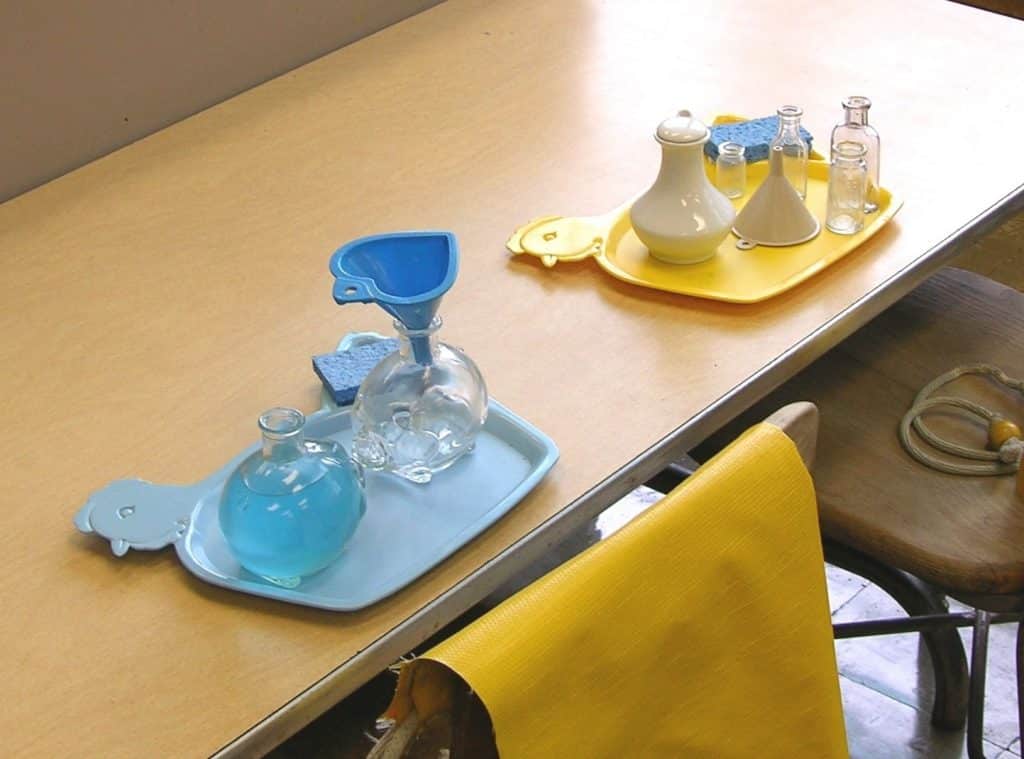
Extensions:
- “The long pour” is an exciting activity. Placed on a low table, the exercise is done standing, pouring water from one large container to another. Since both containers are in a large basin, the water is contained if spilled. A funnel can be added if desired. Try a watering can with a long spout that produces a thin stream of water.
- Change the scale of the funneling activity with tiny equipment. Use a tiny funnel and pitcher with less than the right amount of water to fill all the tiny bottles. This is definitely an advanced exercise.
Resources:
- https://www.montessoriservices.com or 877-975-3003
- https://www.containerstore.com, https://www.worldmarket.com
- Shop cloths: auto supply stores
- Pitchers, dish pans, sponges: discount stores, restaurant supply store
- Experiment using recycled milk and cream product bottles: Many are plastic bottles with thin printed plastic skins which can be removed.
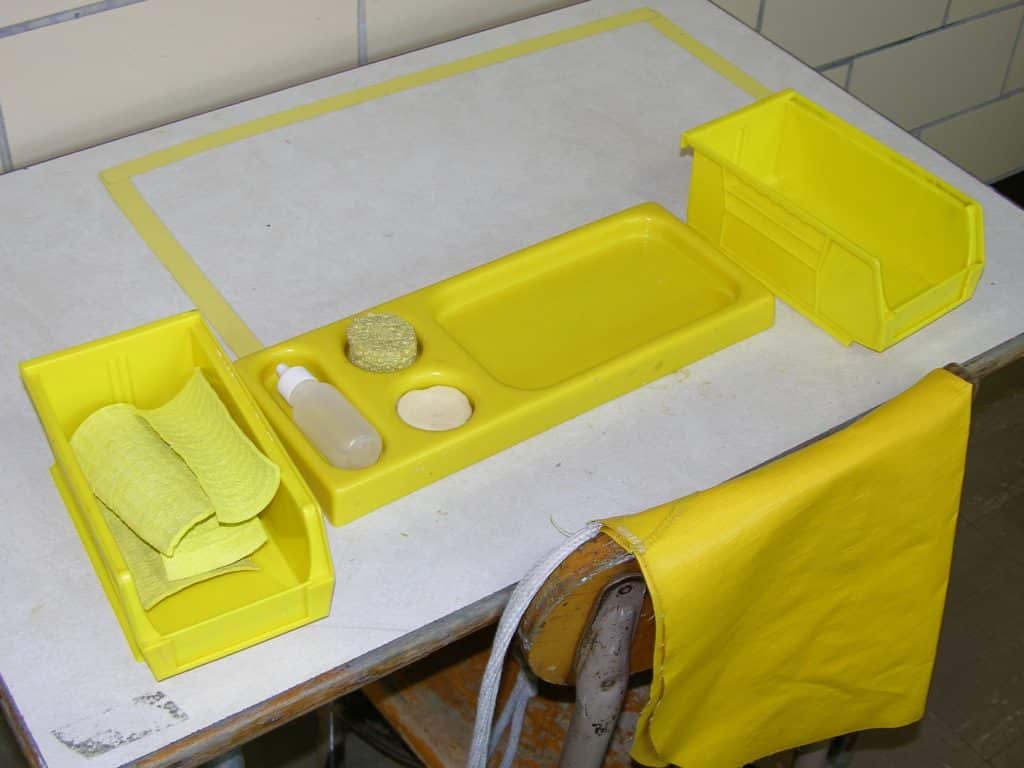
Isolate this activity when it is first placed in the environment. It works well on the shelf after the routines of using the work and cleaning it up are established. To my knowledge, the tray in the photo is not available. However, suggestions are made for containers for saddle soap and how to prepare it for use. This is an exercise that was very popular because most of my students had leather shoes. You may need to furnish a few extra leather or plastic shoes for children wearing cloth ones. Many children cleaned only the plastic parts of their gym shoes and others cleaned the bottom of each shoe as well. Have a nail brush in a basket, with a rolled work mat, for children who have suede shoes.
- Prerequisite: Practical Life activities
- Direct Aim: To clean leather and plastic shoes
- Indirect Aim: Prerequisite for Shoe Polishing
- Point of Interest: You might wish to suggest ways of positioning the shoes while cleaning.
Materials:
- An apron
- At least one pair of leather shoes
- A cake of dried saddle soap in a small container (See: Preparation)
- Applicator: a regular sponge cut for the work or a sponge applicator for polishing shoes
- A squeeze bottle of clear water, such as a food coloring bottle
- Drying cloths: Handy wipes or sponge cloths – both work.
- Basket or container for drying cloths
- Basket or container for dirty cloths
- Work mat
- A tray, if putting on a shelf
Preparation:
- Choose a container for the saddle soap.
- Using a spoon or palette knife, fill the container with soap and allow it to dry. This may take up to two or three days, or even more. Make at least one extra container of soap ahead.
- Cut regular household sponges into circles that are the same size as the soap container. Make several ahead of time for replacing the dirty ones. Place the sponge on a small dish or on the lid of the container used for the soap.
- Fill several bottles with water. Present only one bottle with the activity.
- Cut the sponge cloth into smaller pieces and place in a container damp, or use cut handy wipes.
- Assemble work on a table or place the equipment on a tray if putting it on a shelf.
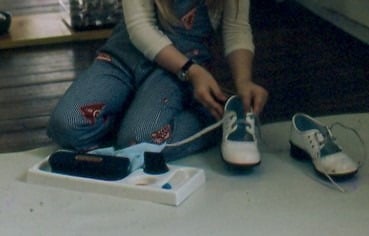
Presentation: 3-9
- This is an individual lesson. Introduce the work by its name.
- “The soap you are using is saddle soap made for cleaning leather, and also works for cleaning plastic shoes.”
- Remove your shoe and make sure the shoestrings, if any, are placed in the shoe.
- Make sure the sponge is damp.
- Squirt a small amount of water on the soap and rub the sponge on the soap until there is a small amount of bubbles.
- Start cleaning the shoe at the toe holding the shoe flat. Wipe off the soap with the cloth.
- When needed, put more water on the soap and load up the sponge.
- Turn the shoe on its side to clean the side, and wipe.
Clean the back with the shoe flat again. Wipe off the dirt. - Turn the shoe on its other side to clean and wipe.
- Clean the other shoe. (Optional) I only cleaned one of my shoes.
- Suggest they clean both their shoes.
- Demonstrate how to clean up the activity and put things back in place.
- Clean the sponge and place on the soap.
- Return the work to its place in the environment if on a shelf.
- Note: I had simple, leather flats that I wore for giving this lesson.
Presentation: 9-12
- Place all the equipment in a tote or tool caddy. Give a lesson if necessary.
Extension:
- Place a buffer in a container next to the activity. Demonstrate buffing.
- Introduce the activity with neutral shoe polish.
- Start with a clean shoe.
Resources:
- https://www.montessoriservices.com for individual soap applicators (instead of a sponge circle)
- https://www.specialtybottle.com/whitedoublewallplasticjarsmi.aspx
- Buy a DOUJ1/2: ½ Oz Double Wall White Plastic Jar with Dome Lid for the saddle soap. Look at the whole site to see what they offer.
- Jot Magnetic Round Metal containers with lid: Dollar Tree
- Plastic lid from a jar: 2” in diameter, ¾” deep
- AkroBins: Model No. 30230: for Shop Cloths
- https://monsterbins.com/akro-bins/stackable
- Peruse https://www.containerstore.com, https://www.worldmarket.com
- Auto stores for shop cloths
- Pitchers, dish pans, sponges: Discount stores, restaurant supply stores
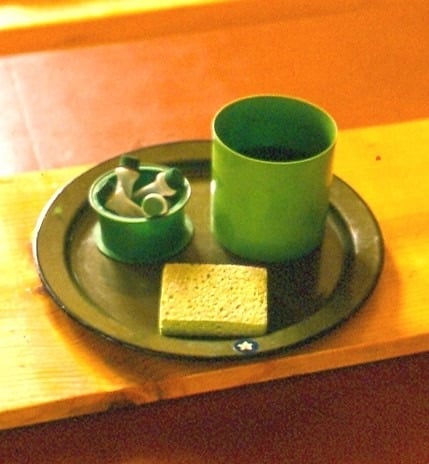
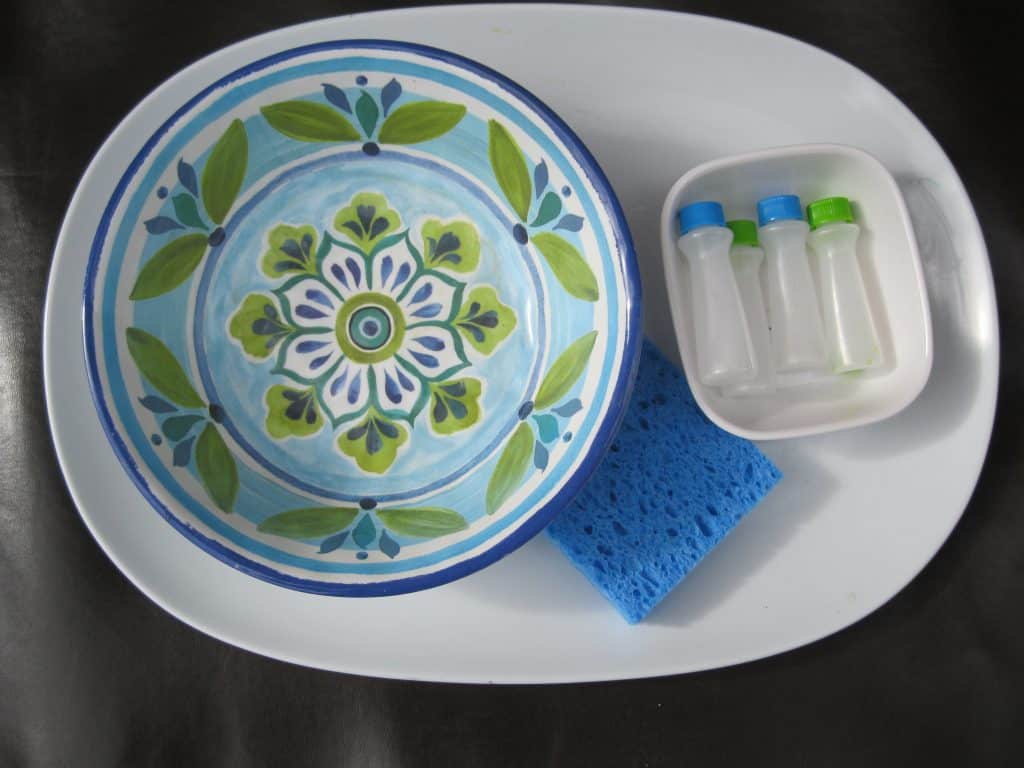
The small plastic bottles that had contained food coloring are excellent for providing small quantities of water for an activity. They have colored caps that enhance the beauty of an activity and help to color code activities. Best of all, the activity is an excellent science lesson. The point of consciousness is very clear.
- Prerequisite: Water activities
- Direct Aim: To fill bottles with water for other activities
- Indirect Aim: Air takes up space
- Point of Interest: “Isn’t it interesting how important air is? How easy it is to forget that it is present?”
Materials:
- An apron
- 4 small plastic bottles (see Resources)
- A container for the empty bottles
- A sponge
- A container for water
- A pitcher for getting water (optional)
- A tray for the work
Preparation:
- Place the empty bottles in a container. Mine was an open ended, plastic cylinder that had held ribbon.
- Choose a stable water container. Make sure you can easily get your hand and the bottle under the water. Place a water line on the container if you think that it would be helpful.
- Choose a sponge
- Place everything on a tray
- Decide where to place an apron, or how to get one.
Presentation: 5-9
- Introduce the work by its name.
- Bring the activity to your teaching space. Put your apron on.
- Fill the container with water.
- Remove the lid from the first bottle.
- “Each bottle is full right now and cannot be filled until they are emptied.” They will react to your statement because to them they are empty. “Watch closely and see what happens when I put it under the water.” It pops up to the top immediately.
- Put the bottle under the water and press, expelling the air. Do it slowly so they see the air bubbles rising to the top.
- Ask them to report their observations.
- “Air fills the bottle even if we can not see it. Air takes up space!”
- Release the squeeze but not the bottle. Remove the bottle from the water.
- “Now there is water and air in the bottle.”
- Next, start by pressing the bottle so that the water rises up toward the top, pushing out more air. Then lower it into the water and tell the children you are going to again release the press, but hold on to the bottle.
- Allow the child or children to try the process.
- Empty the bottles and clean up the work.
Extension:
- Use the activity as preparation work for children when filled bottles are needed for another activity.
Resources:
- Small food coloring bottles work well to contain the small amounts of water you need. Each package has 4, 3 fl. oz. plastic squeeze bottles. Choose ones with regular tops, not pointed. (see photo)
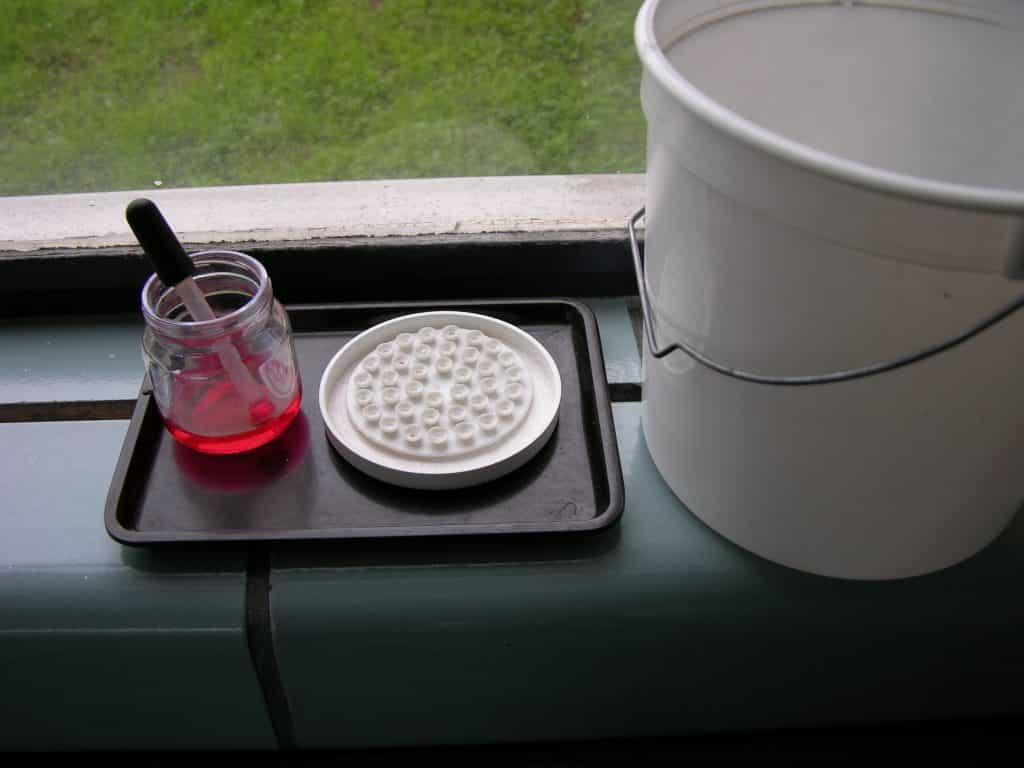
This is a standard activity in most Montessori environments. It serves to increase concentration and builds skill in using a dropper for color mixing activities. Place an observation chair next to the work to encourage peer teaching.
Note: Choose plastic eye droppers. Children often tap the dropper repeatedly into the paint container thinking that is how it is filled. Glass droppers will break and produce sharp ends.
- Prerequisite: Practical Life activities
- Direct Aim: To build skill using an eye dropper
- Indirect Aim: To prepare for art and science activities
- Point of Interest: See how many drops you can add to a suction cup without the paint spilling over.
Materials:
- A small container for watercolor paint
- A plastic eye dropper
- Liquid watercolor paint of your choice
- Small white dish
- Soap holder with small suction cups
- A tray for the paint and soap dish
- A chair adjacent to the work for an observer (optional)
- An apron
Preparation:
- Prepare paint and place in container along with the eye dropper.
- Place soap holder in a dish.
- Place paint and the soap dish on a tray.
- Isolate the work on a table.
- Place the apron on a chair or nearby on a tray.
- Place the observer’s chair, if using.
- Place a small bucket and damp sponge nearby for clean up, or use a sink bucket for cleanup. You choose.
Presentation: 3-9
- Invite the child to wear the apron.
- “This is a soap holder. You can practice putting one drop of paint in each of the tiny suction cups.”
- Use the words “press” and “release” or “let go” to demonstrate how to fill the dropper.
- “You can practice using the eye dropper first if you wish. Empty the dropper one drop at a time back into the container.”
- Fill one of the cups and offer the work to the child.
- Assist if needed.
- Help the child to get water and clean the equipment as needed.
Extension:
- Color drop paper:
- 3 small containers of liquid watercolor paint, each with an eye dropper
- Squares of Dippity Dye paper
- A bucket with a sponge
- A glass surface or other slick surface upon which the work can dry
- Drop primary colored paint on the paper until the paper is colored
- Place the wet paper on a drying surface. If vertical, it will fall off when it is dry enough.
- Use an eye dropper to water tiny plants or seeds for germinating.
Resources:
- Eye Droppers: https://www.carolina.com Item 736913, package of 12
- Tip trays: restaurant supply
- Small white, gray, or brown tray: https://www.montessoriservices.com
- 50 sheets of Dippity Dye Paper: https://amzn.to/2rjpTlE

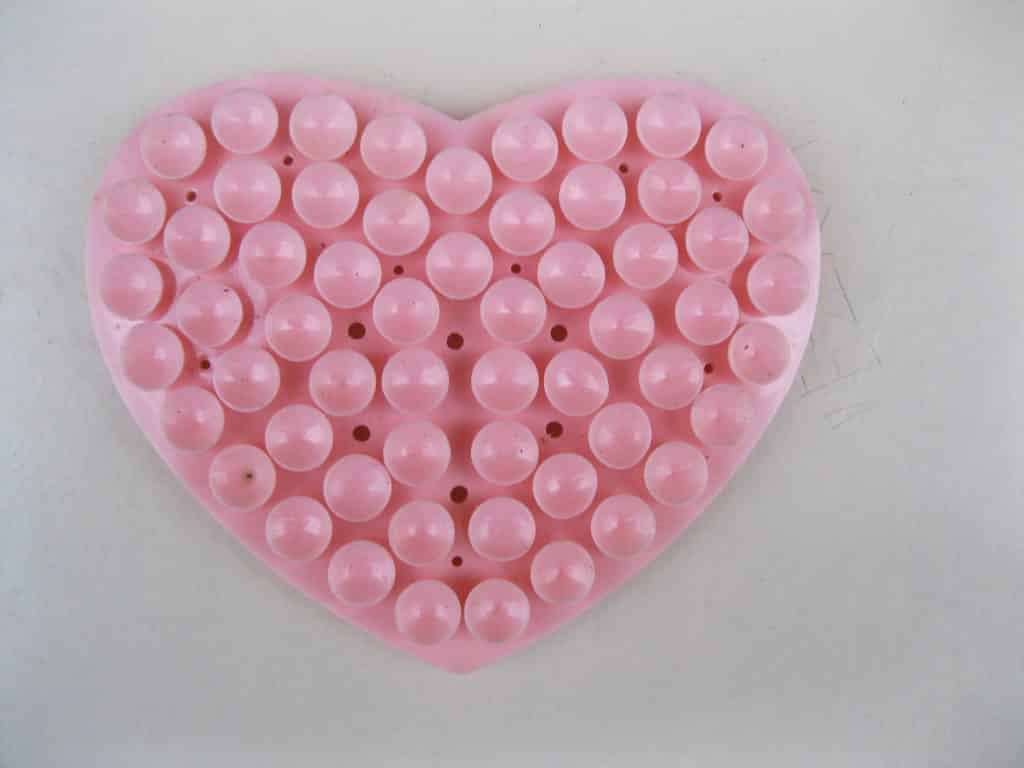
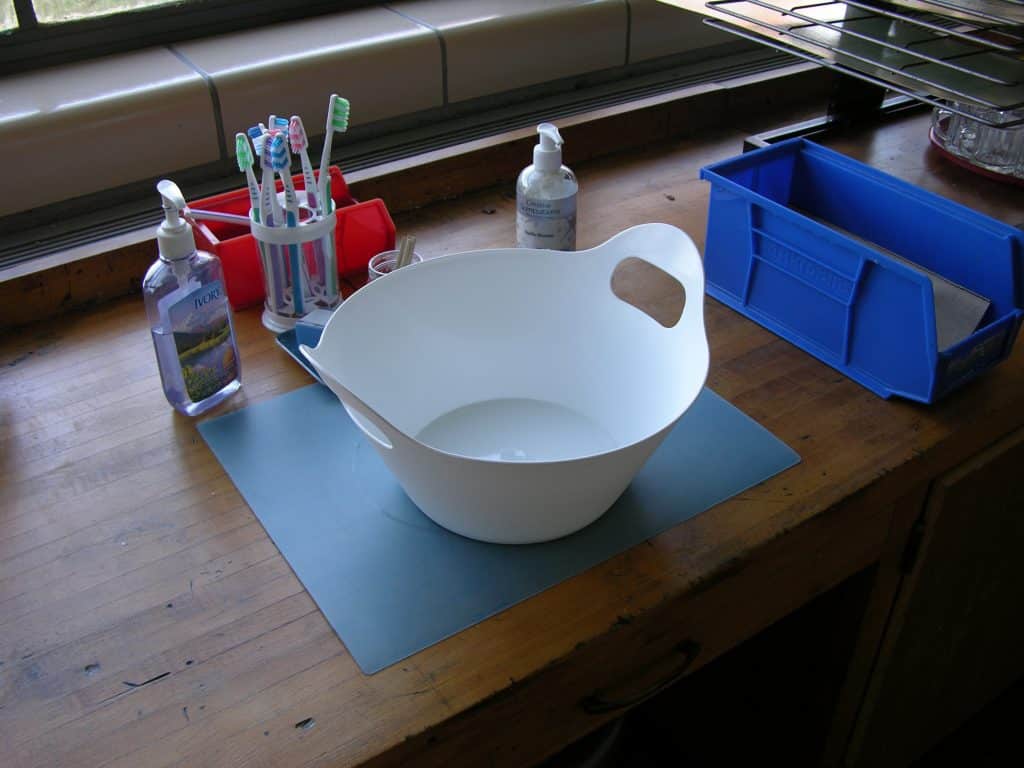
My 9-12 environment needed some kind of personal care activity. This is an advanced hand cleaning activity. I hesitated putting this work in the environment because I thought it would only appeal to the girls. I went ahead anyhow, thinking I would figure out something equally interesting for the boys. To my surprise, it was a hit with the boys in all of my classes! It was so popular that I added more equipment to make it a two person work. Have fun designing and selecting the materials for the activity. Make it attractive but not cutesy. Children keep the emery board and orange stick.
Note: Buffing the nails is the last step. Be aware, some nail polishes contain toxic substances.
- Prerequisite: General cleanup skills
- Direct Aim: Care of the hands and nails
- Indirect Aim: Preparation for adult life
- Point of interest: Suggest what, if anything, is needed the next time they work on their nails. Offer a lesson, if needed, to buff the nails.
Materials:
- 2 Aprons
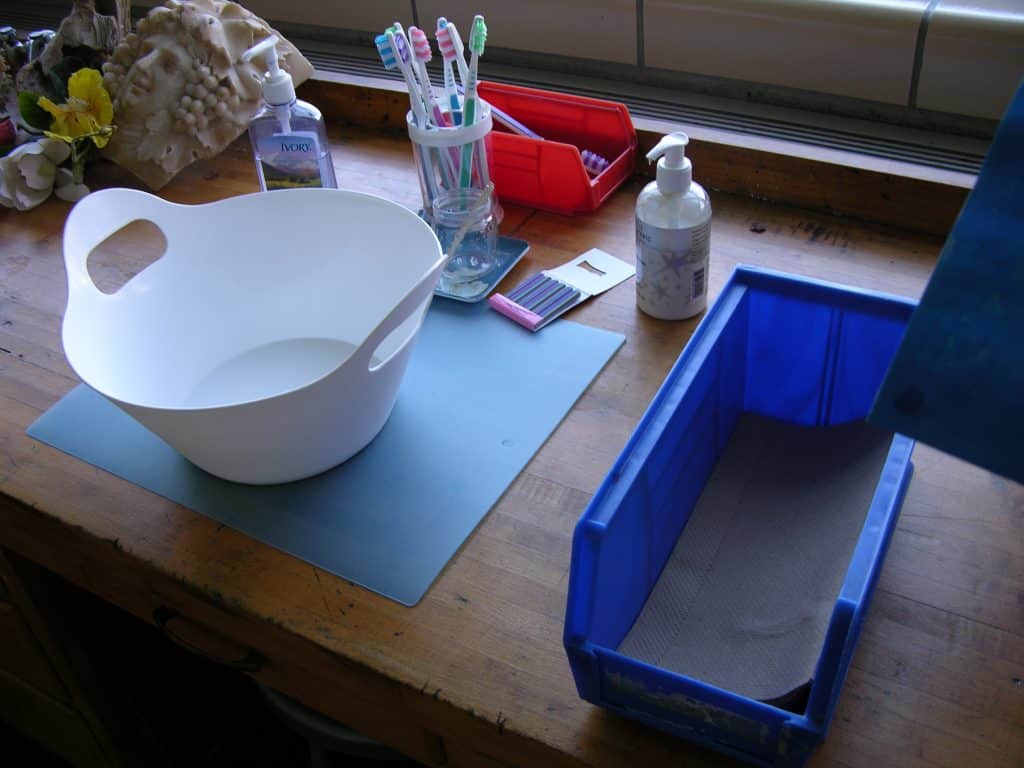
- 2 Water containers with built in handles large enough to accommodate both hands
- 2 Work mats to contain drips
- A container of liquid soap in a pump bottle
- 6-8 soft tooth brushes in a container
- 6-8 manicure sticks (also known as orange sticks)
- 2 Polishing prisms
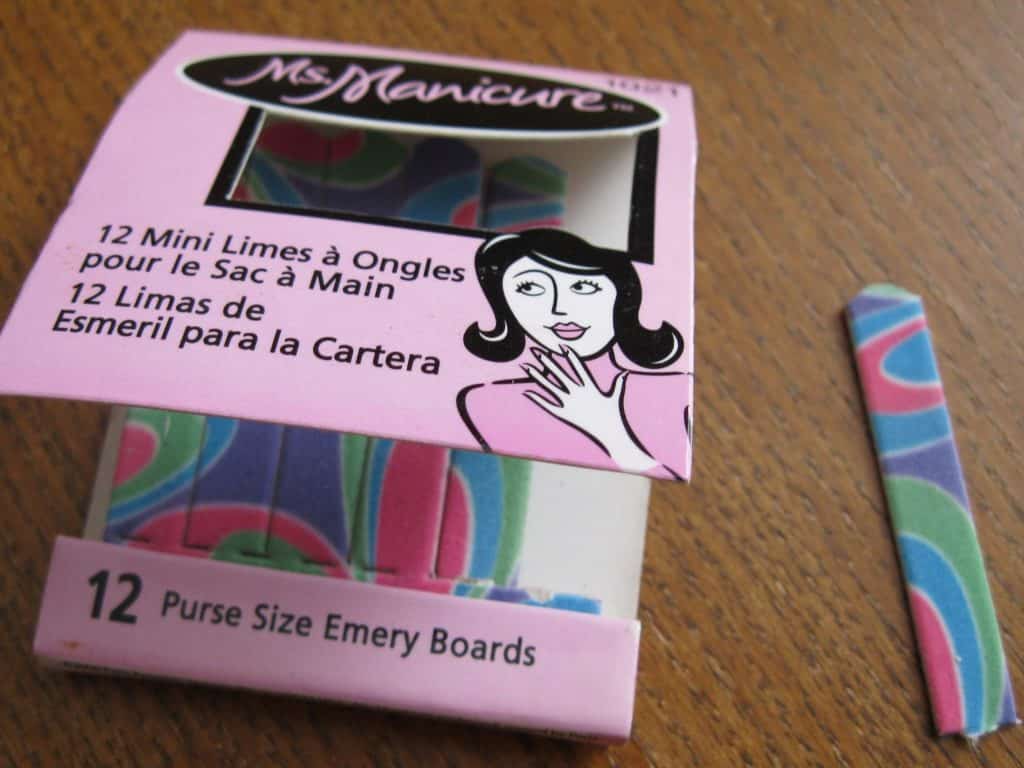
- 2 matchbooks of small individual emery boards
- A pump container of hand lotion
- A stack of paper towels to dry hands in a container
- An empty container for used brushes
- A small trash can for used paper towels (optional)
- A sponge for each water container
- Antibacterial soap to clean used tooth brushes
- Large bottles of soap and lotion to replenish the pump bottles in the activity.
Preparation:
- Select all of the equipment and consumables.
- Fill the containers with consumables.
- Cut the manicure sticks in half, and smooth the cut ends with utility scissors or sandpaper.
- Assemble the activity.
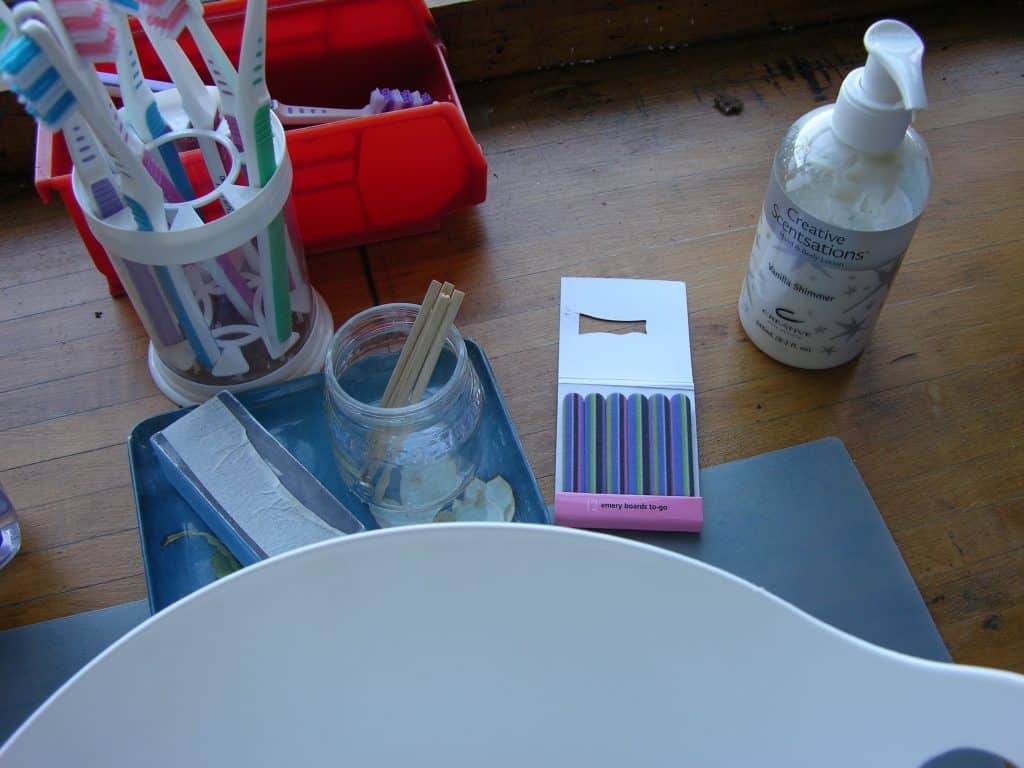
Presentation: 9-12
- Put on an apron.
- Fill the water container with warm water.
- Wash hands with soap and rinse. Dry with a damp sponge.
- Load a tooth brush with soap and gently scrub the top and under side of the nails of each hand. Rinse.
- Repeat the process again this time gently scrubbing each nail from the tip to back.
- This gently pushes the cuticles back.
- Using the wedged end of the manicure stick gently push the cuticles back (optional)
- Rinse the hands and dry with a paper towel. Keep the damp towel.
- Use the wedged end of the manicure stick to clean any dirt from under the nails.
- Wipe any soil from under the nails onto the damp towel.
- Take the dirty water to the sink and clean up the container.
- Wipe up any drops of water on the table.
- Put the towel in the trash can.
- Get an emery board from the “Match Book” and demonstrate its use. I kept the “Match Book” of boards in my pocket.
- Demonstrate how to buff the clean nails.
Note: Revlon makes a white pencil that is used to color the underside of the nails for a French manicure the old fashioned way.
Resources:
https://www.enasco.com/artsandcrafts: 8100210 Utility Snips (scissors) or hardware store
https://www.walgreens.com: Ms. Manicure, Purse Size Emery Boards
https://www.sallybeauty.com: Birchwood Manicure Stick
https://www.sallybeauty.com: ASP Miracle Buff & Shine Block
Discount store: water container with handles
I was introducing architectural terms and decided to show the children how to make domes using bubbles. Ancient domes are smooth and cover an amazing amount of space. The train station which is also the Cincinnati Museum Center has a main building that is one quarter of a sphere.
The geodesic domes of the twentieth century made by Buckminster Fuller are made by a series of triangles which are then covered with plastic, cloth, or metal. A study of this man would be interesting to 9-12 people because he did so many interesting things that were so far ahead of the rest of the world at the time they were done.
Note: This is also a science activity. Why does the water stay inside of the straw, if I cover the top end with my finger? There are several interesting answers given to that question on the internet. The information will be an asset to your presentation. I made my simple examination, but you might wish to develop your own.
- Prerequisite: Large water works
- Direct Aim: To create a dome bubble
- Indirect Aim: To control water to introduce an architectural term
- Point of interest: The next time you make a dome bubble, remove the straw. See if you can put it back into the dome and make it bigger.
Note: This can be given as a group lesson and then set up on the table. It is not shelf work.
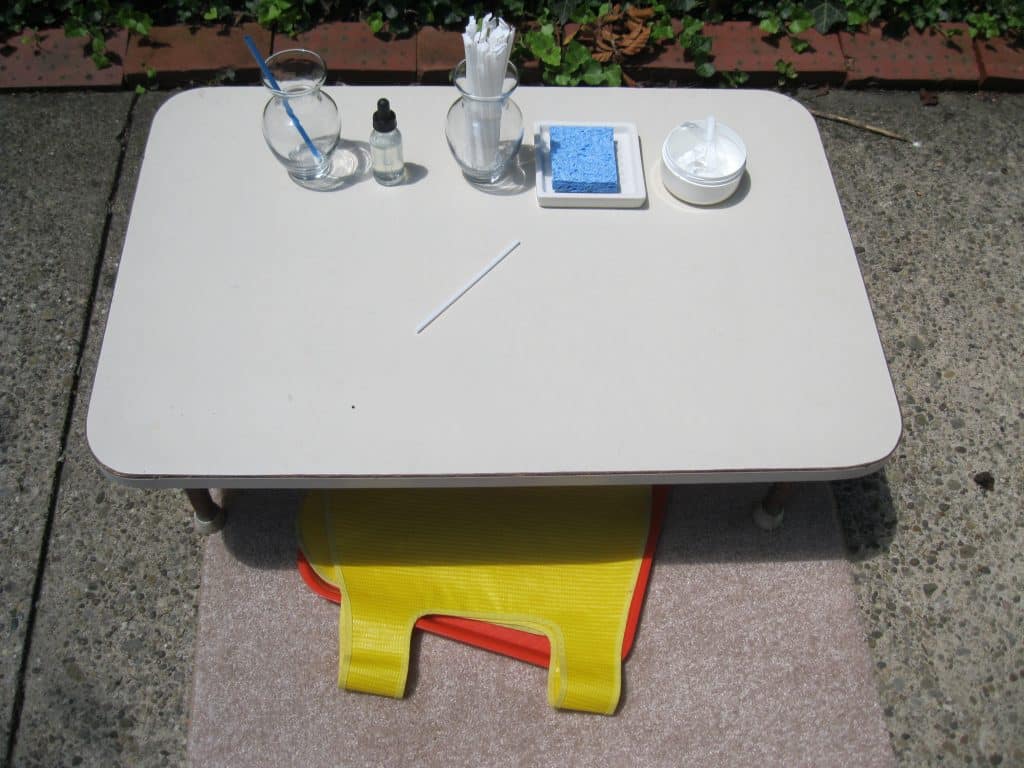
Materials:
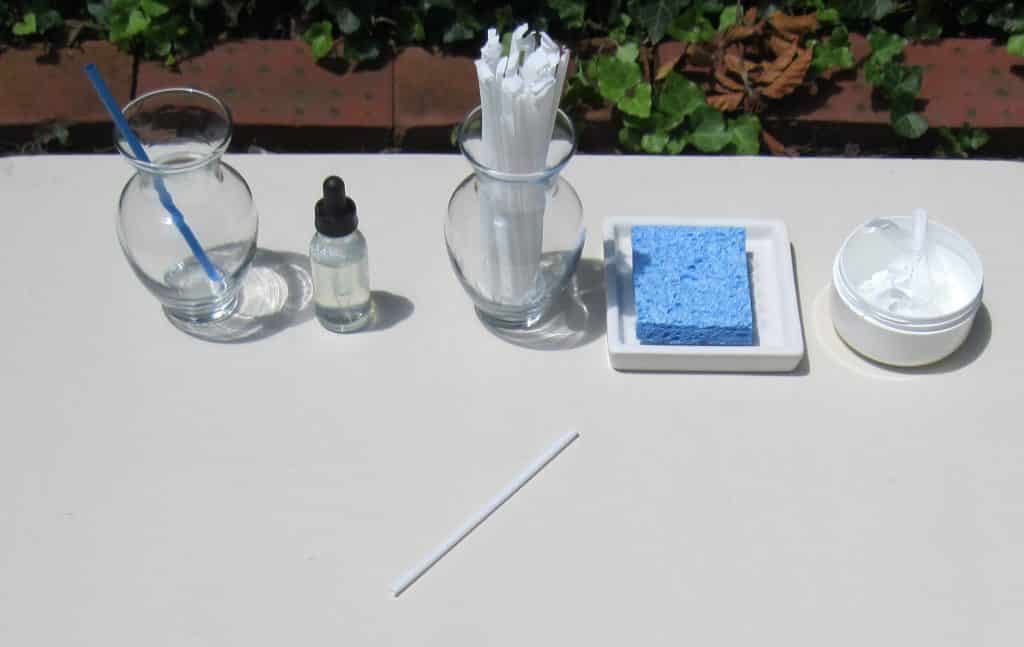
- An apron
- 1 larger straw in a container of water with no more than 2½” of water
- The amount of water in the container acts as a control of error
- 10-15 smaller straws in a container
- A container for the straw wraps
- 1 dropper bottle of water with dish washing liquid
- ¼ teaspoon of dish washing liquid to ½ cup of water
- Damp sponge in a container
- A work mat or large white plate (optional)
- I used a low table for the work. (no mat)
- Books and illustrations of domes are a nice addition to the environment.
Note: Milk carton straws are suggested for the smaller straws. They are not recommended for straw constructions because they are so narrow. They could be used by 9-12 students, provided you have string that can easily be threaded into the straws. They are also cheap.
Preparation:
- Gather all the materials you need for the activity.
- Select a small table for one person to house the activity.
- Set up the activity.
- Place the main straw in its water container.
- Place the dropper bottle of water and soap to the right of the water straw.
- Place the dome making straws in a container.
- Place the damp sponge in its container.
- Place the small container for paper wraps to the right of the activity.
- Place the apron on the back of the chair or under the floor table.
Presentation: 5-12
- Bring a bucket, a small amount of water and a sponge to the work.
- Put your apron on. “This is a way to make a bubble that is shaped like a dome. Watch how I get the water I need.”
- Put your index finger over the top of the straw and remove it from the water container. Put the straw over the center of the table.
- “By covering the top of the straw with my finger, I have trapped the water in the straw. Watch what happens when I remove my finger. The water falls on the table.” You can stop the explanation here, or continue.
- “The water falls to the table because the air pressure that kept the water up in the straw is no longer strong and gravity pulls the water down.”
- “I am going to gently add an entire dropper full of soapy water to the water that is already on the table.” Do it.
- Choose a smaller straw. Remove its wrapper if it has one, and put the wrapper in its container.
- Hold the straw straight up and down in the liquid on the table, and blow gently into the straw. Slowly raise the straw while blowing, and stop when the bubble looks like a dome.
- Clean the table and return the bucket and sponge to the sink.
Resources:
- Buy 5 ½” milk box straws. They are packaged in boxes of 500. It is best to buy them from a local source. They will cost less than five dollars. If found on line, the cost of sending them to you may be enormous.
- If you have a lunchroom, ask the manager to help you find them.
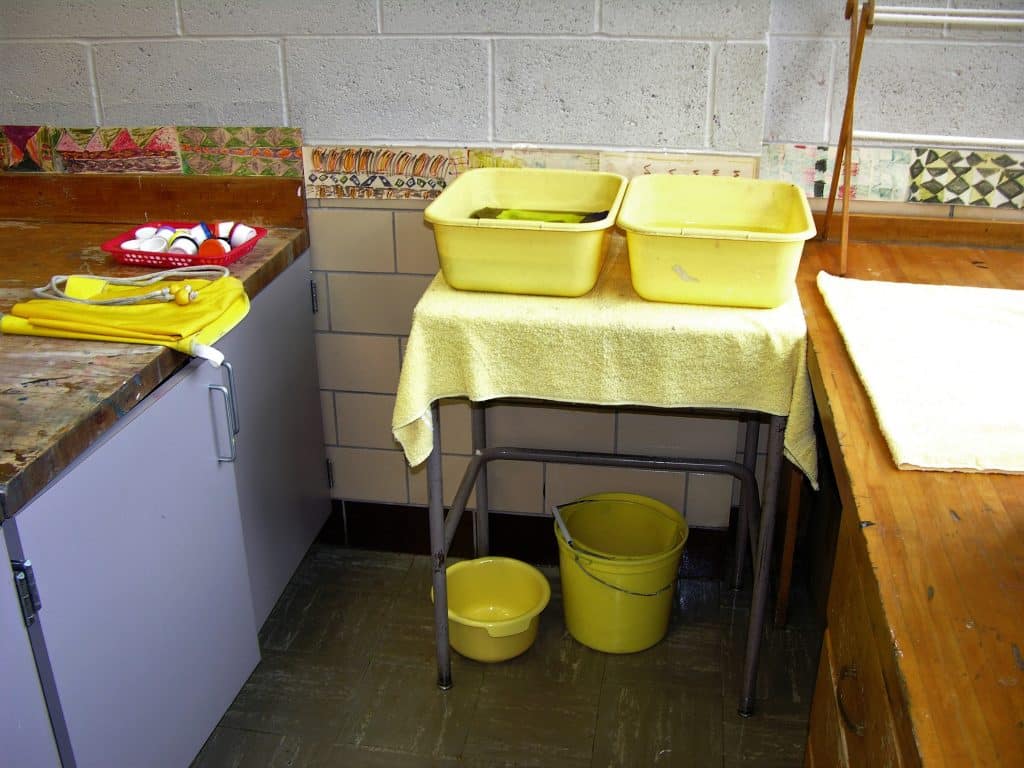 In my last five years of teaching, I had no assistant. This cleaning activity was always present in my room that alternately served kindergarten and 6-9 students, although the kindergartners were not interested. Volunteers, students, and I needed to use the cleaning station every day to keep my studios ready for use. This is popular work with elementary students. I had several 6-12 groups of students I called “the lunch-bunch” that helped me prepare the environments at noon every day. They wanted to do the work instead of playing after lunch. I had parent signed permission slips. We cleaned paint brushes, paint containers, paint pallets, eyedroppers, glue bottles, sponges, buckets, shop cloths and washcloths. The activity was only set up in the small studio but 9-12 students also volunteered to help. Kindergarten children were introduced to some of this work during the last quarter of the year as preparation for their 6-9 experience.
Note: An additional full setup for any activity, e.g. painting, can be in use while another is being cleaned.
- Prerequisite: Control of water
- Direct Aim: Clean the environment, community service
- Indirect Aim: Preparation for life
- Point of Interest: What do you see that needs to be done?
Materials: This Activity is designed for one or two people
- 2 aprons
- 2 dish washing containers
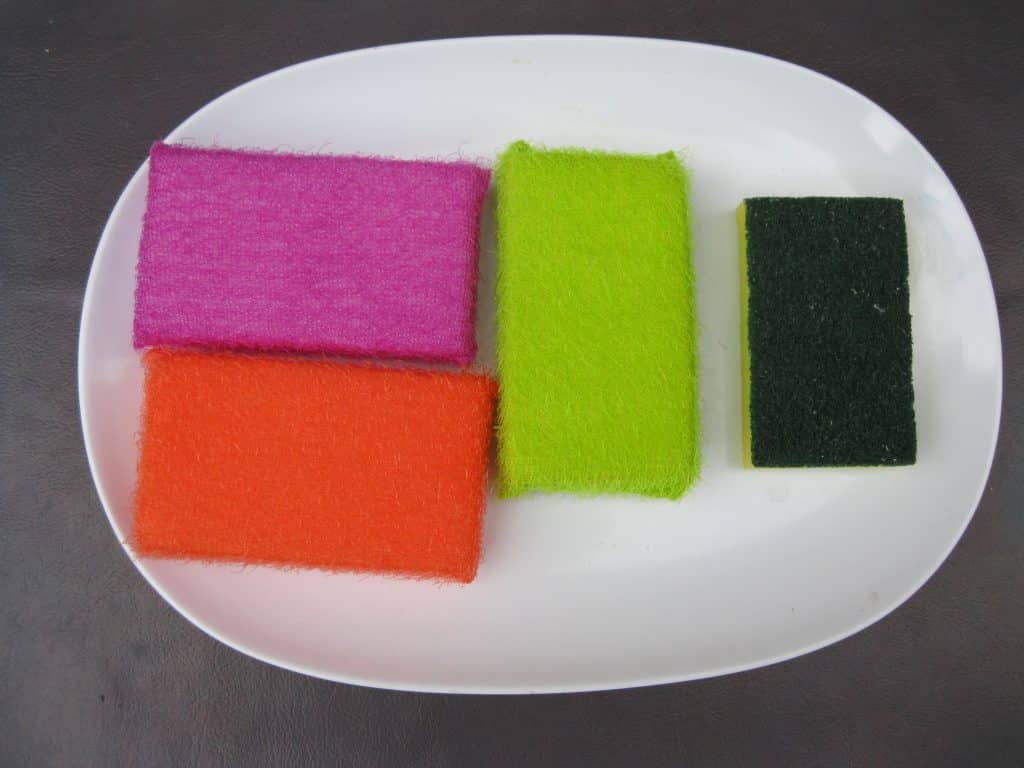
- 2 sponges (1 for soap water, 1 for rinse water)
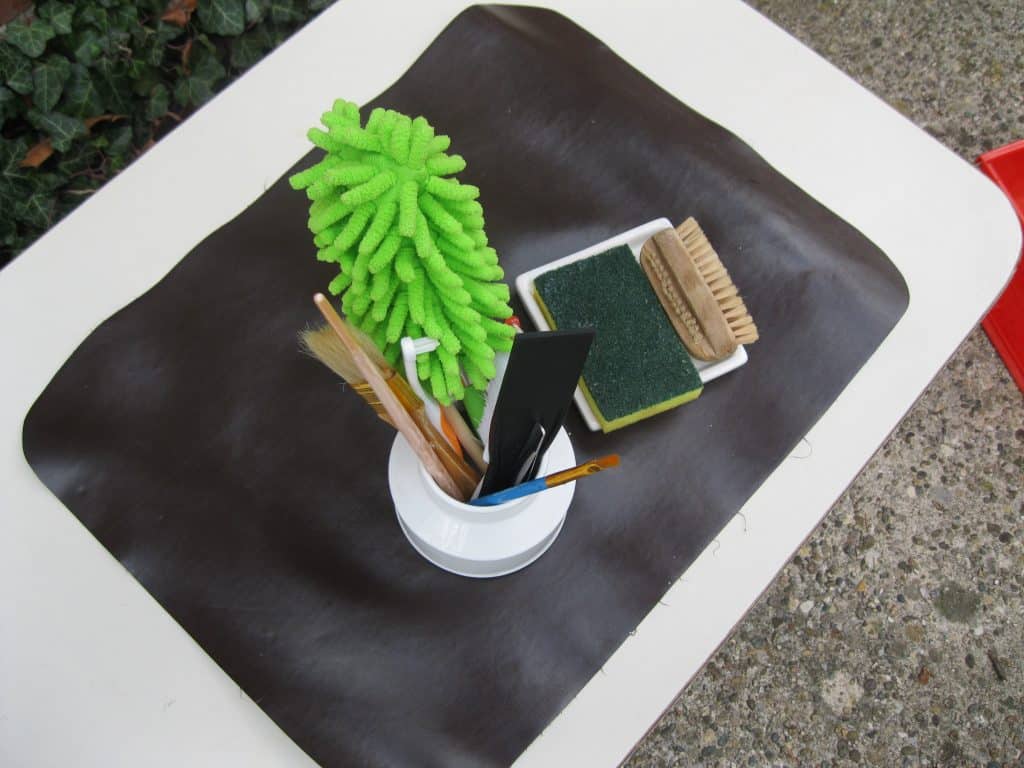
- A container holding a bottle brush, a scrub brush, a small plastic paint scraping tool, and a scrubbing cloth or scrubbing sponge
- 2 large towels, one for under the dish pans, one for the drying area, and a tray for clean, dry equipment
- Wash cloths in a container placed in the drying area
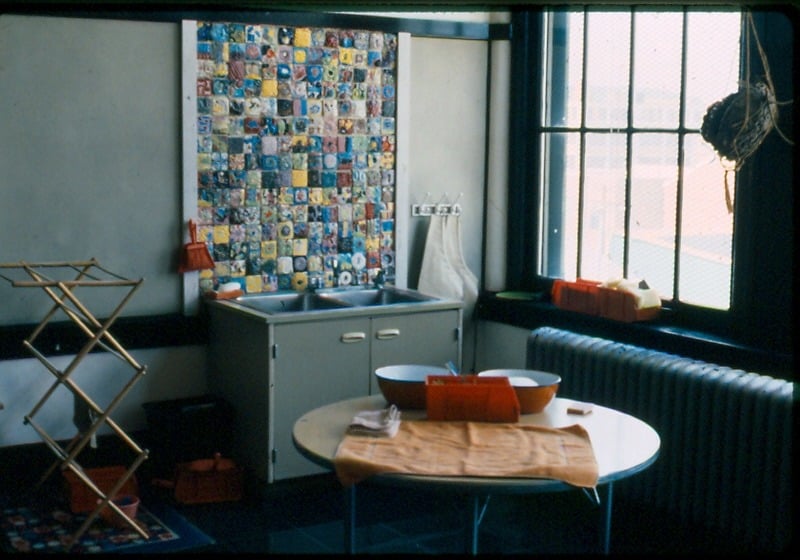
- A small drying rack (clotheshorse) for wet cloths
- Shop cloths in a container and dirty linen basket for floor spills on a rug
- A large tray, container, or mat for dirty items
- 1 bucket for under the table
- A smaller bucket for carrying water to and from the sink
- Dish washing liquid
- Safety glasses (optional)
Preparation:
- Decide on how the work is to flow from a space for dirty objects to a cleaning space to a drying space.
- Place dirty containers under the table or nearby to the left of the water station.
- Cover a small table or tall desk with a bath towel for the two dish pans.
- Place cleaning containers on the table and fill half way with water. Add soap to the first one.
- Place the container holding a bottle brush, scrub brush, and small paint scraping tool next to or near the washing pans.
- Decide where to place the drying rack and the small dirty linen basket.
- Decide where to place the bath towel for the drying space.
- Place the face cloths in a container on the drying area of the table or shelf.
- Designate a table or shelf close by for clean containers.
- Place the container of shop cloths and laundry basket out of the way, but near by.
- Empty the water after the children have gone for the day.
- Note: I liked to place the shop cloths next to the brooms and trash cans that were near the sink. They can be in both places.
Presentation: 5-12 (experienced 9-12 students need only a brief review)
- Introduce the work by its name.
- Demonstrate putting on your apron.
- Choose one or two dirty objects and place in the water.
- Use the sponge and scrubbing cloth to clean it.
- Use one of the special cleaning tools. Very briefly discuss how each can be used.
- Place clean container in the rinse water and remove any suds.
- Put the clean container on the towel to drain.
- Dry the object with a wash cloth and place on a special shelf, on a big tray, or in a container.
- Restore the work for the next person.
Materials:
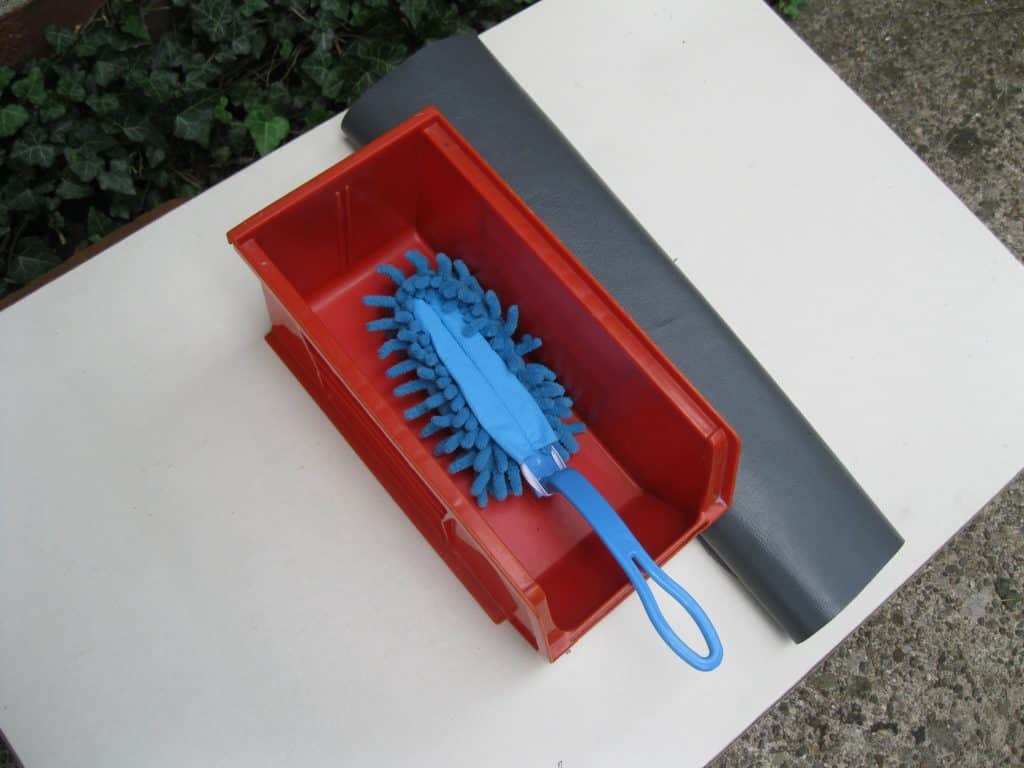
- 1 washable duster in a container
- 1 large mat
Presentation:
- Place the activities from the top shelf on the mat (nearby table).
- Dust the shelf and materials.
- Restore materials.
- Dust each shelf. Work from the top down.
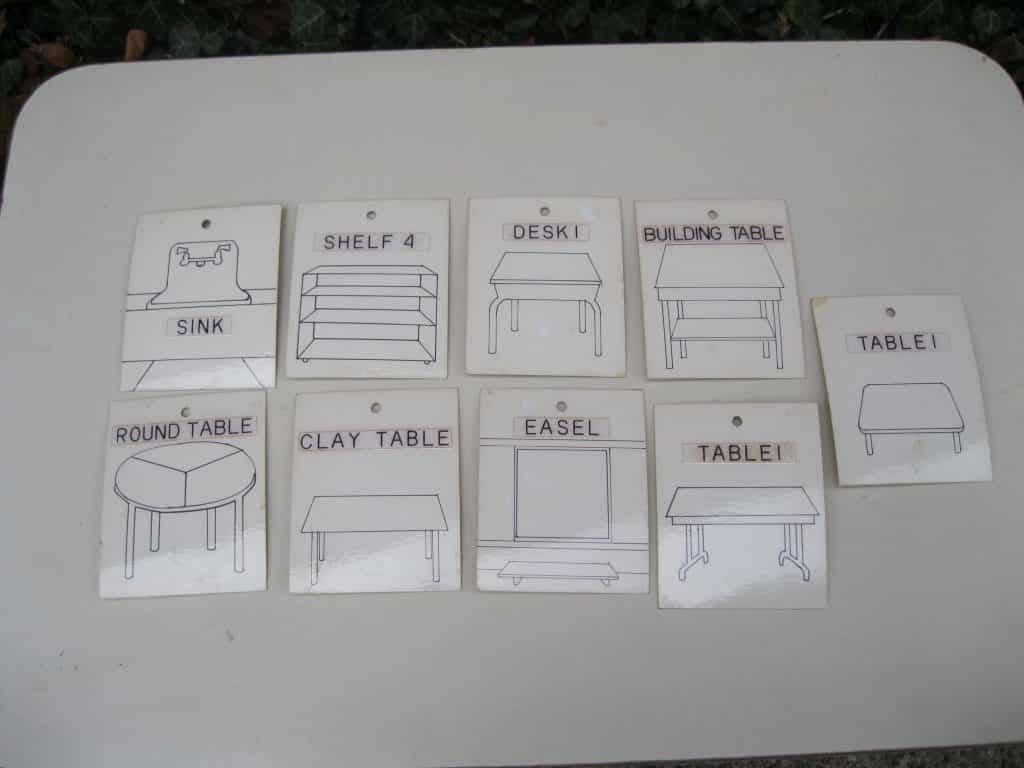
This is a class activity done at mid-year in the afternoon and all day at years-end. Schedule all classes for the event with all students participating. The process may take more than one day so make a list of “Things to do”. In general, there will be dry work and wet work. A list would be helpful. Checking off the list is a great wrap-up activity at the end of each work period. Newly discovered jobs may need to be added. The following suggestions are very general and will need to be refined to fit your environments. Remember, I had three art studios.
While planning this activity, think about all the different areas that need attention such as the classroom, and its storage spaces as well as outdoor areas. It will be an active time with a higher level of noise. The more you involve students in the planning, the more they cooperate to do the work. It is possible that they might suggest some things you did not think of. That is one of the joys of teaching. Having a small cleaning station operating in your environment beforehand is critical to having success the first time you do this.
One of the ways to approach this process is to teach each major cleaning operation on separate days at mid-year. I used the days before Winter Break because the children were less focused on school. This method introduces each job in isolation, and everyone sees the lessons, even if they don’t choose the work. The dry work may be things you can teach everyday year long. It can be preparation work for the future such as making name tags, taking down bulletin boards, designing and making new borders for display areas, organizing storage boxes, sharpening all pencils (even crayons), sweeping the floor, or dusting shelves.
This work requires the adults to stand back and observe. The teacher does a little dance. She steps in to assist where needed, and again stands back to observe. She steps in to put things away that are clean, and gathers the next pieces to be cleaned. Leave enough time to restore the environment. Don’t rush yourself or the children. Laugh if you have a big spill. Keep everyone out of the water, and clean it up from the outside in. Have a mop handy, but out of sight.
Designate a place far away from the sink where children can congregate to rest. Place any dry work like sorting, packing, or preparation work in that area, including making envelopes or putting holes in name tags. Have children check materials for missing pieces. At the end of each work period, make sure the floor is dry. Throw dirty cleaning water away, and refresh the buckets and sponges. Let the children help you do this chore. If everything had its own place, the cleaning equipment will be returned. After order is restored, sit in a group and talk about the coming vacation time, make a simple origami piece, or have a healthy snack.
Note: During my last year of teaching, my twelve 6-9 classes cleaned all three studios and complained when the work was done. They wanted more work.
- Prerequisite: A Cleaning Station and other real daily living chores
- Direct Aim: Care of the Environment, Community Service
- Indirect Aim: Preparation for life, the joy of creating chaos, and the thrill of re-establishing order
- Point of interest: Usually, they are about the control of water.
General Organization for Cleaning the Environment
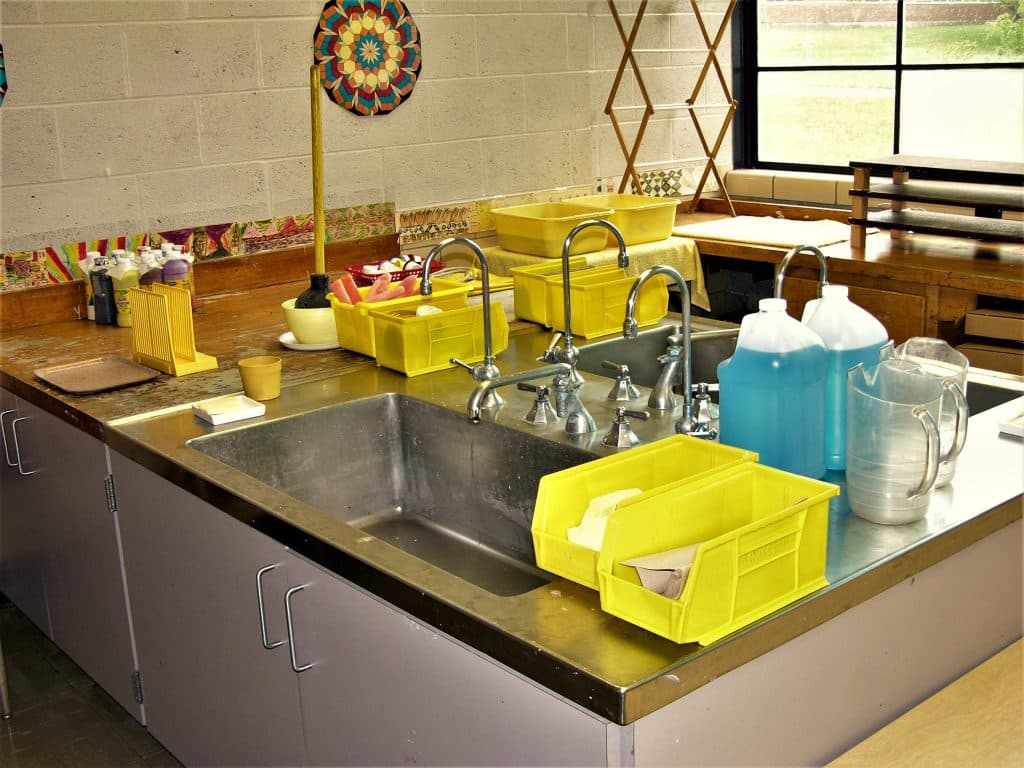
- Cluster the following items together in a location at or near the sink: a trash can, a container of shop cloths, a container with 2 hand brooms and dust pans, and a dirty wash basket.
- Place plastic floor mats and aprons in an area for general use.
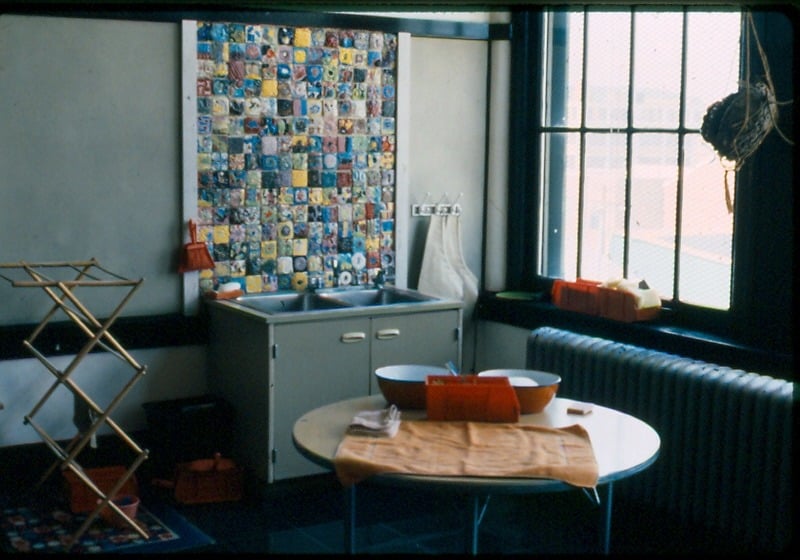
Small Cleaning Station: 2 Person Activity
Materials: Small Cleaning Station
- A table
- 2 aprons: 1 for washing, 1 for drying
- 2 dish pans for cleaning small objects and trays
- Dish washing liquid
- 2 sponges: 1 for washing, 1 for rinsing
- 1 tooth brush
- Fuzzy bottle brush
- 2 bath towels
- A container of washcloths for drying
- Place for clean objects: large tray, container, shelving
Preparation: Small Cleaning Station
- Place the work near the water source.
- Cover table with 2 towels: one under the water containers, and one next to or in front of them, for clean objects to be dried.
- Fold 6 washcloths. Place them in a container. Put it on the drying towel.
- Put warm water in the dish pans (1/2 full), add soap to washing pan.
- Float the cleaning equipment in the dish pans.
- Put the dirty containers under or beside the cleaning station. Decide where to put the dried objects.
- Clean one area or shelf at a time so children can reassemble the activities.
- Be aware that you may need to refresh the water during a working period. Use plastic pitchers to bail out the pans until they can be safely carried to the sink.
- Dry the floor around the work station with shop cloths if needed.
- Place very wet cloths in the laundry basket.
- Place the container of shop cloths and laundry basket out of the way, but near by.
Presentation: 5-12: Small Cleaning Station
- Introduce the work by its name.
- Demonstrate putting on your apron.
- Choose one or two dirty objects and place in the water.
- Use the sponge and scrubbing cloth to clean one.
- Use one of the special cleaning tools. Very briefly discuss how each can be used.
- Place a clean container in the rinse water and remove suds.
- Put the clean container on the towel to drain.
- Dry the object with a wash cloth and place on a special shelf, or put on a big tray, or in a container.
- Restore the work for the next person.
Large Cleaning Station: 4 Person Activity: 2 wash, 2 rinse and dry
Materials: Large Cleaning Station
- A place for the work near the water source
- A table
- 4 aprons
- 2 bus tubs (used for bussing dirty dishes) for cleaning large containers and trays
- Dish washing liquid
- 4 sponges: 2 for washing, 2 for rinsing
- 2 scrubbing sponges for washing
- 1 Bottle brush
- 2 tooth brushes for cleaning small places
- 2 bath towels: 2 to cover the cleaning table and drying table
- A place for the clean, dry equipment
- 6 wash cloths in a container for drying
- A plastic paint scraper
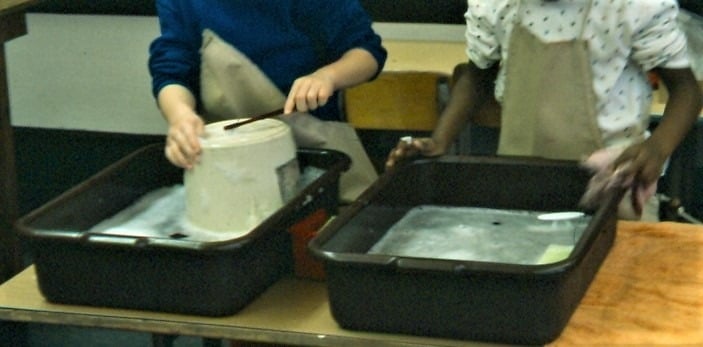
Preparation: Large Cleaning Station
- Cover the table with two towels.
- Half the table will hold the bus tubs.
- Half will hold containers to dry.
- Place the bus tubs on the table and carry water to fill them half way or less. To empty, reverse the process.
- Put a little soap in the first tub. Too much foam will be a problem.
- Place dirty containers under the table.
- Decide where to put the clean, dry equipment.
Note: Do not carry the bus tubs when they have water in them. Bail them out.
Presentation: 6-12: Large Cleaning Station
- Two people wash containers, then two people rinse and dry them.
- The presentation is the same as for the small cleaning station.
Note: This is a popular work space. The activity functions best with only 4 people. Those who have chosen this activity could switch jobs or choose other work after a reasonable time. Decide how to handle uninvited workers.
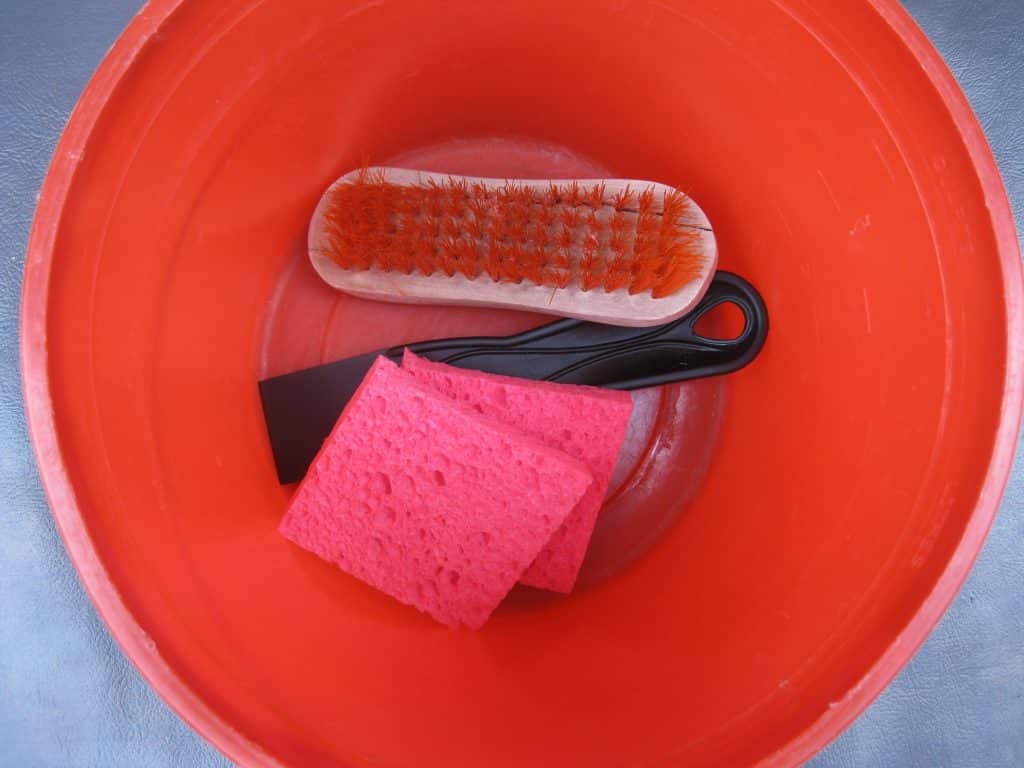
Cleaning Tables, Chairs, and Shelving
Materials: Tables, Chairs, and Shelving
- 6 aprons
- 6 one gallon buckets
- 3 to 4 cups of water for each bucket
- 6 small hand sized scrubbing brushes: wooden with natural bristles
- 6 sponges
- 6 sponges with a scrubbing side
- 3 to 4 plastic paint scrapers to remove glue
- Oil Soap or similar product if cleaning wood
- A stack of shop cloths in a container for drying the clean shelves
- Photographs of each shelf
- Floor mats
- “Clean” tags and strings: to label clean objects and areas
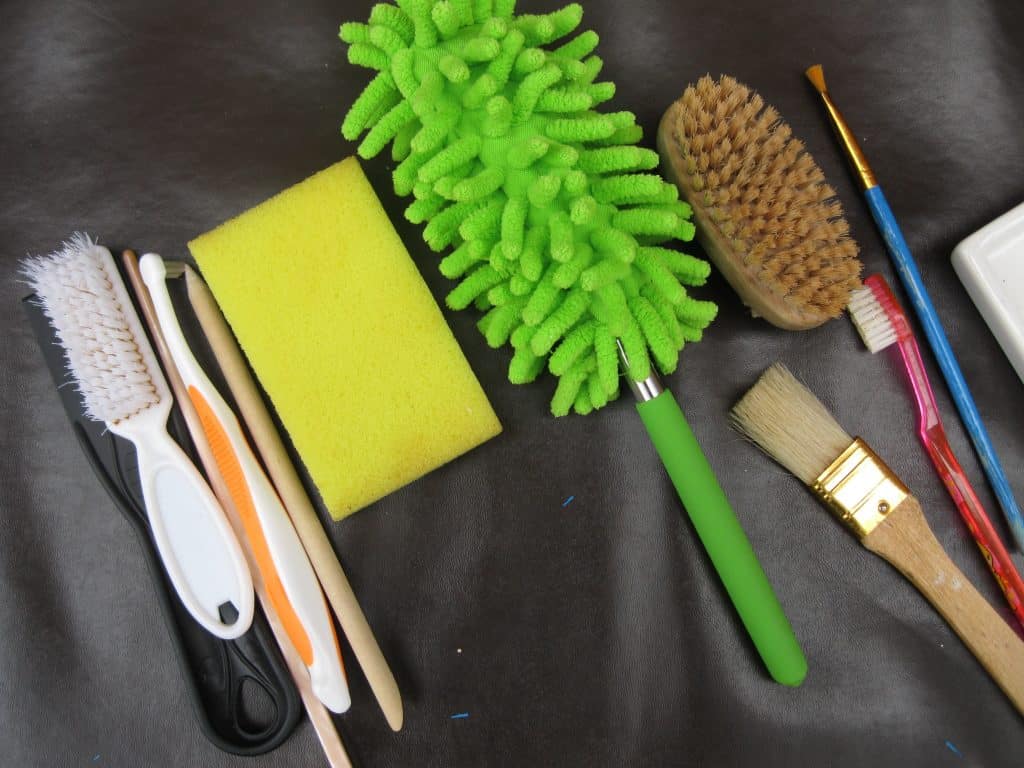
Preparation: Tables, Chairs, and Shelving
- Prepare 6 buckets with 1 sponge, 1 scrub sponge, 1 small scrub brush, 3-4 cups of warm water, one cap of oil soap.
- Note: choose the number of buckets you think are needed.
- Put the paint scrapers in a container to be used only if needed.
- Decide where to place or hang aprons.
- Line up the prepared scrubbing buckets on a shelf, on a table near the sink, on a window sill, on the top of a clean shelf, or on a counter by the sink.
- Place shop cloths in a container at the end of the line of buckets.
- Have ready a container of name tags with strings marked “clean” to attach to finished work.
- At the end of the work period, empty the buckets and rinse everything.
Presentation: Tables, Chairs, and Shelving
- Place materials from the shelf in order on a floor mat or table.
- Place floor mats overlapping on the floor to hold the shelf, table or chair.
- Note: Demonstrate giving the scrubbing brush a single shake to remove excess water before scrubbing.
- Scrub the object, then wipe it with a damp sponge, and then dry it with a shop cloth. When presenting using a shelf, clean the top, then wipe with a sponge and cloth. Have the children work down each shelf.
- Note: White resin glue dries clear and will appear white again after being rehydrated by scrubbing. Demonstrate how to hold paint scraper flat against the wood. Use your index finger to press the flat edge down to scrape the glue off.
- Sweep the floor space where the shelf was while the shelf is being cleaned.
- Place the clean shelf back in its space.
- Replace the learning materials. This could be a job for another two people.
- Dry the mat(s) first with a sponge then a shop cloth. Store the mat if not being used again. Dry the floor around the mats as well.
- Follow the above instructions for tables and chairs: top, bottom, front, and back.
- Note: Tables can not always be placed on work mats, so it is important to keep the floor around them as dry as possible.
- Use “Clean” tags to label clean shelves, chairs, and tables.
- Note: Don’t be surprised by a child who removes the clean tag and scrubs the item again!
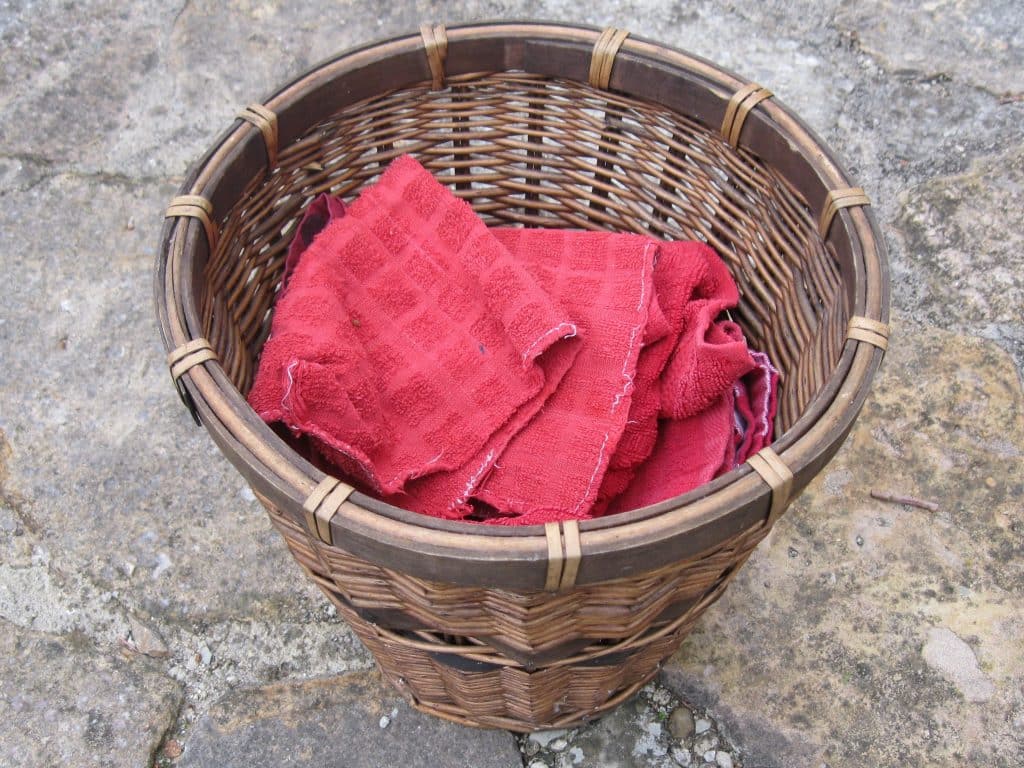
Hand Washing Laundry: Washing Shop Cloths and Washcloths
Materials: Shop Cloths and Washcloths
- A table
- 2 Aprons
- 2 large 3 gallon buckets for washing and rinsing
- A washboard for cleaning cloths
- Polyurethane to seal the washboard, and a foam brush
- A large towel to cover table under the buckets
- Dish washing soap
- 1 large drying rack (clotheshorse)
- You may need an extra one.
- One large floor mat or rug to place under the drying rack to catch drips
- Basket for dirty linens
- Chair for a dirty linen basket
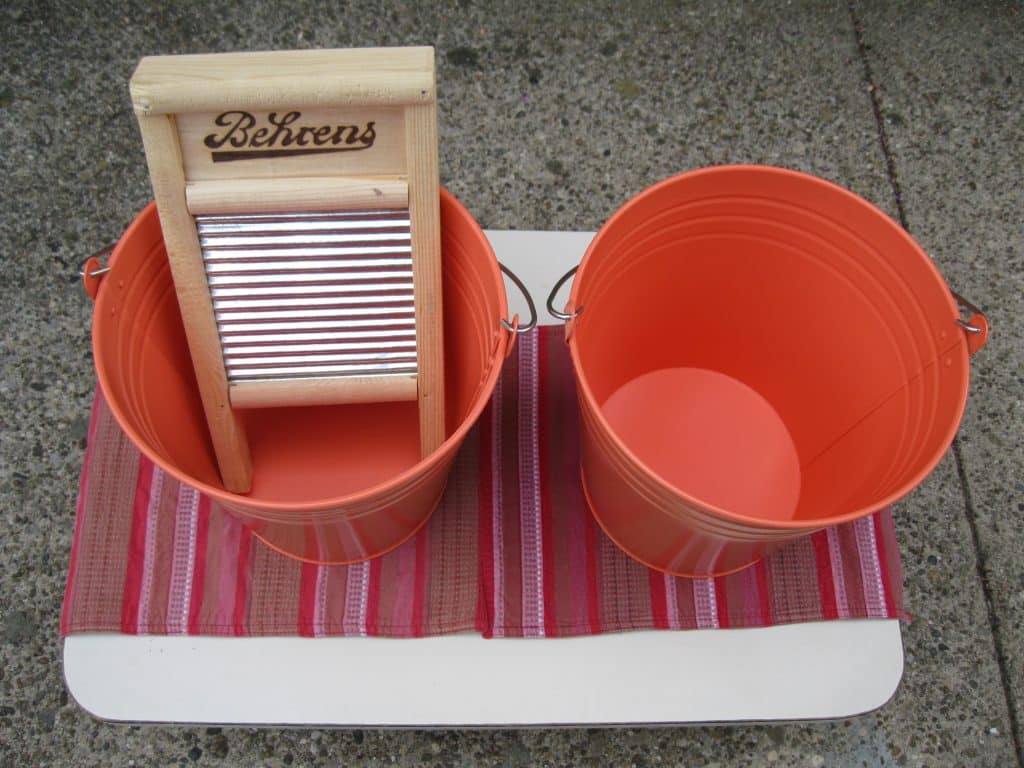
Preparation: Shop Cloths and Washcloths
- Seal with polyurethane or paint the wooden structure of the washboard, allowing 48 to 72 hours for the sealant to set.
- Place the work near the water source.
- Decide where and how to place the 2 aprons.
- Cover the table with a towel.
- Set up two large cleaning buckets half full of water; one with soap, warm water and the washboard; the other with warm rinse water.
- Place the drying rack to the right of the table. Place a rug under the rack.
- Be aware that you may need to refresh the water during a working period. Use plastic pitchers to bail out the pans until they can be safely carried to the sink.
- Provide a container of dry shop cloths nearby.
- Place the laundry basket on a clean chair to the left of the washing table.
Note: At the end of the week and sometimes daily, I took the laundry home to rewash, because the classroom cleaning activity does not always rinse all the soap from cloths, nor does it sanitize the materials.
Presentation: Shop Cloths and Washcloths
- Place a washcloth or shop cloth in warm soapy water. Choose by size for the child you are teaching.
- Demonstrate how to gather the cloth in your hand and rub it against the wash board. Drop the cloth into the water and grab it again and repeat the process.
- Demonstrate how to wring the cloths. Fold each washcloth twice before wringing. Fold the shop cloths 3 or 4 times. Ask an older child to help the younger children learn to wring if needed. Just gathering the cloth and squeezing leaves a dripping mess.
- Rinse each cloth and then wring each one.
- Open each cloth up and then fold each one in half and hang it on the clotheshorse.
- Fold the cloths after they are dry.
Resources:
- https://www.montessoriservices.com
- 3 gallon Bucket: Hardware stores, discount stores
- https://www.acehardware.com: purchase DUBL HANDI or Behrens washboard, 14” to 18” long
- Restaurant Supply Stores for large containers called “bus tubs” which can handle large objects that need to be cleaned
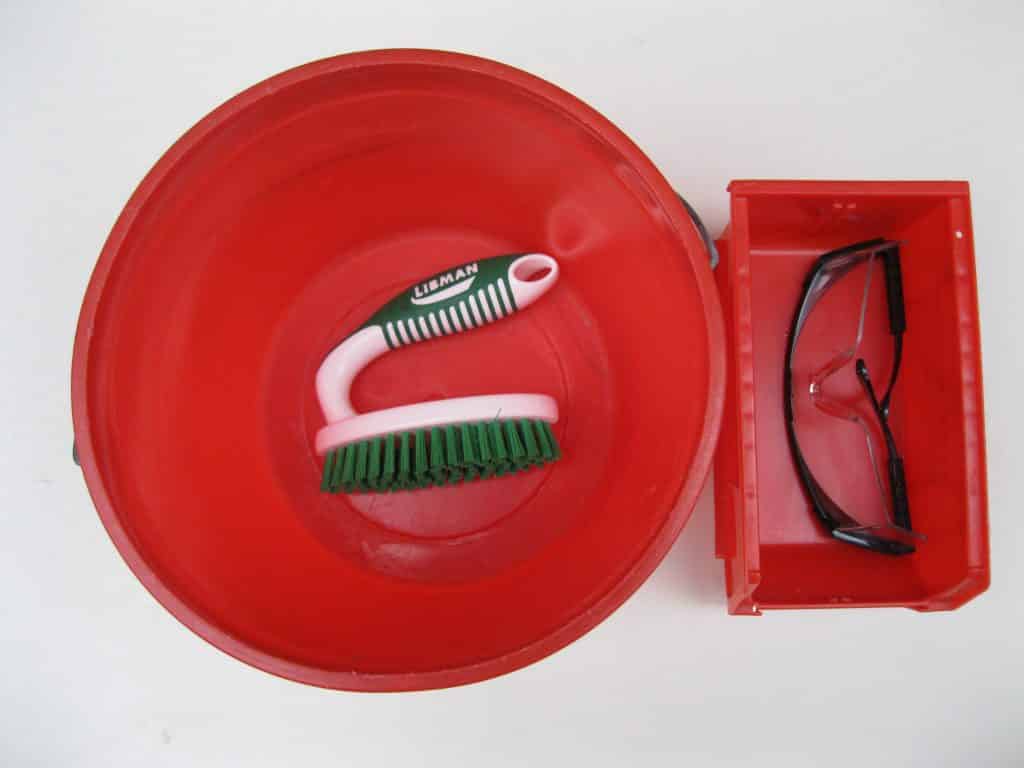
Scrubbing Rugs: 1-2 children activity
Materials:
- Dirty rugs
- 1 hand sweeper or hand broom and dust pan
- 1-2 aprons
- 1-2 buckets
- 1-2 scrub brushes with a handle
- Dishwashing liquid
- 1-2 safety glasses in a container
- Dirty sit-upons and/or small carpets
- 1-2 floor mats big enough to accommodate a rug
Preparation: Rugs
- Place the whole activity in its own space away from the 6 other cleaning set ups if possible.
- Stack all the dirty rugs and sit-upons in one place.
- Place the container of safety glasses and the folded aprons on a tray before the buckets.
- Place hand sweeper or hand broom and dust pan before the buckets.
- Prepare each bucket with a little soapy water no more than 1 ½” deep, and a brush with a handle.
- Decide on a safe place to put the clean rugs, such as against a wall that is out of the way or out of the room.
Presentation: 6-12 Rugs
- Put on the apron.
- Put on the glasses.
- Place a rug on mat and clean with a hand sweeper or whisk broom and dust pan. Put dirt in the trash can.
- Important – Demonstrate giving the scrubbing brush a single shake to remove excess water before scrubbing.
- Scrub the rug up and down left to right as with table scrubbing.
- Turn rug in opposite direction and again scrub up and down.
- Place the clean rug in a place or area to dry where it will not be stepped upon.
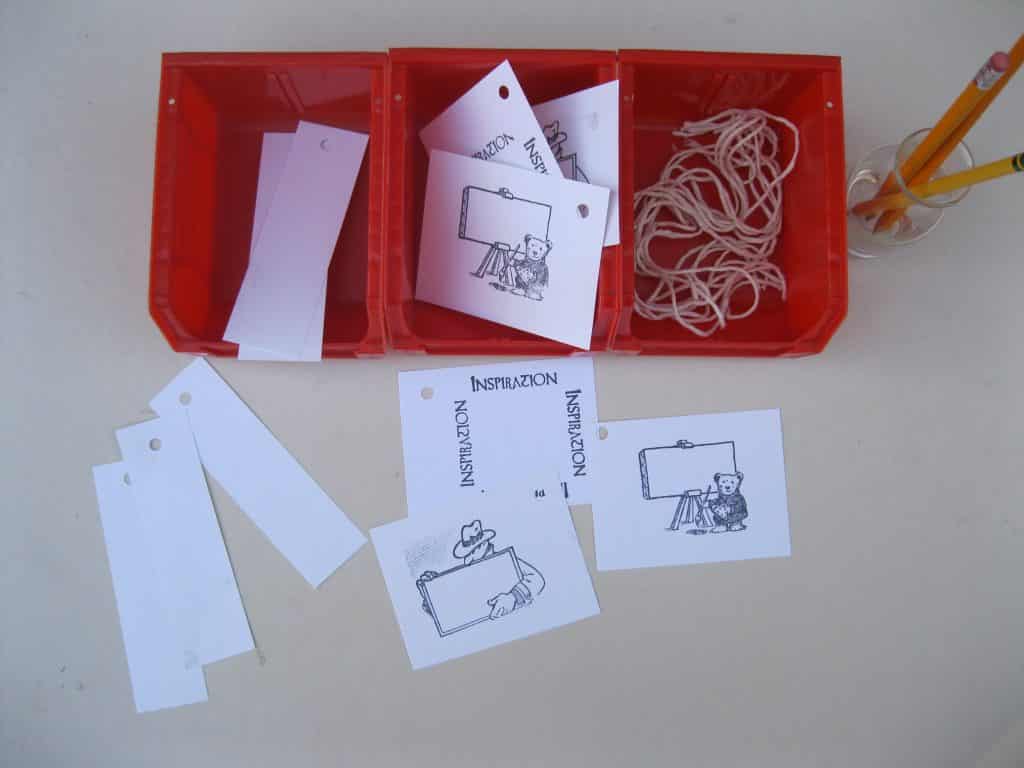
Suggested Dry Work: See: Environment for more details
- Making name tags 5-9
- Prepare Plain White 5” x 8” index cards.
- Cut them into strips 1½” x 5”.
- Punch a hole in one end of each strip.
- Making name tags 9-12
- Prepare plain white 4”x 6” index cards.
- Cut them in half to 3” x 4”.
- Print each tag with a stamp designed to make short notes.
- Use several different designs.
- Punch a hole in the top corner.
- Making name tags strings
- Find a piece of cardboard or wood 5” wide to use as a gauge.
- Wrap string around the gauge and cut in half.
- Making envelopes for unfinished work.
- Fold clean shop cloths.

