The safe and effective use of basic materials and equipment (scissors, staplers, glue, etc.)
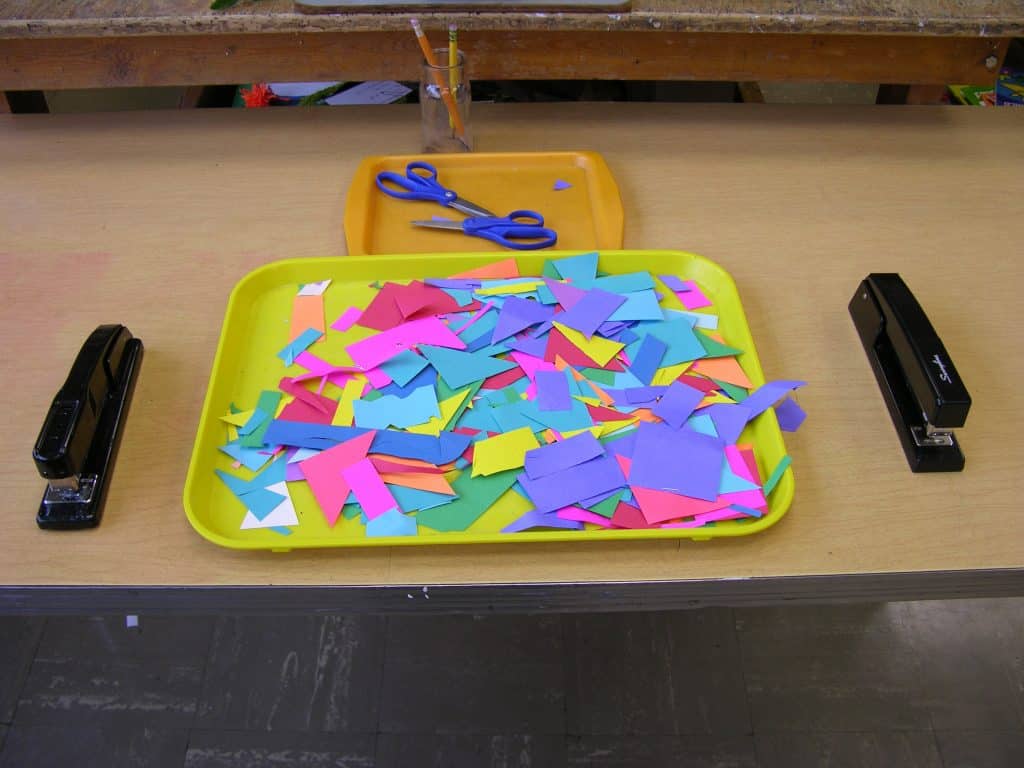 Basic skills activities are to the art education curriculum as practical life activities are to the general Montessori curriculum. Each skill needs to be practiced with a series of activities that require ever increasing levels of difficulty, and at the same time, present ever increasing levels of creative possibilities. These activities start the process of self-directed art making.
It is important, when giving these lessons, that we as adults give what I call “classic lessons.” The lesson represents the minimum information necessary to safely do the work. There will be variations that your students can discover for themselves and will share with others. They may think they have made a mistake and bring it to you to correct it. They are so happy when you explain how clever they were to have discovered a variation.
These may be some of the first art activities that need to have students’ names on them. Putting names on the work is an important part of the presentation. Keep on file all the work that you have made so that it can be used for future lessons.
 Judging how many or how much of each material to put out for the day is something one learns over time. Each activity will demand differing amounts. In general, it is wise to under supply until you ascertain the demand.
The environment needs to have a recycle bin to collect colored paper. Good colored paper scraps can be used for paper making, coloring sculptures, or as material for another basic skill activity.
Note: This section covers activities that require cutting paper with scissors, and the use of staplers, paste and glue sticks. After simple cutting and stapling, other cutting activities can include pasting or stapling, and other pasting and stapling activities will include cutting. These activities need to be together in the environment. Start with cutting. It will be up to the teacher to choose the order of introduction for the other skills.
Important: Please read the entire text of an activity before preparing each.
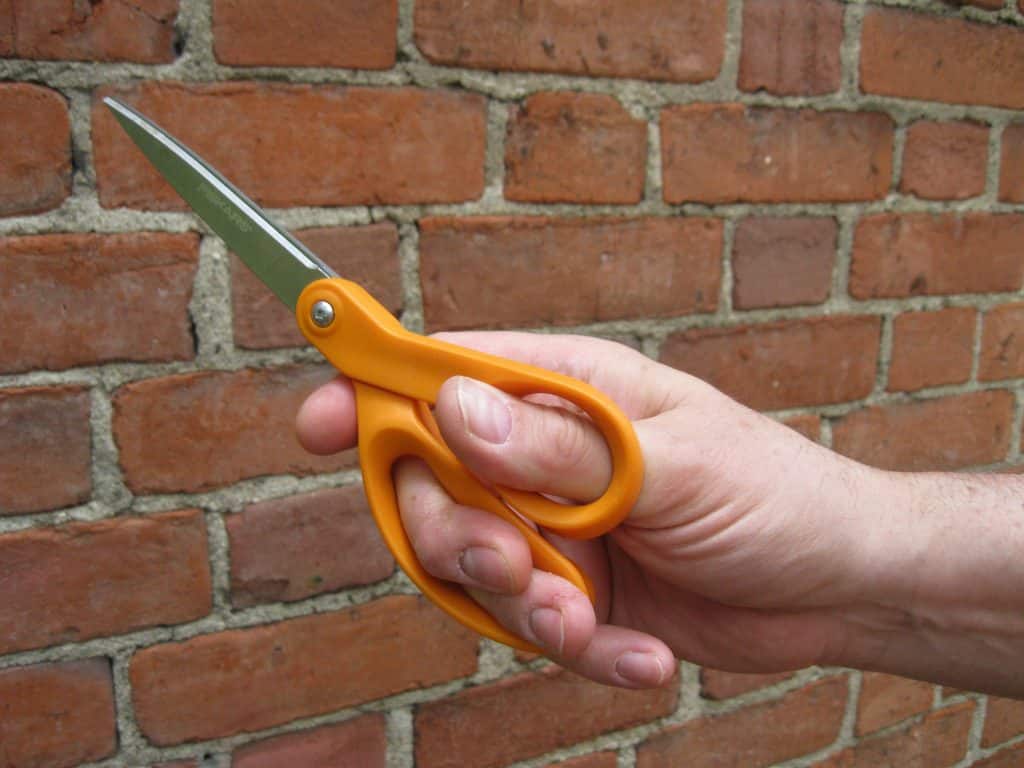 If this is the first time a child is expected to use a pair of scissors, it will be helpful to define the role each hand plays. It can be done with your hands alone. Make a V with the index and middle fingers of your dominant hand. It becomes the scissors. Fold and cover the ring finger and the baby finger with your thumb. Open and close your index and middle fingers to represent the blades of the scissors at work. With your other hand, hold the imaginary paper strip with your index finger and thumb. Fold the remaining fingers into your palm. Demonstrate the cutting action using just your hands. After that, introduce the scissors.
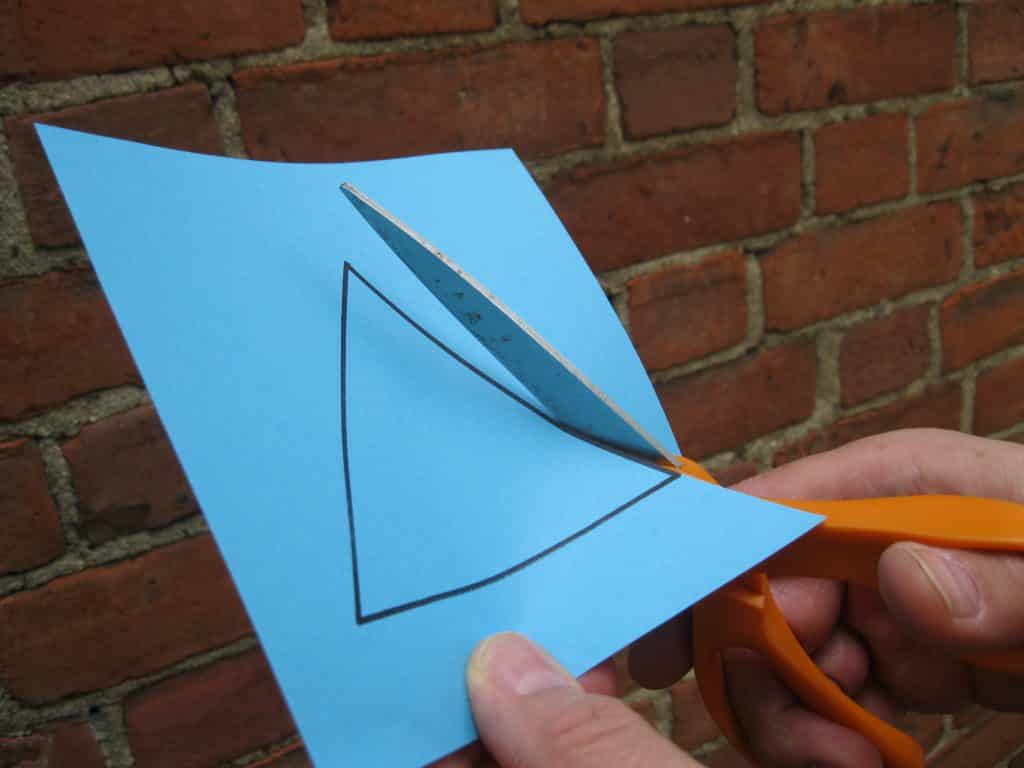
Holding Scissors and Paper:
- Place the scissors in the dominant hand.
- Place the thumb into the first or smaller loop, just to the first knuckle.
- The inner crease of the thumb knuckle and the thumb pad control this part of the scissors.
- Place the middle finger, ring finger and the little finger into the lower, larger loop.
- Place the index finger outside and on top of the larger loop.
- Hold the paper in the non-dominant hand, clamping it between the thumb and index finger with the thumb on top to stabilize the paper during cutting.
- Keep the scissors in front of the face when opening and closing them. They only open and close.
- Place the paper in the V of the scissors at the line to be cut.
- Place attention on the line to be cut.
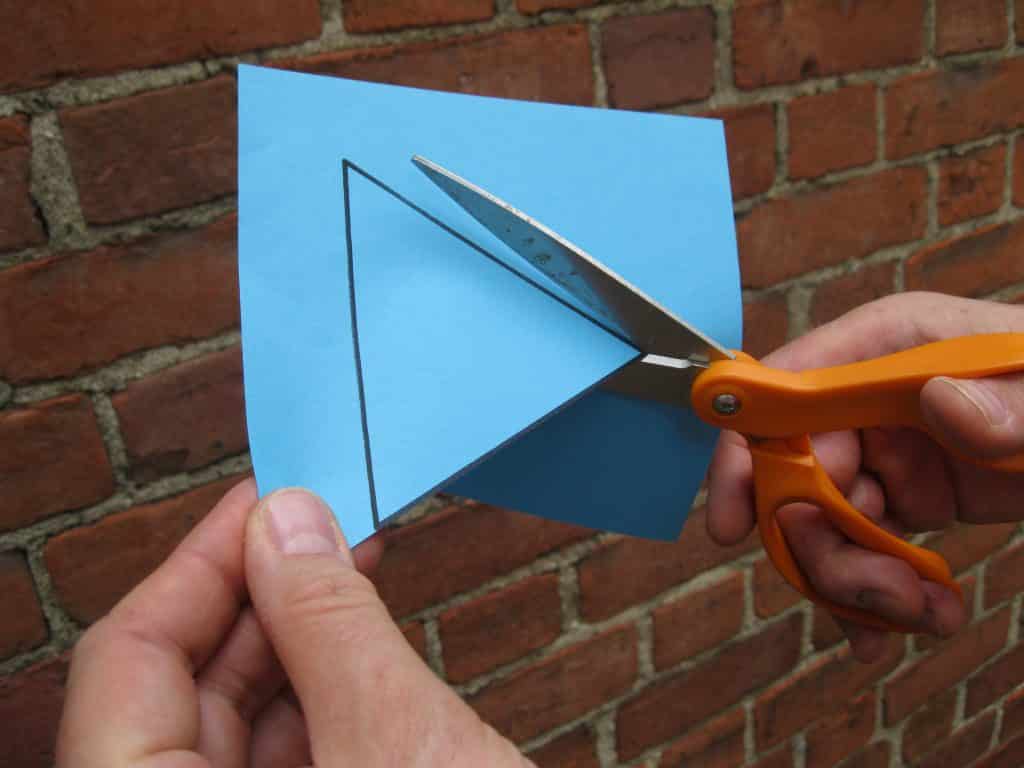
- Move the paper with the other hand so that the line or edge to be cut is always in front of the person’s vision because the scissors only open and close to cut the paper.
- When the line changes direction, the scissors can usually remain engaged in the paper until the non-dominant hand can move the paper into its new position.
- When the eyes focus on the line or edge to be cut, the brain moves the hands correctly.
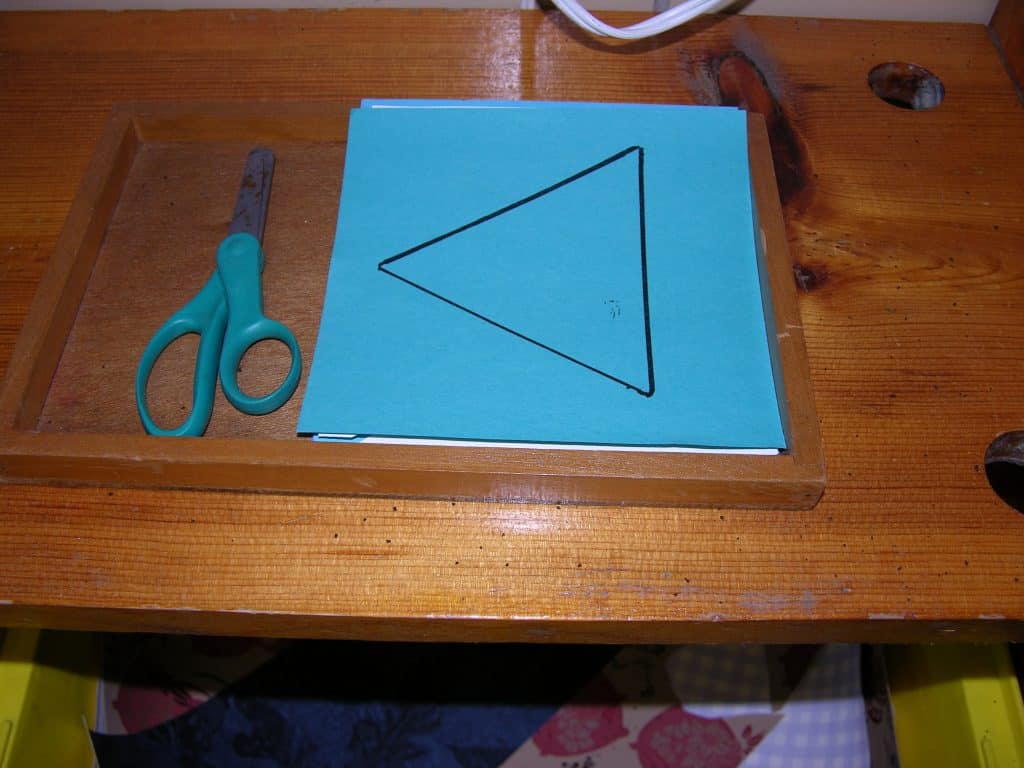 General Rules for Using Scissors
- Always put the scissors down when you are not cutting.
- Do not sit close to other people when you are working with scissors.
- To avoid accidents, use the scissors only for cutting.
- When walking with scissors, grasp the closed blades; the handles will stick out above your hand.
- Pass scissors to another person by holding the closed blades, and offering the handles.
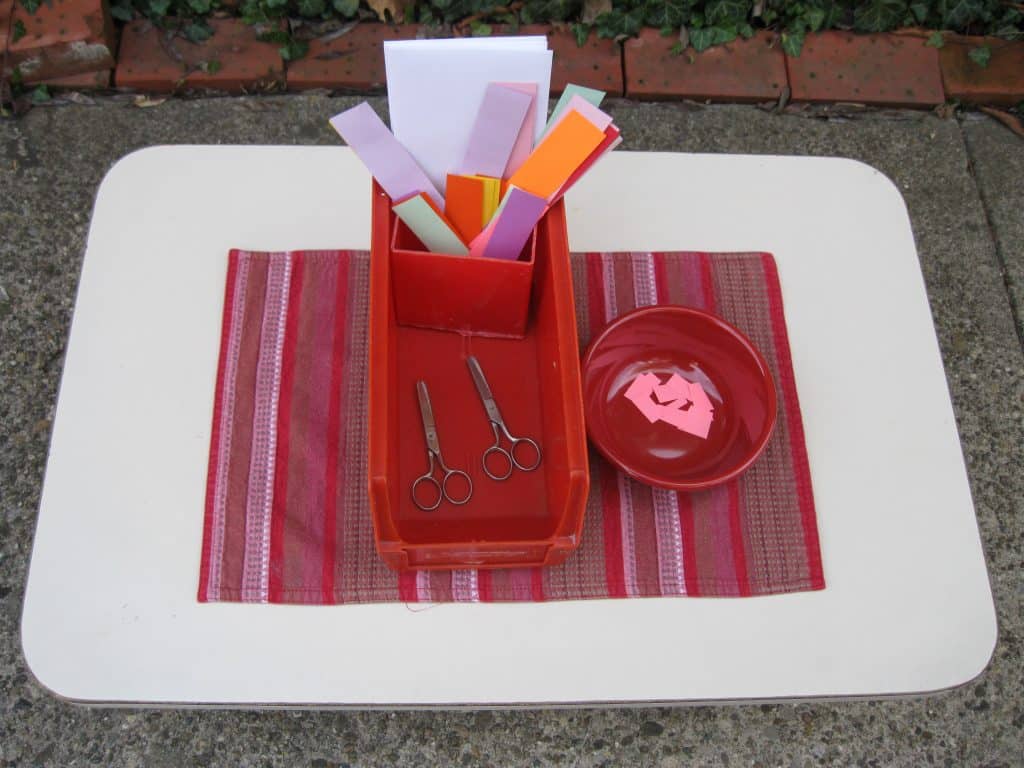 Cutting starts with plain colored cover paper strips and advances through traditional Montessori printed paper. Having quality colored cover paper for cutting exercises is important. Construction paper easily fades, and the loss of color over time is disappointing. Investing in good paper allows families to keep, frame, and display their children’s artwork without deterioration. Simple kirigami activities increase the level of difficulty of cutting paper (See: Kirigami in this section).
- Prerequisite: Practical life activities, tearing paper
- Direct Aim: Develop skill of cutting with scissors
- Indirect Aim: Creative use of the skill for making art
- Point of Interest: How many pieces of paper do you think a person could cut from one strip of paper?
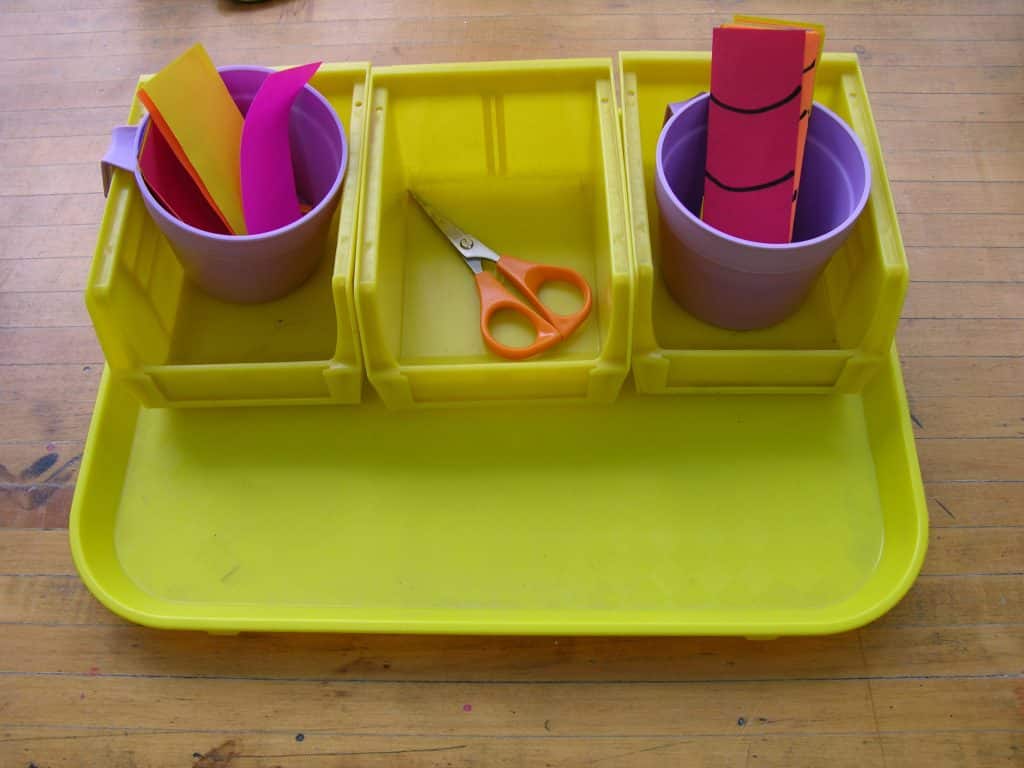
Materials:
- Two scissors that are designed for either hand
- Strips of colored cover paper
- Container for the strips
- Tray for everything above
- Envelopes for the cut pieces to be saved or taken home
- A container for the cut pieces not used by the child
- recycle into other activities
Preparation:
- Cut strips of colored cover paper 8 ½” long. Lighter weight paper needs to be cut in shorter strips so the strips do not droop while cutting.
- Place two or three pieces of cut paper in the recycle container.
- Assemble materials in the order they are to be used.
- Envelopes to take cut pieces home.
Presentation: 5
- Introduce the work by name.
- Demonstrate the correct way of holding and using scissors.
- Cut an entire strip into pieces.
- Place some pieces in an envelope and others in the recycle container.
- Replace work into the environment, if not isolated.
Extensions:
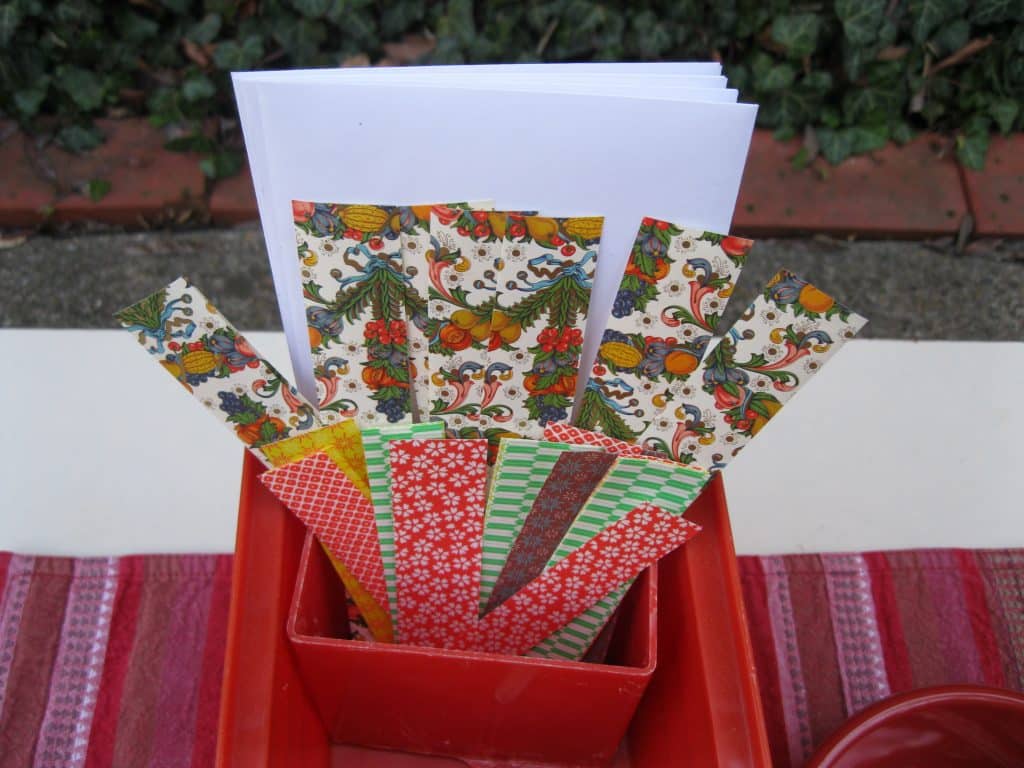
- Replace plain colored strip with patterned paper. Printed paper is available in art supplies catalogs. Origami paper is very interesting and expensive.
- A practical life activity: demonstrate how to sort the leftover clean colored paper scraps into labeled paper bags with corresponding color swatches. Provide a bag for all printed paper strips.
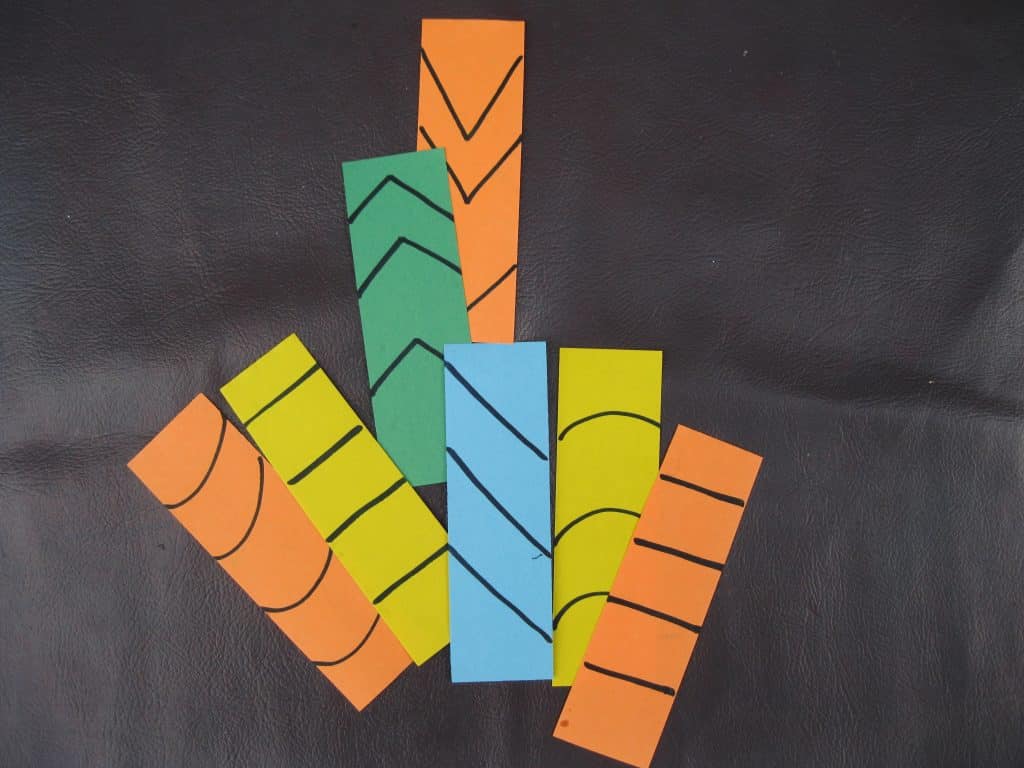
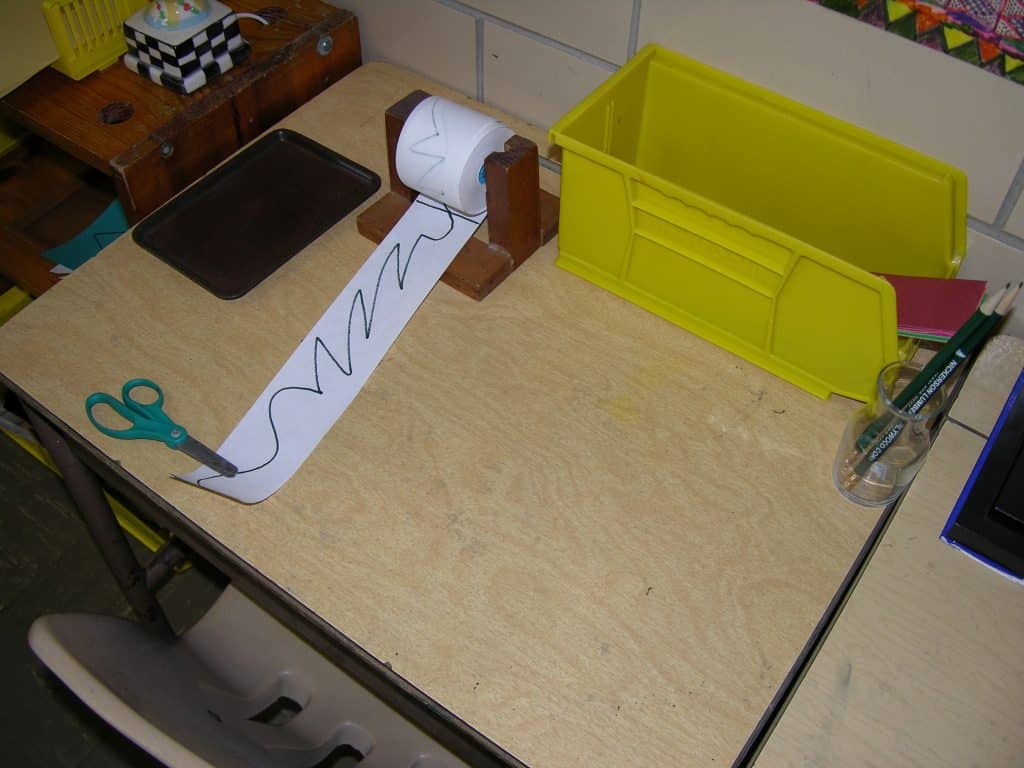 An individual lesson is needed when cutting the Montessori strips because this is the first time a child is expected to control the path of the scissors. The child is required to move the paper while cutting. The curved line is difficult because it requires the paper be continually moved. When moving the paper becomes easy, the child is ready for more challenging and creative work.
- Prerequisite: Cutting plain paper strips
- Direct Aim: To continue to develop the skill of cutting
- Indirect Aim: Creative use of the skill for making art
- Point of Interest: Keep your eyes focused on the line so your brain can tell your hand where to cut!
Materials:
- Masters of Montessori paper cutting sequence
- All equipment, materials, and containers that were needed for cutting the plain strips
- Envelopes for finished work
- Container for paper pieces left behind
Preparation:
- Copy the Montessori designed strips onto colored cover paper.
- Cut the strips apart.
- Assemble the activity.
- Decide where to place it.
Presentation: 5-6
- Introduce the work by name.
- Bring the work to your teaching mat if the work is not isolated.
- Demonstrate again the correct way of holding and using scissors.
- Cut a few shapes, demonstrating the new level of cutting difficulty which would involve moving the paper.
- Offer the work to the child. It may be necessary to help the child move the paper or hold the scissors correctly.
- Place wanted pieces in an envelope and unwanted in the recycle container.
- Replace work into the environment, if not isolated.
Extensions:
- Create a grid on a colored board and ask the children to paste their pieces on a square piece of paper, which when finished is placed in a space of their choice on the grid. Display finished work with a museum identification tag (See: The Environment for tag suggestions).
- Create with your students a plan for designing a border for a bulletin board using their cutting work. Start by asking a question such as “How can we use your exciting colored shapes to make a border for our bulletin board?” Staple or paste the shapes at random onto strips of colored poster board or cover paper.
Resources:
- Use 20 or 24 lbs weight colored paper.
- Packet of cover paper in many colors: Michael’s
- I advise against using construction paper.
Kirigami is a Japanese word that means paper cutting. The following activities are very simple kirigami pieces that can be made more difficult in order to facilitate the development of greater cutting skills. It is also indirect preparation for advanced work in this art form.
Georgie Story
When I first introduced kirigami to children, I made a variety of designs from simple to complex, knowing that most children can be relied upon to choose the best one for them. I created a complicated design of an eddy kite with a long tail of bows. I showed the activity to another teacher who was surprised I would include the kite design in the activity. She stated that it would stay in the activity and not be chosen.
It was perfectly cut and mounted the first day it was in the environment. It was done by a five year old child who had been taught paper cutting from a very young age. It was the only design that would have interested a child with that much experience.
- Prerequisite: Cutting Montessori strips, simple stapling or pasting
- Direct Aim: To increase the difficulty of cutting
- Indirect Aim: Creative use of the skill for making art
- Point of Interest: When finished cutting, suggest children open both folded pieces of paper. This will reveal a shape made of paper and another made of space. The paper surrounding the negative space shape is not scrap!
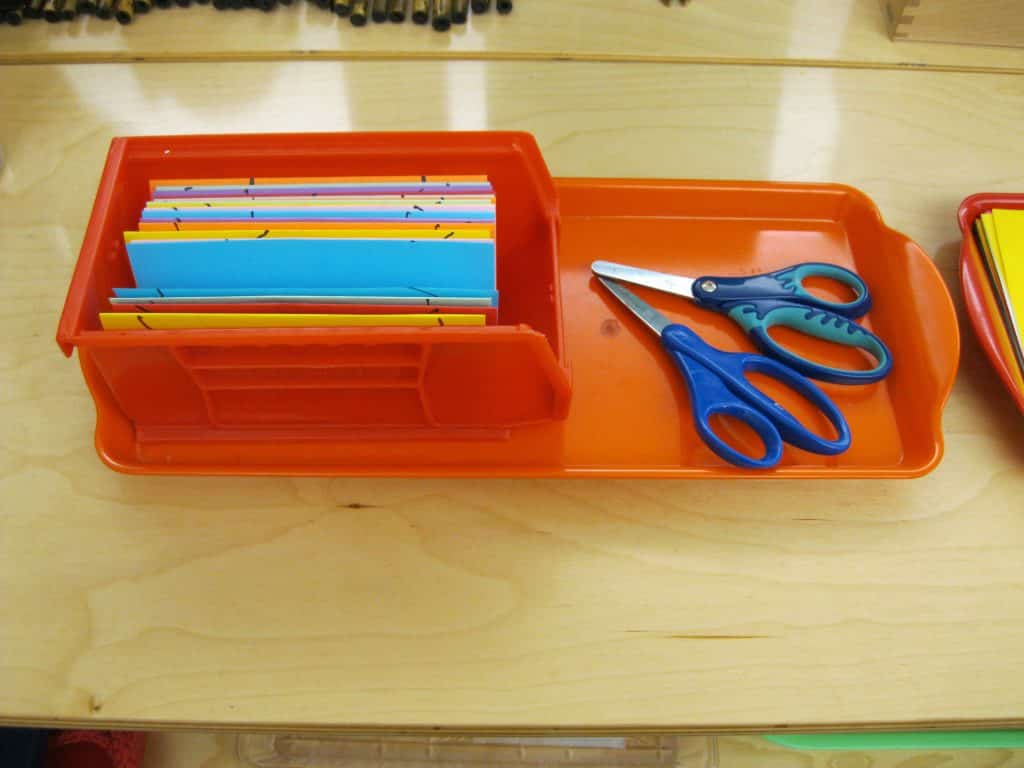
Materials:
- Squares of colored paper the size of metal inset paper (5½” x 5½”)
- Cut extra squares for mounting
- Two pairs of scissors
- A thin black marker
- Metal insets: Use the triangle, and you choose the rest.
- Container for the folded paper
- Tray for everything
- A container or napkin holder for mounting paper
- 2 staplers, paste or glue sticks
Preparation:
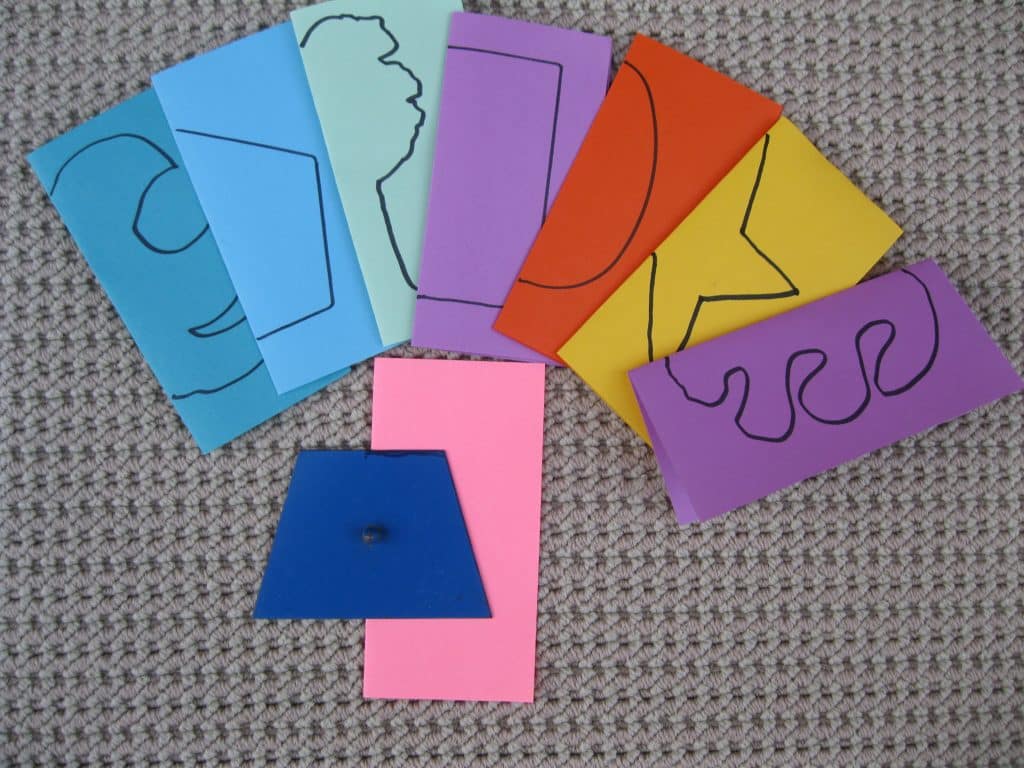
- Cut and fold the colored paper. Put some unfolded paper aside for mounting finished kirigami work (two pieces for each one cut).
- Produce strips of paper to set aside for Beginning Stapling while cutting paper for kirigami. Cut three 1” x 11” strips from 8½” x 11” paper until only 5½” x 11” is left. The paper is then ready to be cut in half to create 5½” squares, which are then folded in half for kirigami.
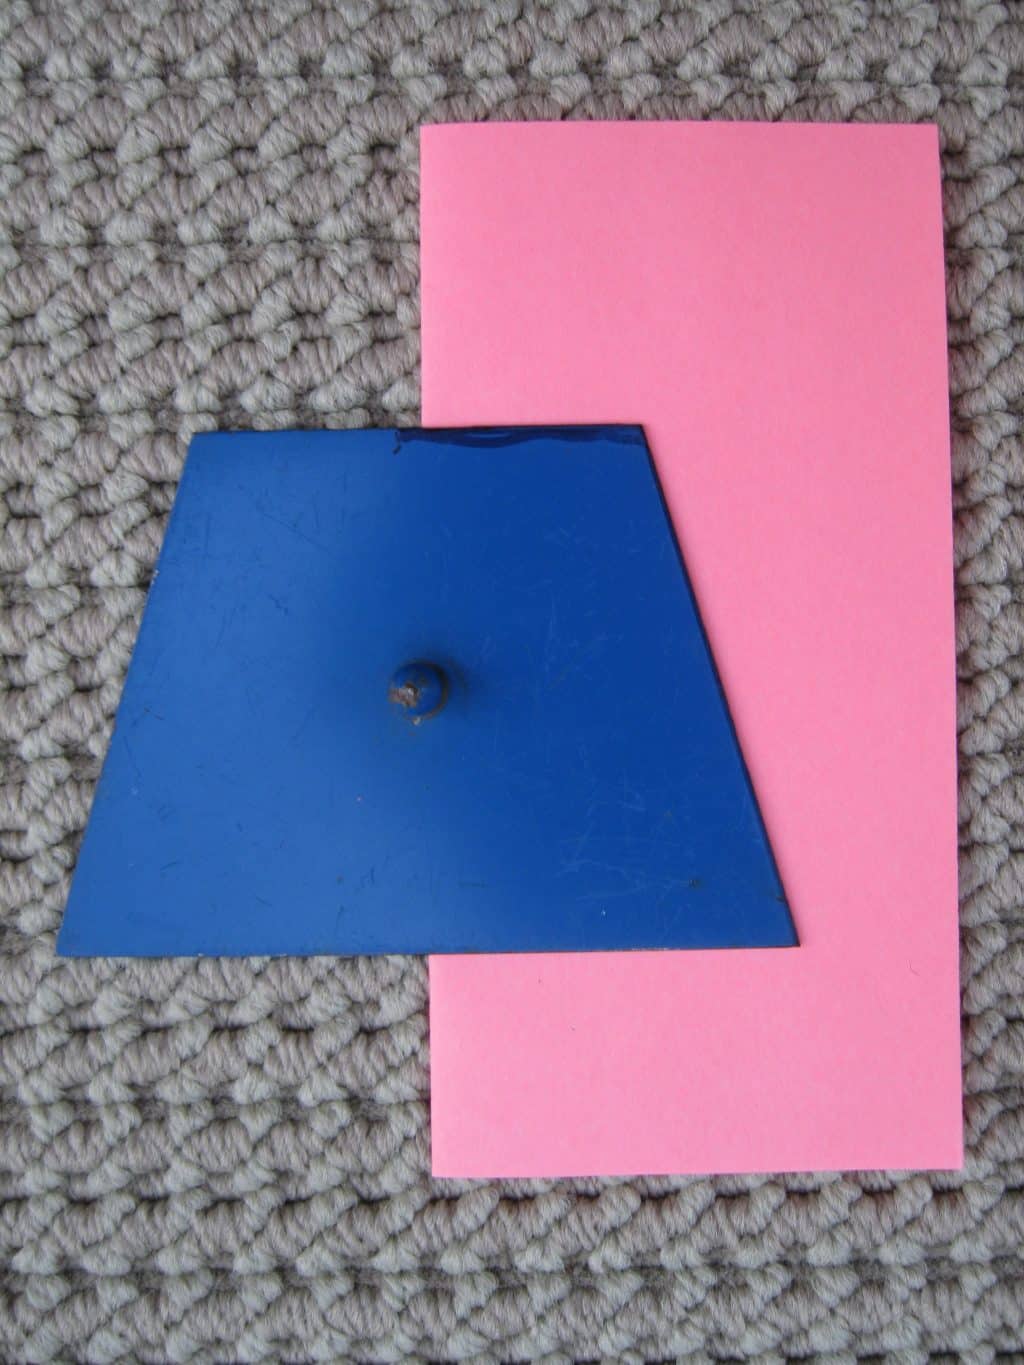
- Choose the metal inset shapes you wish to use. Place the shape’s vertical axis on the folded edge in the middle of the paper (see photo). The handle will be on the fold of the paper. Trace it using a black felt marker.
- Create free-form designs, or ones that will create objects such as trees, houses, stars, cars, hearts, snow people, etc. Along with the geometric shapes, it will increase the difficulty of cutting, and maintain your student’s interest in the activity.
- Note: You are drawing ½ of the object on the folded edge of the paper.
- Prepare at least two of each metal inset shape and an equal number of free form designs. Make several sets ahead to easily resupply the activity.
Presentation: 5-9
- Introduce the work by name.
- Show several of the line patterns and choose the triangle.
- Place the paper in your hand so that the folded edge is at the bottom.
- Review how to cut while watching the line.
- Emphasize putting the scissors down before unfolding the paper.
- Open the triangle to show them the shape you cut.
- Declare that you have two triangles, and open the other folded paper.
- Note: If you do not open the square to reveal the other triangle made out of space, the paper will be discarded as scrap, and teaching “negative shape” will be that much harder. Remind them that “nothing is always something, i.e., zero.”
- At this point, the work can be considered finished and taken home. However, the children will sometimes opt to continue the work if they are shown how it would look mounted.
Presentation: 5-9 Simple Mounting
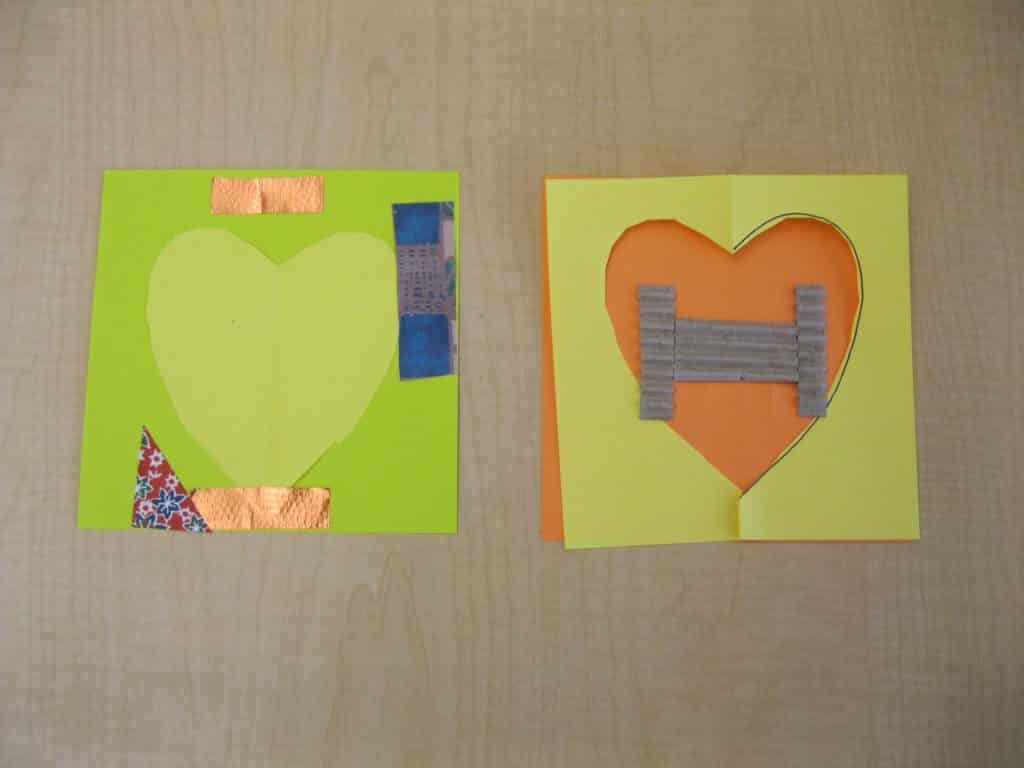
- “When we attach a finished work to a larger piece of paper to act as a frame, it’s called mounting.”
- Introduce the work by name. “We are going to mount one paper on top of another.”
- Choose two pieces of paper for mounting.
- Demonstrate the chosen way to attach the work to the mounting paper.
Extensions:
- For advanced work (6-12), present blank folded papers with a black felt marker pen so the children can draw their own designs. They will need an additional lesson. Start near the top of the fold, draw a meandering line around the paper, and exit near the bottom of the fold. The line cannot cross an already drawn one.
- Embellish the mounted work with markers, oil pastels, and/or a collage tray.
- Display finished work. Ask the children if they would enjoy sharing their work, and involve them in planning how it can be done.
- Create a grid the size of the artwork on a large piece of poster board or foam core. Include a plain border around the grid when designing the board, if desired. (See: Mounting).
- Create a border around the room or doorway. Use smaller square paper.
Resources:
- Colored cover paper: Michael’s
- Colored copy paper: $.03 per sheet, Office Depot & OfficeMax, colors limited
- AstroBrights Paper: Office supplies, Amazon, Target
- Dick Blick Arts and Crafts: Fadeless Designer Art Paper
- AstroBrights Papers: Colors can be bought from a Neenah Paper Distributor near you using your zip code. Each color is sold in a 500 sheet package each costing a little over $14. Organize a group and share the cost. Note: Not every distributor carries all the available colors. 1-800-558-5061 Customer Service, neenahpaper.com
- My choices were: Solar Yellow, Orbit Orange, Re-Entry Red, Gravity Grape. Celestial Blue, Gamma Green.
- Temko, Florence. Kirigami: Greeting Cards and Gift Wrap. Boston:
Tuttle Publishing, 2004. - Temko, Florence. Origami and Kirigami: 75 Fun-to-Do Projects. Mineola, New York: Dover Publications, Inc., 2002.
- Askew, Mike and Ebbutt, Sheila. Geometry: the Size and Shape of Everyday Math. New York: Metro Books, 2011:166.
- Badalucco, Laura. Kirigami: The Art of 3-Dimensional Paper Cutting. New York: Sterling Publishing Co. Inc., 2001. (Very advanced work)
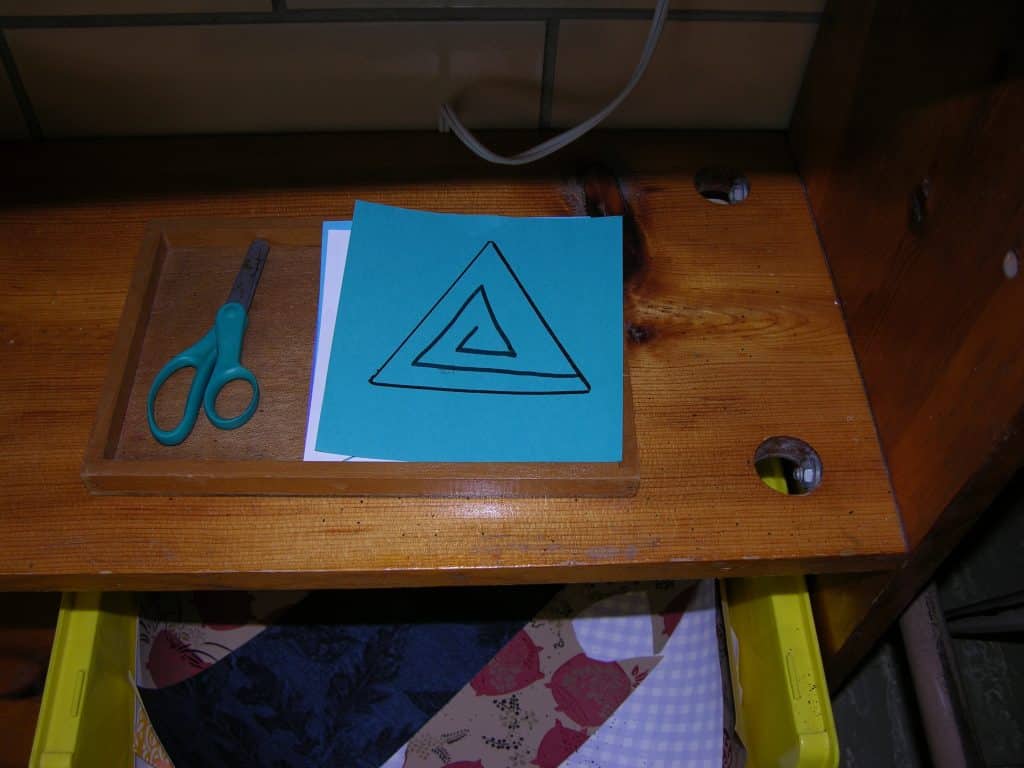
This activity is designed to extend the time used to practice cutting. Ask your children to think of a clever way to use the finished work. For example, paint a fallen tree branch and hang the spirals off of it; place the branch in a corner of the room or office. Or, could the spiral be a note that is to be hung when taken home in an envelope?
- Prerequisite: Kirigami. Knot tying lessons (See: Knot Tying lessons that appear later in Basic Skills)
- Direct Aim: To increase the difficulty of cutting
- Indirect Aim: Creative use of the skill for making art
- Point of interest: “Would you like to hang your work?”
Materials:
- Different shape spirals printed on colored cover paper
- Two pairs of scissors
- A paper punch
- String on a letter I (see photo), or on a plastic hair-curler cylinder
- Necessary containers
- A tray for the activity
Printable PDF to cut shape spirals

Preparation:
- Copy the PDF sheet of Shape Spirals included in this Section onto as many different colors of cover paper as you have.
- Cut the four sections apart and place in a container.
- Loosely wind warp thread or # 3 crochet thread onto a wooden Letter I and place in a container.
- Place the scissors and paper punch in a container.
- Assemble the work.
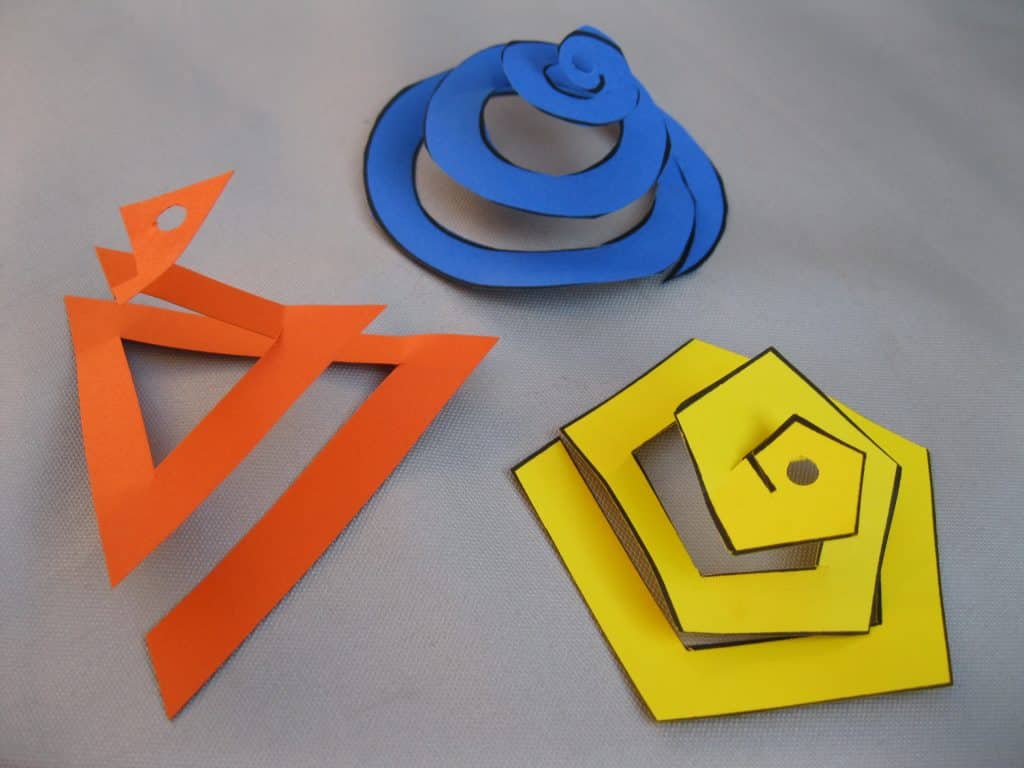
Presentation: 5-9
- Choose the triangle and give your demonstration.
- Cut out the entire triangle. Put scraps into a box for collage.
- “Find the line that touches the outside edge of the triangle.” Point to the line. “That is where to start cutting.”
- “Follow the line all the way to the very, very end until it changes direction. Leave the scissors in the paper. Use your other [subdominant] hand to move the direction of the line on the paper so you can see the next part of the line. Continue cutting. Remember, the scissors don’t move, they just open and close.”
- “Leave the scissors in the paper every time you need to change directions.”
- “Stop when you run out of a line.”
- “If you wish to hang it, punch a hole in the center of the shape and attach a long string. Tie three knots”
Extensions:
- Enlarge the designs. Compose notes that are designed to be hung when taken home in an envelope. (See 5 x 5 sample included here.) Let the child practice writing the note on white copy paper first.

Resources: See: Resources for Kirigami
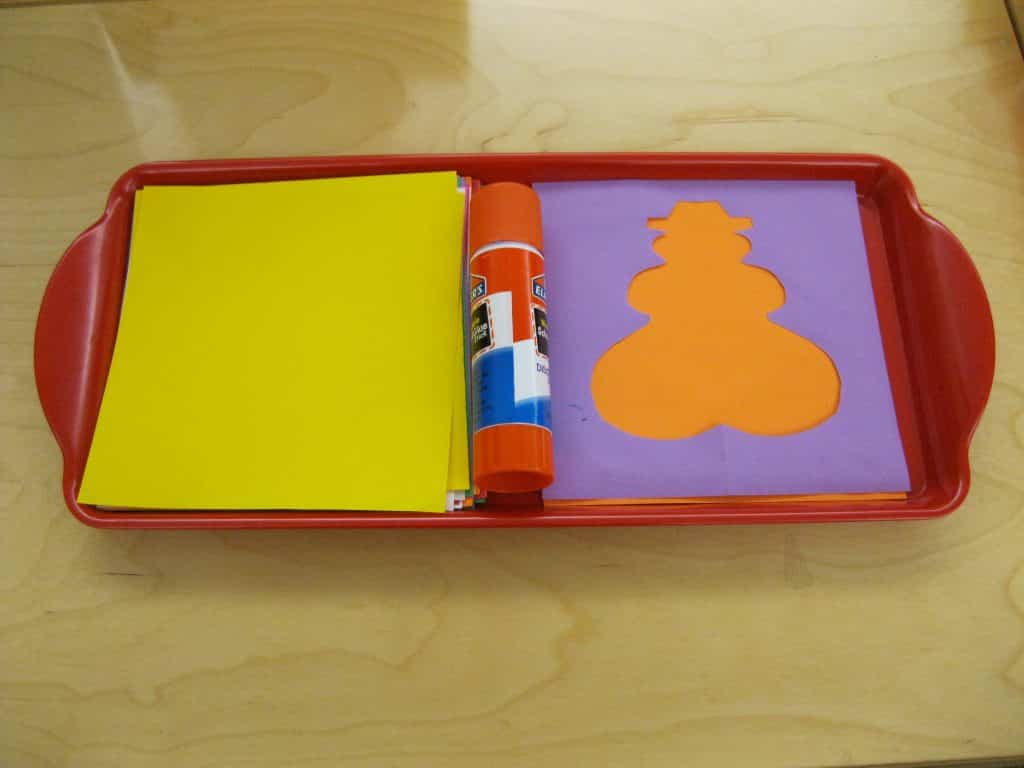 Mounting can be introduced using any work generated by the basic skills activities, especially kirigami and any metal inset work. Mounting is the simplest way to get artwork ready for display. While all two dimensional artwork can be mounted, kirigami and inset work are small enough for children to do successfully. True mounting is advanced work.
Prepare mounting paper to accommodate each activity you want the children to mount. Place it with the work for which it was designed. Simple mounting paper forms an even border around all four sides of the finished work. True mounting paper forms an even border around the top and sides of the work but is slightly larger at the bottom. This is because the optical center appears slightly higher than the physical center on the paper shape. Placing the work on the mounting paper so that the edges are parallel is a skill mastered over time. It may be mid-elementary level before true mounting with an extended bottom border can be attempted with success. Practice is needed.
All color combinations will work aesthetically. Make the mounting paper all one color if you plan to ask the children to produce a large panel of their works. Consider the visual cohesiveness of such a decision.
- Prerequisites: Kirigami or Metal Insets work, Beginning Stapling, and Glue Sticks
- Direct Aim: To mount finished work
- Indirect Aim: Preparation for matting
- Point of Interest: Point out how the mounting paper makes an interesting and pleasing thick border around the work. It acts as a simple frame.
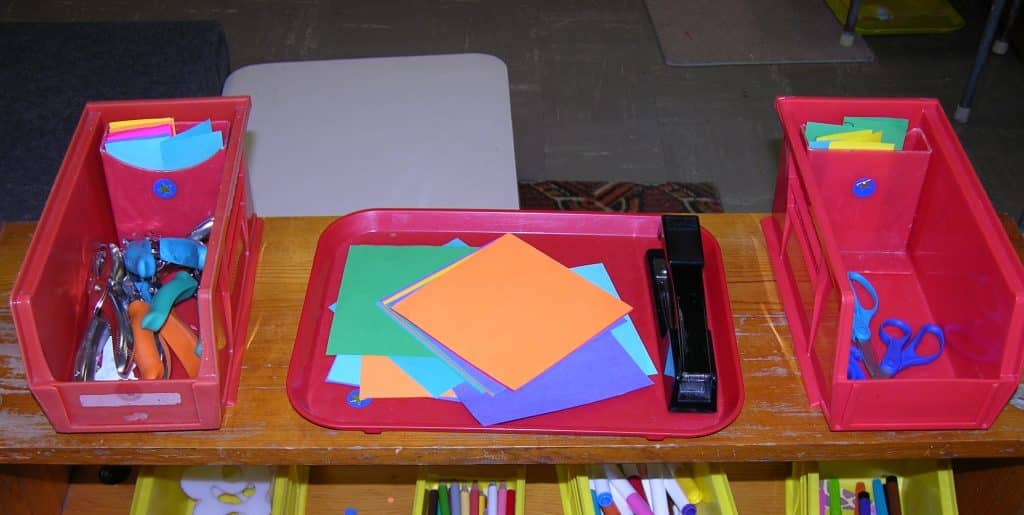
Materials:
- Cover paper cut to mount a specific art form
- A container for the paper (napkin holder, AkroBins)
- 1-2 staplers
- 2-4 glue sticks: higher level of difficulty for the older students
- Tray for the above or isolated on a table
- Sample of your work mounted
- A work to be mounted
- 2 pencils in a container
Preparation:
- Cut cover paper, oak tag board, or railroad board 1 inch larger than the art form to be mounted (6½” squares for kirigami and metal inset art). Keep all scraps for other work.
- Assemble the activity from left to right:
- Place the mounting paper in its container.
- Place the staplers and container of glue sticks next.
- Place the above on a tray, if presenting the activity on a shelf.
- Place the pencils in a container last.
- Mount a piece of your work for the presentation.
- Collect children’s work to be mounted for the presentation.
Presentation: 5-9
- Introduce the work by name. Show your mounted work.
- Reintroduce the chosen method(s) of attaching the art to the mount.
- Demonstrate your effort to center the work before you apply glue stick or use staples. “Line the work up so the top and side borders ‘look’ equal in size and the bottom matches.” Move your upper body around in order to see each edge of the work, which prompts the children to do the same.
- Center the artwork on the cover paper and staple, or turn the work over, apply the paste, center it, and glue in place.
- Put your name on the work and place it in the Finished Work box.
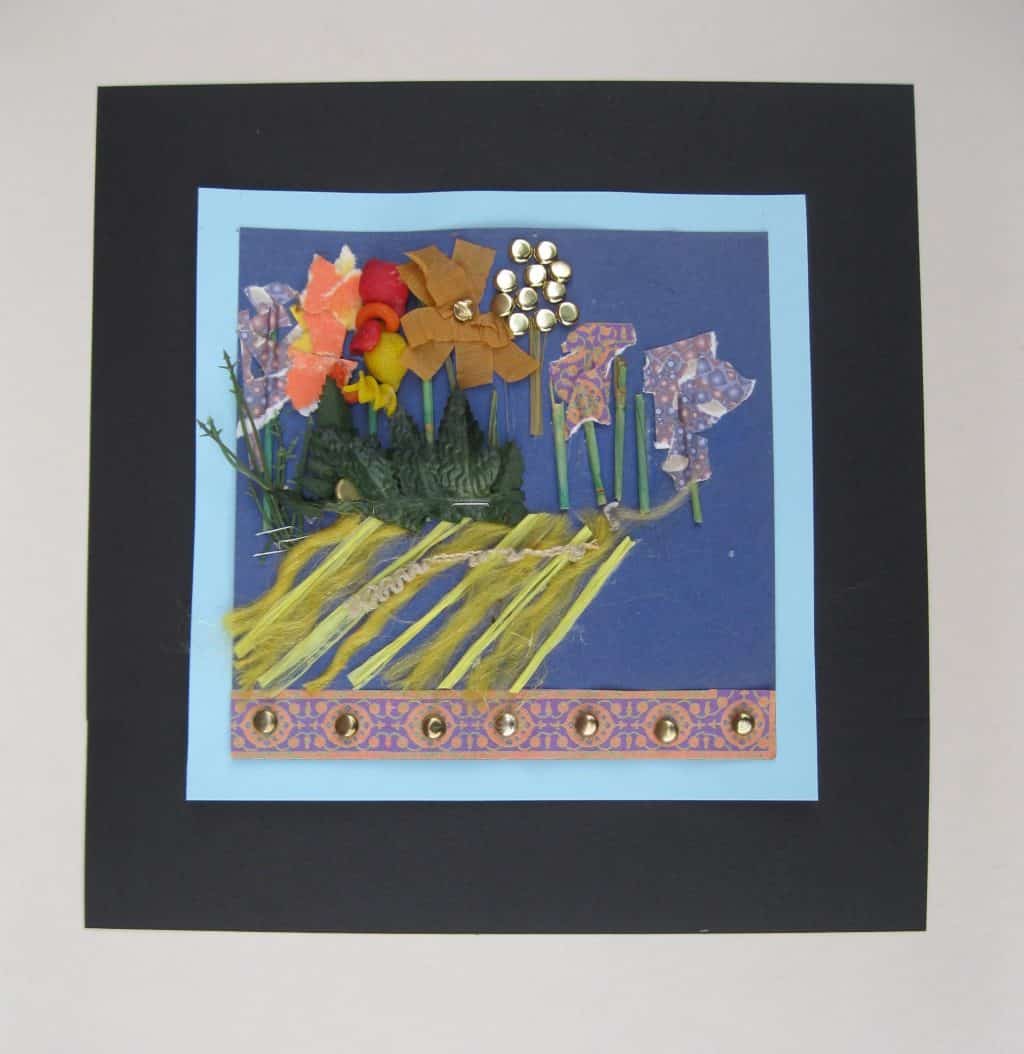
True Mounting:
- To be true mounting, the top and sides match in width and the bottom border is wider by at least ⅜” or more. The larger the work the larger the bottom edge.
- Metal inset mounting paper would be 6½” by 6⅞” or 7.”
- Pencil a “B” for “bottom” in the center of the back lower edge of the paper.
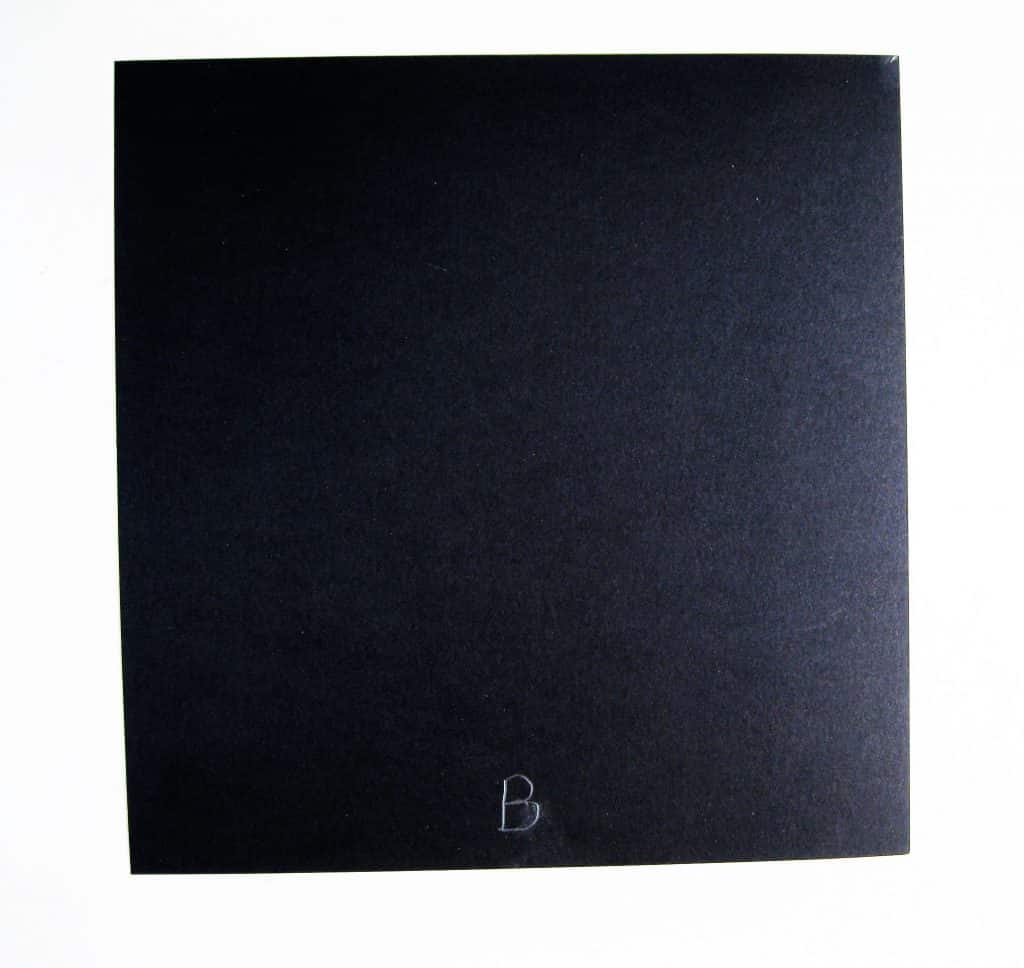 Extensions:
- Double mount the work for elementary students. First, the work is mounted on a paper that creates a ⅜” border all around the work, and then mounted on a larger paper that creates a wider border.
- It can be designed to be true mounting by extending the bottom width of the paper. Mark the bottom with a “B” on the back.
- Make a book of metal inset or kirigami designs, or a border for a bulletin board. Make the works smaller for a border.
- Create a grid on a colored poster board, on which to display the finished work. (See: The Environment for ID tag suggestions.)
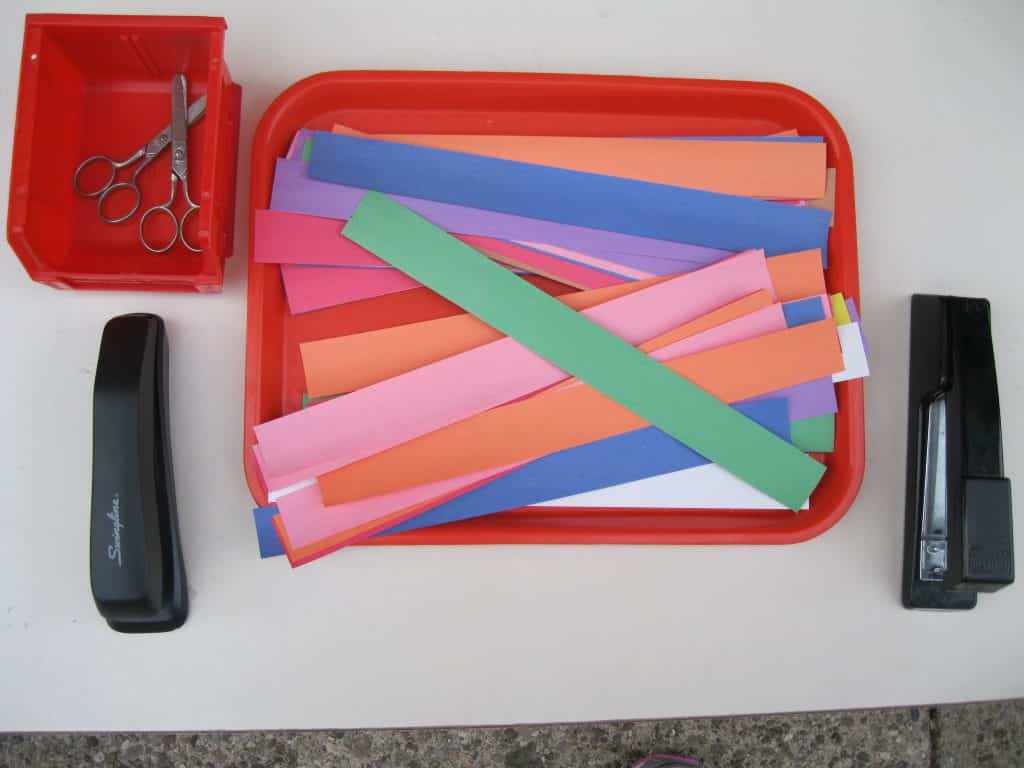 This simple skill gives rise to many other activities. It is as basic as cutting. Children want to use this equipment . Present this activity on its own table. It is more immediately accessible than when placed on a shelf. More advanced work can be introduced once the children can use the equipment safely. However, it takes time for the children to tire of using paper and the stapler.
The quality of the stapler is important. Heavy duty ones can weather the abuse of new users. There is a learning curve to using the stapler without slamming it down. Inexpensive ones break easily and discourage the children.
- Prerequisite: Practical Life and Cutting activities
- Direct Aim: To isolate the skill of safely using a stapler
- Indirect Aim: To develop the skill of stapling for creative use
- Point of Interest: Can you hear the stapler making two sounds? Ka-chunk.
How to use a stapler safely
- Open the stapler. Show the students where the staples come out, and the metal plate below that bends the staple closed.
- Close the stapler and show them where they want to place the paper, not their fingers!
- Show your students the staples and put them into the stapler. They are straight when they are loaded into the stapler.
- Place two strips of paper in the stapler.
- Use both hands to staple. Place one palm on top of the other palm and press down. Make your movement dramatic; use your body weight so they can see the force you need to close the stapler. It helps if the table is low enough for the students to use their upper body weight to staple.
- Explain that the staple is forced down through the paper, and the metal plate bends the ends in toward each other to clamp the paper together.
- Show the front and the back of the stapled paper.
- Note: One must use both hands to staple.
- Put the work on a floor mat for students who have a hard time pushing hard enough to staple. This will allow them to use their total body weight.
Materials:
- Strips and shapes of colored paper
- A tray for the paper
- Two staplers
- Staple remover
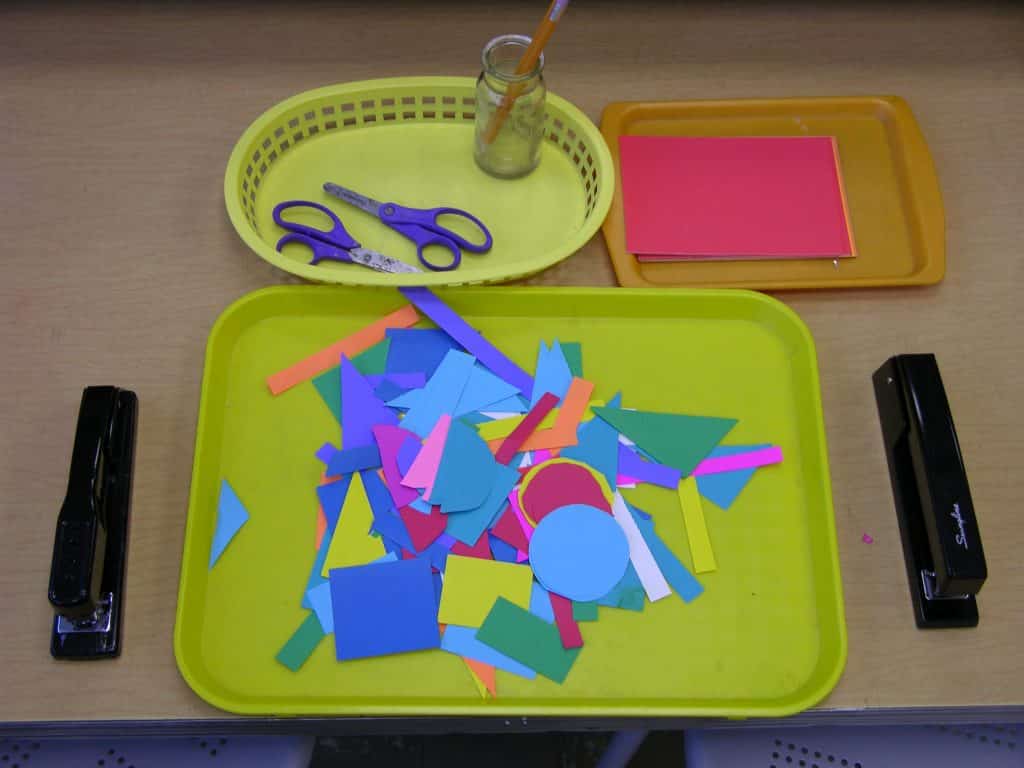
Preparation: 5-9
- Use the strips and shapes of colored paper created by preparing squares for kirigami, or cut any clean paper in the recycle bin.
- Rectangles and squares can be cut diagonally to create triangles.
- Avoid very small shapes for this beginning work.
- Isolate the work on a table or desk. This is standing or kneeling work.
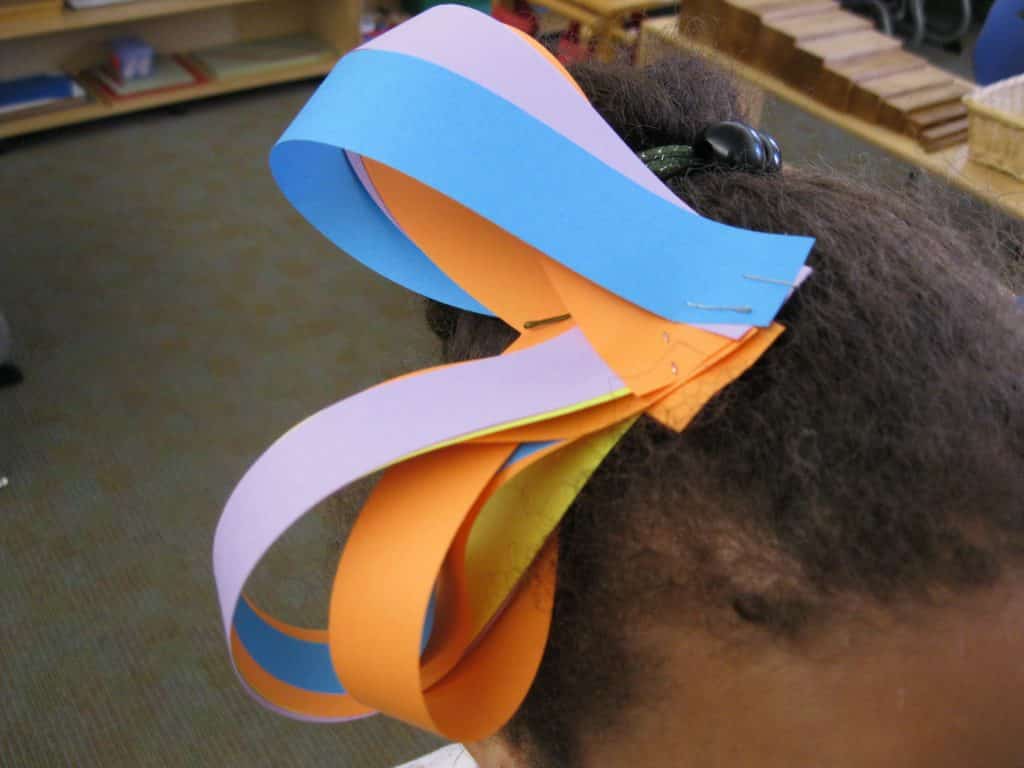
Presentation: 5-9
- Introduce the work by its name. Explain how the stapler works.
- Consider reciting “How to use a stapler safely”.
- Choose two strips or shapes and place in the stapler’s jaws.
- Place both hands on the stapler (palm on top of palm) and press down. Make your movement dramatic, using your body weight, so they can see the force you need to close the staple.
- Staple a second piece to the first two and ask the children to listen for the two sounds: Ka-chunk.
Extensions:
- Include two pairs of scissors to reshape the paper for their ideas.
- At first they will want to take their work home. Later, suggest they create a work of art using everyone’s stapling creations. Let them design the project. Be prepared to follow them. (See: Design by Consensus in the section Understanding Art). You can direct this project somewhat by suggesting a space for the work, or asking them if they can think of another place to put their creations.
Resources:
- Choose 20 or 24 lb weight colored copy paper sold in reams.
- If cost is a problem, organize a group of teachers to share the cost of basic colors such as yellow, orange, red, purple, blue, green, gray, brown, black, and the popular intermediate colors of blue-green and magenta.
- The Office Depot & Office Max printing centers sell good colored paper at three cents a sheet as of 2017.
- See: Kirigami Resources for more details about colored paper.
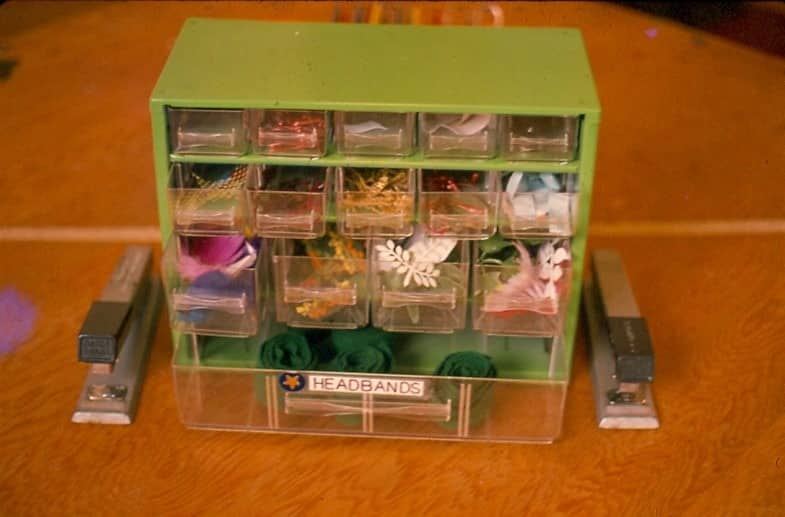
This is a teacher initiated activity. The idea is supplied in order to increase the skill of stapling. The materials are so interesting and attractive that children wish to use them. The materials are smaller and require greater skill to use them. Once this activity is mastered, the stapler can be added to other activities without a lesson for its use.
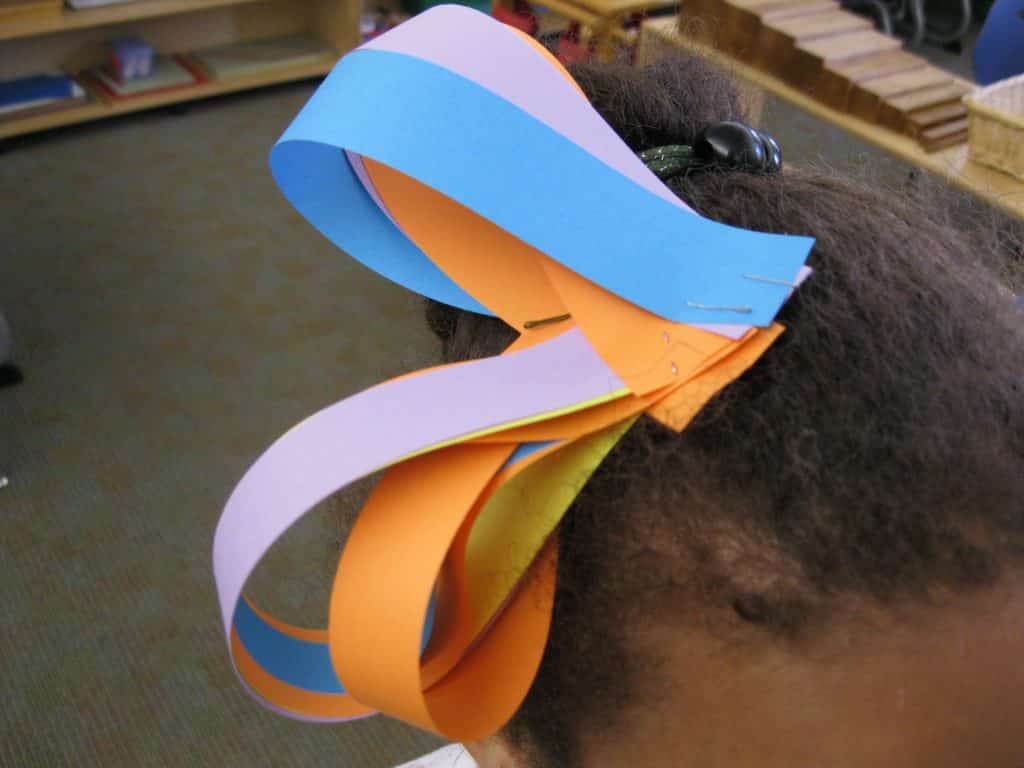
Enjoy the task of selecting materials for this activity. While materials are suggested, you will find some so wonderful that you will wish you were a child in your own environment.
Note: Decide whether the children may wear their headbands as soon as they are made, or put them in a place to be taken home. Will there be a limit as to how many each person can make?
- Prerequisite: Paper stapling
- Direct Aim: To increase the skill of using a stapler
- Indirect Preparation: Increase stapling skill for creative use
- Point of interest: You may wish to try stapling two or more things on top of each other.
Materials:
- Strips of colored felt
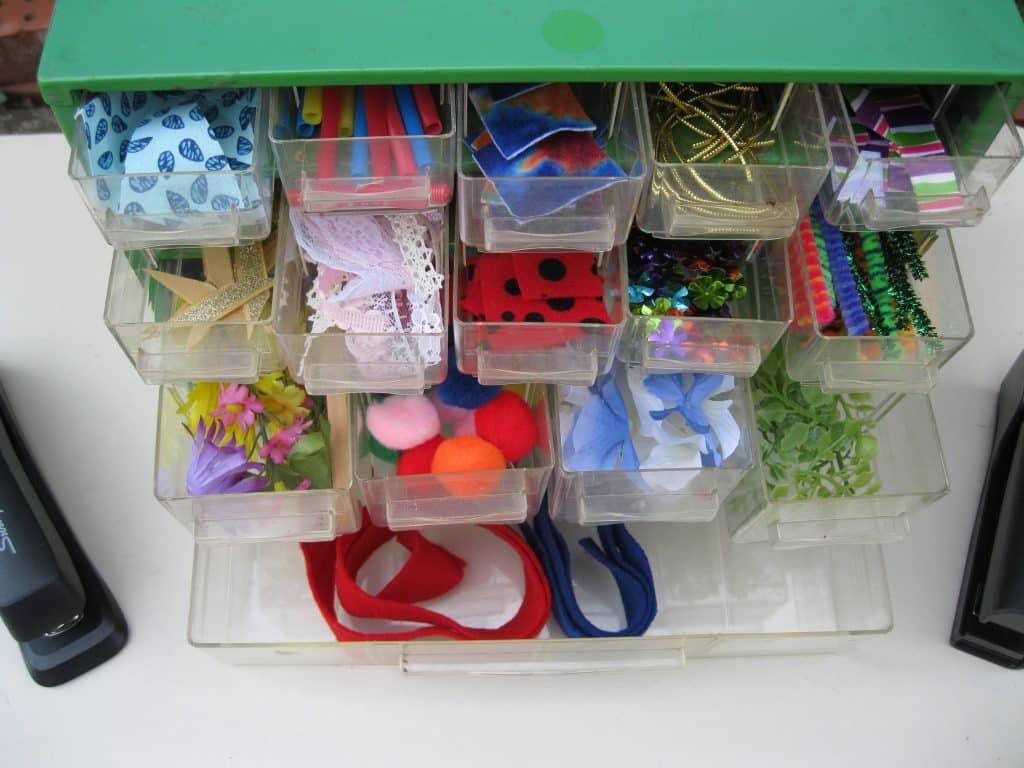
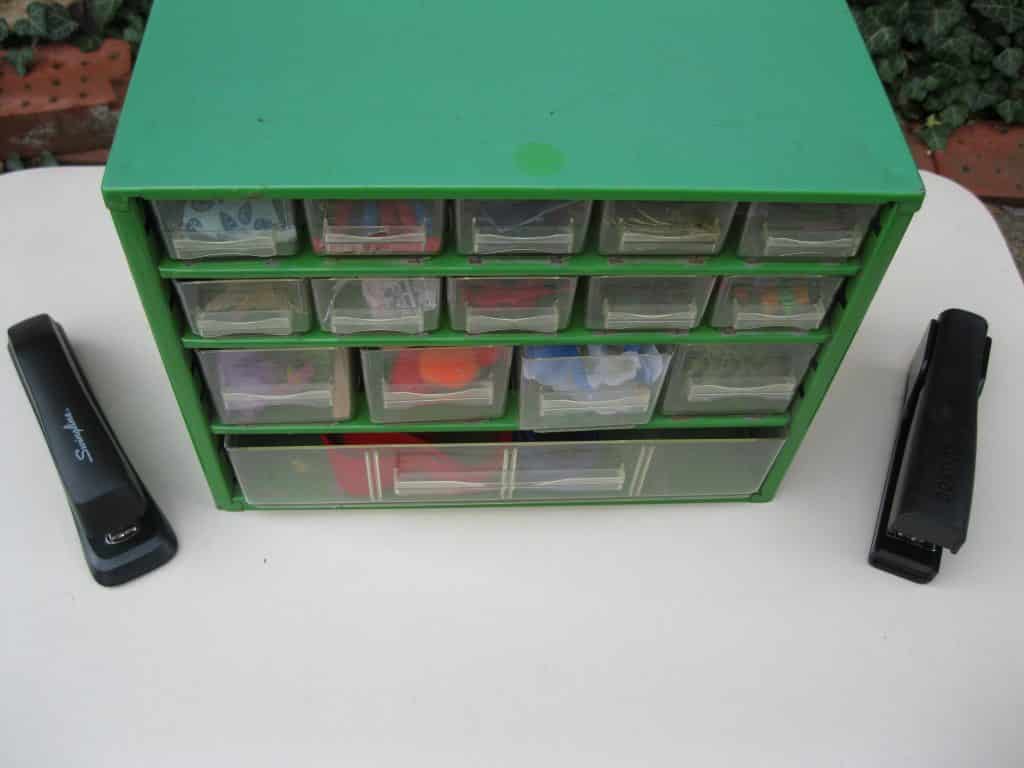
- Storage cabinet with drawers; one large drawer at the bottom for the felt strips, and at least 8 to 12 smaller drawers for decorative items
- Two staplers
- Name tags and pieces of string in a container
- Envelopes for finished and unfinished headbands(See: The Environment)
- 2 pencils in a container
Preparation:
- Use a yardstick and fine felt tip pen to create the felt strips the width of the stick. Start by making them 18” long. The headband is designed to crisscross and hang down in the back of the head. It could be designed to encircle the head only. Choose the style that the children like best, or use both. I only used one color at a time, but varied the colors.
- Prepare items to store in each drawer of the cabinet such as:
- Colored feathers cut in half, exotic feathers
- Large and medium sized sequins
- Precut felt and/or plastic foam shapes
- Strips of lace or ribbon, strips of silver and/or gold rick-rack
- Silk flower parts (new), tiny sprigs of plastic flowers, clean plastic flower parts
- Strips of raffia, colored plastic or cellophane straws, jumbo yarn, chenille pipe cleaners
- Very small pom-poms
Note: paper decorations are not strong enough for this activity.
- Make name tags and strings (See: The Environment).
- Isolate the activity on a table. Assemble the activity. Present the name tags and envelopes with the work, and at the finished work desk.
Presentation: 5-9
- Introduce the work by its name.
- Open the bottom drawer and remove a felt strip.
- Demonstrate how it is worn around the head.
- Open a few drawers to show what is inside them.
- Fold the strip in half to find its middle and begin there.
- Announce that you are going to choose things from the cabinet that you like to design your headband. Choose one and staple it in the middle.
- Staple at least two more things onto the band to reinforce how to use the stapler. Place one on each side of the middle piece. “You may creatively add others from the middle out to the ends.”
- Staple a second piece on top of one in the middle. “You can staple as many things as you wish on top of each other.”
- Demonstrate how they can help each other fit the headband on their head.
- Staple the headband together.
- Make a name tag and attach it to the headband.
Note: Consider removing the staples so the headband can be used for another presentation.
Georgie Story
It was always important to me to let the children know that they were welcome to use as many decorations as they wished. Had I been given this work as a child, I would have encrusted my headband with as many of the most beautiful things available!
You may wish to remind them in some fashion. “What do you think you need to do if all the decorations have been used? Right, tell me and together we can fill the cabinet again. No problem!”
Extensions:
- Keep all the scraps that you make cutting the headbands for collage, or small pieces of jewelry.
- Punch a hole in one end of the scrap strips and turn them into hanging strips that can be installed anywhere. Depending on the selected decorations, the whole piece can have a theme (i.e. Spring, The Sky, Valentines Day, etc.) decided upon by your class. Think about where to hang them in a group. Hand them up just out of reach. Hang them from the ceiling or light fixture. Make a group mobile. Put the work in the school office, library, or cafeteria.
- Six to eight inch strips can become Christmas tree ornaments, or Hanukkah or Kwanzaa decorations.
Resources:
- Arts and crafts catalogs and stores
- Fabric stores for decorative materials
- Discount stores: silk and plastic flowers
Pasting is the most sensorial of all the basic skills when done using the finger as the applicator. Health concerns require that a brush or spreader replace the finger. The following activities use paste, glue sticks, or glue. A glue stick acts as an extension of the finger. Paste and glue sticks are best used with paper. Anything heavier requires glue.
Buy high quality products. While school grade products are cheaper, they are harder to use because they do not perform well. It is difficult enough for the children to paste and glue without contending with materials that do not work! Buy the best you can afford. Explain this to parents. Give them brand names. Explain that you would rather have quality over quantity. Using paste, glue sticks, or glue requires a lesson on how to use them with control, as well as how to clean them up.
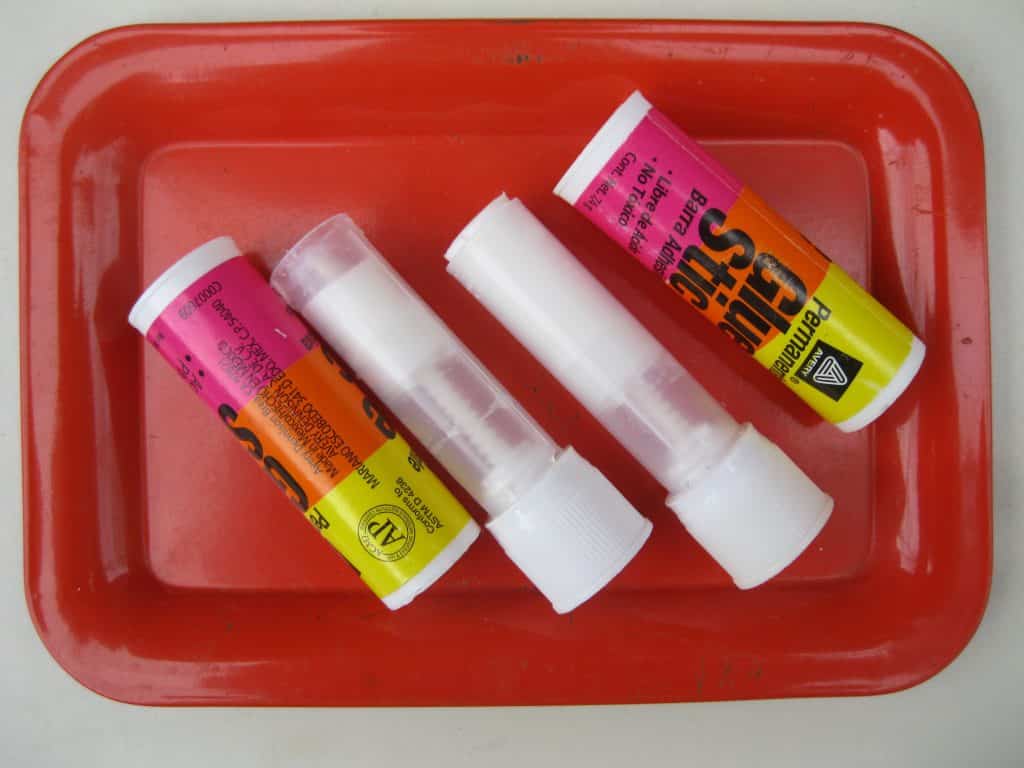
Demonstrate how to open the glue stick and wind the stick so only a small amount of glue shows above the edge. Going back to wind the stick up a couple of times during a lesson helps to clue the children how to use it. When you are finished using the stick, be sure to wind it down again so the glue is not visible above the rim. Replace the cap upside-down. Hold it on the table and push down until it clicks. Show the group again and ask them to listen for the click!
There are at least two different ways to use white resin glue. One product is runny and easy to spread or over use (Elmer’s Glue), and the other product is thicker (Tacky Glue). Learning how much glue is needed for any application is a sensorial sensitivity learned over time. I have never isolated gluing. Children are more highly motivated to use glue with control when used within an interesting art form. I suggest you buy at least a dozen two-ounce bottles of glue and a very large bottle to refill them. Even 9-12 year olds like the smaller bottles over the four ounce size. Two small bottles of tacky glue will be enough, since so little is used at one time. Glue, like paint and clay, is a high maintenance material.
Pasting
- Prerequisite: Practical life activities, especially ones involving water
- Direct Aim: To develop the skill of pasting with a brush or spreader
- Indirect Preparation: Creative use in making art
- Point of interest: See how little paste you can use and still have things stick together.
Materials:
- Paste
- Variety of colored paper shapes
- Prepared cover paper
- Hog bristle brush, or stiff square tip ¼” wide brush
- Containers for the materials
- 2 pairs of scissors
- Pencil in a container
- A sponge in a dish
- A work mat
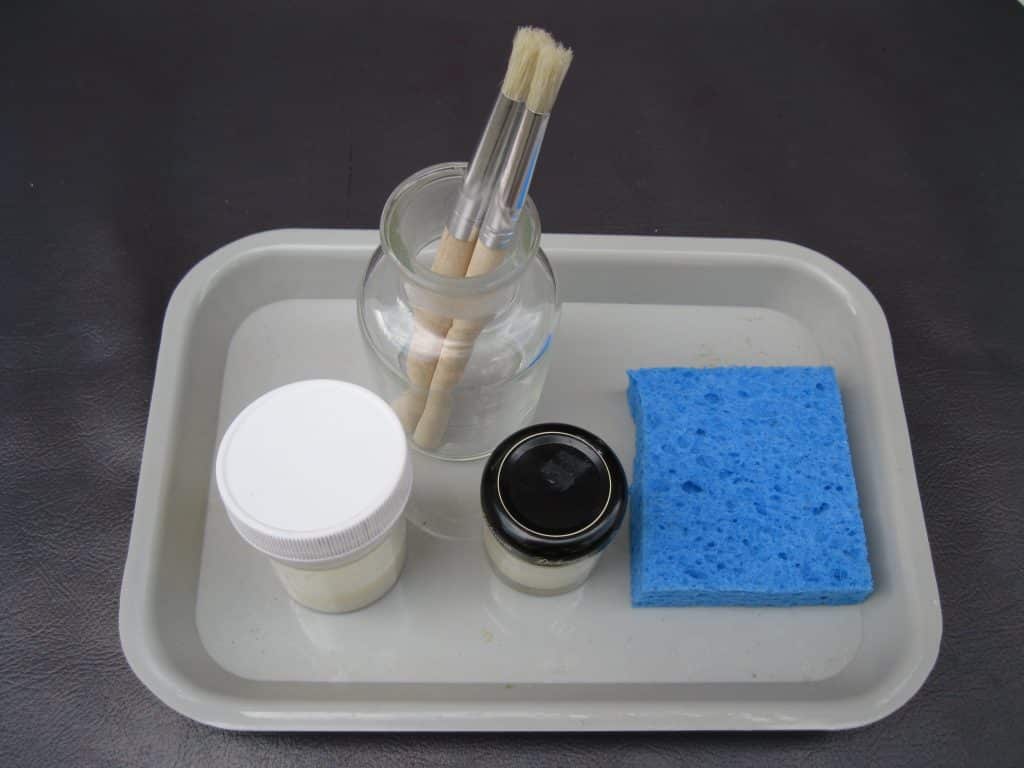
Preparation:
- Something to embellish.
- Use mounted Kirigami work, Origami work, stapling work.
- Cut paper into small shapes and place in a container.
- Cut cover paper into squares, rectangles, or other geometric shapes.
- Place a damp sponge in a container, on a dish, or in a square defined by tape for placement.
- Assemble the materials on a table or tray, in the order they are to be used.
Presentation: 5-9
- Introduce the work by its name.
- Select a piece of cover paper or a work you have already made. Put your name on the back it if needed.
- Select the first small shape and move it around the paper to demonstrate that you are thinking about where you want to place it. Share your idea. “I may be choosing a shape or material you like.”
- Use the scissors once to alter a shape.
- Turn the shape over and apply a small amount of paste around its edges.
- Press the pasted shape down with your fingers.
- Repeat the process.
- Let the group know that you are not finished and will continue the next time you give the lesson. Show them your name is on the work.
- Wipe off your fingers with the sponge and remove any paste from the work mat.
- Clean the sponge at the sink and return it to the work.
Resources:
- YES brand paste is strong and non-toxic. Find it in office and art supply catalogs or stores.
- Paste and glue spreaders: MontessoriServices.com
- Hog’s hair brush: School supply sites or Michael’s: Stencil Brush Set
- Buy Avery Glue Sticks marked Permanent, Acid-Free and Photo-Safe. They have a transparent holder for the glue so you can see it going up and down as you twist. This gives the child greater control of the stick. Its top is large and covers the whole stick, so it is easy to find if dropped. Scotch also makes one with a large top, but the holder is not transparent.
Extensions:
- Use wallpaper, origami paper, magazine paper and pictures, paper doilies, and wrapping paper for making the shapes. It becomes a mini collage tray.
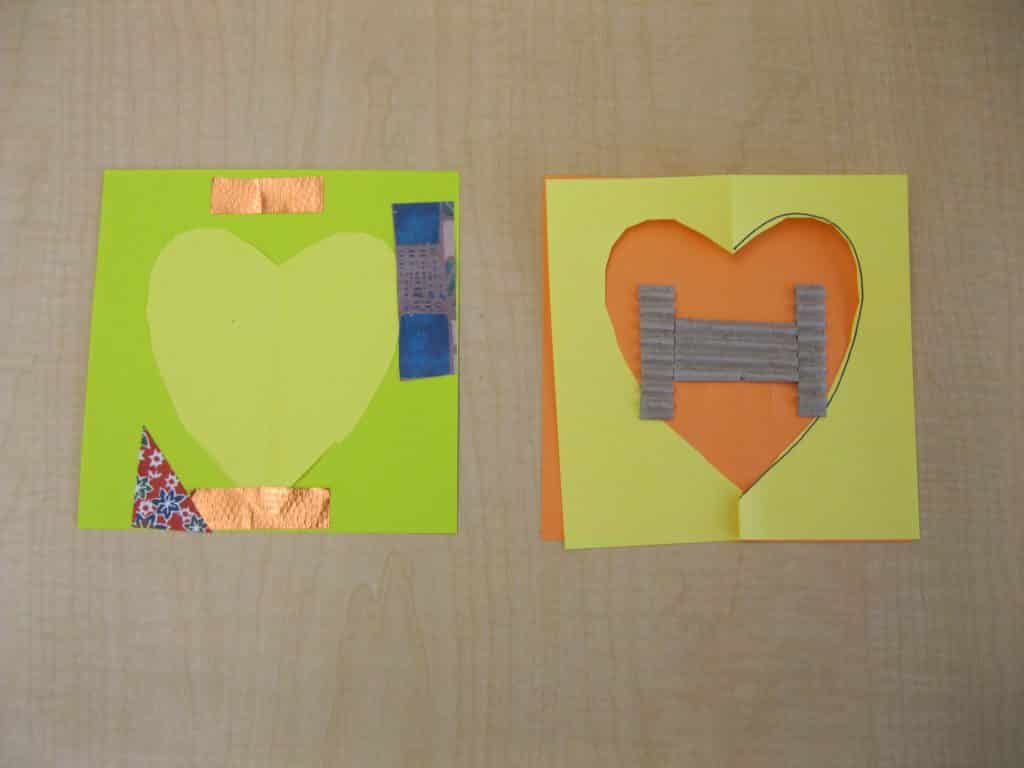
- Prerequisite: Pasting, Practical Life activities involving water
- Direct Aim: Develop the skill of gluing
- Indirect Aim: Creative use in making art
- Point of Interest: See if you can use so little glue that it will not ooze out when you push down on your work.
Materials:
- Small collage tray on a table
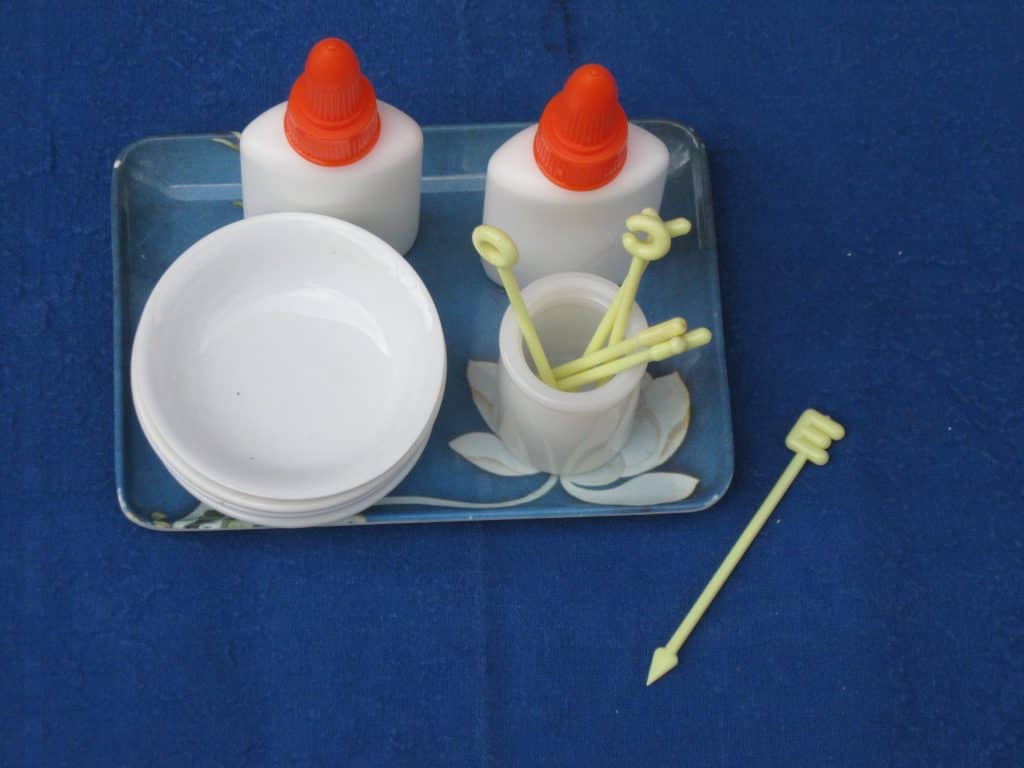
- 2 two-ounce bottles of white resin glue with labels removed in a small container or on a tray
- Note: Use Elmer’s Glue, not Elmer’s School Glue.
- Cocktail toothpicks in a container (one end is pointed and the other end has a capital letter or something similar)
- 2 butter dishes or empty refill pans that once held dry watercolor paint. The small container acts as a control of error and prevents too much glue from being used.
- 2 pairs of scissors in a container
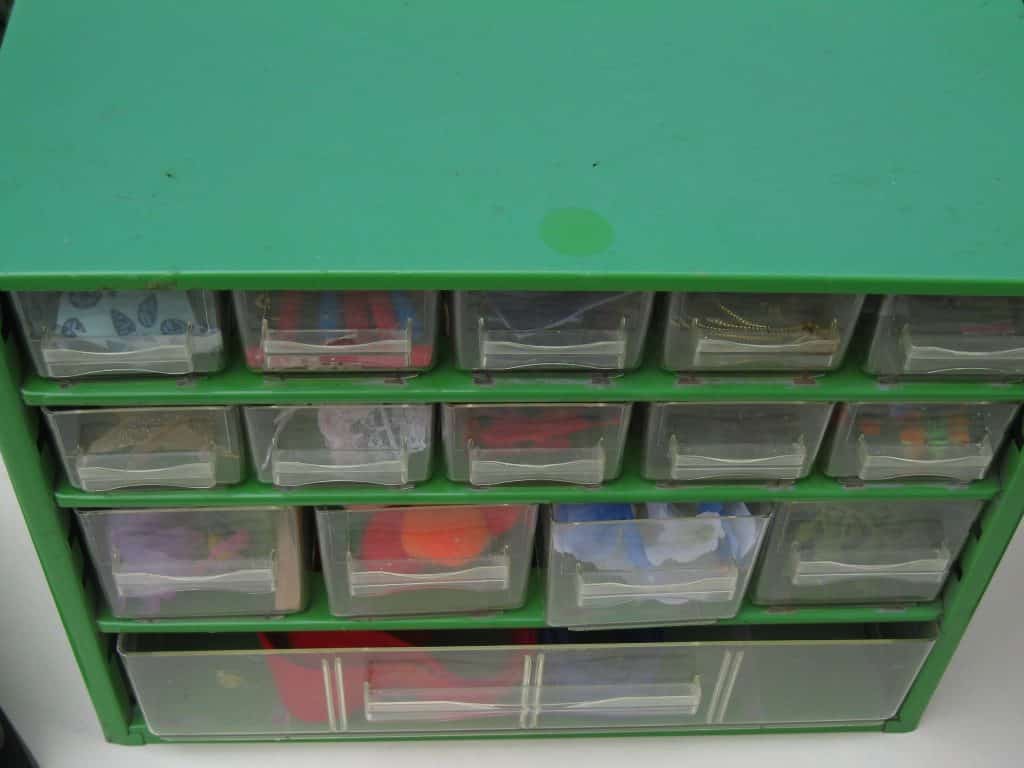
- A desk drawer organizer, approximately 9”x16”, or storage cabinet
- Choose collage materials such as
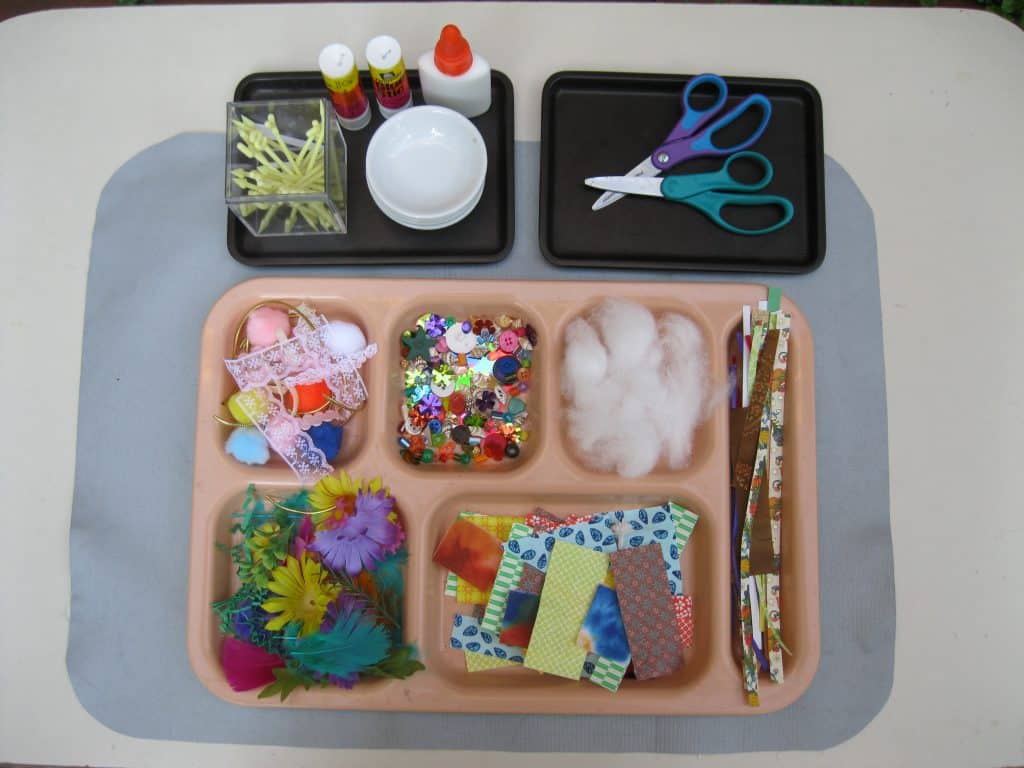
- Precut felt and/or plastic foam shapes
- Strips of lace or ribbon, silver and/or gold rick-rack
- Silk flower parts (new), tiny sprigs of plastic flowers
- Strips of raffia, jumbo yarn
- Pieces of colored plastic or cellophane straws
- Strip of chenille pipe cleaners of varied lengths
- White or silver/gold paper doilies cut into interesting pieces
- Wallpaper shapes or scraps
- Fancy origami paper, wrapping paper, designs printed on tissue boxes
- Plain and printed paper strips and shapes
- Colored feathers cut in half, exotic feathers
- Large sequins, flat buttons, small pom-poms
- Colored cover paper or railroad board 5½” x 5½” for collage
- Black cover paper or oak tag board 6½” x 6½” for mounting
- 2 pencils in a container
Preparation:
- Select the desk organizer or storage cabinet and select the collage materials for each of its compartments.
- Prepare collage materials.
- Cut the cover paper into 5½” squares.
- Cut the mounting board into 6½” squares.
- Assemble the materials and containers.
- Install the materials on a table next to a shelf, or ledge.
- Choose a place to put the finished work to dry.
Presentation: 5-9
- Introduce the work by its name. Collage is from the French word “coller,” meaning to glue. It is a young art form when compared with painting and drawing. It appears in the early 20th century.
- Demonstrate how to open and close the glue bottle.
- Announce your ideas for your work and then choose the one you like the best. Choose something they can relate to, such as my front door, a tree in my yard, my new necklace, my grandmother’s tea pot, my kirigami piece, or use something they are studying (kinds of leaves).
- Put your name on the back of the cover paper.
- Put a small amount of glue into a butter dish or other small container.
- Use the tooth pick at least once and suggest how to use each end (if they are different).
- Demonstrate at least once, how to use one drop of glue on a material straight from the bottle (optional).
- Use your finger to spread the glue. Demonstrate how to rub your fingers together until the glue dries and falls off.
- Custom cut a material at least once. Place the scraps back into the tray.
- Point out that the glue is strong after it’s dry, but ooey and gooey when wet. If you use too much and it oozes out from under any of your materials, it’s ok because the glue dries clear.
- Let the group know that you are not finished and will continue the work each time you give the lesson. Put your name on the work or show them your name if it is on the work already.
Extension:
- Add a variety of small rectangles of cover paper or railroad board to the already available squares.
- Use the tray to embellish any basic skill work, Kirigami, or Origami.
- Create a collage center at a later time that will be a true art form, not just an added decorative possibility.
Resources:
- Arts and crafts catalogs
- Tag board (oak color)
- Fabric stores for decorative materials
- Discount stores
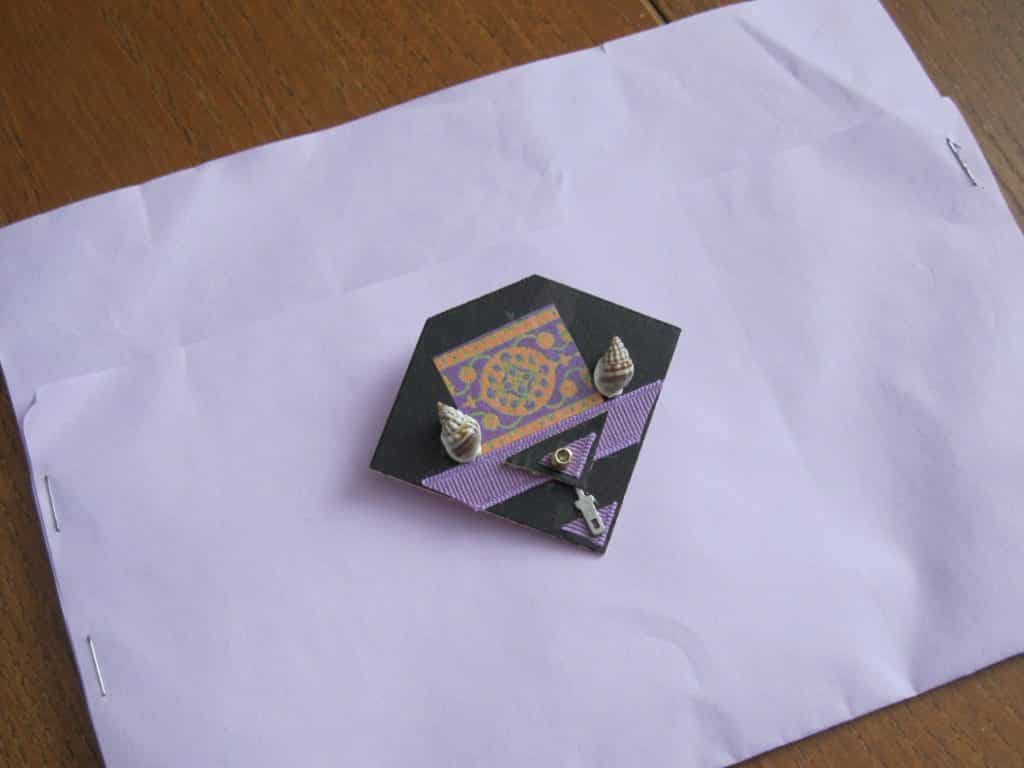
- Prerequisite: Pasting and glue 6-9
- Direct Aim: To review the skill of gluing
- Indirect Aim: Creative use in making art
- Point of Interest: Play with the materials and try several possible ideas before proceeding to the final design.
Materials:
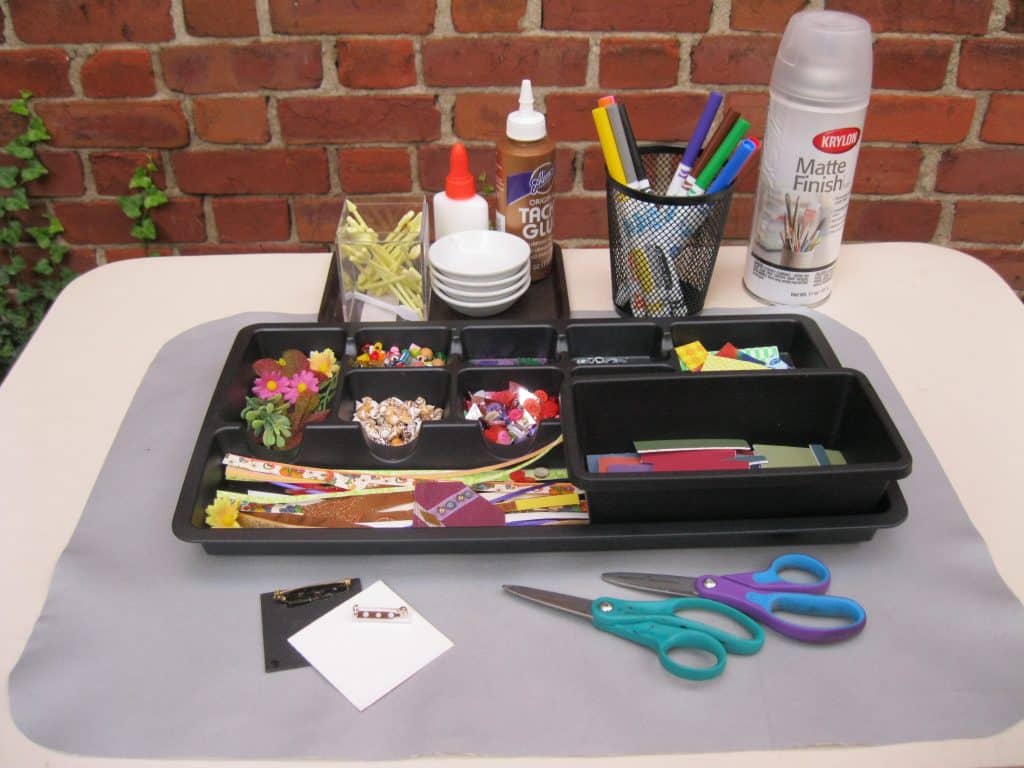
- Squares of mat board 2” x 2”
- 2 two-ounce bottles of white resin glue with labels removed
- Small bottle of tacky glue
- 4 glue sticks
- Toothpicks in a container; one end is pointed like an arrow
- 4 butter dishes or empty refill pans that once held dry watercolor paint. The small container acts to control overuse of glue.
- 4 pairs of scissors in a container
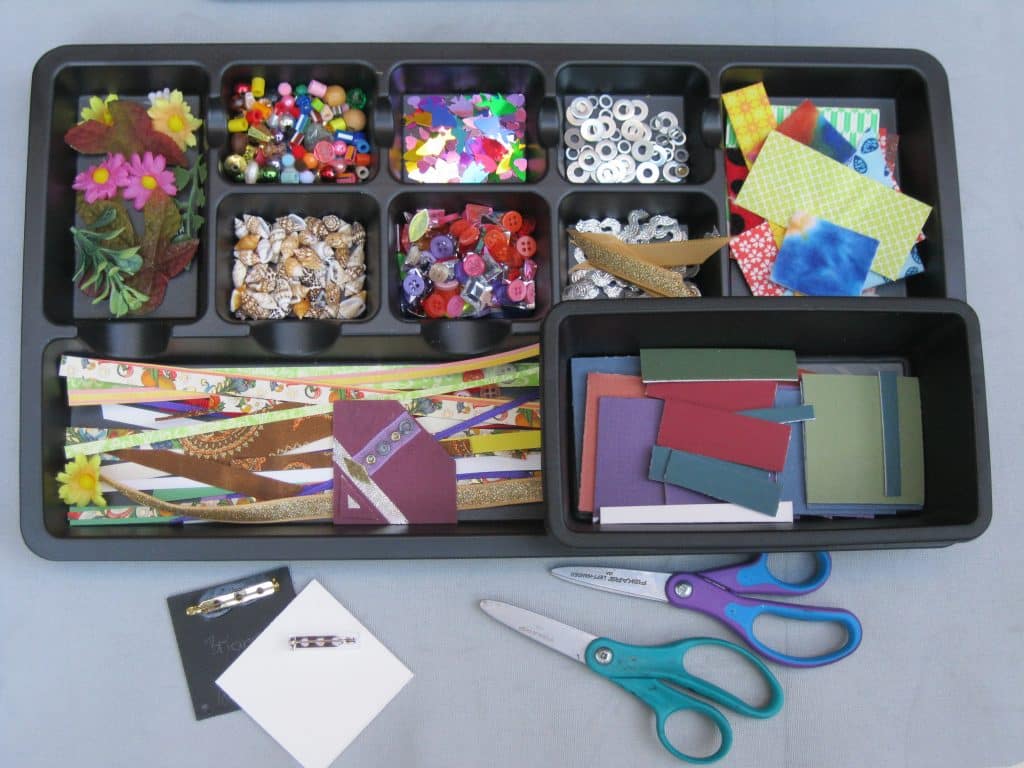
- A desk drawer organizer, approximately 9”x16”, or storage cabinet
- A variety of collage materials (See: lessons above)
- Pencils in a container
- 4 restaurant tip trays for gathering materials
- Storage envelopes in a container
- 1” or 1¼” pin backs (jewelry findings)
- A set of permanent colored markers to color the edges of the finished piece.
- Optional: Matte or gloss protective finish
- “Braid Mod Podge”, #7 brushes or
- Spray can of KRYLON Matte Finish 32-35 (my favorite)
Preparation:
- Select the organizer and select the collage materials for each of its compartments.
- Cut mat board scraps into squares and place in the collage tray or separate container.
- Tiny exotic feathers, sequins, beads, small buttons, shells
- Small plastic gems
- Strips of lace, ribbon, cord and leather of different widths, silver and/or gold rick-rack, raffia
- Tiny silk flower parts, tiny plastic flowers (new)
- Silver/gold paper doiliesPrepare small items and place in a desk organizer desk tool cabinet.
- Strips and shapes of exotic paper longer and/or larger than the mat board
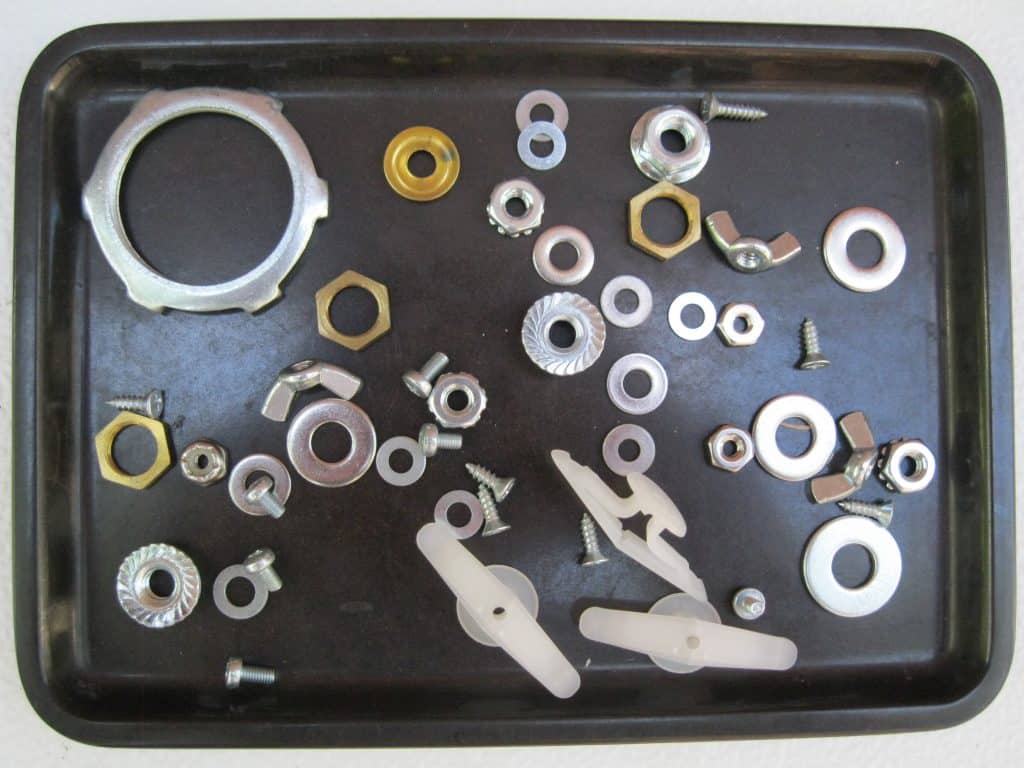
- Small interesting hardware pieces
- Have students cut out smaller shapes found in its design
- Place the pin backs in a container, in the tray, or give on demand.
- Choose a place to put the finished work to dry.
- Install the materials on a table or shelf.
- Enjoy making a finished piece to use with the lesson.
- Create a work plan (See: Work Plans in The Environment).
Presentation: 9-12 Step 1 of 2
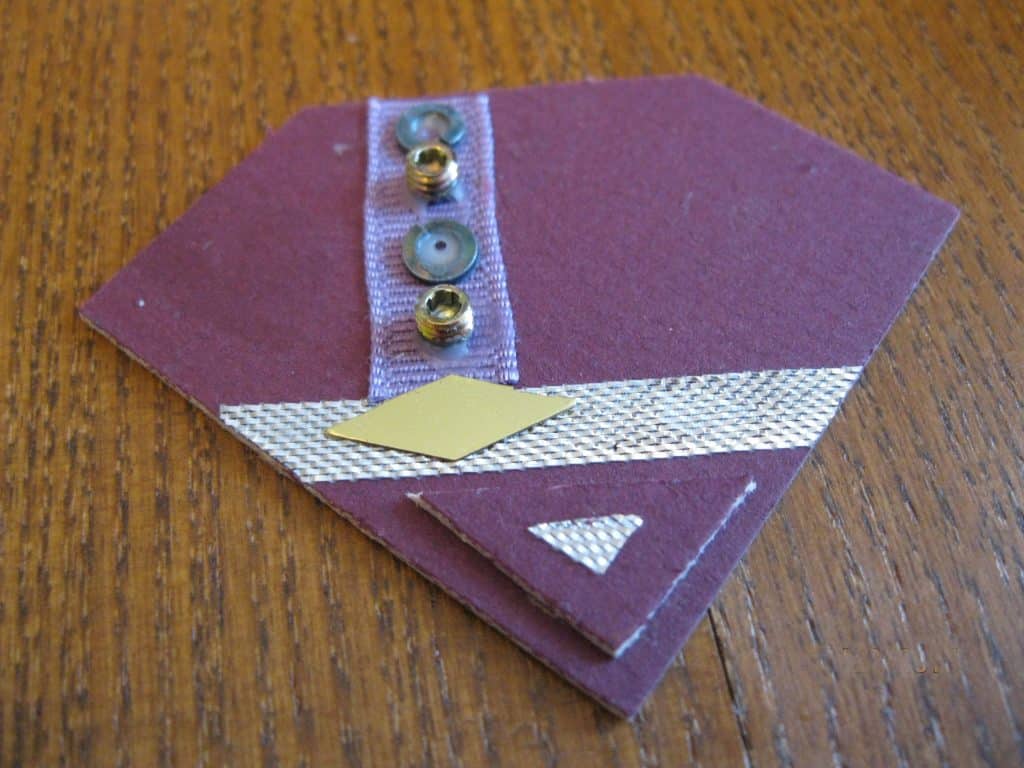
- Introduce the work by its name. Collage is from the French word coller meaning “to glue” (colle: the word for glue). Explain that the work is meant to be worn.
- Choose a color of mat board and 3 or 4 other materials, and place them on a tray. Gather equipment and supplies.
- Silently look at the square shape and move it into a diamond orientation then back to the square. Immediately put your name on the back of the board to indicate which you chose. Add that the orientation (the way the shape is viewed) can still be changed at any time.
- A utility scissor or mat knife is needed to cut mat board. Draw a line of the back of the square to guide the cut.
- Talk about the background of your piece. Ask yourself questions so the students can hear the evidence of your planning. “Do I want the background to be the color of the square? Do I want a paper shape as part of the background?”
- Review chosen materials and decide which adhesive each needs.
- Use a glue stick to adhere paper to the shape.
- At least once, review how to open and close the glue bottle and demonstrate how to use one drop of glue on a material.
- Use the toothpick at least once. Toothpicks can be used to move things around.
- When you use the white resin glue, point out that it is strong when dry but ooey and gooey when wet. Mention that if you use too much glue and it oozes out from under any of your materials, it will dry clear and appear shiny.
- Use the tacky glue for materials like beads, cords, or shells.
- Clean up the work space and activity.
- Put your name on an envelope. Store your pieces of material, if not finished. Put the wet work on top of the envelope, and put it in the drying space.
Presentation: Step 2
- Demonstrate brushing on the protective finish and how to clean up the work. Follow the product’s directions.
- Note: Only adults should apply the KRYLON spray-on Matte Finish to the children’s work. Read the instructions on the can. Spray only in a well-ventilated space away from children.
- Use Tacky Glue to adhere the pin back to the back of the jewelry. Make a line of glue slightly above the center of the piece so it will hang correctly.
- Avoid getting the glue too close to the movable parts of the pin back.
Extensions:
- Make earrings and barrettes.
- Use this activity for a parent night get-together. The children will teach their parents or other guests how to do the work. Have volunteers and lots of puzzles and games for younger children.
Resources:
- Michael’s: small scraps of mat board, tiny shells, and other tiny decorations
- Arts and crafts catalogs: jewelry findings, tiny decorations
- Fabric stores for decorative trims, ribbon, small pieces of cloth
- Oriental Trading Company: collage materials and interesting paper
- Request a catalog: 800.875.8480, shop on line
- Hardware store: tiny interesting metal pieces such as:
- Washers
- Toggles
- Wing Nuts
- Brass Washers
- Machine Screws
- Whiz Nuts
- Key Nuts
- Hex Nuts
- ⅜” Sheet Metal Screws
- Prerequisite: Hand strength to use the punch
- Direct Aim: To use a hand-held paper punch to produce another work that can be mounted
- Indirect Aim: To use the skill creatively to make art to introduce another activity with negative shapes
- Point of Interest: “Tell me what you discovered doing this work, please.”
Materials:
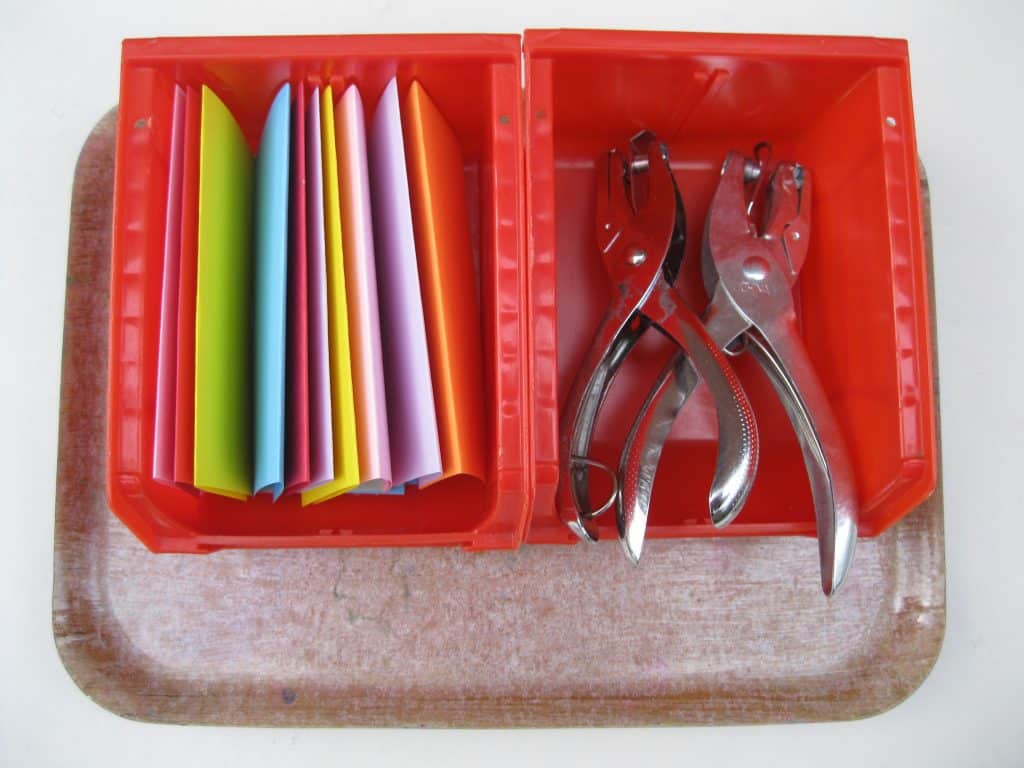
- 4-6 paper punches with a variety of size and shape holes
- Folded colored paper
- Cover paper or tag board squares for mounting
- Containers and trays for the above
- 2 glue sticks
- Optional: Provide coin envelopes to store the tiny paper shapes to take home, or to recycle into a collage activity.
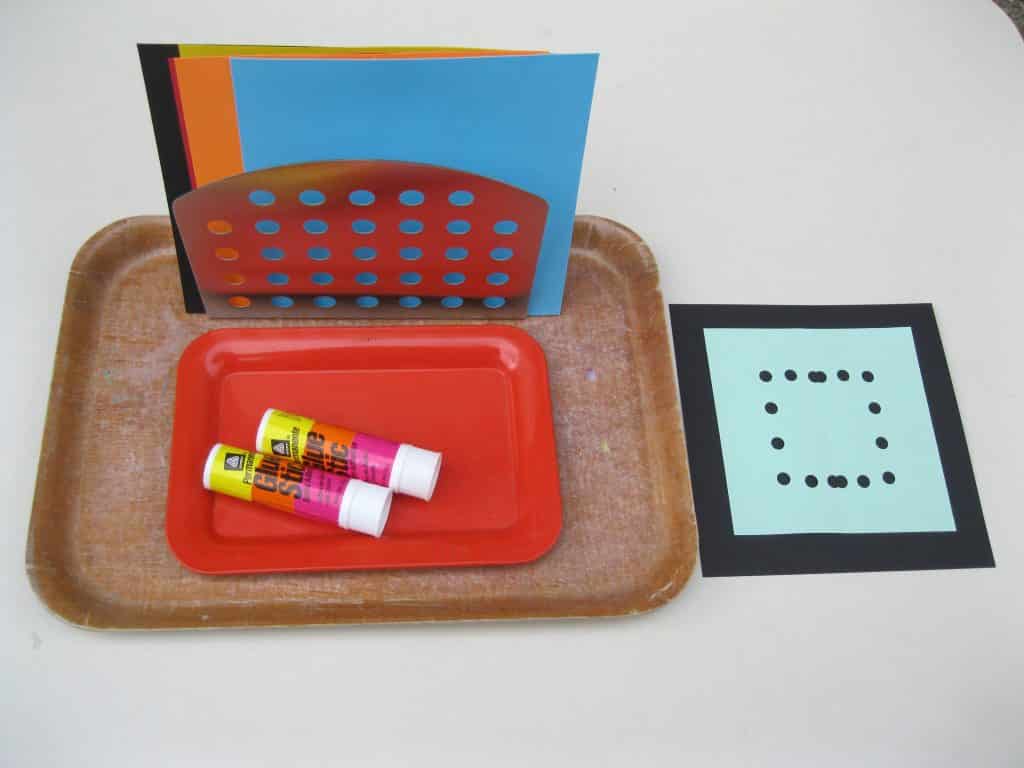
Preparation:
- Cut colored paper into 4½” squares and fold into rectangles.
- Cut matching mounting cover paper 5½”.
- Place the prepared paper and the punches in two different containers.
- Provide a pencil.
- Put everything on a tray and place on the shelf with the other skill building activities.
Presentation: 5-9
- Introduce the work by its name.
- Select a color of paper and a hole punch.
- Point out with your finger where the paper is to be inserted.
- Place the paper under what looks like an upturned tongue.
- If it is inserted above the tongue, the punch sticks in the paper.
- Insert the folded side of the paper into the punch. Make a hole.
- Open the paper to reveal the two circular holes. Refold the paper.
- Demonstrate punching a line of three holes. Again, open the paper.
- Put your name on your work to use for the next lesson.
- Point out that the paper has one folded edge, three open edges and all the space in-between. “Be creative about where you can punch the paper. Open it often and see how it looks. That way you can decide and know when it is finished.”
- Demonstrate how to clean up the work and how to use the envelope.
- Return the work to its place in the environment.
- Note: Ask the children if they would enjoy mounting their finished work for exhibition, or to take home.
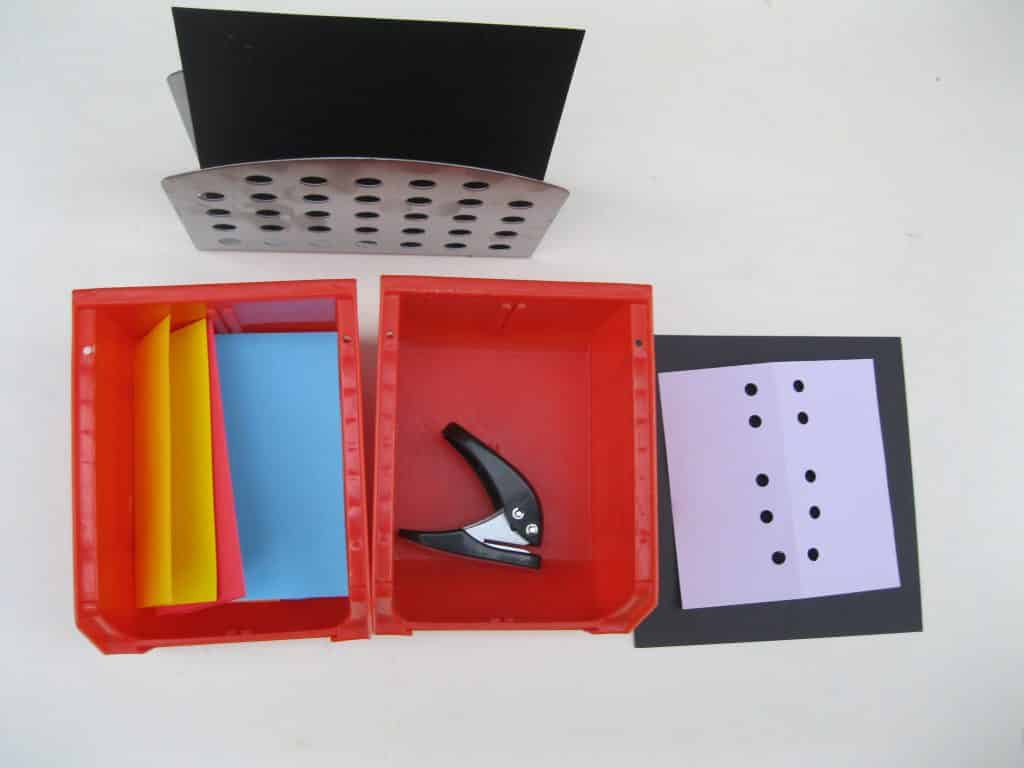 Extensions:
- Fold the paper into triangles.
- Make bulletin board borders.
- Use smaller squares for punching.
- Mount finished squares on strips of railroad board or heavy paper.
- Laminate the strips.
Resources:
- Office supplies catalogs and stores
- Art supplies catalogs carry equipment that is more expensive and offer a variety of shapes
- EK Success, Fiskars, and Martha Stewart each make lever operated punches that produce a large, single shape that would be easier for younger children to use. Many of the most interesting are sold only on line.
 Knot tying and cutting with scissors are the first two most needed lessons for making art. Knot tying enables a child to produce a three dimensional shape easily with simple, readily available materials. Straw tetrahedrons can be turned into kites. Start with making a triangle with straws and string and move on to polyhedrons and other geometric structures.
I instructed 3-6 children to make three knots. One overhand knot is not very strong. It easily comes undone. Two knots are very strong if made as a square knot. Three overhand knots will be very strong. Children are discouraged if their work falls apart. You may notice there are children who will count out loud to three while tying only two knots.
Georgie Story
I founded a Montessori art environment called “The Children’s Studio” for children living in my neighborhood. A very intelligent seven year old turned down a straw tetrahedron lesson. He had been making the tetrahedron using plastic connectors and wooden dowels. When asked if he would like to make one he could take home, he admitted that he did not know how to make knots!Simple Knot Tying
- Prerequisite: Practical Life activities, other basic skills
- Direct Aim: To make knots
- Indirect Aim: To use the skill in making art
- Point of Interest: “I can see you made three knots.”
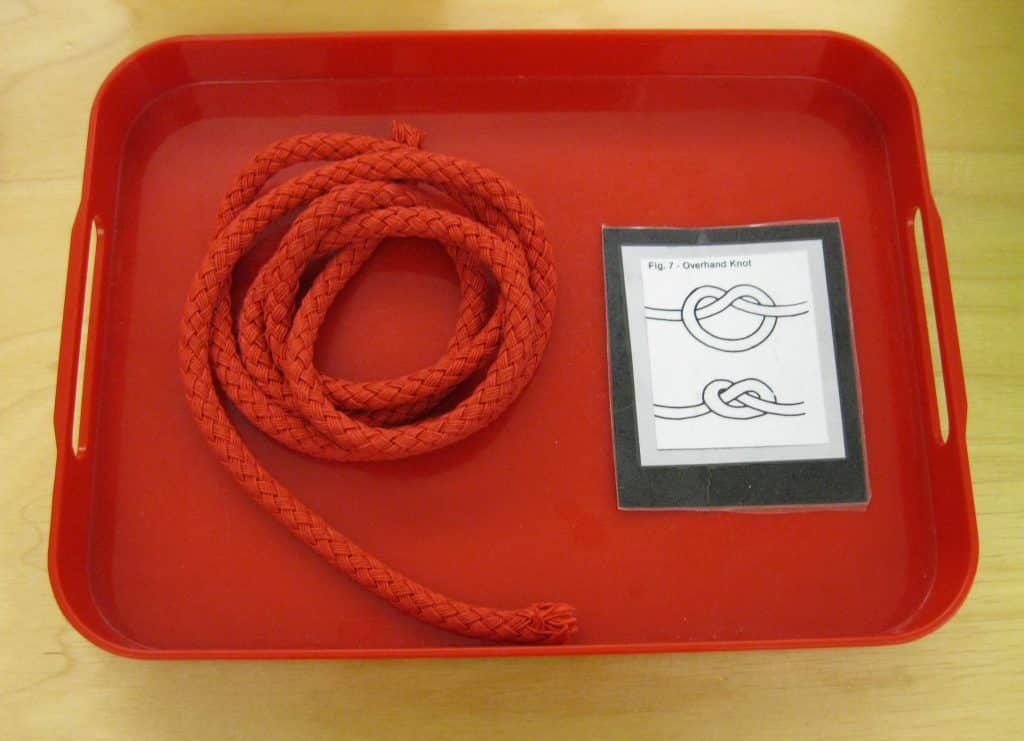
Materials:
- 5 pieces of thin rope, each 12” long
- A container for the rope
- A picture of an overhand (granny) knot
- A tray for the activity
Preparation:
- Choose the rope and cut 5 pieces 12” long.
- Secure the ends of the rope in one of the following ways, so they do not unravel.
- Paint the ends with clear acrylic paint.
- Paint the ends with white resin glue.
- Sew the ends closed using white heavy duty thread.
- Find or make a picture of the knot and laminate it.
- Assemble the activity.
 Presentation: 5-9
- Make a knot silently.
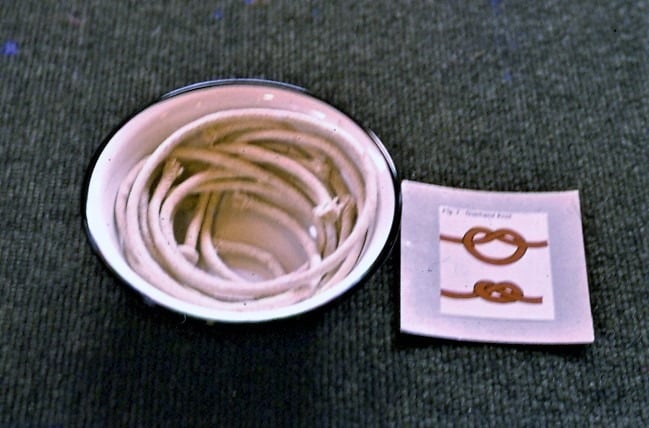
- “This is an overhand knot. It is also called a Granny knot. I am going to make it again.” Open the knot.
- “Crisscross the rope to form a loop. The end on top goes under the rope and up through the loop, then pull both ends.” I always seemed to put right over left. Observe what is natural to you and to the children. There is no correct way.
- Let the group practice.
- After everyone has tried, continue to the second way if desired. You choose.
- “There is a second way to make the knot.” Make the knot silently.
- “Crisscross the rope to form a loop. Notice, I made the loop the same way. This time, the end on the bottom goes down through the loop and under the rope, and then you can pull both ends.” Is one way better than the other? No. They are just different.
- “Now you are ready for straw construction or any other art form that requires knots. Enjoy!”
- Note: You can stop the lesson after showing them one way. They may discover the second way and not even realize it.
Extension:
Knot Tying: Using an old bow tying frame
- Use an old bow tying frame for teaching granny knots (overhand knot) and square knots.
- Renovate it using round shoe strings, because the ends are finished.
- See how much cord you will need for both knots and the ends.
Resources:
- Cords or rope: fabric stores and hardware stores
- Pictures of knots: Look in “how to do it” books. Often they are in holiday magazines that have sewing projects.
- Draw the knot shown in the lesson. Serve pretzels for snack.
- Find a knot book at the library, and copy nice pictures of finished knots.
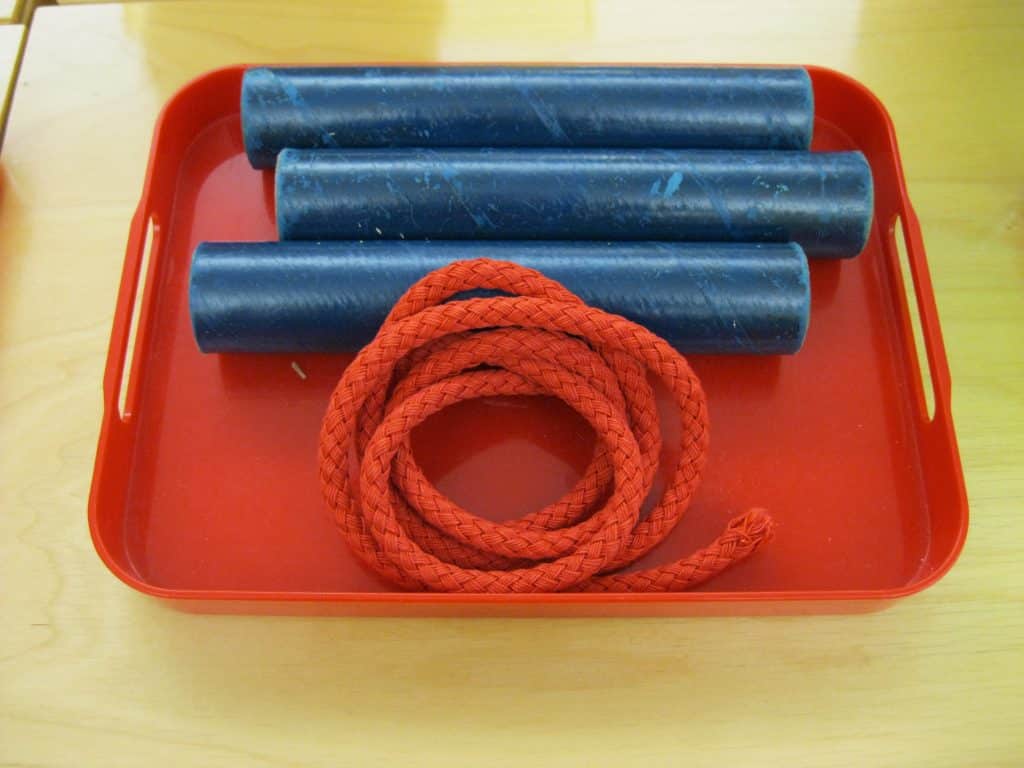 The tube triangle is a simple activity to allow children to practice making knots. It is short lived and the children can progress to making straw triangles. They are then ready to build three dimensional shapes using straws and string.
- Prerequisite: Basic Skills, Knot Tying Lesson
- Direct Aim: To make a triangle using knot tying skill
- Indirect Aim: To use the skill to make art
- Point of Interest: “I notice you made three knots.”
Materials:
- 3 heavy cardboard tubes the same length
- Rope or heavy cord
- A container for the tubes
- A container for the cord
- A tray for the activity
Preparation:
- Select the tubes and cord.
- Measure the length of the tubes and add at least 24 inches or more for the cord length. You need enough cord to tie three knots. Put the triangle together and trim any excess cord.
- Secure the ends of the rope so they do not unravel. You choose.
- Paint the ends with clear acrylic paint.
- Paint the ends with white resin glue.
- Sew the ends closed using white heavy duty thread.
- Assemble the activity.
Presentation: 5, and 6-9 if needed
- “I am going to show you how to use these three tubes and this cord to make a shape you can name.“
- Thread the cord into each tube. Keep it straight and flat.
- Center the tube on the rope and hold it up in the air.
- Slowly bring the ends together. “Tell me what you see.”
- “Count the knots with me as I make them, please.”
- “This is a triangle made out of tubes.”
Extension:
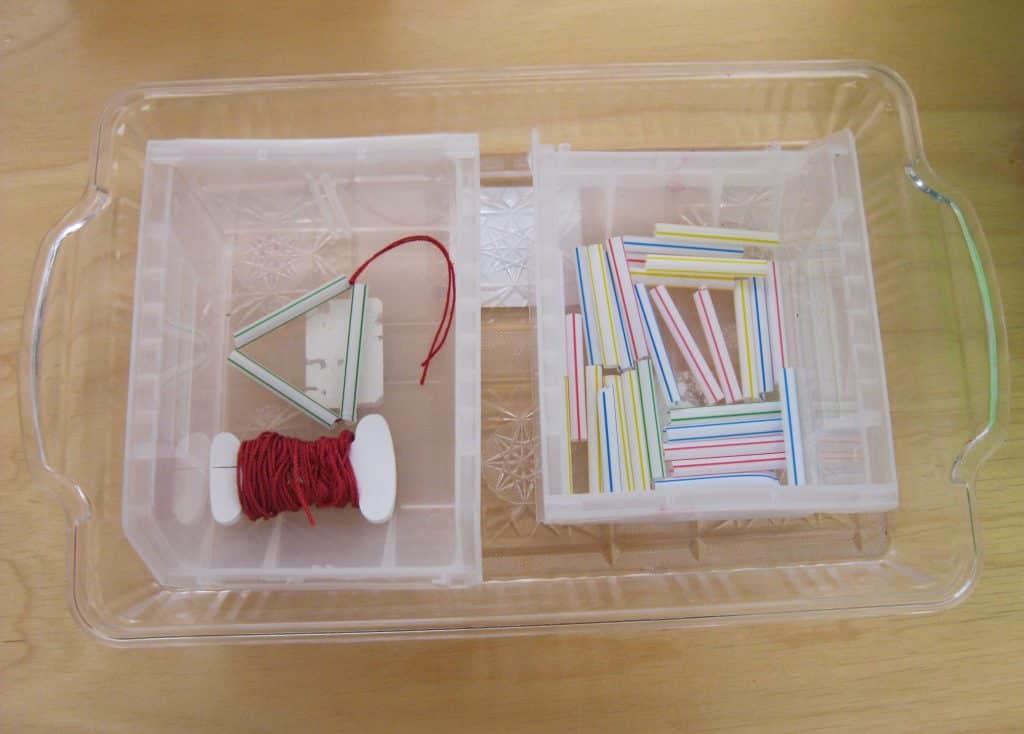
Straw Triangles: Make triangles using straws and string. It emulates the tube triangle only on a smaller scale. The activity sustains interest in practicing making knots.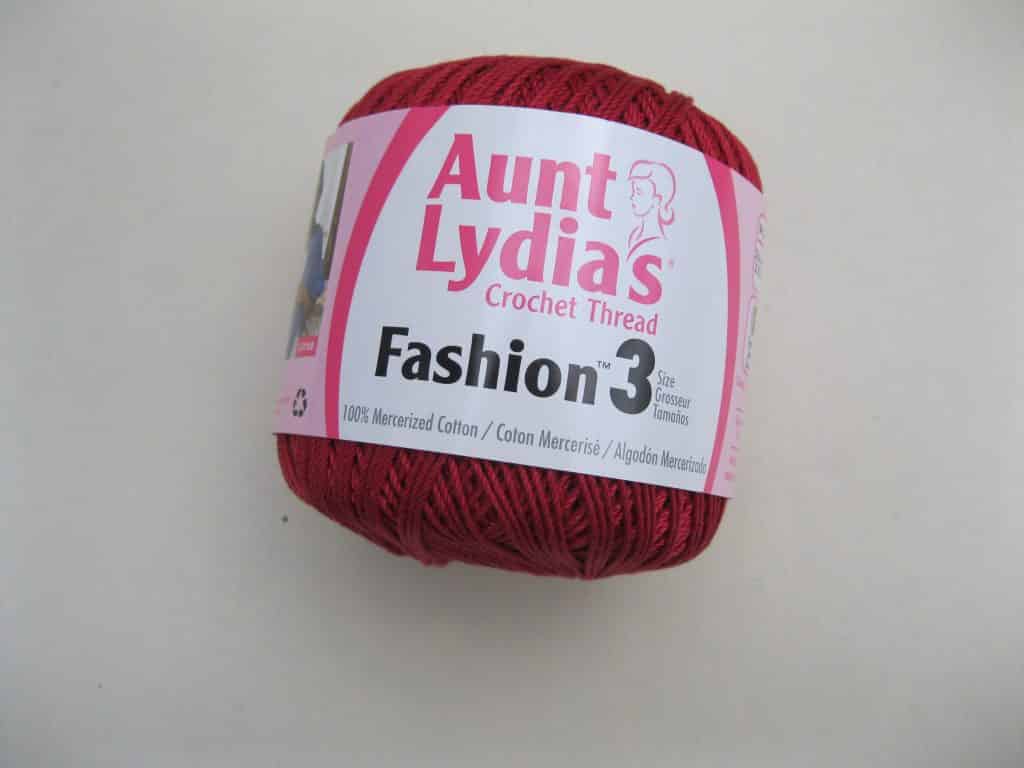
Materials:
- Drinking Straws, solid colored with bending elbow
- String: Carpet Warp or heavy crochet thread
- Container for straws
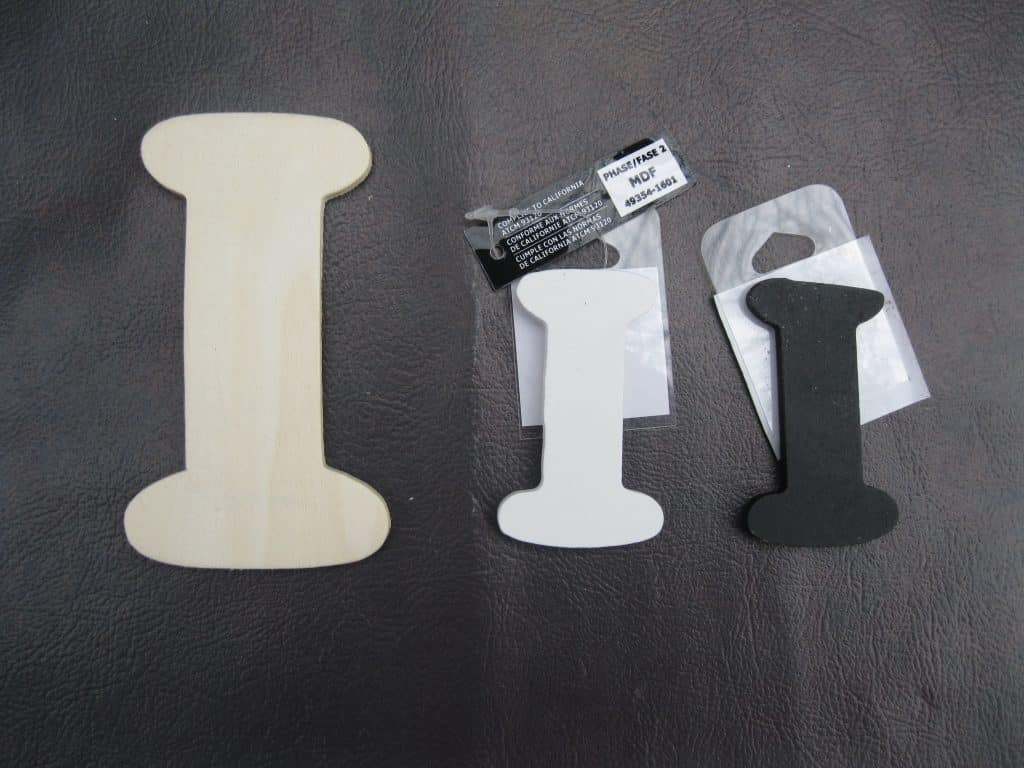
- 2 wooden letters to hold string: They look like the Roman numeral one, or capital I.
- A container for the string
- 2 scissors in a container
- Envelopes for finished and unfinished work
Preparation:
- Cut the straws into three pieces.
- Cut above the elbow for small straws. Use in collage.
- Cut below the elbow for long straws. Use to make triangles.
- Save the elbow pieces as beads.
- Wrap enough string for 6 triangles around the wooden letters, and place in a container.
- Make name tags and envelopes available for 5-9s.
Presentation: 5, and 6-9 if needed
- “Now that you can make the tube triangle, you can do the same thing using straws and string.“
- “First, put the string through the straws. Do not cut the string until you know you have enough string to make the triangle.” Silently unwind string from the wooden holder and thread it into three straws. Lay your work flat and make sure you have enough string on both ends to make knots (4”- 5”). Cut the string from the wooden holder.
- Center the straws on the string, and tie the knots.
- “Count the knots with me as I make them, please.”
- “This is a triangle made out of straws.”
Resources:
- Straws: Any straws you like or
- Hanamal Colored Disposable Flexible Drinking Straws
- Cellophane straws: a step up in difficulty because they’re narrower
- String: eNASCO Arts and Crafts, Leesburg Carpet Warp, click on “view more options” to see several colors
- Aunt Lydia’s Crochet Thread Size 3
- Wooden Letter I: Michael’s: made in black or white, 2½ inches tall
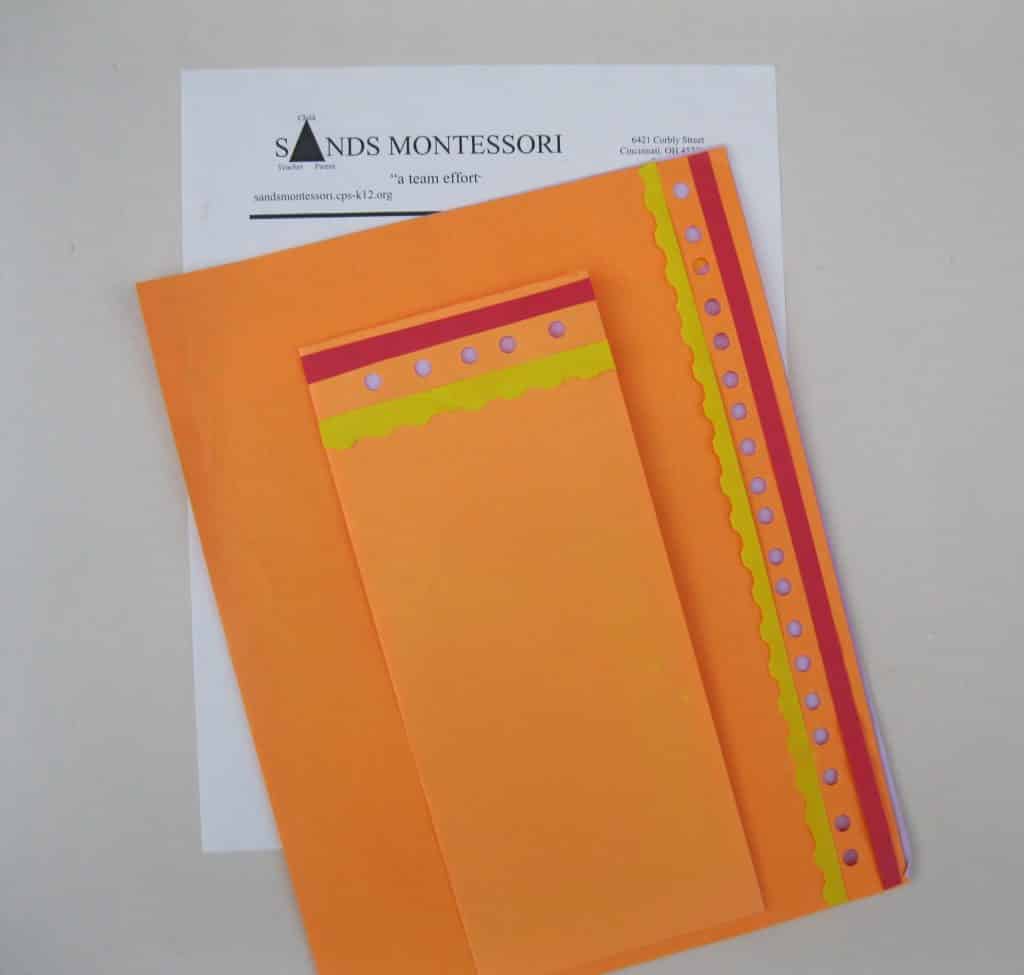
Making individual stationery in the very beginning of the school year is a way to introduce some of the basic skills in an interesting manner. You will be able to observe how proficient each child is with using scissors, glue, paper fasteners and glue sticks.
I suggest you formally introduce a paper cutter used for scrapbook making or better (see photo). It allows children to cut paper into thin strips easier than using scissors and less dangerous than an X-Acto knife.
- Prerequisite: Experience using scissors, glue, glue sticks, paper fasteners, paper punches
- Direct Aim: To review the basic skills for making art
- Indirect Aim: To use basic skills to make art
- Point of interest: “The next time you need to write a thank you note you will be able to creatively do that task, right?”
Materials:
- A piece of the school’s stationery
- A collection of interesting stationery
- Colored copy paper
- Colored envelopes or a large envelope for all the letters
- Regular scissors and scissors that cut a decorative pattern
- Paper punches with different size holes and shapes
- A ⅛” hole punch for the tiny paper fasteners
- A glue set-up for 4 (See: Preparation)
- 4 glue sticks
- 2 staplers, 2 rulers
- Smallest paper fasteners
- Fiskars Paper Trimmer
- Flat collage materials , collection of magazines
- Colored ink pens for writing
- Containers for equipment
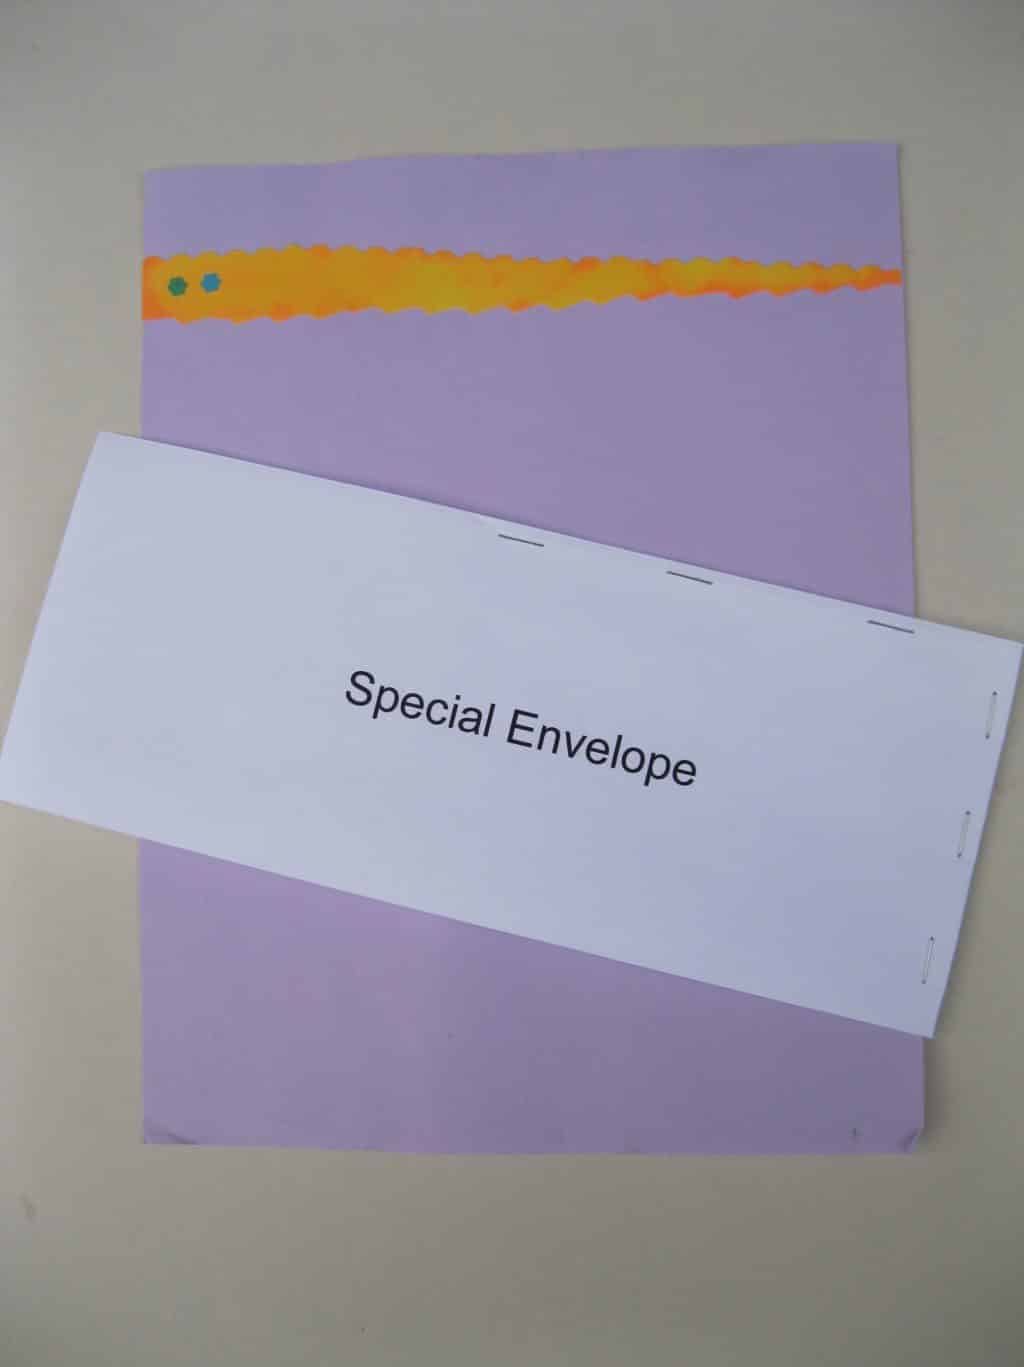
- Special envelopes for paper strips (see photo)
- Stamps if mailing
Preparation:
- Buy the trimmer and read any instructions that come with it. Practice using it. Make your own stationery. Enjoy.
- Decide how to display all the colors of paper you have. If nothing else, put each color in its own file folder. Put a sample of the color on the tab or color the tabs with markers. Put them in a desk file folder holder.
- Decide how to display the envelopes. Use a Napkin holder or an AkroBin.
- Put a desk tray next to the paper holder to receive partial sheets of paper.
- Place scissors, paper punches, paper fasteners, and glue sticks in containers. Put sequins in a plastic box.
- Make a glue set-up (See: Gluing activity and photos for more details)
- 2 two-ounce bottles of white resin glue on a tray
- Cocktail toothpicks in a container
- 2 butter dishes or empty refill pans that once held dry watercolor paint
- Put magazines on a tray or in a bin.
- Assemble the activity on a table. Place the trimmer in the middle of the work space or have a dedicated place for using it.
 Presentation: 9-12
Note: If you are planning a field trip, use this lesson as part of the class’s preparation.
- Bring a damp sponge to your presentation.
- Demonstrate how you made each part of your stationery. Wait to show the finished work until you have demonstrated all the equipment you used.
- Demonstrate how to use the trimmer.
- Choose a color of paper.
- Demonstrate how to use the ruler and grid on the trimmer to line up the paper at top and bottom and make a strip.
- Use the trimmer to make a strip of paper to put on a second color of paper.
- Use the paper punch on the strip. Put the strip on the second color to show how the negative shape allows the first color to be seen.
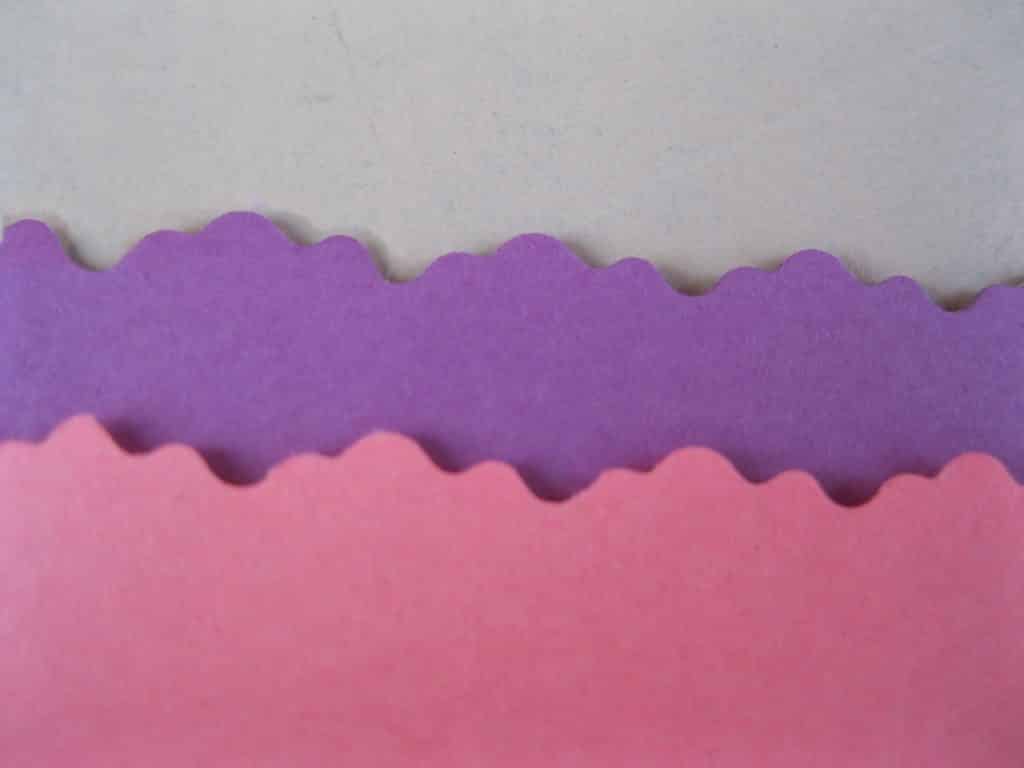
- Demonstrate how to follow a ruled line on the paper when cutting with the decorative-edge scissors.
- Demonstrate how to open and close the glue stick. Remind them to listen for the click to make sure it’s completely closed.
- Glue a sequin onto the strip using the glue set-up, wipe the dish clean with the sponge.
- Restore the work and show your finished stationery.
Extensions:
- A thank you note can be written or typed on paper then folded into an origami figure.
- Suggest your students could design an alternative way to make a thank you note the next time one is needed.
Resources:
- Paper trimmer: Amazon, Michael’s, Dick Blick
- Fiskars 12” Sure Cut Deluxe Craft Paper Trimmer $28-32
- Fiskars 12” Portable Scrapbooking Trimmer $14-21
- Special hole punches: Art supplies catalogs carry equipment that is more expensive and offer a variety of shapes:
- Scissors that create a repeated decorative edge as they cut:
- Colored copy paper: $.03 per sheet, Office Depot & OfficeMax, colors limited
- AstroBrights Paper: Office supplies, Amazon, Target
- AstroBrights Papers: Colors can be bought from a Neenah Paper Distributor near you using your zip code. Each color is sold in a 500 sheet package each costing a little over $14. Organize a group and share the cost. Note: Not every distributor carries all the available colors. 1-800-558-5061 Customer Service, neenahpaper.com
- My choices were: Solar Yellow, Orbit Orange, Re-Entry Red, Gravity Grape. Celestial Blue, Gamma Green.
- Dick Blick Arts and Crafts: Fadeless Designer Art Paper
- Paper fasteners: Staples, Walmart
 Introduction:
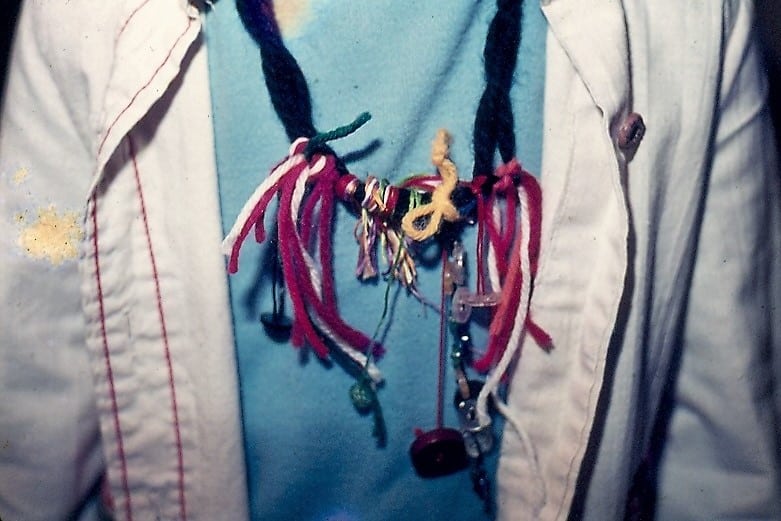
Magic rope was taught to me by a fellow Montessori teacher when I was still teaching in my Children’s Studio. Start by making small pieces of rope that when finished will be 8-10 inches long. With practice longer pieces can be made that become a part of a necklace (See Photo).
Prerequisite: Overhand knots
Direct Aim: To make a piece of rope
Indirect Aim: To use the skill creatively
Point of Interest: Take a piece of yarn home and practice making rope. Have fun. Teach rope making to a friend or family member.
Materials:
- 3-ply yarn in different colors or multi-colored ones
- Container for yarn pieces
- 1 hook (See Resources) (See photo)
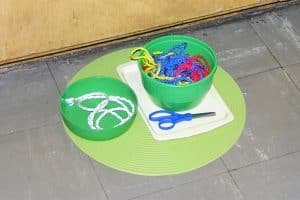
- 1 scissors
- 1 small floor mat
Preparation: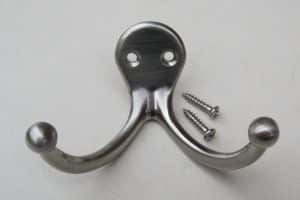
- Cut 10 pieces of yarn four times longer than the length you want for the finished rope. (36 inches each piece, for a bookmark)
- Wind each piece of yarn loosely around a finger and place in the container.
- Install the hook (above a child’s standing eye level, for safety).
- Put the yarn and the scissors on a mat on the floor under the hook (See photo).
- Make a piece of finished magic rope for the presentation.
- Place the rope in a book with the knot tassel sticking out above it.
Presentation:
- Remove the rope from the book. ”This is a small piece of ‘magic rope’ used for a bookmark. I will show you how to make it.”
- Chose a color of yarn, place it centered over the hook, and bring the two ends together.
- Hold the ends together and twist the yarn using both hands
- One hand twists the ends of the yarn (dominant) while the other (sub-dominant) holds the twist, just above the twist.
- Demonstrate how to twist the yarn.
- “Hold the yarn in your dominate hand so you can see the back of your hand. Twist the yarn again the hand turns so you can see your palm.
- Use your other hand to hold the twist you just made.
- Repeat the process 3 or 4 times.”
- “Hold the yarn in your dominate hand so you can see the back of your hand. Twist the yarn again the hand turns so you can see your palm.
- “Now that you have seen and know how to twist the yarn, I can show you a quicker way to do the same thing.”
- Twirl the threads together using the thumb and forefingers of both hands. Use your dominant hand to twirl the ends and use the sub-dominate hand to hold the twist just above it. They work together. First, the bottom pair twirls then the top pair. The twirling fingers hold the threats while twirling.
- The control goes back and forth. CAUTION: It is easy to drop the threads when first learning this skill. Just pick up the dropped thread ends, make them equal again and continue the work.
- Stop twirling when the twists are very small. Hold the bottom of the yarn with the thumb and index finger of your dominate hand. Place the index finger of your other hand in the middle of the strand you have created and fold the bottom of the rope up to meet the loop at the hook. Hold the two ends tightly and pull the loop off of the hook.
- Release your finger that holds the middle and the rope is made magically. Notice that it bunches up.
- Keep holding the yarn ends and loop in one hand, and with the other gently run your fingers down the yarn to smooth the twists out into a piece of rope.
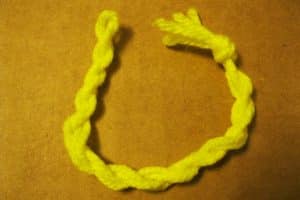
- Tie the loose ends into a knot leaving enough yarn to make a tassel. (See photo.)
- Cut the loop end apart to make a tassel of four yarn ends.
Extensions:
- To make a necklace. Measure how much is needed to go around a child’s neck and make it a little more than four times longer.
- I always prepared the yarn with each child. Use a mirror so they can see the size they want,
- Prepare a number of yarns of a single size if you wish and make each into a ball for the container.
- Each necklace can be a different color.
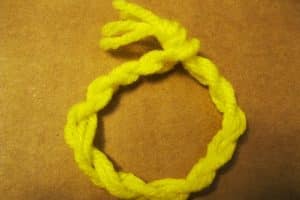
- To create a clasp, insert the knotted end into the loop at the other end of the rope. Trim the loose ends at the knot if desired (See photo).
- Tassels and pom-poms can be made to hang off the necklace as well as fancy buttons. You and your children may find other things as well. Have fun!
- Simple holiday gifts can be made the size of the bookmarks using appropriate colors. Add a hook to hang on a tree or just place in a book.
- Once they learn to make rope, children create ways to use it.
Resources:
- Yarn: Amazon, craft stores, fabric stores
- Hooks: Hardware store (Ace has a Double Garment Hook with safer rounded ends)
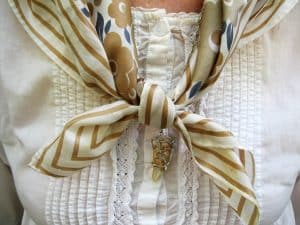 Overhand knots come apart easily. It’s frustrating when knots come apart when creating an art form that requires their use. However, tying an overhand knot is the first and second step for making a square knot. Learning how to make a square knot serves two purposes: it is a secure knot when needed, and by itself it is a beautiful-looking knot for making art (See Extensions).
The instructions that follow show you how I would demonstrate making square knots for my students. Practice making overhand knots and observe what feels natural to you, then make a square knot. The colors for the ends are arbitrary. Have fun.
Prerequisite: Overhand Knot, Right and Left Lessons
Direct Aim: To make a secure knot
Indirect Aim: Prerequisite for macramé
Point of Interest: You can practice making the square knot when you wear your sports shoes.
Materials:
- A 6” wooden, plastic, or metal ring
- Paint or ink to color the wood
- 6 pieces of very thin clothesline, or cording 12” long
- 2 colors of acrylic paint or nail polish
- A tray
Preparation:
- Practice making the knot. The instructions below reflect how I am comfortable making the knot.
- Color the ring of wood, if using wood.
- The ring in the photo is black to contrast with white clothesline.
- Cut 6 pieces of the clothesline or cord.
- Paint the ends of each cord to stop them from unraveling.
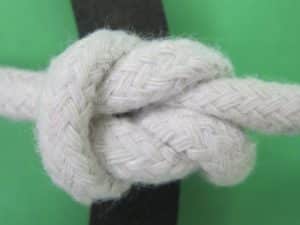
- Use a different color on each end of the same cord, to visually facilitate the tying presentation (I used black and white).
- Tie each cord into a square knot on the circle.
- Do not tighten them too much or it will be difficult to take them off the circle
- Put the prepared material on a tray.
- Put the label on the tray and place in the environment.
Presentation: 5-12 individual or small group
Note: I have included a photo of a scarf tied into a square knot. I learned to make the knot as a teenager. It was the fashion then as it is now.
- “The knots on this ring are called square knots.”
- “You already know how to make an overhand knot (granny knot). Two overhand knots tied in a sequence create one square knot.”
- “The square knot is not only stronger than the overhand knot but is also beautiful when used to make art called macramé.”
- Open the knots and take them off the ring.
- Stretch out a cord. “One end of the cord is painted black the other is painted white." Note, you are only working with the cord, not the ring.
- Make the first overhand knot silently. Repeat the process using words.
- “I have the black end of the cord in my left hand and the white end in the right.”
- “Cross the black end over the white.”
- “Hold them where they cross, while you curl the black end around the white cord and bring it up through the loop. Pull the knot closed.”
- “Now the black end of the cord is in my right hand and the white is in my left.”
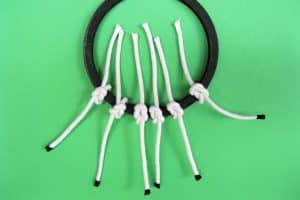
- Repeat the above process and close the knot.
- Let the children practice making the knots with just the cords.
- Tie each knot back onto the ring.
- Put the black end in the left hand and the white end in the right with the ring in the middle.
- Tie the square knot around the ring.
- Ask the children to help you.
- Return the work to its place in the environment.
Extensions:
- Teach making square knots when constructing polyhedrons.
- Investigate macramé as an art form.
- See the photo of a Christmas ornament constructed using beads, lark’s head knots and square knots around a key ring. I found instructions for how to make different designs online (See Resources). You and your children might be interested in creating your own designs. You will learn how to estimate the length of cords by studying macramé.
- Square knots and beads can be used to decorate a finished weaving.
Resources:
- Hardware Store: Light weight cotton clothesline
- Michael’s: wooden ring, wooden letter O, paint, Higgins ink
- Amazon: wooden rings, wooden letter O
- Square knot Holiday ornament instructions online: ornament instruction videos (scroll down to a group of three links, and try the center video for a simple snowflake)
- Note: The process for snowflakes begins with the single strand held in place by a T-pin on a piece of carpet.
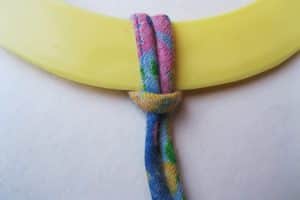 The lark’s head knot is easy to present and very creatively useful. It can be used to decorate any art form. It is easy for the children to learn. After the presentation, my students used the practice pieces I provided to create crawling creatures. I suggest how to make practice pieces in ellipse or rectangle shapes. Design your own simple shapes if you wish.
Prerequisite: Overhand knot
Direct Aim: To make a lark’s head knot
Indirect Aim: Preparation for macramé, for creative use
Point of Interest: Lark’s head knots are used to tag new clothing. Look for them.
Materials:
- A wooden, plastic, or metal ring 4”-6” for the presentation activity
- I cut a plastic ring from the base of a thick plastic picnic plate
- 6 cords 12” for the presentation lesson
- I suggest you do not use clothesline — it’s too stiff
- Yarn for children to practice making the knots
- Bristol-board shapes (practice pieces) with punched holes, for knot-making practice
- Containers for the work
- Tray
- 1 scissors
- A label and a photo of the knot
Preparation:
- Select a ring for the knots.
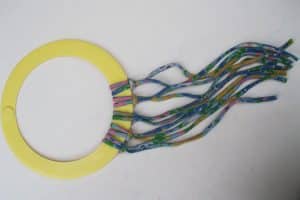
- Choose the cords for the presentation and cut 6 pieces. The thicker the cord the longer it needs to be.
- Tie 6 lark’s head knots onto the ring (See photo) and place it in a tray or basket.
- Design your practice pieces for the children (See photo). Make at least 20 of them.
- Punch ¼” holes around the practice shape ¼” from the edge.
- Place in a container
- Cut pieces of yarn 10” long and put them in a container.
- Put assembled materials on the tray.
- Decide where to place the presentation piece and the practice materials in the environment if you do not have a shelf of Basic Skills The Practical Life shelf is another possibility.
- Make a label with the name of the knot and a picture of the knot, and place it with the presentation material.
Presentation:
- “There are 6 lark’s head knots on this (plastic) ring. The lark’s head knot is a simple knot to make and can be used creatively.”
- “I am going to remove the knots from the ring. There is one cord that goes straight across two other cords. Grab that cord and pull and wiggle the cord and the knot will come off the ring.”
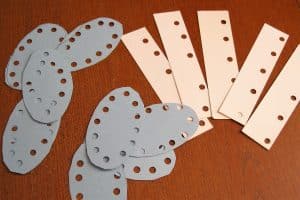
- “Now they are just a bunch of cords that I can use to show you how to make the lark’s head knot.”
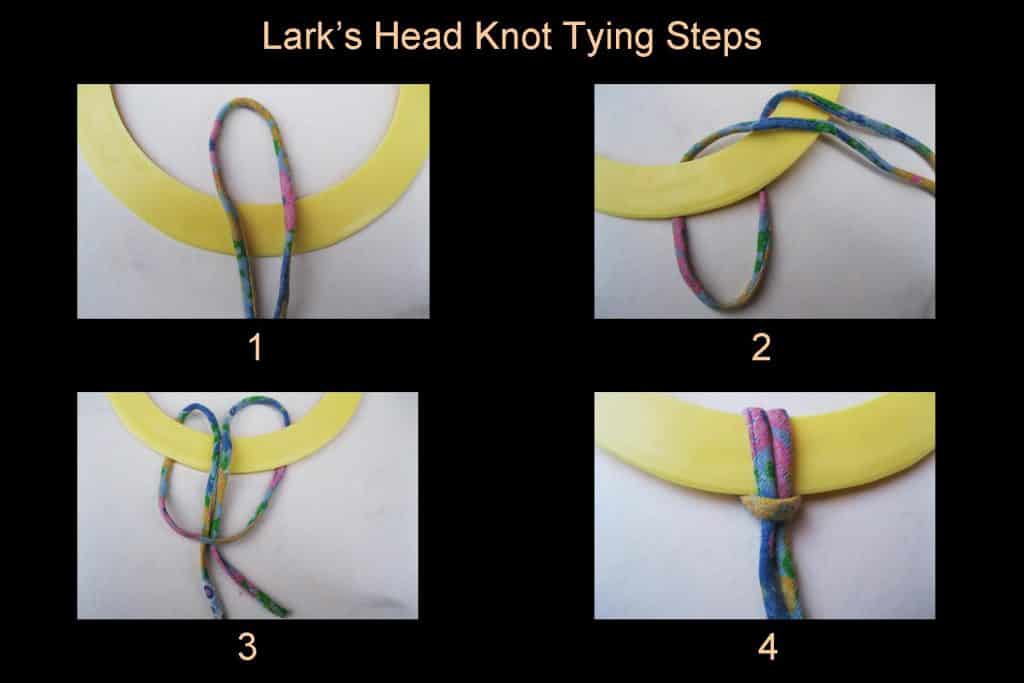
- “Put the two ends together and it will form a loop in the middle.
- “Grab the loop and drape it around the ring and let it extend down behind it.”
- “Put the two ends together and insert them down through the loop.”
- “Grab the ends and pull.”
- “Sometimes you have to wiggle the two ends to completely close the knot.”
- Let the children make the rest of the knots around the ring.
- Introduce the practice pieces and show them where they will be in the environment.
Extensions:
- Holiday hang-ups can be made using a key ring (or shower curtain ring) and yarn. Add a yarn bow and it becomes a wreath. Add sequins or other collage materials if desired.
- One year I showed the children how to unravel the ends of the yarn and comb them.
- Use lark’s head knots to decorate the ends of a God’s Eye.
- Children will create other ways to use the knot.
Resources:
- Michael’s: yarn, wooden 6” ring (The letter O)
- Joanne Fabrics: yarn, cords
- Hardware: key rings, 1” to 3”
- Amazon: key rings 1.25”
 Introduction: 5-12
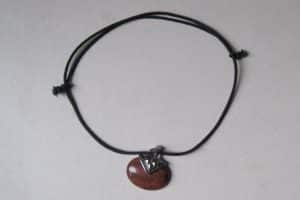
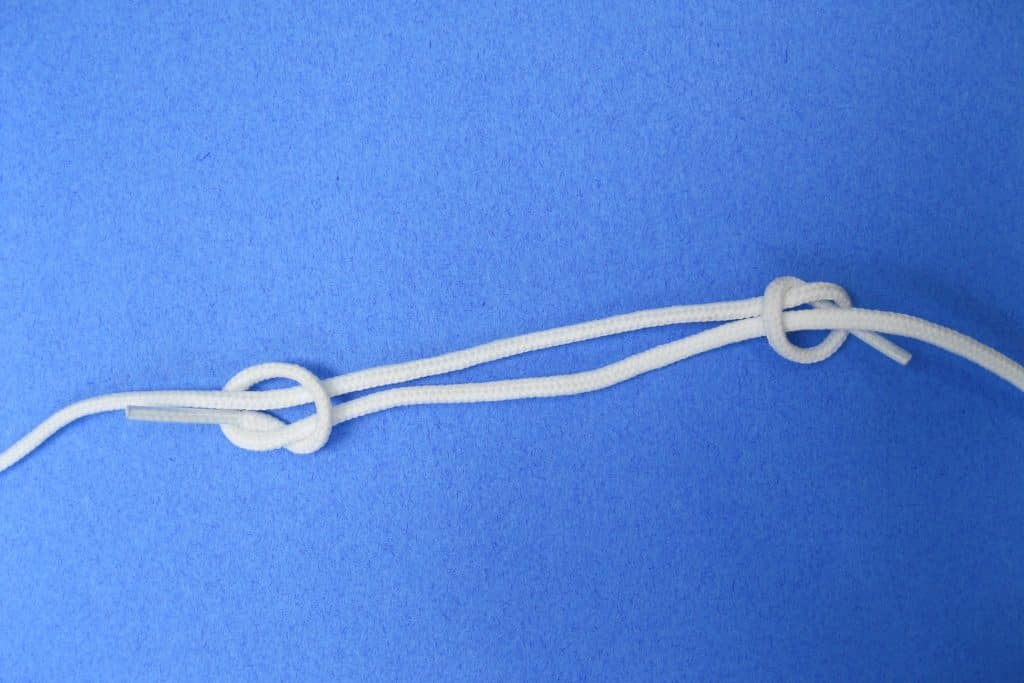
I bought a necklace that opened and closed using a sliding knot. The artist taught me the knot that day (See photo). It was easy to incorporate into my curriculum. Before this lesson, the children had tied necklaces on using an overhand knot and a bow. The lesson was easy to give and made the children’s work look more professional.
Prerequisite: Overhand knot
Direct Aim: To learn to make a sliding knot
Indirect Aim: To use creatively, to use when making jewelry
Point of Interest: Did you notice that this is a common knot used in a new and creative way?
Materials:
- 4-6 round (not flat) shoestrings 18—24 inches long
- 4-6 cords can be used but the ends must be knotted.
- 4-6 very thin clotheslines can be used for the lesson with knotted ends. The length of the clothesline will be longer than if shoe strings are used.
- Make sure the strings or cords are colorfast – read all Reviews
- A label with the knot’s name and picture
- A container or tray for the shoestrings which are already tied into a loop using sliding knots
Preparation: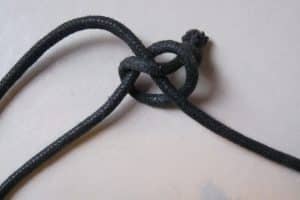
- Choose shoestrings meant to be used in craft projects or hiking boots
- Regular ones are ok but they come in limited colors and are usually more expensive. The string needs to be round, not flat.
- The finished ends of shoestrings may be longer than usual and need to be trimmed to ½”.
- Tie the cords/shoestrings into sliding knots using the following steps (See photo detail).
Presentation:
- “This is a shoestring that we use to make a variety of necklaces.”
- “The sliding knot allows a person to put their necklace on over their head and then adjust the length of the necklace for the clothes the person is wearing.”
- Demonstrate how the knots slide. “Holding the knots, gently pull them away from each other to shorten the necklace. Pull gently on the string on the outside of the knots and the necklace will lengthen.”
- Let the children shorten and lengthen the loop.
- Take apart one of the loops to begin the lesson.
- “Lay out the shoestring so that the ends lie next to each other and overlap each other by 6”- 8.”
- “Wrap one end of the shoe string under and around the other string then over itself to make a loop. Put the shoe string end into the loop and pull the overhand knot closed.”
- Do the same on the other side.
- Return the materials to the environment after the practice session is over with the shoe string necklaces all retied.
Resources
- Amazon: Polyester Yarn laces, 60 pieces (29 inches each, with sealed ends – cut shorter and knot the ends if desired)

