Enjoyable activities that require solving problems using visual cues, clues and imagination
“No skill, whether it be skill in baseball, in playing the cello, or in thinking, can be acquired by passive reading; skills can be acquired only by active and informed experience.” Robert H. McKim
The Visual Thinking section is filled with activities and lessons that require solving problems using your vision, imagination and the ability to see an object presented in one view and mentally envision it in another view. Some of the activities are available for sale; other activities in this Section need to be prepared using illustrations from books such as those referred to in the Bibliography below. You will likely discover or recognize printed materials in unlikely places that can be made into Visual Thinking activities. An example of this kind of discovery is part of this section.
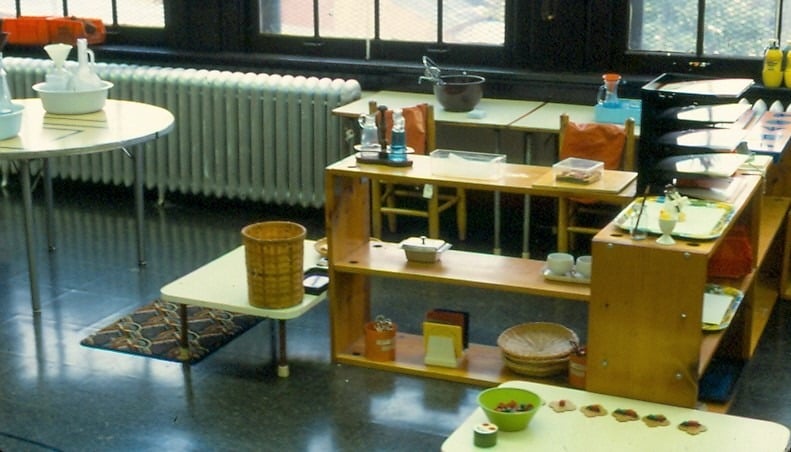
The visual thinking activities were housed on a shelf with other activities that built concentration. If an activity captured my interest it usually captured the children’s. Working through a visual thinking activity of one’s own choosing is another kind of an affirmation to reinforce one’s own ability to think and imagine.
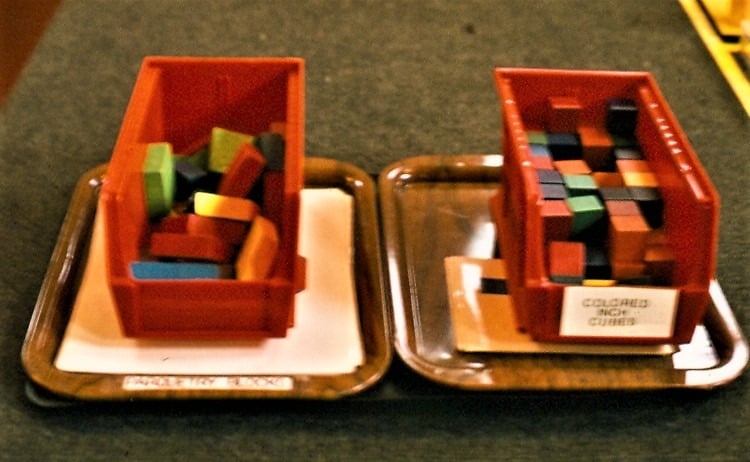
Note: Some Visual Thinking activities were placed on the Special Work shelf because of their important connection to other academic subjects, e.g., inch cubes to mathematics.
- McKim, Robert H. Thinking Visually, A Strategy Manual for Problem Solving. Palo Alto, California: Dale Seymour Publications, 1980.
- Read the first thirty pages to see multiple examples of how visual thinking problems can be presented. Chapters are devoted to exploring different ways of developing your inborn creative potential.
- Look at other chapters for more ideas for visual thinking materials.
- Use his bibliographies.
- McKim, Robert H. Experiences in Visual Thinking. Monterey, California: Brooks/Cole Publishing Company, 1972.
- This is an earlier edition of the above book by McKim.
- Arnheim, Rudolf. Visual Thinking. Berkeley, California: University of California Press, 1971.
 Introduction:
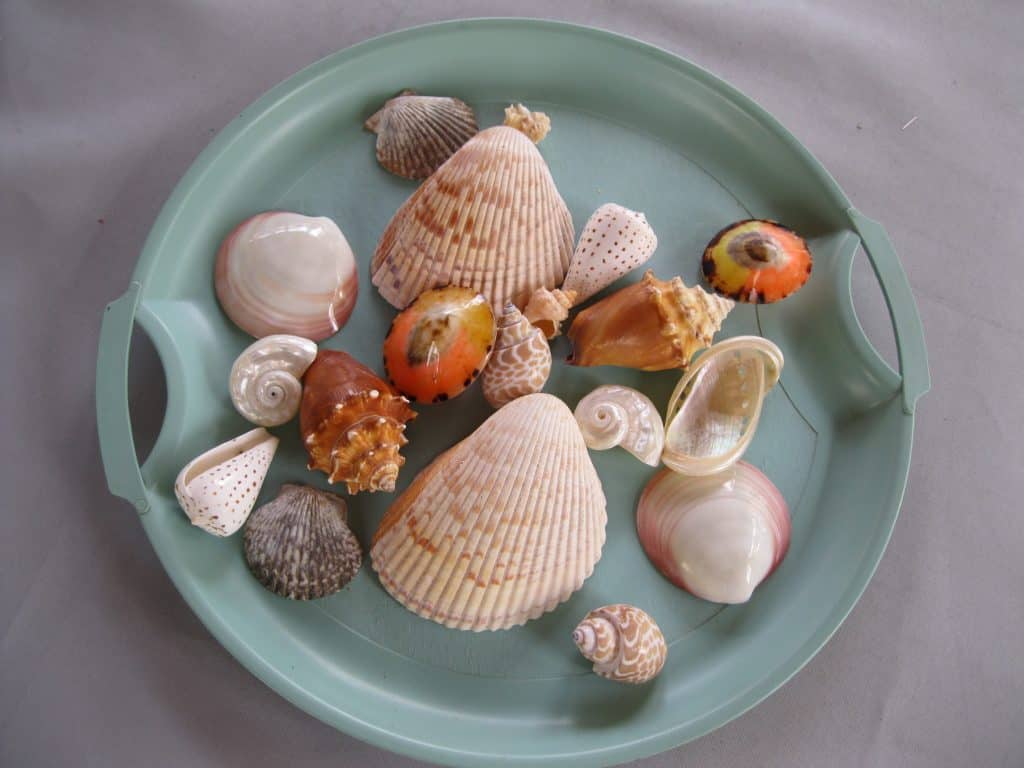
Simple matching exercises ask a child to find two objects or designs that are identical (or near identical, as in the case of natural objects). Each pair matches, or doesn’t match. This is where the practice of matching begins.
- Prerequisite: Practical Life
- Direct Aim: To use visual discrimination skill
- Indirect Aim: Preparation for advanced visual thinking skills
- Point of interest: “Would you like to see more matching work?”
Materials: Choose from the following suggested materials
- Natural objects: shells, nuts, real leaves
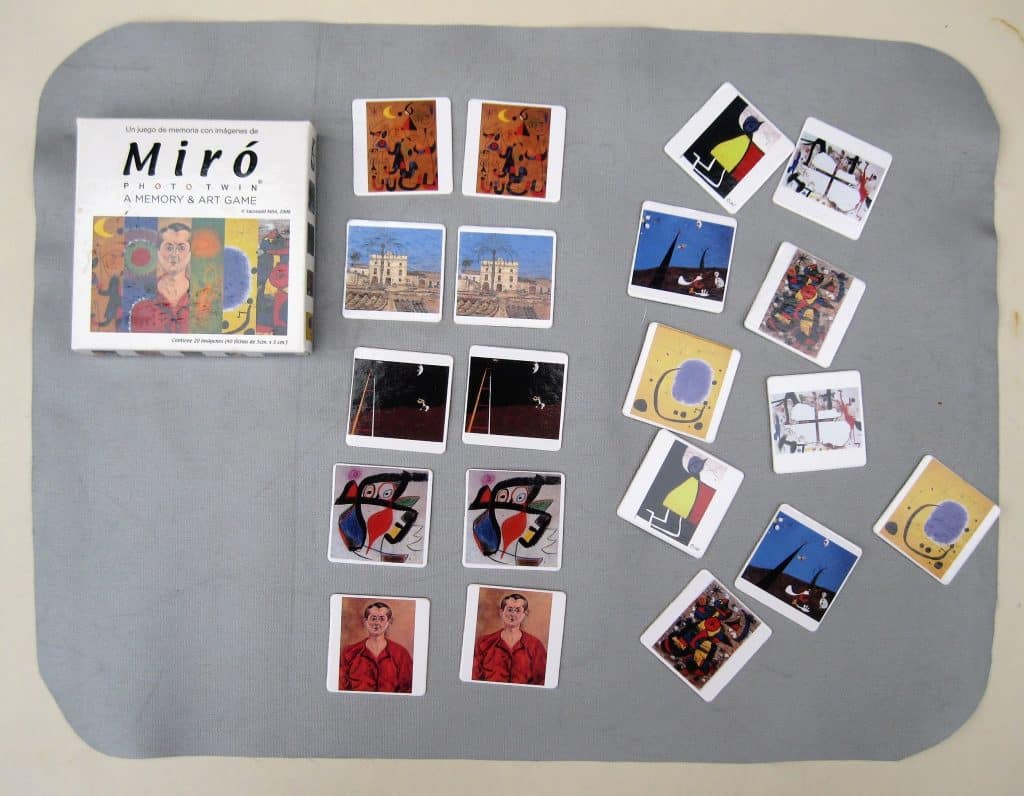
- Matching cards of paintings: Museum Shops
- Postcards from local or national museum (See Resources)
- Matching Cards of Quilt Patterns
- Pictures mounted on Bristol board or cover paper
- Laminating material
- Containers
- Teaching mat or table
 Preparation:
- Gather the materials for the activity
- Present 12 card matches (24 cards), or natural materials
- Mount and laminate the cards if needed
Presentation: 5-9
- “This is a matching activity. Help me put the cards out.”
- Place the pictures face up at random.
- If the objects are on a tray place it to the left, then choose one object and place it on the work mat to the right of the tray. Invite a child to find its match.
- “Would you like to choose a quilt pattern you like? Thank you.”
- “Find another pattern that looks exactly like it. They match.”
- Continue the activity until all are matched.
- Demonstrate how to return each piece of the work so it is ready to be used again. “We are going to put each piece of our work away in random order which means in no special order; just mix them up, that way the next person or persons will have fun finding the matches.”
Extensions:
- Lay out the cards face down and play a Concentration game.
- Put three-dimensional objects in a mystery bag and use the sense of touch to make the matches.
Resources:
- Buy matching postcards from a nearby museum.
- Enlist another teacher and each of you buy a box called New York 100 Postcards. They will be useful for many lessons, especially those in The Art Chart and Understanding Art I, II, etc.
Introduction:
The two advanced matching activities below require more visual thinking skills.- Prerequisite: Simple Matching
- Direct Aim: To recognize visual clues that make several designs a group. To recognize a design even when it is repeated and reduced size
- Indirect Aim: Preparation for advanced visual thinking activities
- Point of interest: “Would you like to see more matching work?”
 Introduction:
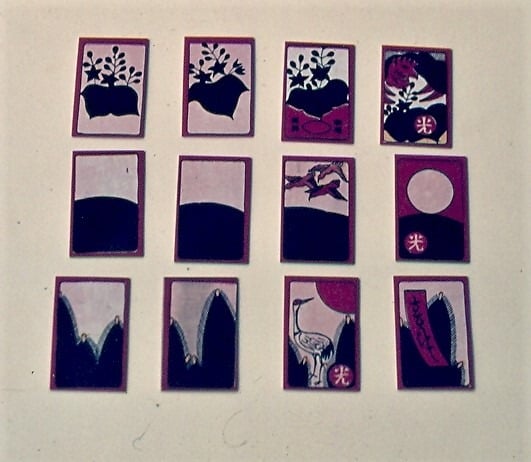
Japanese playing cards require a child to see that four cards belong to a design group.
Materials:
- 1 deck of Hanafuda cards (flower cards)
- 1 container for the cards
- 1 work mat
Preparation:
- Place the cards in a container.
- Place the work in the environment with other visual thinking activities.
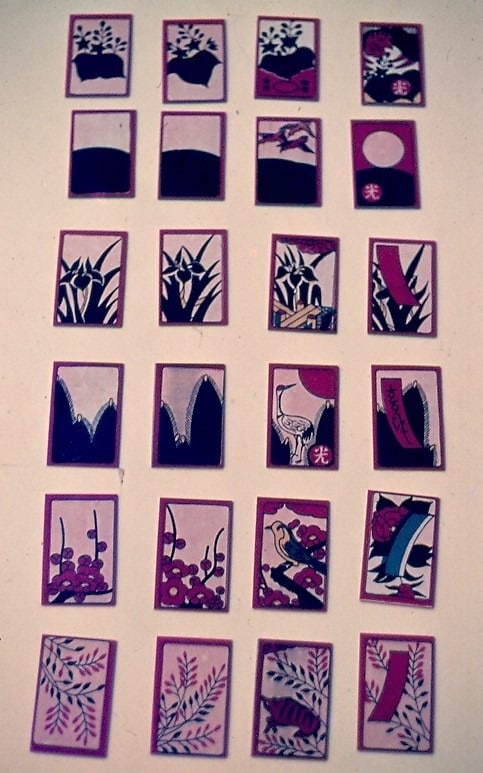
- Learn about the cards. They are beautiful. Teach the children to match them. There are 12 sets of four cards each. Each set represents a month of a year. Two of the four cards in each set are matches. Two are more complex, and still belong in the set.
- Note: The set that represents November is difficult to see as a set. The first two cards do not match. Think of introducing November by itself after all the others are matched. Explain that the November set does not follow the design pattern that is established by the rest of the deck. Or, include November in any matching set and the children will discover them – then you can explain the problem and reward them for their discovery. You choose.
Presentation: 5
- “This is a matching game using parts of Japanese playing cards. There are twelve different designs. If you find cards that do not match just put them aside.” Explain why they are different after the children have found them.
- Proceed to introduce the cards like any other matching work you have. Add the third and fourth card of each suit at your discretion.
Presentation: 6-12
- “This is a matching game using Japanese playing cards called Hanafuda, which means flower cards. The deck has 12 sets of four matching designs. Each set of four represents a month on the calendar. If you find cards that do not match just put them aside.”
- “Two of the cards in each set are matches. The other 2 of the set look like they belong because they contain things found in the first two but each has something else that is special.”
- Proceed to present the cards like any other matching work you have.
 Extensions: 5-12
- Give a presentation matching the cards to the months they represent. For an image of the complete deck, see: http://www.unmissablejapan.com/etcetera/hanafuda
- The internet link below takes you to information on how to play Koi-Koi with the Hanafuda cards. You will find a YouTube video that can be simplified to the first description of the game of just collecting the four cards of a suit. https://youtu.be/PB94VwGc89U?t=25
- Teach the card games on rainy days when the children must stay inside.
Resources:
- Amazon: Hanafuda Cards https://amzn.to/2Nuw4Mr
- eBay: search for Hanafuda Cards
Introduction:
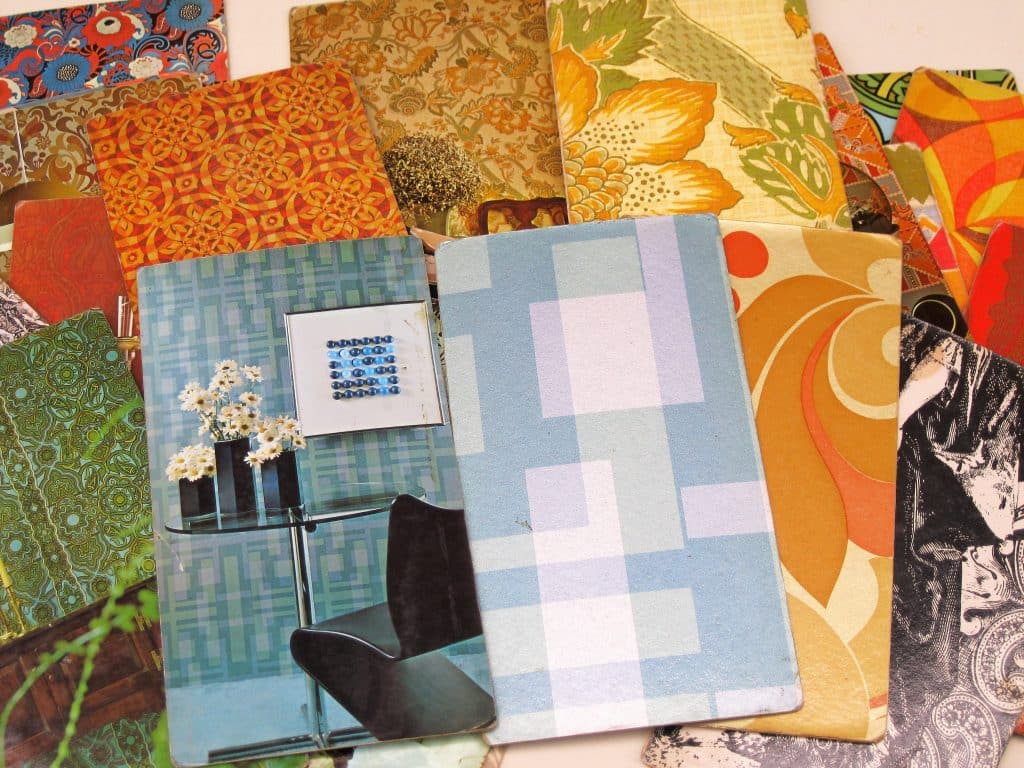
The wallpaper matching requires the child to recognize a real wallpaper sample reduced in size and repeated as the wall covering in a photograph of a room. This is an activity that must be made.Georgie Story
I asked at Home Depot if they had any wallpaper books that were going to be thrown way. They gave me a stack of four books. I was looking for wallpaper samples to put in a collage box. Most of the books had designs that were not interesting. I kept one book to make into the lesson below. There was a full sample of each wallpaper design and a photograph of the wallpaper used in a room. I mounted and laminated each design and each photo separately. The activity was a challenge to many 5-6 year old children. I hope you find a book as good or better for an activity.- Prerequisite: Simple Matching
- Direct Aim: To recognize a design even when it is repeated and reduced in size. To recognize parts of a design that are part of a larger one
- Indirect Aim: Preparation for advanced visual thinking activities
- Point of interest: “Would you like to see more matching work?”
Materials:
- 1 book of wallpaper samples
- Bristol board, railroad board, or heavy cover paper
- Laminating material
- 2 containers
- 1 tray
Preparation:
- If what I found is not available, use what you do find.
- If nothing else, cut 6-10 wallpaper samples into two or more parts. They will still look related and can be matched to make one whole design.
- Mount and laminate each part of the work.
- Select the container.
- Assemble the work.
 Presentation: 5-6
- “This is a matching game. We will match each wallpaper sample with a photograph of that wallpaper used on a wall in a room.”
- Remove the wallpaper sample and make a row of them across or down a work mat.
- Find the room that matches the piece of Wall Paper
- “This is a matching game using 8 different pieces of wallpaper that have been cut into 2 pieces. Let’s start by putting all the pieces of wallpaper on our mat and start finding the ones that match.” The children would need to match two pieces that are different parts of the repeated pattern. The color and details of each design would be the strongest clues.
- Demonstrate how to put the work away.
Resources:
- Home Depot, Lowes, Wallpaper and Paint Stores: Old wallpaper Books
 Georgie Story
When I first introduced pattern making with two geometric shapes, the first pattern was one sphere and one cube. Three more patterns using spheres and cubes followed. I gave the lesson and class all started choosing work. I was approached by a student who asked me if all spheres or all cubes by themselves were patterns. The answer, of course, is yes. I thanked the young man for bringing his observation to my attention.
- Prerequisite: Matching games
- Direct Aim: To perceive a pattern and repeat it (visual thinking)
- Indirect Aim: To use repetition of a pattern (color, shape) as a means of expressing an idea
- Point of Interest: “See if you can find a repeated pattern in the room somewhere. Bring it to the group to share with everyone.”
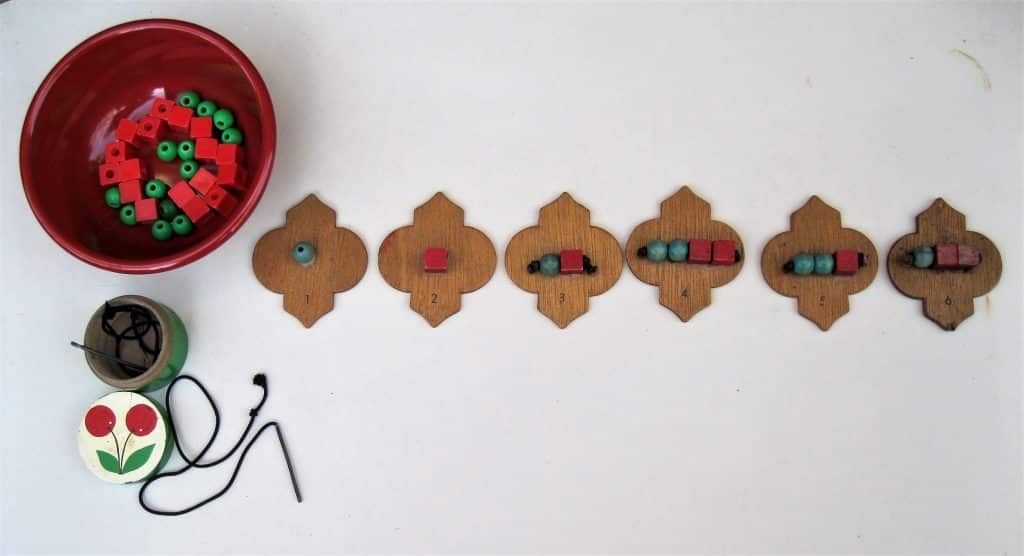 Materials:
- A collection of geometric beads: wood or plastic
- Choose two different shapes and two different colors to make the patterns
- 6 bead patterns attached to a base shape
- 6 base shapes: one for each pattern. The base shapes seen in the photos here were wooden, in a fancy shape, but yours could be a simple geometric shape.
- Glue appropriate for affixing the bead pattern on the base shape
- Shoe laces
- Rub on numbers
- Polyurethane and sponge brushes
- Container for loose beads
- Container for 2 shoe laces
Preparation:
- Choose the base shape and the glue needed.
- Seal wooden bases if needed.
- Rub on the number of each pattern on its base.
- Make each bead pattern.
- Make a knot on the end of a shoe string and place the bead pattern on the string and make another knot to hold it together and trim. Rub glue on each knot and let dry.
- Glue each pattern on its base.
- Place the loose bead in a container.
- Place the two knotted shoe strings in container.
- Decide to put the work on a tray and place on a shelf or isolate it on a table.
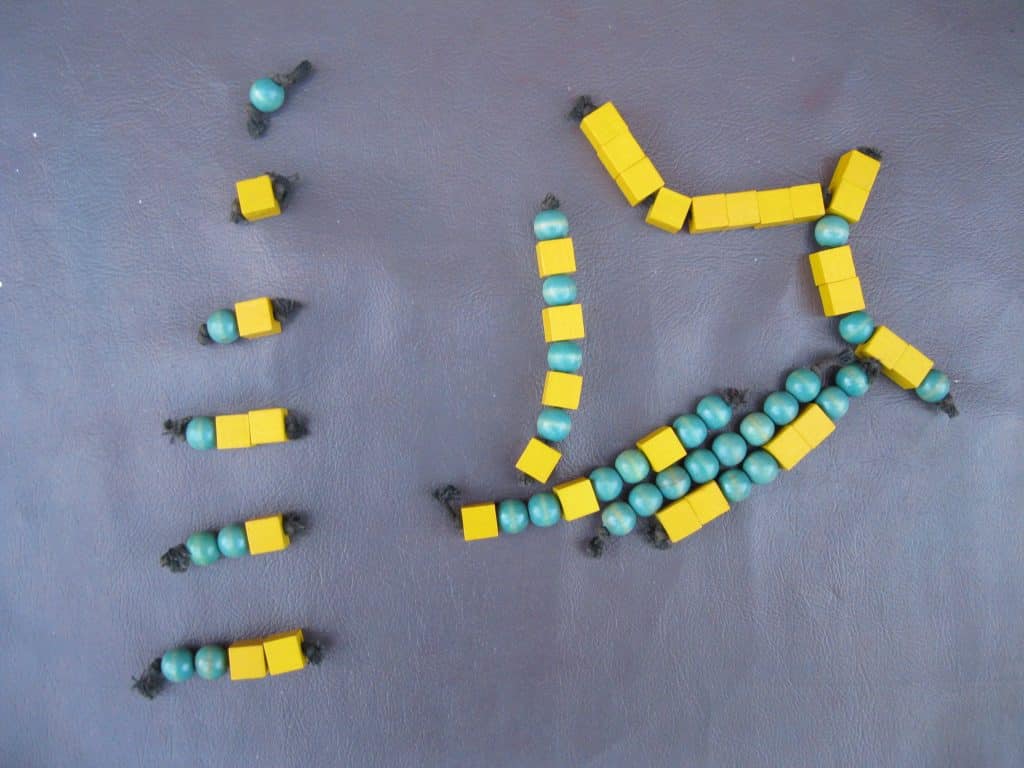 Presentation:
- “This work is about bead patterns. There are 6 patterns and each pattern is a model that you can copy.”
- “There are two shoestrings, so you and a friend can work together.”
- “I am going to make a short necklace by repeating the model number 2, putting one cube on the string, then another and another. I will take them all off the string after I see how that pattern looks repeated.”
- “Copy each model if you wish, or choose one you like the best and put it on the string. Practice making them.”
- “Return everything to its container and straighten the work for the next person.”
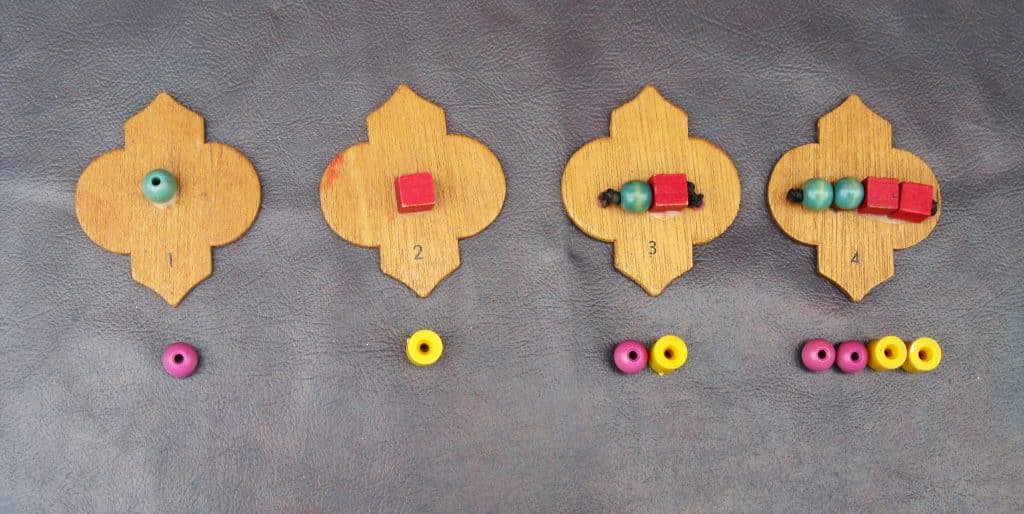 Extensions: Use each of these important extensions
- Make a matching game. Match each pattern to an example of that pattern repeated on a string that is 6” or longer.
- Make a second activity using the original patterns. Have students copy the original patterns but use 2 different shaped and colored beads. Let the child decide which bead is 1 and 2. This checks their understanding of the design process and breaks the rigidity of the first lesson. Set it up just like the first one.
- This is a fun lesson that produces laughter and some very creative solutions. It is necessary if you wish to do a good job with the next extension. The original bead patterns used a different shape and different color to distinguish each element of the pattern. Follow the original bead patterns and translate the patterns using something different than shape and color, e.g.,
- letter forms symbols: aaaa, bbbb, bababab, aabbaabb
- number forms: 11112222, 12121212, 1122112211221122
- Words: dog & cat, sun & moon, up & down, yes & no
- Sounds
- Emojis
- Record bead patterns found in a group of necklaces bought at a thrift store.They can be very complex and would be difficult to distinguise without the above extensions.
Resources:
School Supply Company: striped straw beads
 Introduction:
This work is to make a simple to complex bead pattern necklace with inexpensive materials. The children can make as many as they wish.
- Prerequisite: Practice making bead patterns
- Direct Aim: To make an interesting necklace using bead patterns
- Indirect Aim: To creatively make bead patterns within bead patterns
- Point of Interest: “The next time you make a bead necklace, see if you can make it more complex by adding more repeating patterns.”
 Materials:
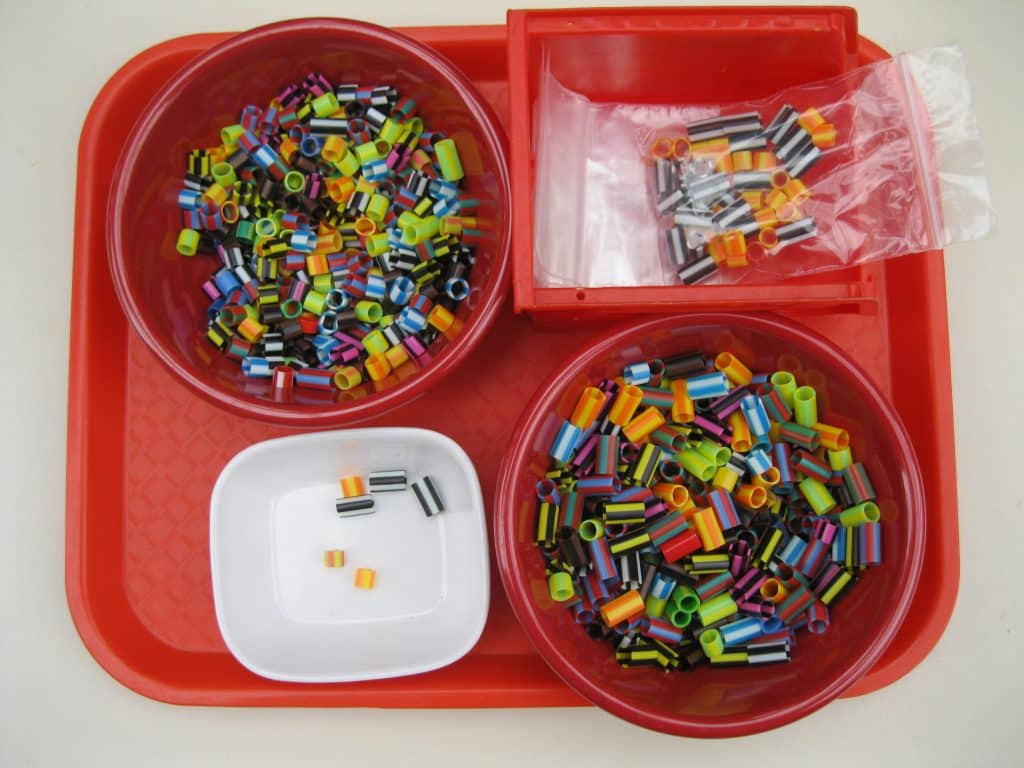
- A package of small and large striped plastic “straw beads”
- Pattern examples made with the straw beads
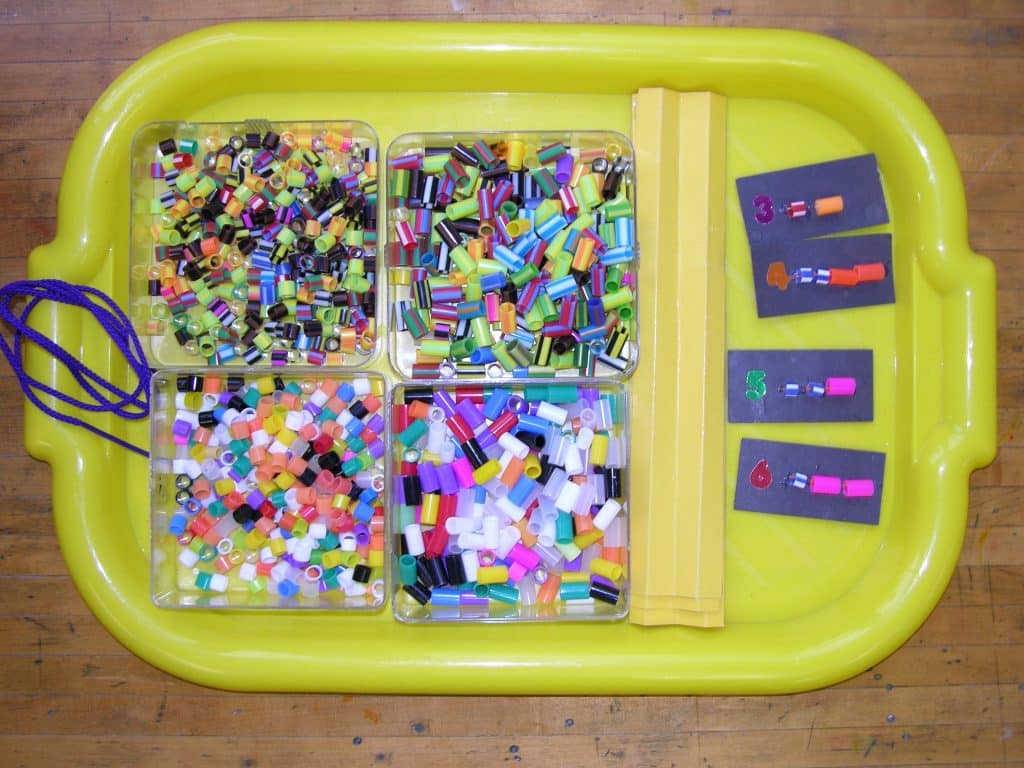
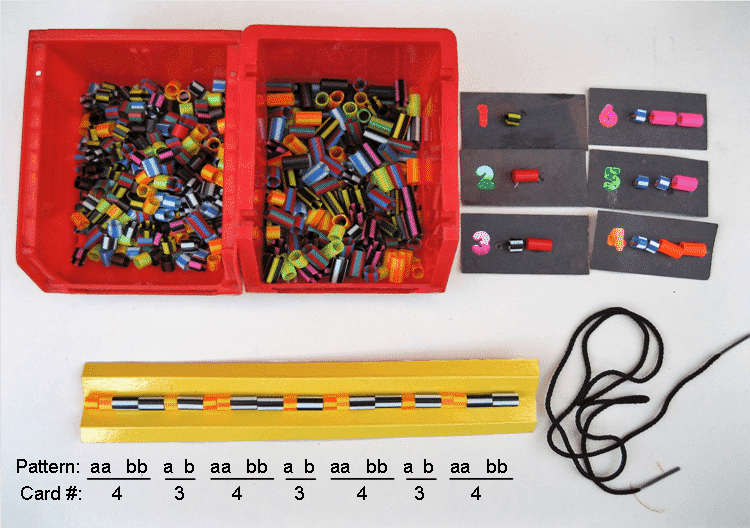
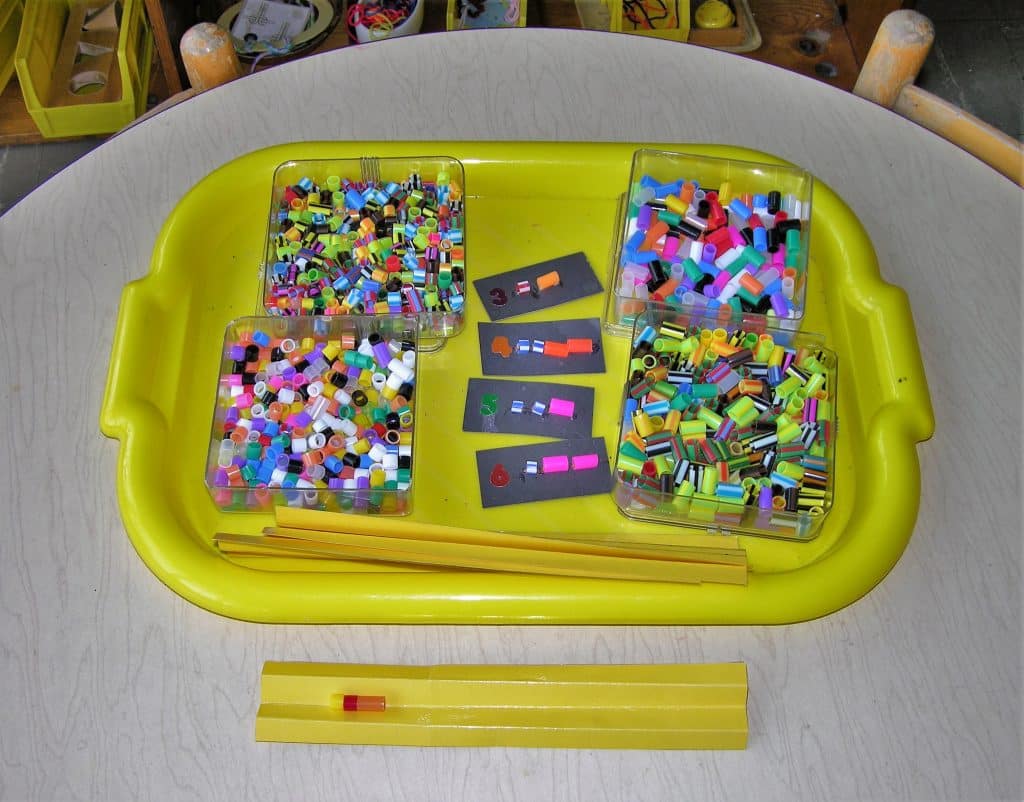
- Strips of cover paper 2” x 10 or 11”, laminated (see photo)
- Scraps of white or black mat board, about 2” x 4”
- Super Glue
- Stick-on numbers
- Shoelaces
- 2 containers for loose beads
- Container for shoelaces (start with 4 to 6 laces)
- Envelopes to store chosen straw beads and/or unfinished necklace
 Preparation:
- Open the package of beads and sort them into storage containers.
- Put the small beads in one storage container and the large in another
- Fill the containers for the environment but not too full. Add more beads when needed.
- Make the pattern examples. See the photo here for one idea.
- Select the beads for the patterns, cut the mat board pieces
- Glue the beads in place, add a number for each example.
- Make the bead boards which hold the repeated bead patterns until they are strung onto the cord. Use 2 boards if the necklace is long.
- Cut long rectangles of heavy cover paper into strips 2” x 11”. You chose the color. Draw 3 lines lengthwise in the rectangle. One line will be down the middle of the rectangle and the other two will divide the spaces between the middle and the edges of the board, so the strip will be divided into 4 long parts.
- Laminate the strips
- Score the lines with an open scissors. Fold each strip into a long M, as in the photo here.
- Decide how you wish to handle the shoestrings. Put them in a container and place with the rest of the materials. Put the container in your private space in the environment for easy access (or carry them with you during the teaching).
- Assemble the activity.
- Place the envelopes next to the activity or place in the administration area where name tags, pencils strings, etc. are displayed.
Presentation: 6-12
Note: When preparing for the presentation choose the size and colors of beads that you want to use. If you wait until you are presenting, the lesson will be too long and you will miss the fun of creating something you like! Tell them that you have already selected your beads.
- “This work allows you to creatively design a necklace by using repeated patterns.”
- “You may wish to use the patterns we have used before or you may choose to make your own pattern(s). It is possible to create 2 new patterns and repeat them.”
- “The beads are striped so it is important to change colors between bead patterns so the patterns can be easily seen.”
- “I will create a pattern so you can see what I do to make the necklace. I will need a bead board and beads.”
- Isolate the beads you like and create the pattern on your bead board (See photograph. Note that the bead colors are different than the example but the pattern matches)
- Use the patterns I used: Pattern 3 followed by pattern 4. The second pattern is not easily seen. Deliberately change your mind right in the middle of the presentation. Find a new color combination that will complement the first one.
 Extensions:
- Use other beads and make necklaces with them.
- Use other materials and make beads.
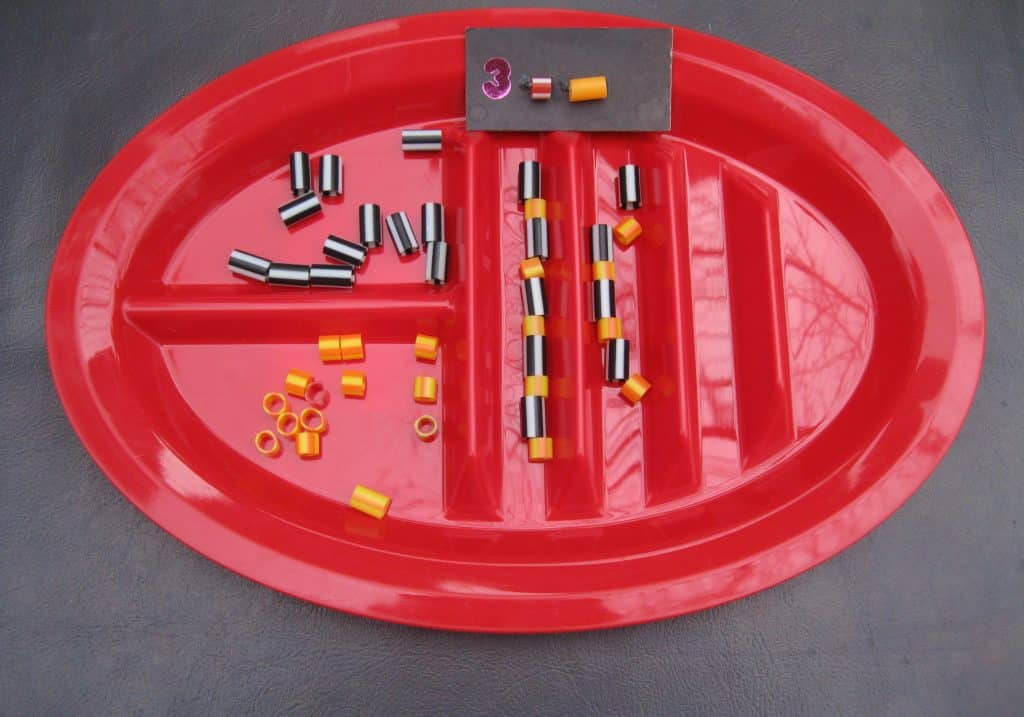
Note:While shopping for interesting containers I found a plate designed to hold tacos (see photo). It had a built-in bead board that could be used to make necklaces. It had possibilities. The beads and bead patterns could be placed on the tray. The taco plates (4) could be stacked on the shelf .
Resource:
PACON striped straw beads:
 Introduction:
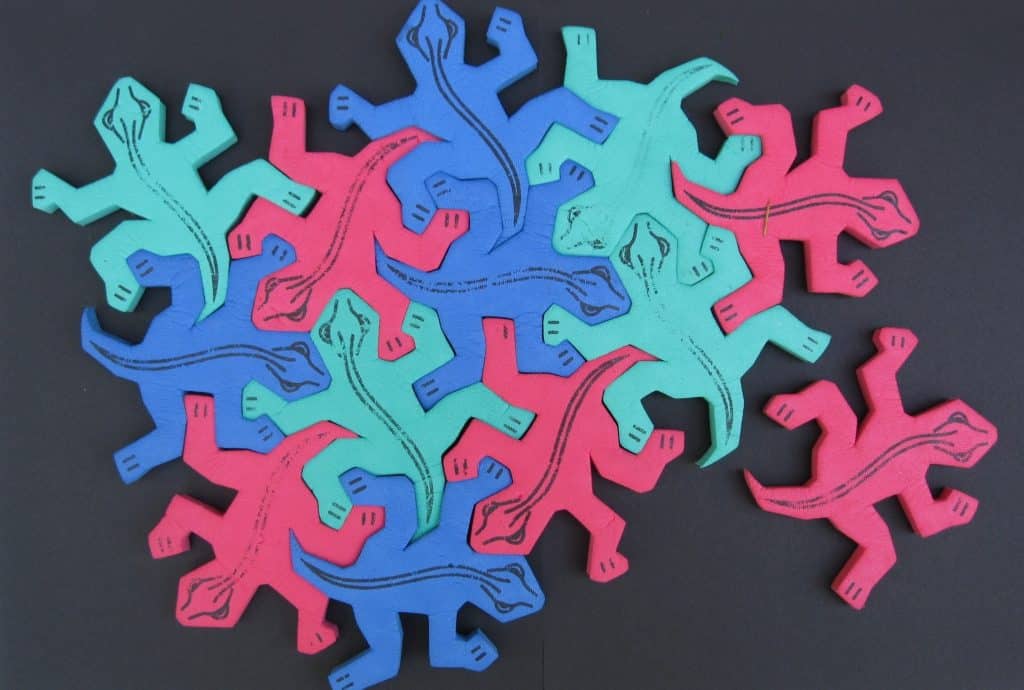
The term tessellate has been defined as: “To cover (a surface) by repeated use of a single shape, without gaps or overlapping.” It is difficult to explain what a picture plane is, and even more difficult to explain tessellation. The puzzle explains by its design the meaning of tessellation. There are two ways of approaching this material. Put the puzzle out in pieces and let the child discover that all the pieces are the same or to present the puzzle together and then take it apart. Either way putting it together is not always easy to do in the beginning.
- Prerequisite: Simple puzzles
- Direct Aim: To experience a puzzle that explains by its design the meaning of tessellation
- Indirect Aim: To enjoy seeing tessellation in art. To encourage learning to use tessellation creatively
- Point of interest: “Would you be interested in other tessellation puzzles?”
Materials:
- A tessellation puzzle, one version of which can be purchased at the following Etsy site. This vendor produces the lizard shapes in a variety of colors to order, sold in sets of 4 (same color) for $3.50. Buy 3 or more colors to link in the puzzle, increasing children’s interest and attention. https://www.etsy.com/listing/527481318/puzzle-lizards-mc-escher-style
Preparation:
Note: In the product above, the tops of the pieces are sculpted and the bottoms are flat. All the pieces go together top-side-up.- Put the puzzle pieces in a container.
- Place the container on a table for one or two children
- Put three pieces together. Start by putting two heads together.
Presentation: 6-12
- “This is a special kind of puzzle. All the pieces fit together and all the pieces are the same shape”
- Each piece has a head, four feet, and a tail.
- “Let’s look at one of the pieces. The tail is long and pointed, the head is the biggest part the legs are not the same shape.”
- “Let’s look at the shapes of the spaces between the parts. There is a pointy space, a square space, a big space next to the head and lots of space around the tail.”
- “Let’s look at the three pieces that are already together.”
- “Do you see any space where the long pointed tail might fit?”
- “Good, then place the tail in the space. Wow, the tail and two legs went together.”
- Continue the work. Remove yourself when they take over.
Resources:
https://www.etsy.com/listing/527481318/puzzle-lizards-mc-escher-styleIntroduction:
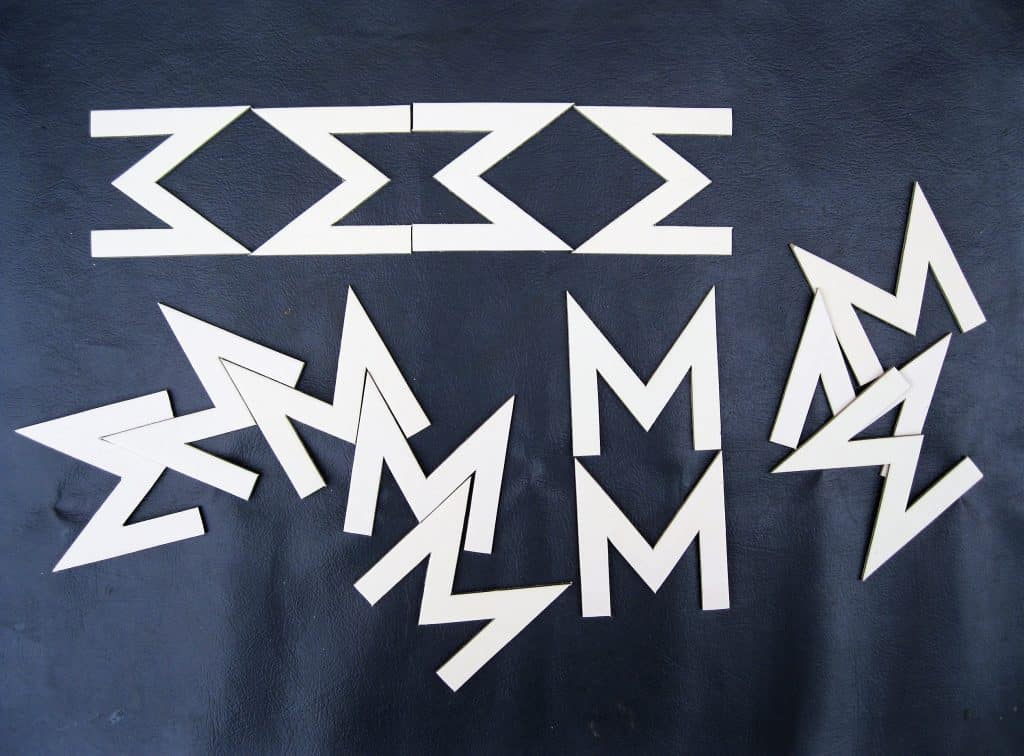
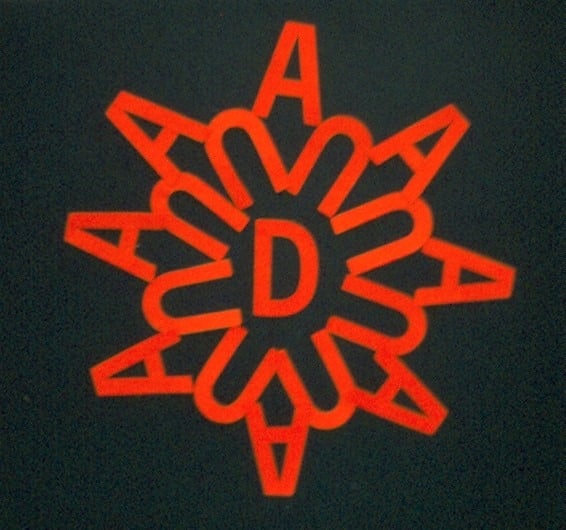
Letters are shapes. A single uppercase letter form when repeated and manipulated produces interesting designs. Negative shapes as well as positive shapes can be formed. Note: I had cardboard letter forms which are no longer made. Wooden letters would be the closest material still available. I also used letter forms made of felt.- Prerequisite: Letter recognition. Negative and positive shapes (See: Sensorial Materials)
- Direct Aim: To discover the creative design potential of letter forms
- Indirect Aim: Introduction to Graphic Design
- Point of interest: “Work with the letter again and see what new shapes and designs you can find.”
 Materials:
- 10-12 letter forms of a single upper case letter (A-H-M-V-W-X)
- Made of felt (without a sticky back), heavy paper, cardboard, or wood
- Ideal size: 3”
- Felt Board
- Work mat
- Containers
 Preparation:
- Make or buy the letter forms
- Choose containers
- Place the activity in the environment
Presentation: 5-9 (9-12 if never used)
- “The letter M is part of many words. When M is used to make a word it is always written in only one way. We all learn to make it that way. The letter M is also a shape.
- “It is possible to create interesting designs by just putting Ms next to each other so they touch. By placing them next to each other they will create new shapes but not words. So you can start by placing an M up-side down, on its side, and even right-side up.”
- “I will be back to see what you have created and discovered.”
- “Do you remember the Negative and Positive Shapes lesson? Let’s find all the new negative shapes you have made and all the new positive shapes you made”
 Extensions:
- Print a design using an ink pad and one uppercase letter stamp.
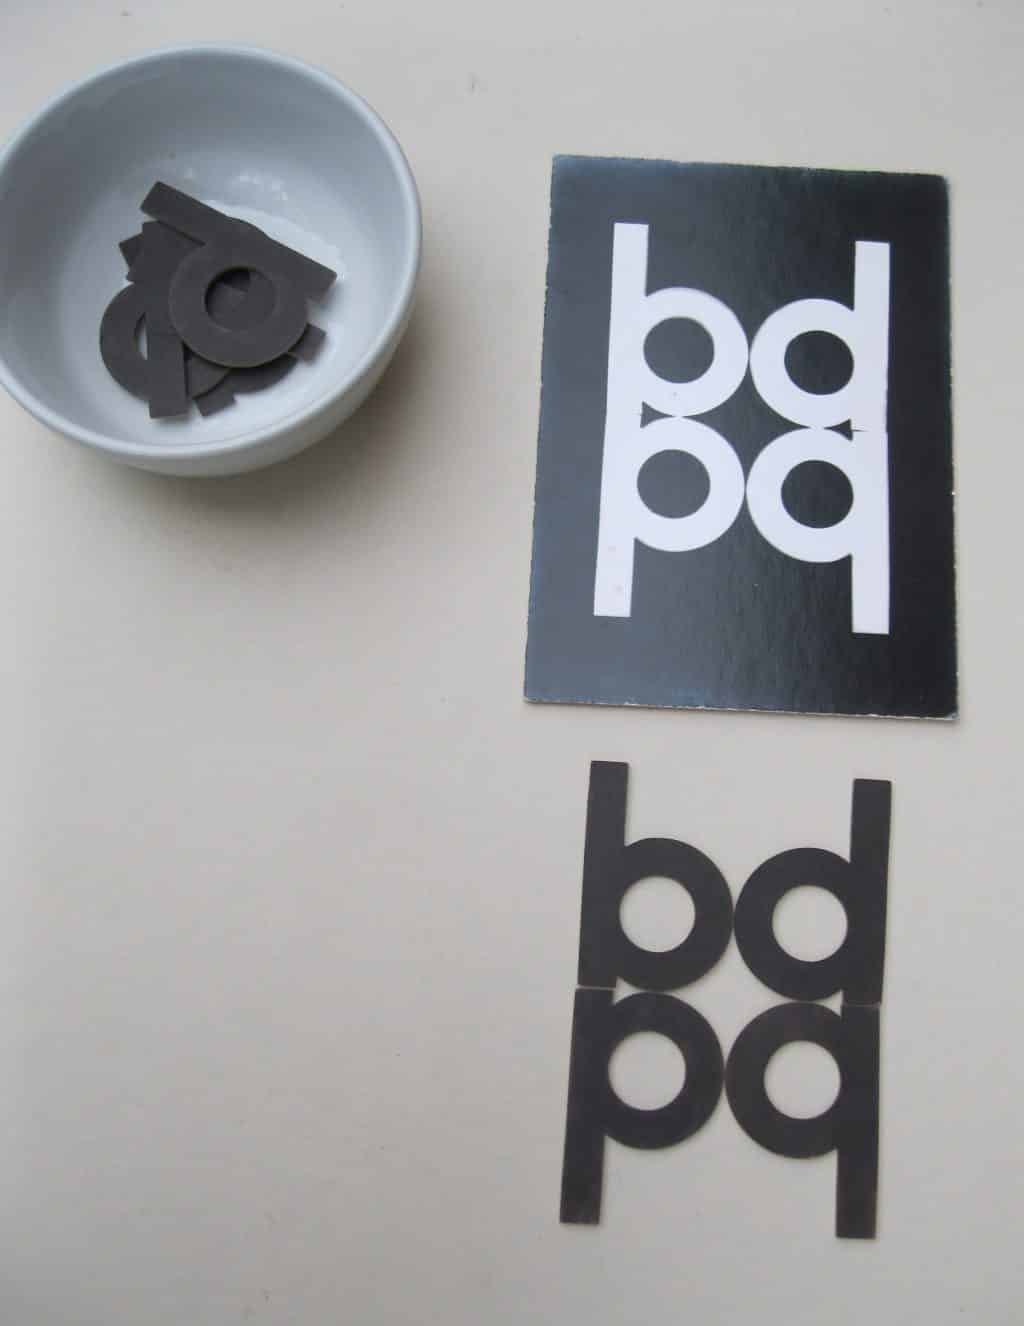
- Use multiples of b d p q lower case letters to create designs.
- Photograph designs to be matched
- Photograph designs made by students to be matched
- Photograph designs to be matched
Resources:
- Michael’s: wooden black and white letter forms
 Introduction:
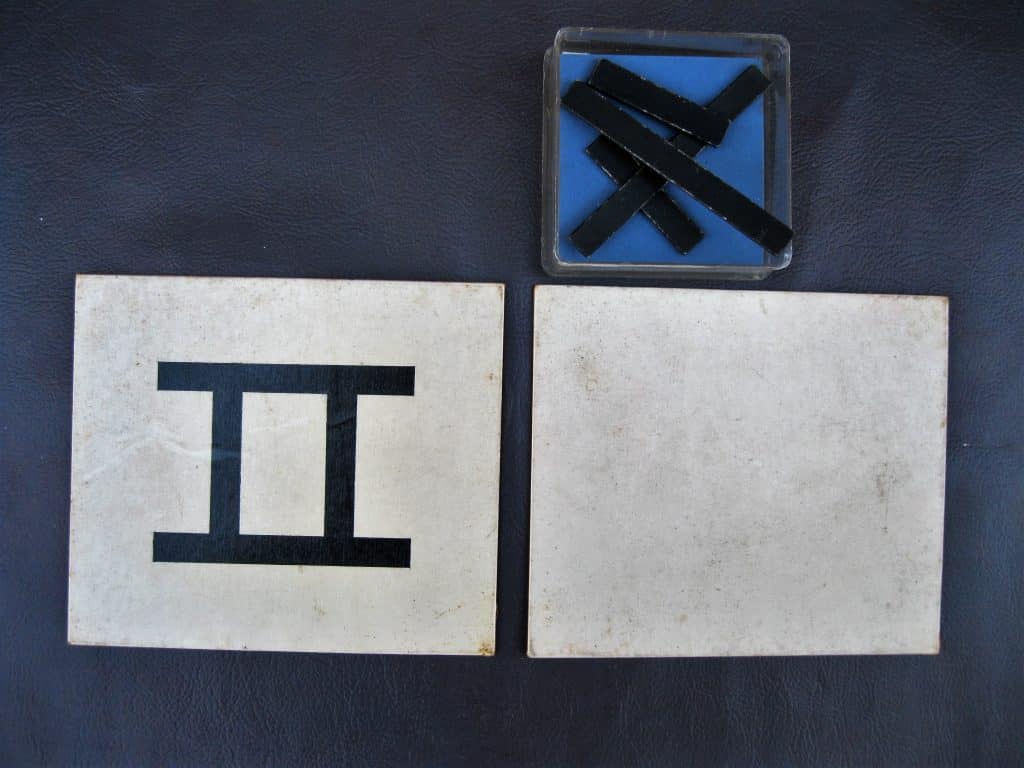
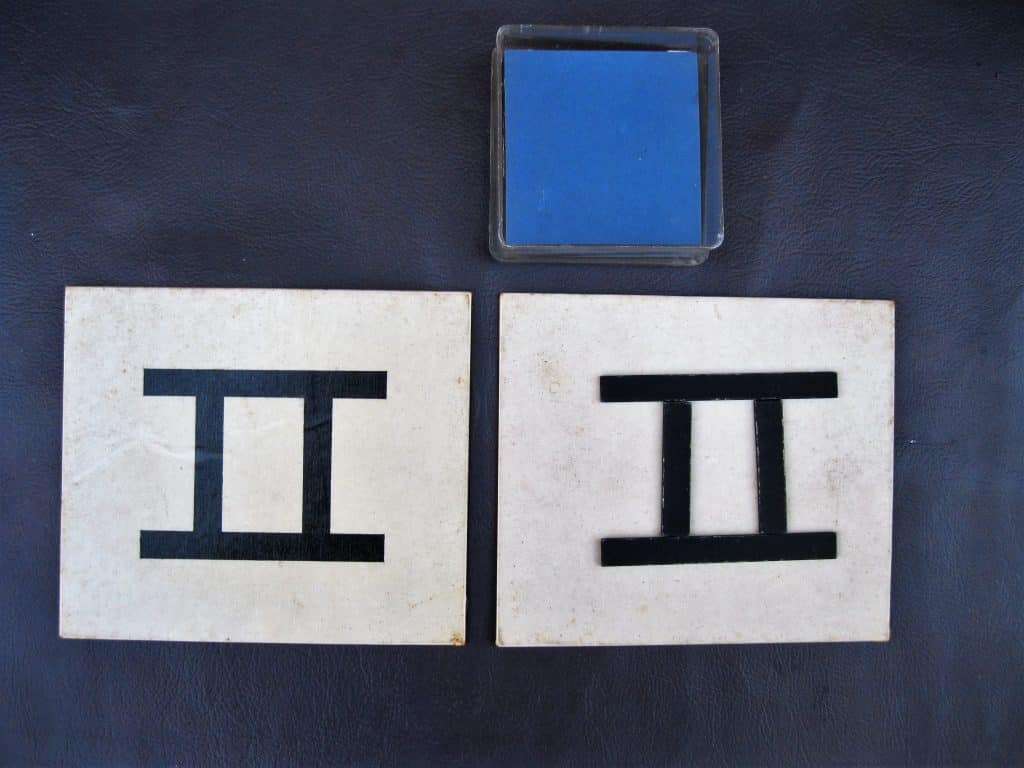
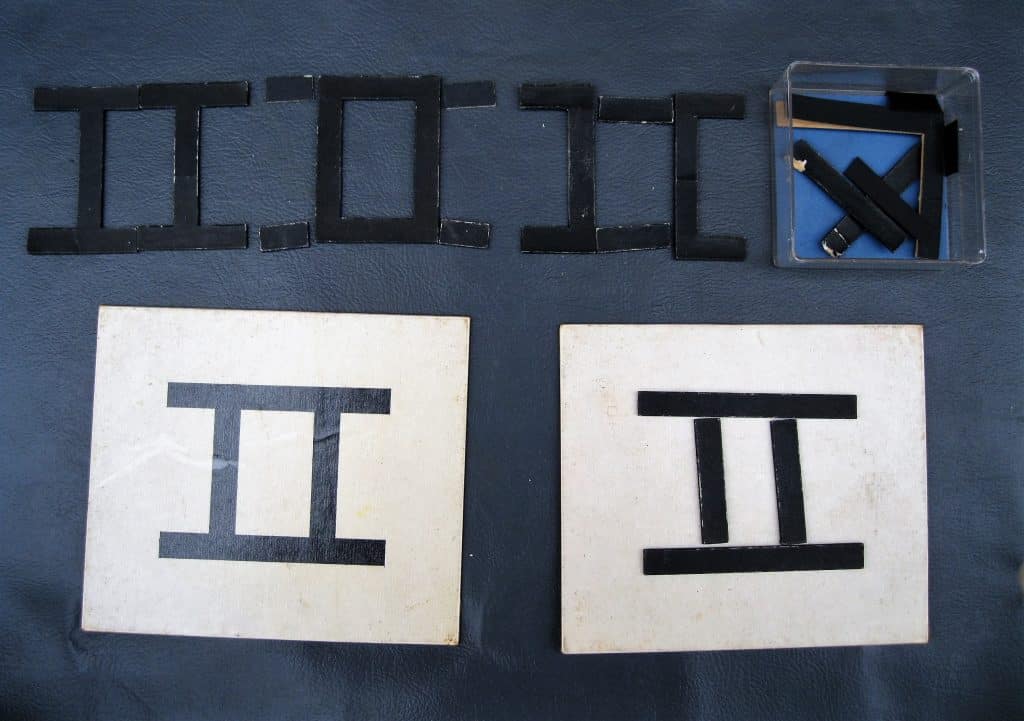
There are 5 ways to see the whole pattern by reorganizing it into parts. They are illustrated in the Visual Thinking book by McKim (see Resources). The illustration is reprinted from New Think by Edward de Bono 1967. In each example the parts are different shapes and are arranged in a different pattern, but when put back together they produce the original Roman numeral pattern. Each of the rearranged patterns is a creative or unusual solution.
- Prerequisite: Visual Thinking matching
- Direct Aim: To see alternative solutions to a problem
- Indirect Aim: To use the skills of visual thinking to solve problems and make art
- Point of interest: “What did you think when you saw so many ways to make the Roman numeral II ?”
Materials:
- Example numeral pattern on white board
- Black cover paper and scissors
- 2 squares of white 100 lb. Bristol board 5” x 5”
- Elmer’s Glue
- Laminating material
- Sets of pattern pieces of mat board, for 5 alternative solutions
- Black mat board
- A retractable mat knife
- Clear acrylic spray
- Pattern pieces of wood, for 5 alternative solutions
- Scroll saw
- Sandpaper
- Black paint or ink
- 5 containers: one for each alternative arrangement of numeral parts
- Rub-on numbers (or marker) for the containers and numeral parts
- Tray for the activity
 Preparation:
- Decide on the overall size of the model. I recommend a 3” x 3” numeral on a 5” x 5” background.
- Make a copy of Roman numeral II to match the one in the book.
- Make the Roman numeral pattern out of black cover paper.
- I recommend the upright pieces be ½” x 2”, and the crosspieces be ½” x 3¼”
- Mount it on a white square of Bristol board and laminate it.
- Make the Roman numeral pattern out of black cover paper.
- Laminate the second square of Bristol board to display the solution.
- Make the Roman numeral pattern pieces from Set #2 – Set #6 in Figure 10-9 from the McKim book page 68.
- Cut the pieces out of black mat board.
- Color the edges with a black Sharpie
- Seal them with clear acrylic spray.
- Cut the pieces out of thin wood.
- Color the top and side of each piece with black paint.
- Number the back of each piece with its Set number. This insures that the numbered pieces from each set are put away in the correct box.
- Place each set of pieces in its own plastic box numbered the same as the pieces for that set.
- Place the model Roman numeral and the blank white display square on the tray with the 5 boxes.
- Place the work in the environment.
Presentation: 5-12
- “This is a visual thinking activity, which means you will use your eyes and your brain to do the work.” Lay out the example numeral card, with the blank white square next to it.
- This is the way ancient Romans wrote the numeral 2. It has 4 parts or lines. Two are horizontal lines and two are vertical lines.
- This card will be your guide to making the number.
- Lay out the five boxes. “There are five boxes. All the pieces in each box will make the Roman numeral II., but the pieces will be different in each box.”
- “I will do the first one with you then you will do the rest.” Open the box, remove the pieces and ask “How shall we start?”
- “ I will return when you are finished and listen to your reaction to this work”
 Extensions:
- Introduce the Dale Seymour cards using the next activity.
Resources:
- McKim, Robert H. Thinking Visually, A Strategy Manual for Problem Solving. Palo Alto, California: Dale Seymour Publications, 1980.
- See pages 68 and 73 on “re-grouping” and “re-patterning”.
Introduction:
Many materials that I used are available but are not always as inexpensive as they once were. Some unfortunately are no longer available. Many are ready to put into the environment once opened, examined, and arranged from easy to difficult. Below are a series of materials you might want to consider adding to your environment.
Introduction:
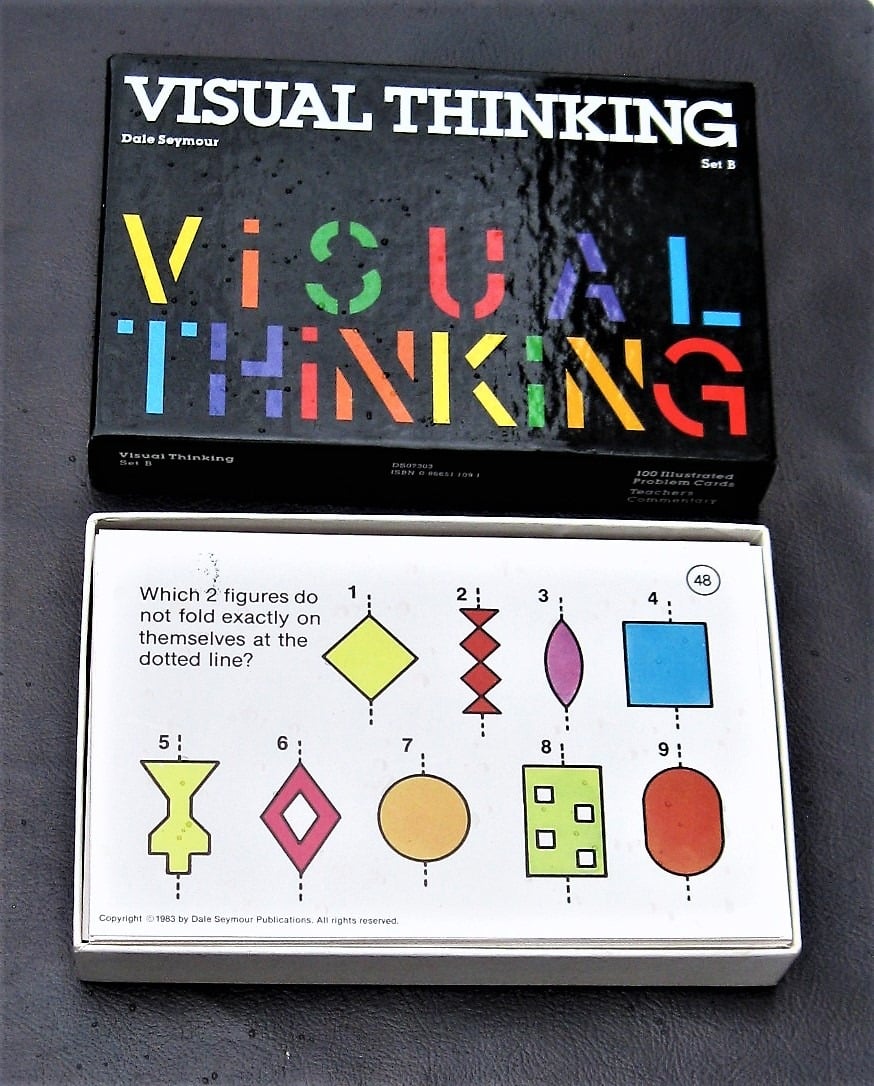
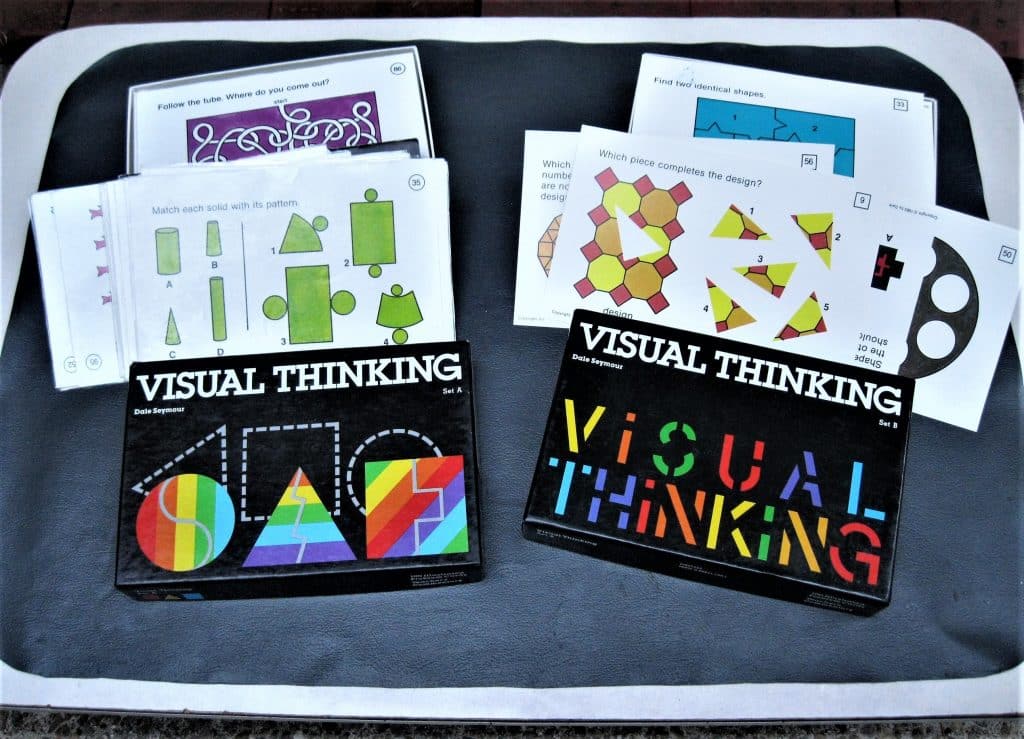
Visual thinking activities present a design or figure and ask that its match can be found among five other very similar designs, or five designs are presented but only two match. These activities require a greater level of visual discrimination.
- Prerequisite: Simple Matching, Advanced Matching
- Direct Aim: To acquire visual thinking skills
- Indirect Aim: To use the new awareness gained by solving problems visually, to make art or to create new ideas
- Point of interest: “Are you learning to think visually? Do you like this work?”
 Materials:
- Set A is best suited for 6-12 students
- Set B designed for students 13 and older
- Some are appropriate even for 6-9 students
- Laminating material (optional)
- Containers for cards
Preparation:
- Read the booklet that comes with the cards.
- The author makes suggestions you can use when presenting the cards.
- Laminate the cards if you choose to.
- All suggestions below are free advice. I just put out the cards 12 at a time and made an easy answer card for 9-12 students.
- Arrange the cards in boxes so one skill is practiced at a time.
- Sort the cards with the children into 11 skill groups.
- Children will know the names of the skills and will recognize them when found in outside sources.
- Put the name of the skill on the box.
- Use the chart in the book and select the first cards to begin the box. If there are not a lot of cards, put them all in the box.
- Create as many boxes as you wish and keep adding more difficult cards.
- Design a record-keeping sheet.
- Design your own way of presenting the material.
 Presentation: 6-12
- “We are going to continue learning visual thinking skills using the puzzles in these boxes. Like creativity, visual thinking skills can be used to solve everyday problems and to make art.”
- “Work alone or with a partner. Share how you solved the problem.”
- “If a problem seems too difficult to solve, just put the card aside and try another day. I found that turning a card upside down or sideways helped me to see the answer to some of the problems.”
- “Check your work and record which puzzles you did.”
Resources:
- Pattern Play: This pattern material has suggested designs to copy. It also can make a three dimensional design. It is open-ended.
- Birch Geo Board: The board is wooden and can be used creatively as well as for geometry work.
- Wooden Tangram Puzzle: It is worth the money to have a wooden Tangram Puzzle. So many Montessori materials are made of wood so it seems to belong. I had a plastic one also because it came with a template that would allow children to record their answers. Better yet, the stencil allows children to make up (discover) their own designs.
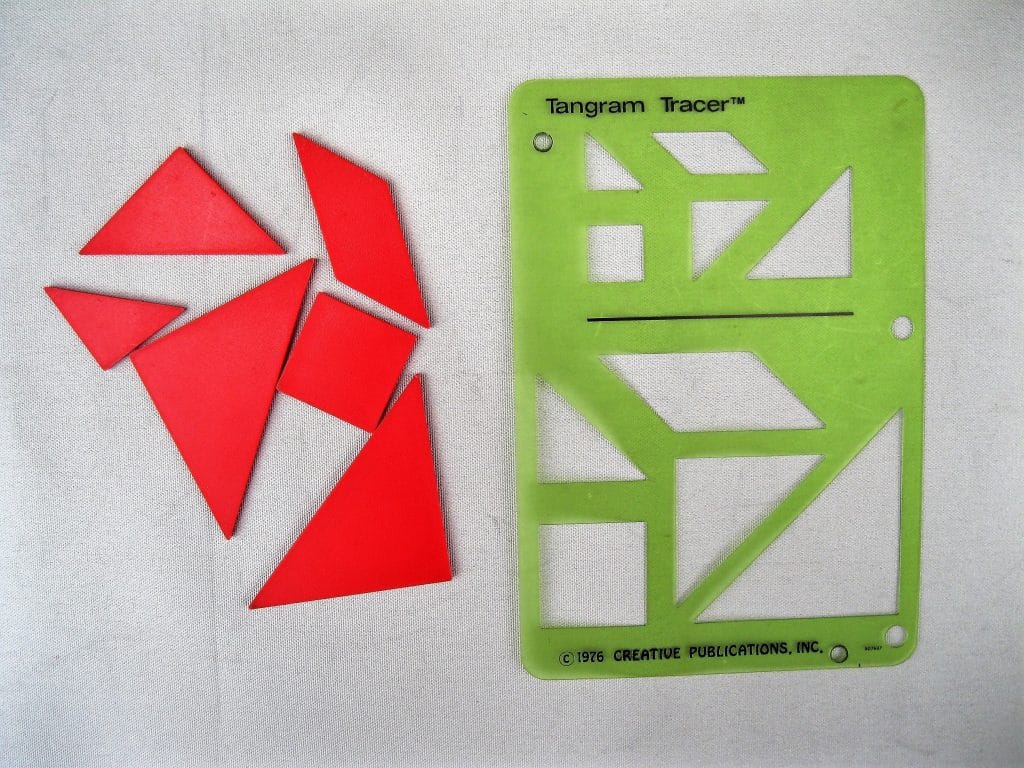 Resource:
https://www.montessoriservices.com/sensorial/shapes-patterns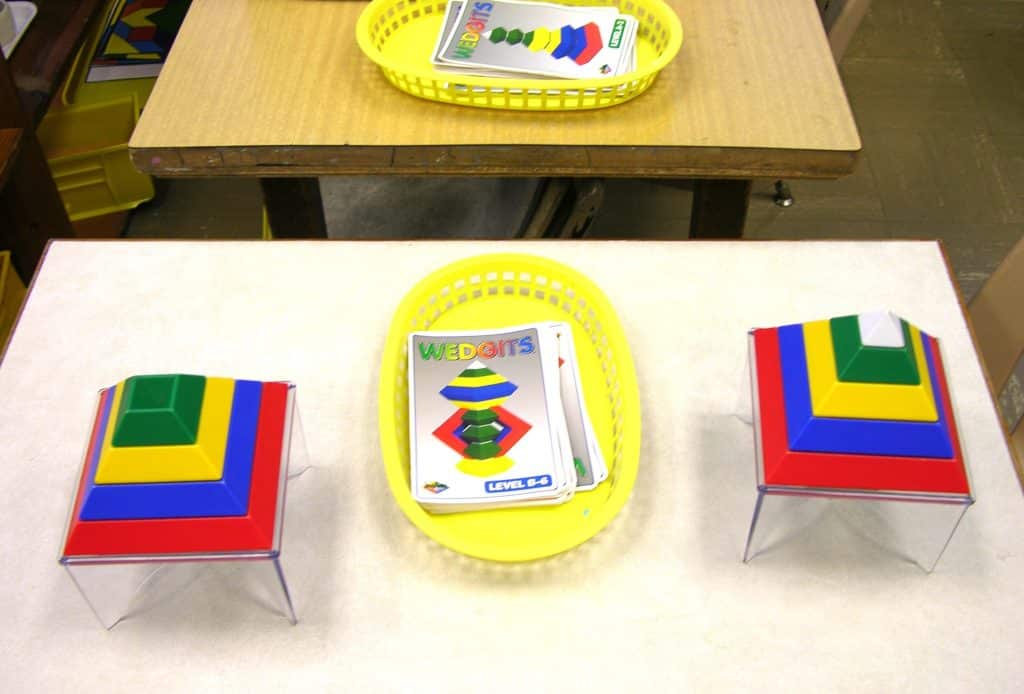 This is a material that I always put out in each level’s beginning environment. (See photos.) While I was teaching there were few options to choose from; now there are many. Some children enjoy the challenge of following the patterns pictured on instruction cards; others enjoy exploring different configurations. I advise you to order several extra small octahedrons. They seem to disappear.
Resources:
Activity Cards:
Buy the book and/or the cards. The children enjoy the illusions. Like color mixing, it seems like magic.
Resource:
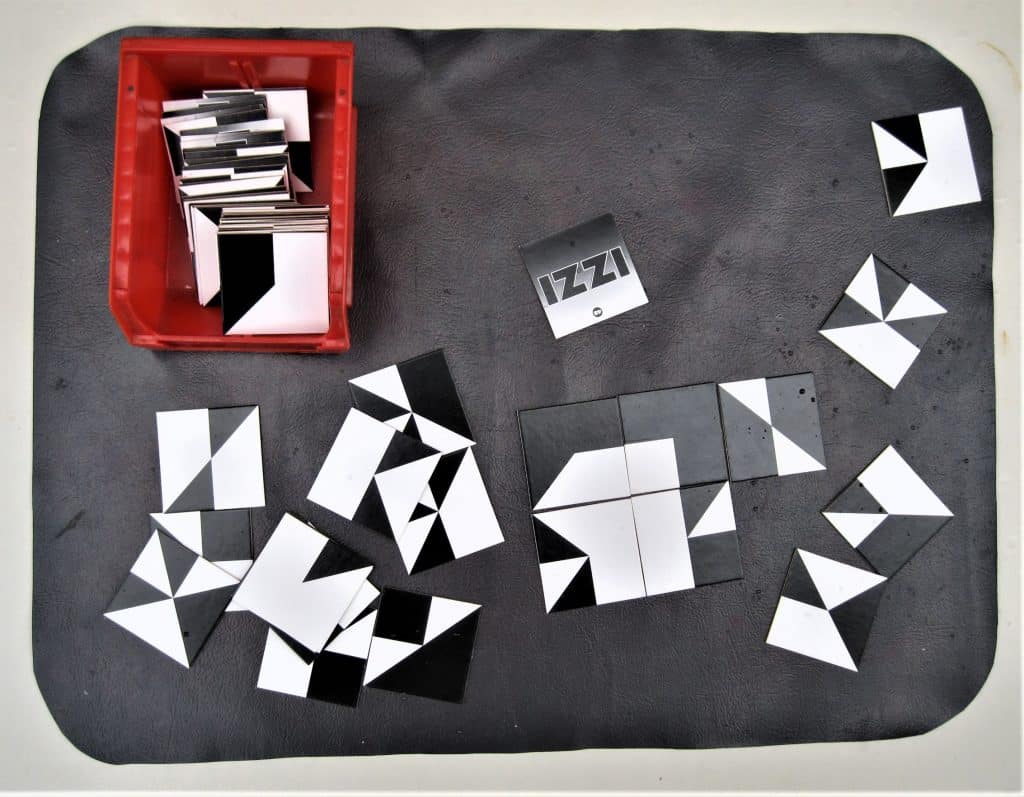 The puzzle comes with instructions; however, I asked children if they could solve the puzzle first by using only 9 pieces to make a square, then 16, etc., because using all 64 pieces seemed too difficult. Interim successes might keep a child’s interest.
Resources:
- Amazon: https://amzn.to/2NI2fHa
- School Specialty: https://www.schoolspecialty.com/?param=ssi Choose “browse as a guest”, then Search for product #322317
- Creative Color blocks with pattern cards
Resources:
- Parquetry Block Super Set: https://www.unitednow.com/product/5258/parquetry-block-super-set-by-learning-resources.aspx
- Learning Resources Creative Color Cubes, 100 Piece https://amzn.to/2qpPLMv
- Learning Resources Pattern Block Activity Pack, 160 Pieces https://amzn.to/2NJa0wu
- Inch cubes natural color with patterns to build
- Green-and-white plastic blocks with patterns to build
- Black-and-white blocks with patterns to build
- 4 Cards that, when manipulated, form 4 different geometric shapes in the middle (circle, triangle. square, hexagon)
- Sequence cards by Bruno Munari are available, but very expensive
- Wooden shape-matching toy having one block that fits through three different shapes – circle, square and triangle (see photo). The only versions of this that I’ve found online are either 3D printed or handmade to order.


